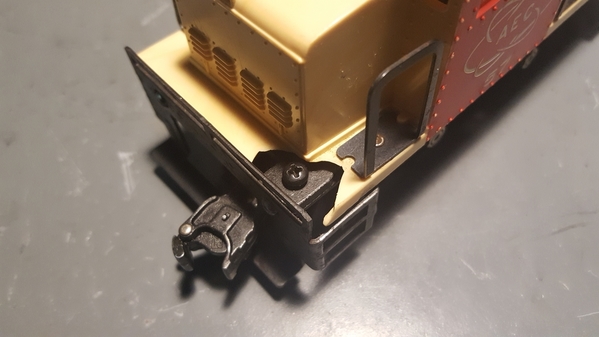
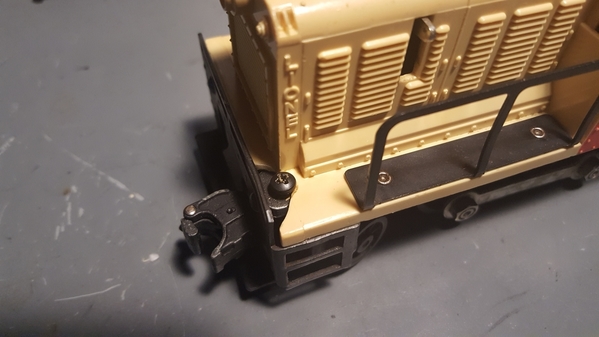
Has anyone repaired or rebuilt the shells of the 2-4-2 Vulcan switcher?  I have one suffering from the usual missing or cracked corner where the screw hole is located.  In my situation a large chunk of both corners is missing to the point where no screw hole remains. 

Options I'm considering are casting epoxy or JB Weld in place or 3D printing the missing geometry.

Ill try and add photos when I can.

Thanks


Original Post

Replies sorted oldest to newest

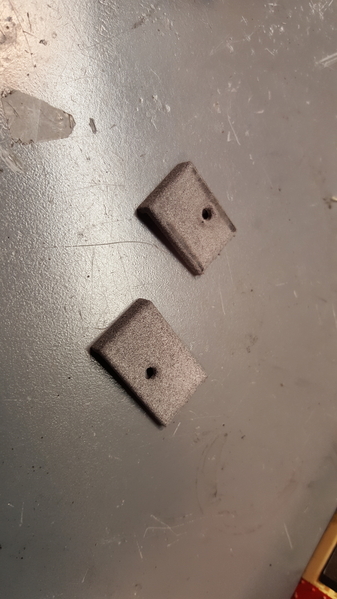
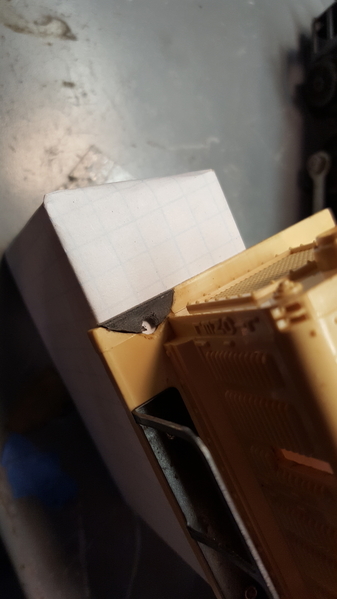
20181013_140911 - Copy

The 3D printed pieces from Shapeways.com

20181013_141356 - Copy

Traced the cutout line

20181013_143039

Test fit. A lot of back and forth with files and dremel

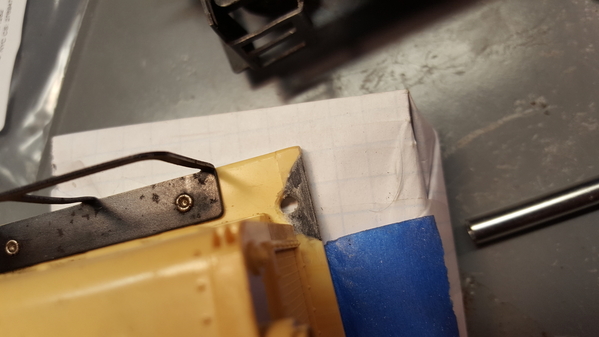
20181013_144149

Stuck the piece on with some glue.  Then soaked the gap and sprinkled baking soda until covered

20181013_144544

Same top side

20181013_150140

Needs a little more fine tuning, but overall very happy with the results.  The 3d Printed material is a little grainy, but smooths out with filing.

Attachments

Images (6)
  • 20181013_140911 - Copy
  • 20181013_141356 - Copy
  • 20181013_143039
  • 20181013_144149
  • 20181013_144544
  • 20181013_150140

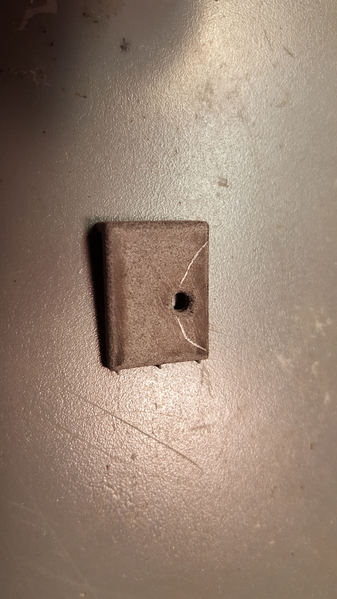
20181013_152455

Test fit of the larged piece. I goofed on the placement of the hole. Luckily it was cut out of the material anyway. I Will drill a new one later.

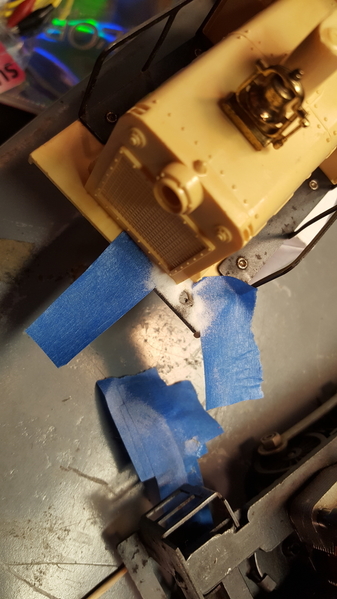
20181013_152740

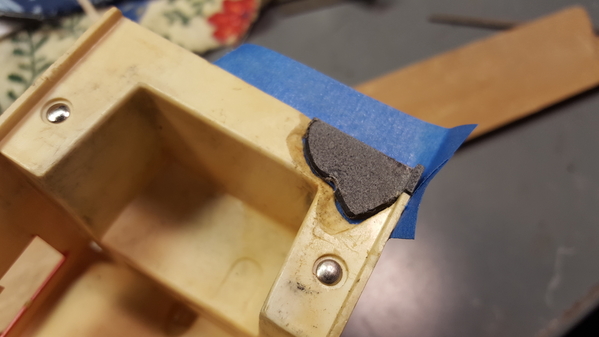
Piece tacked in place with tape and drop of glue.

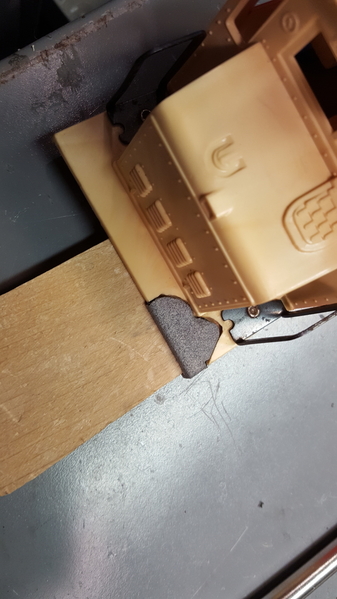
20181013_153452

After soaking gap and adding baking soda to add bulk.

20181013_153640

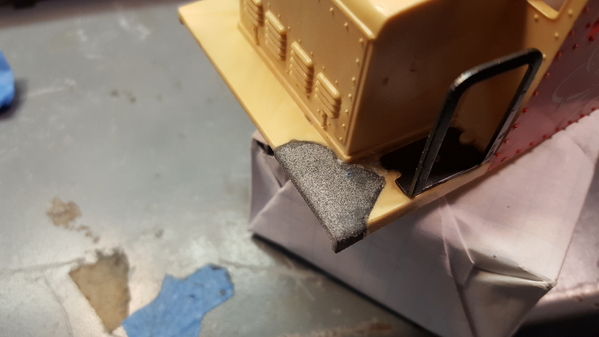
Top side.

20181013_155956

After some filing and a new hole drilled.  Overall very happy with the way this turned out.  I've experimented with mixing some testors paints and have come up with a combo of white, yellow and wood that comes very close to the yellowed plastic.

Attachments

Images (5)
  • 20181013_152455
  • 20181013_152740
  • 20181013_153452
  • 20181013_153640
  • 20181013_155956

seems like a nice repair...like to see the finished product after the touch up work....do you plan on just touching up the repaired area? or are you going to attempt a blend out and coat the entire model with some sort of satin clear to help hide your repair? if you get the color real close, an airbrush and a blend out and then a final top coat over  the entire piece may yield you a better re-finish for all your hard work in making the repair parts.....great job on the parts!

StrapHanger posted:

I don't either. I use an online service for the printing.  One day I will, but for now getting prints off a $100K machine for dollars is the way to go.  I do use CAD all day, so it's easy to turn my day dreams into models ;-)

You have just nailed why I don't have a 3D printer!  While I can muddle through very basic CAD stuff, designing anything meaningful with CAD just isn't in my wheelhouse.  That is the major sticking point for general use of 3D printing, at least for me.

JBW is interesting to mold with and likely would have been my filler on the backside. I prefer the quick set for most molding to avoid droops. Plastic wrap leaves a smooth glossy surface once removed but pinches in corners and folds you leave. It can be worked as it sets, using water to keep it from sticking to fingers and tools.

But it looks pretty good. I'd think about some rubber washers or O rings under the shell, screw heads or both. Nylon screws are another possibility to stop it. 

Folks use um on FMTMs 

harmonyards posted:

seems like a nice repair...like to see the finished product after the touch up work....do you plan on just touching up the repaired area? or are you going to attempt a blend out and coat the entire model with some sort of satin clear to help hide your repair? if you get the color real close, an airbrush and a blend out and then a final top coat over  the entire piece may yield you a better re-finish for all your hard work in making the repair parts.....great job on the parts!

For now just Testors enamel model paint and a brush feathered to the edge of existing plastic.  I would like to get an airbrush setup, but its just not  something I have time for now.  The 3D printed material is a little grainy so might need some primer filler and sanding first.

StrapHanger posted:
harmonyards posted:

seems like a nice repair...like to see the finished product after the touch up work....do you plan on just touching up the repaired area? or are you going to attempt a blend out and coat the entire model with some sort of satin clear to help hide your repair? if you get the color real close, an airbrush and a blend out and then a final top coat over  the entire piece may yield you a better re-finish for all your hard work in making the repair parts.....great job on the parts!

For now just Testors enamel model paint and a brush feathered to the edge of existing plastic.  I would like to get an airbrush setup, but its just not  something I have time for now.  The 3D printed material is a little grainy so might need some primer filler and sanding first.

use the JBW quick set as a body filler over the grainy surface of the 3d repair material....then fashion a small block to use as a small block sander and block the filler down to level with 600 or finer, if its as grainy as you say, rattle can primers, even the filler type are lacking in their ability to "fill". That kinda primer will barely fill in 600 grit scratches, let alone a grainy surface....still, you've done a superb job!

Interesting, it's never too early to learn something new, never knew about the baking soda trick.

Adriatic posted:

Gap filler.

The topside looks close. For topside finish filler, I'd use plain modeling putty for ease of sanding and best feathering as the JBW will likely be harder than the host plastic making feathering harder on the host. The bottom was a better JBW candidate.

 Actually, JB-Weld sands very easy, especially the Quik stuff.  I've had no issues shaping it when repairing plastic with it.  I prefer the Quik for repairs that don't require maximum strength as it sets up pretty quickly and isn't as liquid as the standard mix.

Last edited by gunrunnerjohn

20181118_082846

I'll be the first to point out that I did not 100% nail the color match.  I'm still happy with the results though. The camera and lighting adds more shine and yellow then appears in person.  From a foot away it blends well with the rest of the shell that has a yellow to tan marbled look to it. I just did two coats with a fine sanding in between to smooth out the finish.

20181118_08290320181118_083256

Attachments

Images (3)
  • 20181118_082846
  • 20181118_082903
  • 20181118_083256

Add Reply

Post

OGR Publishing, Inc., 1310 Eastside Centre Ct, Suite 6, Mountain Home, AR 72653
800-980-OGRR (6477)
www.ogaugerr.com

×
×
×
×
Link copied to your clipboard.
×
×