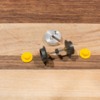
I picked up a Lionel Trackmobile last year with the intent to 2-Rail it and after getting my hands on the unit and figuring out what needs to be done. I came up with a 2-Railing plan and to say it was "involved" is an understatement. The Lionel Trackmobile has some nice features and some not so nice features (from the 2-Railing perspective). The nice features are that it is quite heavy as it contains many die cast components. For electronics, the model comes equipped with a Lionel TMCC Command Control board and a second LED resistor breakout board for a real nice assortment of preinstalled LED lighting features (I think there 11 individual LEDs on this model). The TMCC Command Control board will be swapped out with an HO scale DCC sound decoder. I am hoping that I can mate up the DCC sound decoder with the LED lighting resistor breakout board. We'll see..
For the 2-Railer, however, there are also several not-so nice features. First and foremost, converting the wheels to 2-Rail is not easy at all. From the online research, I found that the rail wheels on the prototype are 28” diameter on this Trackmobile Hercules model. I started with a set of NWSL 28” wheels, p/n 18275-4. There are basically three operations required to convert a wheel to 2-Rail. First, the axle shaft is a 2 MM rod, so a Delrin conversion bushing needs to be made to form a press fit on the 2 MM axle to a 1/8” press fit in the wheel axle hole. This also acts as an electrical insulator. Therefore, each of the 4-wheels ends up electrically insulated and will need an electrical pickup wiper fabricated for each wheel. Next operation needed convert to 2-Rail is that in order to reuse the injection molded plastic wheel weight from the Lionel 3-Rail wheel, the face of the NWSL 28” wheel needs to have a flat recess turned into it so the plastic piece will fit in place, similar to how it does on the Lionel wheel. The third operation that needs to done in the 2-Rail wheel conversion was that the 28” wheels are smaller than the oversized 3-Rail counterparts, therefore the outer diameter of the plastic insert piece needs to be turned down slightly to fit in the newly machined-in wheel face recess. The Lionel plastic wheel insert was a snap fit as I didn’t see any remnant of adhesive after I removed it from the stock 3-Rail wheel. Therefore, I turned down the plastic insert but left it slightly oversized relative to the outer recess machined into the 28" 2-Rail wheel face so that it will also snap-fit into the 2-rail wheel groove just as it did on the 3-Rail wheel.
Next up is converting to Kadee couplers but for now I only got to the point of fully disassembling the model to see what needs to be done. Lionel has a round boss that helps for the self-centering feature of their Electro-couplers. My plan is to machine away the round boss in the die cast frame section at each end and probably end up drilling and tapping mounting holes for the Kadee couplers. Details on installing the Kadee couplers, DCC sound decoder, speaker, pickup wipers will have to wait for a follow-up post to this thread. For a sound file I am thinking of potentially using an RDC sound file since these Trackmobiles sound more like a city bus than they do a locomotive.
Here are photos with captions of the progress to date:
Machining a 5C emergency collet to hold the 2-Rail wheel firmly to perform the face grooving operation. The open vs. closed tolerance on a 5C-style collet is only a few thousandths of an inch, so you need to hold a tight tolerance during the boring process. You basically have a tolerance window equivalent to the thickness of a single sheet of computer printer paper.

2-Rail wheel held securely in the bored out emergency collet.

Grooving face of 28" 2-Rail wheel for plastic wheel insert.

I found that the plastic wheel inserts did not want to come out very easily, they were held firmly in place in the 3-Rail face recess. However, Lionel did me a bit of a favor as they put two holes through the wheels (not sure why - maybe something for the manufacturing process). I decided to take advantage of the holes and whip up a "wheel insert popper tool" which consisted of a piece of aluminum with a few holes and slot machined to fit around the axle. I installed a couple small dowel pins for plungers. I slipped in the wheel insert popper behind the backside of the wheel and press towards the back of the wheel and the dowel pins do their magic and easily popped out the plastic insert.

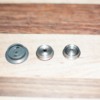
Here is a shot of the wheels, left to right, the Lionel stock wheel with the plastic insert removed, the center wheel is a new 28" 2-Rail wheel from NWSL and on the right is the 2-Rail wheel after machining the flat groove in the face for the plastic insert.

I switched from the big lathe to the Sherline lathe to remove some of the material in the center of the plastic insert using a 1/4" 4- flute end mill so it allowed clearance for the unmachined center hub area of the 2-Rail wheel when the plastic insert was pressed onto the 2-Rail wheel face. When I machined the flat groove in the face, I wanted to leave the center hub area intact so I had a longer core to hold the axle and keep it squarely aligned.

Next operation was to turn down the OD of the plastic wheel insert to snap-fit into the new 2-Rail wheel recess.

Here is the underside of the Trackmobile with the 2-Railing process on the left axle completed. The right axle still has the stock 3-Rail wheels installed.

Both axles have been converted to 2-Rail but the stock Lionel Electro-couplers are still in place. Swapping out to Kadees is next on the to-do list.

The entire model needs to be pretty much disassembled before work can start on changing out the couplers. The small 12-volt motor sits horizontally and an HO scale DCC decoder will easily handle the max current of this HO-sized motor.
Here is the last shot showing the round 3-Rail Electro coupler mounting bosses molded into the die cast chassis at each end. These will need to be milled off and then a Kadee coupler installed with some type of shimming or mounting bracket fabricated to get the proper coupler height.

That's it for now... I will follow up when I have more progress to report. I am somewhat curious how it will run once I get a DCC decoder installed. The unit came equipped with a Lionel TMCC board for motor control and lights but no sound. However, I think there is plenty of room under the cab for the DCC sound decoder and an HO-sized sugar cube speaker but there is still a fair amount of work to do with installing the couplers and electrical pickup wipers before I get to trying it out. More to come...
Scott


