
As stupid as it may sound I am having trouble w/ my most recent purchase.  I bought a 6 pack of NS Coalporters from the LTS (first MTH Bathtubs for me) and I for the life of me cannot get to the screw that attaches the truck.  These cars seem very cheap compared to the other hoppers I have from MTH, they are light and flimsy and there are no screws to remove a bottom metal subframe to access the trucks from the top as on other models.  There are two panels on each end of the car that cover the tops of the trucks, but I cannot get them out. 


Has anyone ever installed two rail trucks on these?  How did you get to the MTH truck bolster screw without breaking anything?  I already have the 100t Atlas trucks to put on them.

Original Post

Replies sorted oldest to newest

Yes I have converted a single MTH coalporter to 2-rail using MTH roller bearing trucks (without rotating end caps) & later reconverted it using Atlas-O 100-ton roller bearing trucks (with rotating bearing end caps).

Here is a link to the car with the Atlas-O trucks

http://www.flickr.com/photos/1...s/72157640375909364/


You will need a box cutter to pry the angled panel. It won’t be easy & you will scratch the silver finish inside the cars. After you have pried it open the screw could be unscrewed.


Hope this helps.

Naveen Rajan


Thanks Naveen...I was hoping there was a different method to this...I tried this last night and felt like I was going to break something.


Jeff...there are no screws on the bottom of these cars like other MTH Hoppers, its a molded one solid piece.  Bad design if you as me.  Click on Naveen's link above...hes got several pictures of the cars on there.

Ed, my only thought would be MTH uses a screw to hold the truck in place with the truck having the recevier portion attached, or built in to it. Unlike Atlas and Weaver who both utilize a hole through the truck, and having the screw go through the truck into the attaching mechanism on the bottom of the car.

I was glad that reply helped. I agree that the design of these cars is not the user-friendly since unlike Lionel, MTH offers 2-rail trucks to folks like us who convert these cars to 2-rail. More than the stubborn panels, what really annoyed me was the large oversize holes where the truck pivots. MTH truck had a cast pivot on the top of their trucks which allowed the trucks swivel relative to the cars. To use the Atlas trucks I had to get a relatively more expensive shoulder screw from McMaster Carr

http://www.mcmaster.com/#shoulder-screws/=qjqwcm

to act as the pivot & I might have used a nylon sleeve

http://www.mcmaster.com/#unthreaded-spacers/=qjqwv3

around the screw to eliminate too much play or wobble. I am in the process of 2-railing a MTH BNSF Husky 48’ stack car with Protocraft S-2 100-ton roller-bearing trucks & the oversize holes are making me think harder to come up with ways to simplify the conversion.

Thanks,

Naveen Rajan

Originally Posted by naveenrajan:

I was glad that reply helped. I agree that the design of these cars is not the user-friendly since unlike Lionel, MTH offers 2-rail trucks to folks like us who convert these cars to 2-rail. More than the stubborn panels, what really annoyed me was the large oversize holes where the truck pivots. MTH truck had a cast pivot on the top of their trucks which allowed the trucks swivel relative to the cars. To use the Atlas trucks I had to get a relatively more expensive shoulder screw from McMaster Carr

http://www.mcmaster.com/#shoulder-screws/=qjqwcm

to act as the pivot & I might have used a nylon sleeve

http://www.mcmaster.com/#unthreaded-spacers/=qjqwv3

around the screw to eliminate too much play or wobble. I am in the process of 2-railing a MTH BNSF Husky 48’ stack car with Protocraft S-2 100-ton roller-bearing trucks & the oversize holes are making me think harder to come up with ways to simplify the conversion.

Thanks,

Naveen Rajan


I just did this 2 nights ago using the new Atlas trucks, a #8 Washer I got from lowes fit the Atlas bushing perfect and also fit in the hole in the car tight to eliminate all the play. 

Naveen, in the process of converting these cars to Atlas O trucks, I've attached a cut piece of styrene sheet over the top of the hole (on the inside). You can then drill a hole thru the styrene and use a #4 x 1/2" screw to attach the truck directly to the styrene piece inside. I've used CA glue to attach the styrene to the inside of the floor, which works really good.

As annoying as it is, there is some sound logic to how MTH trucks are mounted. The screws don't fall out into your layout somewhere never to be seen again. The screws mount tightly into the threads in the truck rather than potentially loosening or stripping out a conventional bolster from the bottom. The down side is that you may have situations with the cars riding too high on the trucks or difficulty using non-MTH trucks as replacements.


That said, it's an initial pain getting inside the car to chang them out (you ought to try out the ACF covered hoppers -- real fun) but once you figure out how to get into the car to get to the screws it's not a big deal.

Originally Posted by Jeff78rr:

Flip the car upside down- you'll see 2 small screws near the bottom on each end, which holds the inside panel in place. Take these out and this will allow the slanted inner-panel to be removed- just nudge it out of the inside of the car. You will then see the screw for the trucks.

 Hmmm. The only one that I did, had these screws on it and I didn't know they were there. I was prying my ars off and found them later. Now they've changed it?

I just reread the initial posting & I don’t think there is a metal sub-frame on these cars. I no longer have the car I converted but it seemed like the body was all-plastic, painted to resemble aluminum.


Jeff, thanks for the advice regarding reducing the hole size in the MTH car. How do you ensure the new hole that you drill in the styrene sheet  is centered or at the same location as the original hole. I have never been confident in my ability to visually gauge these centerlines accurately. I am always worried that the new hole I drill would end up being off-center & the car would permanently list to one side. That concern forces me to come up with these Rube Goldberg type installations for my conversions.

Thanks,

Naveen Rajan

The 25 I converted for the DSMR many years ago were quite different from what you are describing.  These had a round bump as the truck bolster.  After taking out the horizontal interior braces and the slope sheets, I removed the trucks.  A friend machined off the miserable bolster bump, which was in the wrong place and way too deep.  I then cut a piece plastic sheet to fill in the area at the ends of the car.  This also gave a place to mount the Kadees.  Painted black and on the layout, you couldn't see it.  I then built up a bolster, glued in place using a jig another friend made.  Drill press to drill the 4-40 hole for truck screws.  Used Weaver trucks with NWSL wheelsets.


ChipR

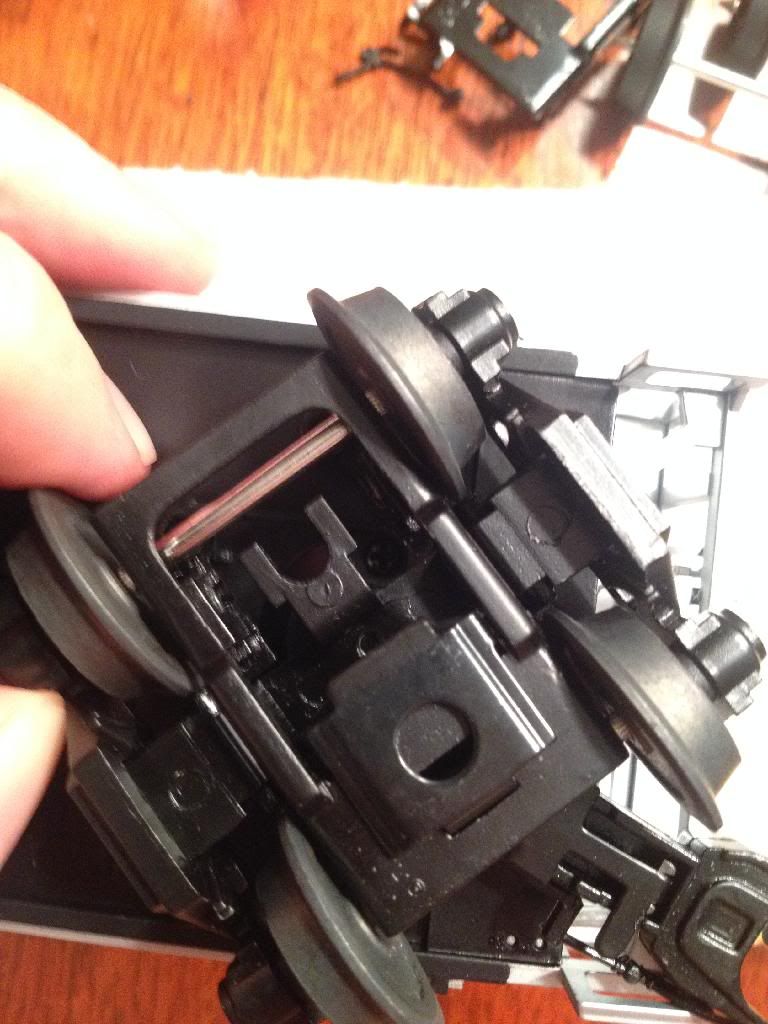
Ok...I feel like a dummy after almost ruining one of my cars.  There are in fact 2 screws that hold the sloped ends of the cars in.  They are extremely well hidden directly above the truck bolster, you can not see them looking horizontally under the trucks because they are recessed, and you have to rotate the truck until the coupler stops to get to them:


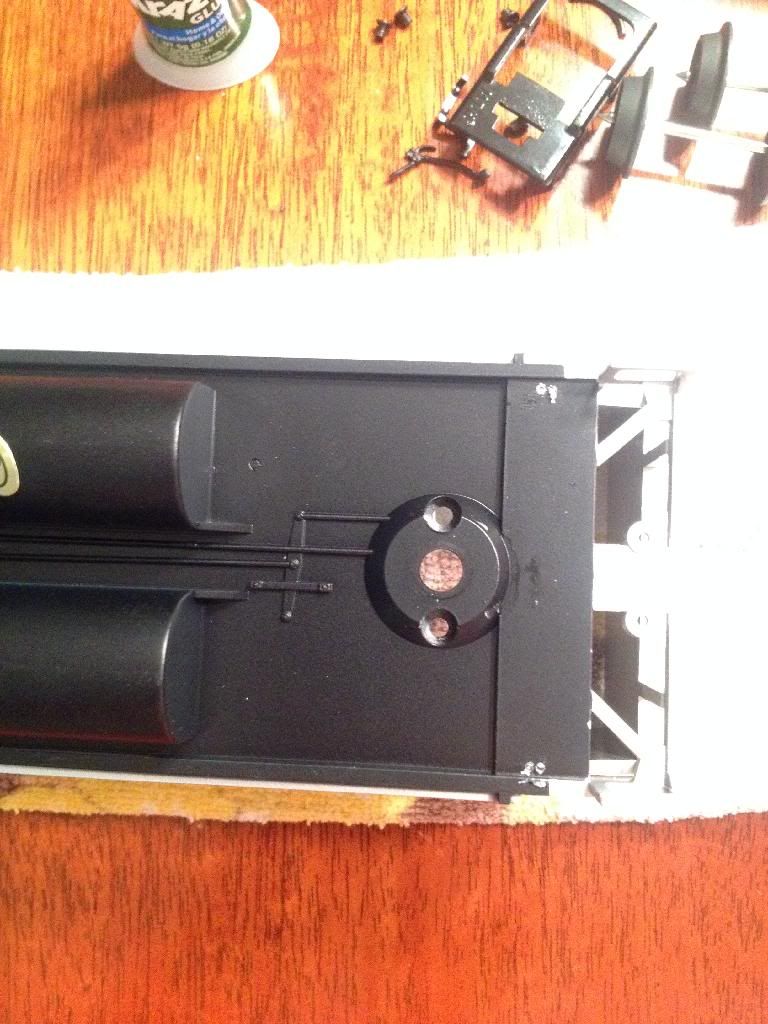
After you remove the two screws you are not out of the woods.  The slopes are a very tight fit, and when MTH workers assembled the cars I imagine the paint is still tacky and therefore they are kind of fused or stuck in there.  After almost breaking one end trying to pry out even after the screws removed (hence all the scuff marks) I came up with a better plan.  I put some oil in a precision applicator and ran it along the seems and let it penetrate for a minute.  Afterwards I flipped the car upside down and pressed the ends out with a wooden dowel.  They come out much easier this way, and also go back in easy with the oil.  I wiped the oil off once I was finished.


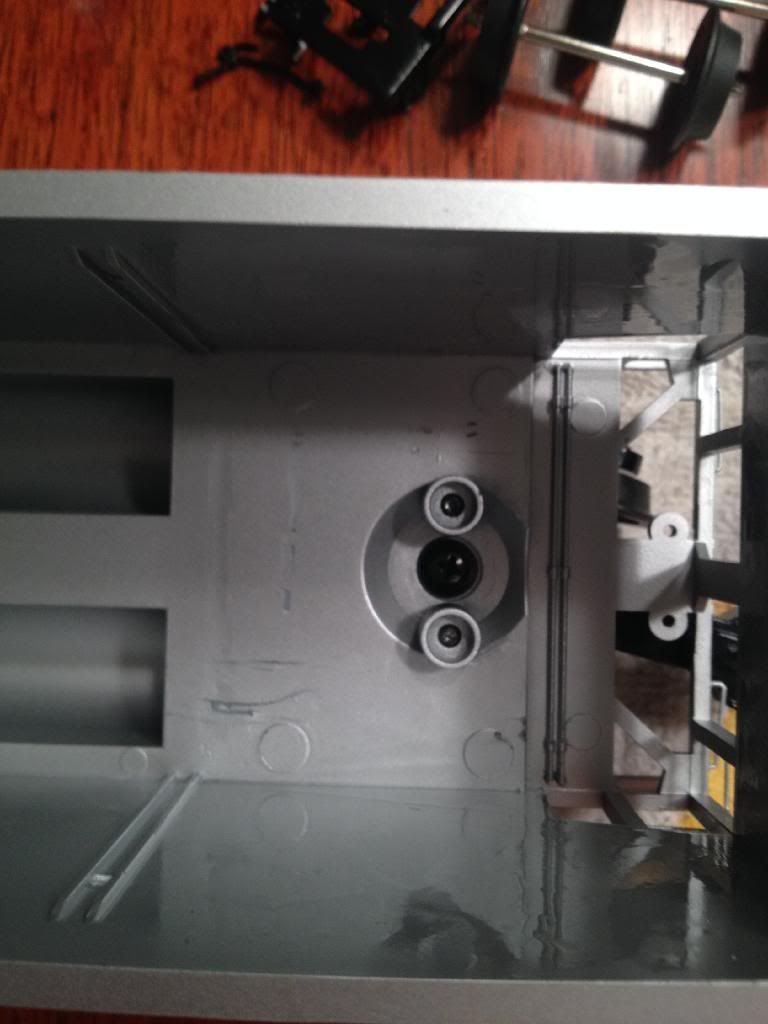
I installed Atlas 100t trucks with the adapter and there is no play at all, you really have to push the adapter in between the screw posts pretty good, when you run the screw from the bottom it pulls it all the way down for a very snug fit:


I don't know if you can lower the car anymore than this, the 100t wheels are already extremely close to rubbing the bottom of the car:
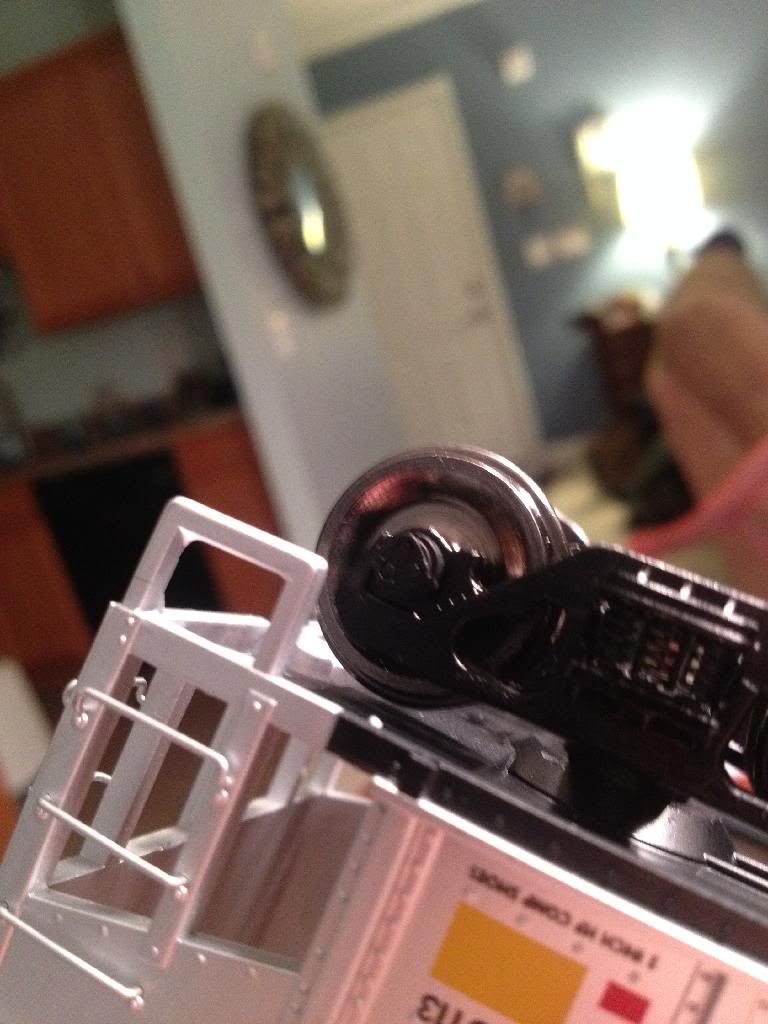


Finish product:


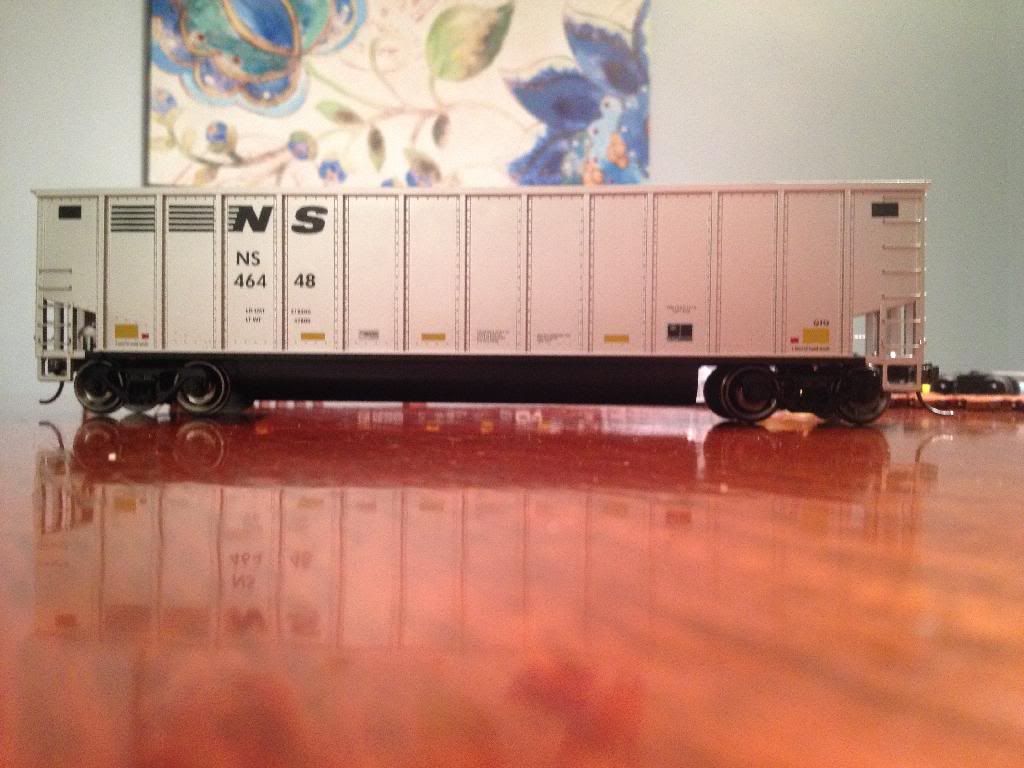
I hit the inside of the car with some silver paint and the scruffs went away...


Anyways, a Homer Simpson moment...DOH!  Thanks for the help...

Post

OGR Publishing, Inc., 1310 Eastside Centre Ct, Suite 6, Mountain Home, AR 72653
800-980-OGRR (6477)
www.ogaugerr.com

×
×
×
×
Link copied to your clipboard.
×
×