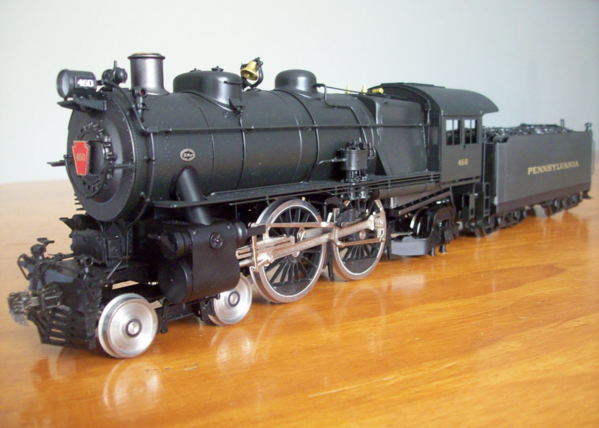
I'm currently in 3RS, but recently I've been thinking about moving over to 2 rail.  As part of this train of thought, I went thru the 2-Rail Scale Forum, looking for information on converting steam and diesel locomotives and lighted/ sound equipped rolling stock (yes, I know it'd be easier to sell what I've got and buy pure 2 rail engines, but I have a personal preference for TMCC/Legacy).  Here's what's still a bit of a grey area for me:

1) How are the pickups fabricated and mounted.

2) Can 2 rail lighted rolling stock run on 2 rail AC-powered track.  If not, what would have to be done?


--As an aside, I can make a separate thread that contains all the pages on converting 3 rail stuff to 2 rail if that's something that'd interest people--

Thanks.

Original Post

Replies sorted oldest to newest

@Ron H posted:

I think it would be easier to buy 2 rail rather than converting 3 rail locos. I believe 2 rail is predominantly DC powered and insulation of the locomotive wheels is different. Maybe someone on the forum has done it and has a different perspective.

Ron H

I do know 2 rail AC has been done, but the trade off would be that the engines wouldn't be able to run on track that is DC-powered.  But that wouldn't be a problem for me since I'd be the only one doing O scale within 15 miles since as far as I know, the rest of the model railroaders are in either HO or 15" gauge live steam.

Easier to go 3 rail to 2 rail than the other way around. Two rail wheelsets usually come one side insulated. Obviously all 3 rail wheelsets would have to be swapped.

Three rail loco and truck frames are usually narrower to accommodate the thicker wheels. At most you can shim the axles. Going two to three rail you likely have to mill the frames. Been there, doing that.

Pete

Last edited by Norton

I bought wiper material from a forum member here (Rod ?). He sells pre-cut strips. I bend them as needed and cut the extra off. Right where the wipers touch the back of the wheels, I use a punch on the back side to create a slight dimple. That helps reduce friction there.

Yes, a lighted or sound equipped car can run on 2 rail AC. If it's designed for DC only, you simply add a bridge rectifier. Plenty of those posts in the electrical forum here about converting to LED lights.

All equipment must have insulated wheels on at least on side for this to work. So converting old engines that weren't meant to come apart easily, can be quite a chore. Those are better left alone unless you really desire one.

@Norton posted:

Easier to go 3 rail to 2 rail than the other way around. Two rail wheelsets usually come one side insulated. Obviously all 3 rail wheelsets would have to be swapped.

Three rail loco and truck frames are usually narrower to accommodate the thicker wheels. At most you can shim the axles. Going two to three rail you likely have to mill the frames. Been there, doing that.

Pete

How do you fabricate your pickups?

Justin, I am going two rail to three rail so I just added pickup rollers. Usually two rail engines have wipers on the tires on the insulated side. i would use phosphor bronze or beryllium copper for the wipers. Both are spring temper. Since this is the two forum I will post details later on a 3 rail forum.

Pete

Last edited by Norton

I bought wiper material from a forum member here (Rod ?). He sells pre-cut strips. I bend them as needed and cut the extra off. Right where the wipers touch the back of the wheels, I use a punch on the back side to create a slight dimple. That helps reduce friction there.

Yes, a lighted or sound equipped car can run on 2 rail AC. If it's designed for DC only, you simply add a bridge rectifier. Plenty of those posts in the electrical forum here about converting to LED lights.

All equipment must have insulated wheels on at least on side for this to work. So converting old engines that weren't meant to come apart easily, can be quite a chore. Those are better left alone unless you really desire one.

Is the wiper material brass?

1) How are the pickups fabricated and mounted?

There are several ways to do this. I like the way John Sethian does it. You can read about it in his thread about his PRR Baldwin Sharks here:

https://ogrforum.ogaugerr.com/...el-legacy-prr-sharks

2) Can 2 rail lighted rolling stock run on 2 rail AC-powered track.  If not, what would have to be done?

I believe some can and some can't. I think newer 2 rail lighted rolling stock (such as the Atlas CZ cars) can run on AC or DC. Older stuff may be DC only. For the ones that are DC only a simple rectifier circuit is all that is needed.

Steam conversions will be very expensive if you are machining drivers.  A cheaper way would be to see if Pat (Harmon Yards) can find a 2 rail chassis to mount underneath your 3 rail boiler. He is a 3 railer who has done this in reverse many times. I think it would most likely be cheaper to buy a factory 2 rail locomotive and install the Legacy electronics in it rather than convert a 3 rail Legacy steam locomotive. There are other factors involved such as if the locomotive is available in 2 rail but rest assured there is a lot more available in 2 rail than most people think. It's up to you to decide which way is the best for you.

As for diesels if you have MTH diesels with the 2/3 trucks converting is a piece of cake and the cost is minimal. If you don't have the 2/3 trucks then it can still be done but it is more difficult. There are several ways to do it but the easiest way is (in my opinion) to change the truck to a 2 rail truck if possible. If not possible perhaps someone like Pat can convert it but again it would most likely be cheaper to buy the 2 rail diesel and install your electronics in it.

All opinion. I could be wrong on any or all of this!

@Hudson J1e posted:

1) How are the pickups fabricated and mounted?

There are several ways to do this. I like the way John Sethian does it. You can read about it in his thread about his PRR Baldwin Sharks here:

https://ogrforum.ogaugerr.com/...el-legacy-prr-sharks

2) Can 2 rail lighted rolling stock run on 2 rail AC-powered track.  If not, what would have to be done?

I believe some can and some can't. I think newer 2 rail lighted rolling stock (such as the Atlas CZ cars) can run on AC or DC. Older stuff may be DC only. For the ones that are DC only a simple rectifier circuit is all that is needed.

Steam conversions will be very expensive if you are machining drivers.  A cheaper way would be to see if Pat (Harmon Yards) can find a 2 rail chassis to mount underneath your 3 rail boiler. He is a 3 railer who has done this in reverse many times. I think it would most likely be cheaper to buy a factory 2 rail locomotive and install the Legacy electronics in it rather than convert a 3 rail Legacy steam locomotive. There are other factors involved such as if the locomotive is available in 2 rail but rest assured there is a lot more available in 2 rail than most people think. It's up to you to decide which way is the best for you.

As for diesels if you have MTH diesels with the 2/3 trucks converting is a piece of cake and the cost is minimal. If you don't have the 2/3 trucks then it can still be done but it is more difficult. There are several ways to do it but the easiest way is (in my opinion) to change the truck to a 2 rail truck if possible. If not possible perhaps someone like Pat can convert it but again it would most likely be cheaper to buy the 2 rail diesel and install your electronics in it.

All opinion. I could be wrong on any or all of this!

Thanks for that thread.  Is there a way to tell which cars can run on ac/dc and which are dc only?

The way to think about it is in 3-rail the center rail is hot and the outside rails are ground and not insulated from each other.  In 2-rail the rails are insulated from each other regardless of AC or DC.  Also remember that in a single car or locomotive you cannot mix and match which side is insulated as it will create a short unless there is insulation between the wheel sets.  

2-rail dead rail is easier, but as I know people are going to say it is SO much more expensive.

@rdunniii posted:

The way to think about it is in 3-rail the center rail is hot and the outside rails are ground and not insulated from each other.  In 2-rail the rails are insulated from each other regardless of AC or DC.  Also remember that in a single car or locomotive you cannot mix and match which side is insulated as it will create a short unless there is insulation between the wheel sets.  

2-rail dead rail is easier, but as I know people are going to say it is SO much more expensive.

I've heard of BPRC and it does sound appealing.

Some avenues of thought, ….the juice for some of us is the build itself,…..so if building locomotives & rolling stock is your thing, then there are some routes you can go to swap existing equipment over,….You can have drivers machined for 2 rail use, it’s involved, and the truly economical way to achieve this would be to machine the parts yourself. You also could hunt for full 2 rail chassis to swap out of your 3 rail locomotives…..I, like the others above swap 2 rail to 3 rail, and my preferred method is the full blown chassis swap, as this gives me something of value to resale when I finish my project,…..not to say what want to do is impossible, but you will have a road to hoe…..

Pat

@harmonyards posted:

Some avenues of thought, ….the juice for some of us is the build itself,…..so if building locomotives & rolling stock is your thing, then there are some routes you can go to swap existing equipment over,….You can have drivers machined for 2 rail use, it’s involved, and the truly economical way to achieve this would be to machine the parts yourself. You also could hunt for full 2 rail chassis to swap out of your 3 rail locomotives…..I, like the others above swap 2 rail to 3 rail, and my preferred method is the full blown chassis swap, as this gives me something of value to resale when I finish my project,…..not to say what want to do is impossible, but you will have a road to hoe…..

Pat

If I do end up going into 2RS, then I'll probably be machining tires, which for me should be fun.  I like building things.

My 2 cents. My layout is set up to run straight DC with MRC Control Master 20s. It also will power up with AC for DCC. Additionally, with a few quick changes, I can run TMCC on AC on one or both of the two existing blocks. I do have 2 rail Atlas and Weaver locomotives that run on TMCC, All MTH are PS3 and 2 rail, they run on DCC and there are a lot of engines in the collection that run on DC. Some of the engines are getting slowly changed over to DCC as time and want permit. Lastly, there is one "dead rail" engine that runs on a battery using radio control. That does just fine regardless of the power. It does taking flipping a few electrical switches to make it work. Jeff Lang's large 2 rail layout ran on DCS when I was last there. I do have a DCS system but not have wired in.


Good luck.  -Al

Thanks for that thread.  Is there a way to tell which cars can run on ac/dc and which are dc only?

Not that I know of by just looking at a car. Looking up information from the original importer may give you the answer.

That is so awesome that you have the skills to machine your own drivers. I would definitely like to learn how to do to that someday. Can it be learned from a book or do you suggest I take a class at a local Vocational Technical HS?

I think the AC/DC and TMCC/DCC discussion may be over complicating.    Most all models, now, 3 rail and 2 rail,  use permanent magnet motors (DC motors), I think.    What separates the operating system is the electronic receiver board in the locomotive.    2 wires from the track are input to the control board, and the 2 wires from the board go to the motor.    If 3 rail, one track wire comes from the center rail, and one from one of or both outside rails.    If 2 rail, one wire comes from each outside rail - there is no center rail.    I think whether TMCC or DCC, it works that way.   

If newer models have DC motors, they will not run well, or probably not at all on AC, unless the signal is offset which DCC can do if desired.

As for car lighting, again it will be the same, 2 rail or 3 rail, just a difference of where the pickups are.   

Basically converting diesels, and cars from 3 to 2 rail is relatively easy - sometimes making pickups gets tricky.   Sometimes finding axles the right length is a chore.     But basically it is generally changing pickups and wheelsets.   Generally it is easy to take these things apart and reassemble them.

Converting steam locos is much more complicated.    The mechanisms have all the rods and valve gear.    That must be removed and reinstalled.    Steam loco drivers vary all over the map and finding the right ones can be very difficult.    There are some machinests around that will convert the original drivers.    Rod Miller as mentioned above may do this work.    These are very skilled craftsmen and the work requires special tools such as lathes and quartering jigs and wheel pullers.    It is not a cheap process.

Many years ago Weaver offered its 2 rail engines with the option for AC TMCC control. I had worked on a friends 2 rail layout and built a system powered by AC and TMCC. Many of the engines we ran were Weaver AC TMCC 2 rail. But he also had a good collection of DC engines, many older. I put in some DPDT double pull double throw switches for power to the different main track loops and yards. I could switch between AC TMCC and DC power. I used a heavy duty TMCC engine control board with the DC engine outputs wired to the track leads. When we wanted to run a DC engine we flipped the switch to DC power. The AC power supply ran to a board mounted TMCC engine control and the DC output leads to the motor instead were wired to the track. Worked well! you could control AC or DC engines from the Lionel TMCC remote. Here are photos of the set up. #11 and #22 were the TMCC address #'s for running DC.

Also on a 3 rail Brass Steam engine I had I wanted it converted to 2 rail. A friend had his specialist friend that did conversions to the change. He cut each metal spoke of the main drivers on one side and glued them back together so insulated. Then changed all the other wheels.

IMG_0911IMG_0912IMG_0913

Attachments

Images (3)
  • IMG_0911
  • IMG_0912
  • IMG_0913
Last edited by kj356
@rdunniii posted:

The way to think about it is in 3-rail the center rail is hot and the outside rails are ground and not insulated from each other.  In 2-rail the rails are insulated from each other regardless of AC or DC.  Also remember that in a single car or locomotive you cannot mix and match which side is insulated as it will create a short unless there is insulation between the wheel sets.  

2-rail dead rail is easier, but as I know people are going to say it is SO much more expensive.

and they are wrong ! they are paying more for their Lionel electronics , than starting out with dead rail, and if you like track power , or want both its a simple flick of a switch

I have done a small amount of converting - if you can machine your own drivers for steam, the rest is dirt-easy.  Electronic components have no idea whether they are fed from three rails or two. 

But boy is this getting complex!  I have the feeling that soon either the circuitry will be obsolete or it will start to fail, and we 2-railers will be getting locomotives for cheap.

Dead Rail ought not to be expensive.  Radio Shack was selling model cars with full radio control of everything for thirty five bucks, including transmitter and batteries.  One would think Lionel could do that with starter sets.

@aoslapas posted:

My 2 cents. My layout is set up to run straight DC with MRC Control Master 20s. It also will power up with AC for DCC. Additionally, with a few quick changes, I can run TMCC on AC on one or both of the two existing blocks. I do have 2 rail Atlas and Weaver locomotives that run on TMCC, All MTH are PS3 and 2 rail, they run on DCC and there are a lot of engines in the collection that run on DC. Some of the engines are getting slowly changed over to DCC as time and want permit. Lastly, there is one "dead rail" engine that runs on a battery using radio control. That does just fine regardless of the power. It does taking flipping a few electrical switches to make it work. Jeff Lang's large 2 rail layout ran on DCS when I was last there. I do have a DCS system but not have wired in.


Good luck.  -Al

That's really cool.  How complicated was it to set up? 

@prrjim posted:

I think the AC/DC and TMCC/DCC discussion may be over complicating.    Most all models, now, 3 rail and 2 rail,  use permanent magnet motors (DC motors), I think.    What separates the operating system is the electronic receiver board in the locomotive.    2 wires from the track are input to the control board, and the 2 wires from the board go to the motor.    If 3 rail, one track wire comes from the center rail, and one from one of or both outside rails.    If 2 rail, one wire comes from each outside rail - there is no center rail.    I think whether TMCC or DCC, it works that way. 

If newer models have DC motors, they will not run well, or probably not at all on AC, unless the signal is offset which DCC can do if desired.

As for car lighting, again it will be the same, 2 rail or 3 rail, just a difference of where the pickups are. 

Basically converting diesels, and cars from 3 to 2 rail is relatively easy - sometimes making pickups gets tricky.   Sometimes finding axles the right length is a chore.     But basically it is generally changing pickups and wheelsets.   Generally it is easy to take these things apart and reassemble them.

Converting steam locos is much more complicated.    The mechanisms have all the rods and valve gear.    That must be removed and reinstalled.    Steam loco drivers vary all over the map and finding the right ones can be very difficult.    There are some machinests around that will convert the original drivers.    Rod Miller as mentioned above may do this work.    These are very skilled craftsmen and the work requires special tools such as lathes and quartering jigs and wheel pullers.    It is not a cheap process.

D you know where one would buy a quartering jig from?

Last edited by Justin Acuna
@bob2 posted:

I have done a small amount of converting - if you can machine your own drivers for steam, the rest is dirt-easy.  Electronic components have no idea whether they are fed from three rails or two.

But boy is this getting complex!  I have the feeling that soon either the circuitry will be obsolete or it will start to fail, and we 2-railers will be getting locomotives for cheap.

Dead Rail ought not to be expensive.  Radio Shack was selling model cars with full radio control of everything for thirty five bucks, including transmitter and batteries.  One would think Lionel could do that with starter sets.

I think it's less that Lionel could offer them than they don't want to.  But that's just IMO.

I live in Australia, and the lath I use is a" Sheraton " manufactured in Melbourne I think? The truth is, its a copy of the American  " South Bend "     The PRB model is a very nice model, and Im pleased to have it, I saw a potential  problem and fixed it, just incase .  The R/C or Blue Tooth - Wi-Fi ( 2.4 GHZ ) is a solution Ive also exploured.       cTr,,,,( Choose the Right )      https://youtu.be/FCZLToxtEtA

Last edited by Stephen Bloy

I know NWSL makes a quartering jig for HO scale.    I don't know if they do one for O also, I have never see one.     I think some of the custom machinests  have made their own.    

Until recently, most 3 rail locomotives were not very good models, so modelrs interested in getting scale locos were not interested in converting them.     That has changed a lot.    However, many of the ones done in 3 rail have also been done in 2 rail.  

@prrjim posted:

I know NWSL makes a quartering jig for HO scale.    I don't know if they do one for O also, I have never see one.     I think some of the custom machinests  have made their own.  

Until recently, most 3 rail locomotives were not very good models, so modelrs interested in getting scale locos were not interested in converting them.     That has changed a lot.    However, many of the ones done in 3 rail have also been done in 2 rail.

Yes, the easy way to be to sell what I have and start over...but I like challenges.

Last edited by Justin Acuna

I have the NWSL O quartering jig,…..a little fidgety until you get the hang of it,….their crank pin cups I find to be sloppy on most of the wheel sets I’ve worked on,…I’ve long since machined various crank pin cups with better fitment/alignment….I’ve even made cups for MTH products, and use the jig on captured axle frames…..I use an inexpensive arbor that I bought and modified solely for the NWSL jig,….having everything locked down frees up your hands to position stuff for the pressings….I’m not sure if NWSL still produces it or not….I’ve had mine for 20 some odd years now…..

Pat

I live in Australia, and the lath I use is a" Sheraton " manufactured in Melbourne I think? The truth is, its a copy of the American  " South Bend "     The PRB model is a very nice model, and Im pleased to have it, I saw a potential  problem and fixed it, just incase .  The R/C or Blue Tooth - Wi-Fi ( 2.4 GHZ ) is a solution Ive also exploured.       cTr,,,,( Choose the Right )      https://youtu.be/FCZLToxtEtA

What size is your lathe?  I've heard some people say that you need nothing less than a 12" lathe, others have said they got by with a 6" lathe.

@harmonyards posted:

I have the NWSL O quartering jig,…..a little fidgety until you get the hang of it,….their crank pin cups I find to be sloppy on most of the wheel sets I’ve worked on,…I’ve long since machined various crank pin cups with better fitment/alignment….I’ve even made cups for MTH products, and use the jig on captured axle frames…..I use an inexpensive arbor that I bought and modified solely for the NWSL jig,….having everything locked down frees up your hands to position stuff for the pressings….I’m not sure if NWSL still produces it or not….I’ve had mine for 20 some odd years now…..

Pat

Do you know the part number for the jig?

@Hudson J1e posted:

Not that I know of by just looking at a car. Looking up information from the original importer may give you the answer.

That is so awesome that you have the skills to machine your own drivers. I would definitely like to learn how to do to that someday. Can it be learned from a book or do you suggest I take a class at a local Vocational Technical HS?

It depends on your preferred style of learning.  I myself would go with a class but that's because I learn, and retain what I learn, much better.

@kj356 posted:

Many years ago Weaver offered its 2 rail engines with the option for AC TMCC control. I had worked on a friends 2 rail layout and built a system powered by AC and TMCC. Many of the engines we ran were Weaver AC TMCC 2 rail. But he also had a good collection of DC engines, many older. I put in some DPDT double pull double throw switches for power to the different main track loops and yards. I could switch between AC TMCC and DC power. I used a heavy duty TMCC engine control board with the DC engine outputs wired to the track leads. When we wanted to run a DC engine we flipped the switch to DC power. The AC power supply ran to a board mounted TMCC engine control and the DC output leads to the motor instead were wired to the track. Worked well! you could control AC or DC engines from the Lionel TMCC remote. Here are photos of the set up. #11 and #22 were the TMCC address #'s for running DC.

Also on a 3 rail Brass Steam engine I had I wanted it converted to 2 rail. A friend had his specialist friend that did conversions to the change. He cut each metal spoke of the main drivers on one side and glued them back together so insulated. Then changed all the other wheels.

IMG_0911IMG_0912IMG_0913

That's a very cool setup you got there.  Just a clarification, are you able to run DC and AC powered engines at the same time with this setup?

It depends on your preferred style of learning.  I myself would go with a class but that's because I learn, and retain what I learn, much better.

Thank you for your response and thank you for starting this thread. I am always interested in knowing how others go about converting 3R to 2R. This information will also be good for anyone else considering O scale 2 rail.

"That's a very cool setup you got there.  Just a clarification, are you able to run DC and AC powered engines at the same time with this setup?"

Although not my post or layout (really cool setup @kj356 by the way) I can tell you it is possible on the same layout but not in the same electrical block. The way I understand it is his TMCC boards put out DC to a block or loop. He could have more than one DC locomotive in that block or loop (both would run at the same speed and could not be individually controlled) but not a locomotive that requires an AC input.

I'm currently in 3RS, but recently I've been thinking about moving over to 2 rail.  As part of this train of thought, I went thru the 2-Rail Scale Forum, looking for information on converting steam and diesel locomotives and lighted/ sound equipped rolling stock (yes, I know it'd be easier to sell what I've got and buy pure 2 rail engines, but I have a personal preference for TMCC/Legacy).  Here's what's still a bit of a grey area for me:

1) How are the pickups fabricated and mounted.

2) Can 2 rail lighted rolling stock run on 2 rail AC-powered track.  If not, what would have to be done?


--As an aside, I can make a separate thread that contains all the pages on converting 3 rail stuff to 2 rail if that's something that'd interest people--

Thanks.

On the steam locomotive side, your best bet is to sell off 3 rail and buy into 2 rail.

The big issue in steam engines is the wider width of the valve gear to accomodate the wider flange wheels of the loco. There would be too much shimming if adding two rail wheels and insulators plus you will not get that "finescale look" as ome does with a factory made 2 rail steam engine.

There is a lot more 2 rail out there than 3 rail so why bother the conversion unless its a hard to get item.

Hi!

It's always good to see a 3-railer convert :-) I do all the work on the Sherline. I love the "NWSL The Quarterer III", a great tool. Proto:48 is my thing, all and everything has to be machined. I personally would not convert 3-rail because it's not really worth the effort. Exceptions are super rare locomotives or such not being made in 2-rail.

Sarah

110AF105-988E-469C-A253-72E51687F958

EC22628C-4110-4707-AFB7-BCB3D29A2E40

61068EA2-1590-4774-9EB2-BEAD3529EE67

Attachments

Images (3)
  • 110AF105-988E-469C-A253-72E51687F958
  • EC22628C-4110-4707-AFB7-BCB3D29A2E40
  • 61068EA2-1590-4774-9EB2-BEAD3529EE67

On the steam locomotive side, your best bet is to sell off 3 rail and buy into 2 rail.

The big issue in steam engines is the wider width of the valve gear to accomodate the wider flange wheels of the loco. There would be too much shimming if adding two rail wheels and insulators plus you will not get that "finescale look" as ome does with a factory made 2 rail steam engine.

There is a lot more 2 rail out there than 3 rail so why bother the conversion unless its a hard to get item.

I’d agree with ya about starting off with 2 rail rather than converting a bunch of common pieces, however, the motion hangers are the furthest thing from being a problem,….they can be moved inboards, or manipulated …..or even swapped around from one frame to another…..this a MTH chassis receiving Kline motion hangers on newly made cross beams…..this ain’t rocket science……😉

Pat 2DB72BB3-56AC-401B-AA82-7A813A8E9F1F

Attachments

Images (1)
  • 2DB72BB3-56AC-401B-AA82-7A813A8E9F1F

That's true.  I converted an MTH Hudson.  New frame, drivers, gears, cylinder block.  Old MTH rods, hanger, valve gear.

Next project is an MTH Bi-Polar.  The only 2-rail option is really flimsy brass.

I have done Lionel Hudsons and B6s, machining new tires for the tinplate drivers - but these days it is truly easier to change drivers - especially MTH, where insulation was done at the axle.

Thank you for the pictures of the NWSL QUARTERER III, Sarah.  I am surprised and glad to hear that you one can do adequate driver machining with a Sherline lathe. I was under the impression that one needed some huge floor standing unit like I used in college physics lab; it was probably a Southbend. Which size lathe from Sherline do you use? Thank you.

She is indeed talented, I can’t do it on my 7” and have to go out to the big shop to use the South Bend,……I’d like to know where to get Leadloy, I’ve used black iron as it’s all I can get my hands on,….my metal supplier knows what Leadloy is, but he can’t get his hands on it……she does AMAZING work to be churning out perfection like she does on a Sherline…….

Pat

@harmonyards posted:

She is indeed talented, I can’t do it on my 7” and have to go out to the big shop to use the South Bend,……I’d like to know where to get Leadloy, I’ve used black iron as it’s all I can get my hands on,….my metal supplier knows what Leadloy is, but he can’t get his hands on it……she does AMAZING work to be churning out perfection like she does on a Sherline…….

Pat

Pat and Bob thanks for elaborating on this topic. Leadloy steel seems to be one of the essential ingredients to make steel tires on the Sherline.

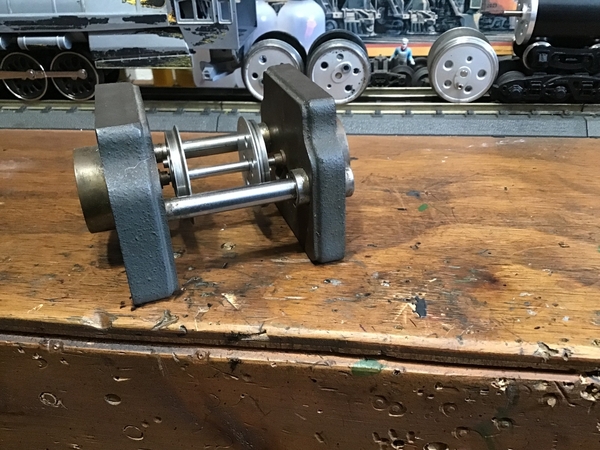
This was my first attempt at insulating wheels as I had an old Scalecraft K4 with loose rims on the insulated side. I had some PVC pipe about the right size so I used that to make some sleeves and then turned their od down after putting them on the center.  Worked pretty good.  Ihave since purchased some of the paper product Joe and Bob suggested  and will try that ont he next wheels I mess with.  3A8AEBC5-102F-40A5-BEF7-CFD25BF1901A4E8C1D80-6639-4EAE-8442-D9B17C9E0AA95477DA64-A733-4BD6-B585-9C5689A240C9E4862303-E4F2-4278-9960-A33CD18B3334

This is a good easy machining steel if you get it in a size large enough to make what you need.


I also was fortunate to have a medium sized older lathe.  I have an old Rockwell 11" on a 48" flame hardened bed so it is decent, but it is belt drive so it does cause some annoyance from time to time lol.  I've never had the opportunity to use a Sherline, did have a Smitty 3 in 1 for a short while but sold it.  Probably should have kept it so I could at least do a little milling that can't be set up on my Rockwell but at the time I thought I would run into a cheap Bridgeport.  I guess I have found a few cheap ones, but **** they are a little heavy to go stuffing ina normal garage lol.

Attachments

Images (6)
  • mceclip0
  • mceclip1
  • 3A8AEBC5-102F-40A5-BEF7-CFD25BF1901A
  • 4E8C1D80-6639-4EAE-8442-D9B17C9E0AA9
  • 5477DA64-A733-4BD6-B585-9C5689A240C9
  • E4862303-E4F2-4278-9960-A33CD18B3334
Last edited by Dennis Holler

On the DC/TMCC AC circuit board that I posted. I had 5 amp breakers on it and at the time many years ago the layout was in a massive room. We had 2 main lines around the rooms and then some main yard tracks. You could run as many trains as the 5 amp circuit could handle. So one remote could be running say 2 trains with TMCC AC on the outside loop  and another controller could be running 2 DC trains on the inside loop or yard tracks etc.

It was a good way to do it at the time as between the few of us involved in working on the layout and running some of us had Weaver 2 rail AC TMCC engines and some DC engines. Worked well.  Could run both with the remote.

I do like the MTH diesel engines now in Premier  many of them can be changed from 3 to 2 rail or reverse. If you are able to find a 2 rail version  though they normally have the fixed pilot. I have found it useful to buy used MTH engines then custom paint them to whatever road name I want and swap in the 2 rail wheels.

@Sarah posted:

Hi!

It's always good to see a 3-railer convert :-) I do all the work on the Sherline. I love the "NWSL The Quarterer III", a great tool. Proto:48 is my thing, all and everything has to be machined. I personally would not convert 3-rail because it's not really worth the effort. Exceptions are super rare locomotives or such not being made in 2-rail.

Sarah

110AF105-988E-469C-A253-72E51687F958

EC22628C-4110-4707-AFB7-BCB3D29A2E40

61068EA2-1590-4774-9EB2-BEAD3529EE67

Thanks for your reply!  I'm a big fan of your UP 9000.

@bob2 posted:

That's true.  I converted an MTH Hudson.  New frame, drivers, gears, cylinder block.  Old MTH rods, hanger, valve gear.

Next project is an MTH Bi-Polar.  The only 2-rail option is really flimsy brass.

I have done Lionel Hudsons and B6s, machining new tires for the tinplate drivers - but these days it is truly easier to change drivers - especially MTH, where insulation was done at the axle.

If only Lionel did the same.

@Hudson J1e posted:

Thank you for your response and thank you for starting this thread. I am always interested in knowing how others go about converting 3R to 2R. This information will also be good for anyone else considering O scale 2 rail.

The 2RS part of the forum has quite a bit of info, but it's just spread out in the 250+ threads (ask me how I know).  With the exception of a few threads on converting nonlighted rolling stock, which I didn't read just because it started getting too repetitive to read an article that was almost identical to a bunch of other threads.  I have all of them saved on my desktop if you'd like to give them a read.

@kj356 posted:

On the DC/TMCC AC circuit board that I posted. I had 5 amp breakers on it and at the time many years ago the layout was in a massive room. We had 2 main lines around the rooms and then some main yard tracks. You could run as many trains as the 5 amp circuit could handle. So one remote could be running say 2 trains with TMCC AC on the outside loop  and another controller could be running 2 DC trains on the inside loop or yard tracks etc.

It was a good way to do it at the time as between the few of us involved in working on the layout and running some of us had Weaver 2 rail AC TMCC engines and some DC engines. Worked well.  Could run both with the remote.

I do like the MTH diesel engines now in Premier  many of them can be changed from 3 to 2 rail or reverse. If you are able to find a 2 rail version  though they normally have the fixed pilot. I have found it useful to buy used MTH engines then custom paint them to whatever road name I want and swap in the 2 rail wheels.

That's an awesome setup.

This was my first attempt at insulating wheels as I had an old Scalecraft K4 with loose rims on the insulated side. I had some PVC pipe about the right size so I used that to make some sleeves and then turned their od down after putting them on the center.  Worked pretty good.  Ihave since purchased some of the paper product Joe and Bob suggested  and will try that ont he next wheels I mess with.  3A8AEBC5-102F-40A5-BEF7-CFD25BF1901A4E8C1D80-6639-4EAE-8442-D9B17C9E0AA95477DA64-A733-4BD6-B585-9C5689A240C9E4862303-E4F2-4278-9960-A33CD18B3334

This is a good easy machining steel if you get it in a size large enough to make what you need.


I also was fortunate to have a medium sized older lathe.  I have an old Rockwell 11" on a 48" flame hardened bed so it is decent, but it is belt drive so it does cause some annoyance from time to time lol.  I've never had the opportunity to use a Sherline, did have a Smitty 3 in 1 for a short while but sold it.  Probably should have kept it so I could at least do a little milling that can't be set up on my Rockwell but at the time I thought I would run into a cheap Bridgeport.  I guess I have found a few cheap ones, but **** they are a little heavy to go stuffing ina normal garage lol.

Interesting material.  When I was looking around, all I found was Leadloy.

@swrr posted:

Pat and Bob thanks for elaborating on this topic. Leadloy steel seems to be one of the essential ingredients to make steel tires on the Sherline.

Ledloy is just 12L14.  Search 12L14 at Onlinemetals.com and SpeedyMetals.com.  They both stock it.

AISI 12L14 is a Standard Resulfurized and Rephosphorized grade Carbon Steel. It is a free machining steel and is commonly called AISI 12L14 Lead Steel and may be referred to by the trade name Ledloy™. Lead has been added to the chemical composition to provide an improved level of machinability.

Scott

Last edited by Scott Kay

For insulation I use the paper that comes in junkmail.  It is usually a bit thicker than plain old paper, and has fibers, which absorb Loctite.  I think it ranges from .003-.007 thick, which saves me from having to be a precision machinist.

If the insulation fails on an older 2-rail driver, don't machine anything.  Gently heat until you can get the tire off, then use my paper trick, finger pressure, and shaft Loctite.  Half- hour of work, 24 hrs for the adhesive to cure.

@bob2 posted:

For insulation I use the paper that comes in junkmail.  It is usually a bit thicker than plain old paper, and has fibers, which absorb Loctite.  I think it ranges from .003-.007 thick, which saves me from having to be a precision machinist.

If the insulation fails on an older 2-rail driver, don't machine anything.  Gently heat until you can get the tire off, then use my paper trick, finger pressure, and shaft Loctite.  Half- hour of work, 24 hrs for the adhesive to cure.

Bob, this insulation technique is similar to what Joe Foehrkolb did except he used fish paper.  His PowerPoint presentations for 3 to 2 rail conversion are still available online.  Lots of great info. Just google this topic: Joe Foehrkolb PowerPoint.

Joe and I corresponded.  Joe did good work - he and I used vastly different techniques.  I have no idea what advantage fish paper yields, but it held well enough for him to do finish machining with the tire mounted.  I could not do that except for light polishing or file forming, since the heat would expand the tire, releasing it from the insulation.

I have found that iron makes much better tires than leadloy - it seems to "grip the rail."

Fish paper is what I bought after both your and Joe's responses a few years ago.  Will give it a go when I get off my butt and do some work lol I've started pulling one of my SC Mountains apart.  When I got it, the insulated driver rims were more or less gone as the loco had been stored poorly and they had rusted off.  Luckily the centers are still good so will have to make new rims for that side and insulate them.

IMG_7926IMG_7957IMG_7958

Attachments

Images (3)
  • IMG_7926
  • IMG_7957
  • IMG_7958
Last edited by Dennis Holler

Just to add some interest, here  is a ten-wheeler with my tires on what I think were Max Grey blind drivers.  Harold Peters gave me enough of these square counterweight drivers to do this project, but every single one was blind!  Cut the old tires off, machined new ones - one side is press fit, the other of course Loctite -impregnated paper.  Ignore the corrosion and dust; when I am ready I have access to a capable bead blast cabinet.

2348

Attachments

Images (1)
  • 2348

Fish paper has high insulation properties as well as fairly precise thickness to it.  I use it all the time near high voltage components as an arc shield in my vacuum tube audio amps.  It also has archival properties unlike ordinary paper that is high in acid.  Eventually the acid in ordinary paper disintegrates the paper.  One can see this in old papers turning a yellowish brown.

Fish paper is what I bought after both your and Joe's responses a few years ago.  Will give it a go when I get off my butt and do some work lol I've started pulling one of my SC Mountains apart.  When I got it, the insulated driver rims were more or less gone as the loco had been stored poorly and they had rusted off.  Luckily the centers are still good so will have to make new rims for that side and insulate them.

IMG_7926IMG_7957IMG_7958

Dennis, you sure like em’ crusty….what did you ever do with the Commodore Swamperbilt?….🤣🤣🤣

Pat

@bob2 posted:

For insulation I use the paper that comes in junkmail.  It is usually a bit thicker than plain old paper, and has fibers, which absorb Loctite.  I think it ranges from .003-.007 thick, which saves me from having to be a precision machinist.

If the insulation fails on an older 2-rail driver, don't machine anything.  Gently heat until you can get the tire off, then use my paper trick, finger pressure, and shaft Loctite.  Half- hour of work, 24 hrs for the adhesive to cure.

Thanks for that advice.

Hi there,

This thread is pretty inspiring. I have greatly admired people who do this work and I want to learn. I think Joe F. did some seminars at conventions years ago so maybe he has some type of instructional info for this.

I did find these on the forum about a month ago.

Attachments

@bob2 posted:

. . .

I have found that iron makes much better tires than leadloy - it seems to "grip the rail."

Funny you mentioned that. Back when I returned to the hobby, Williams used sintered iron driving wheels on their diesel power trucks (no traction tires) and I was amazed how well they pulled. It took a heavy load to get them to slip. I don't know what prompted the switch to traction tires. I got tired of my diesels throwing traction tires and started "testing" scale-wheel MTH offerings in 2009. I've never looked back.

@harmonyards posted:

I’d agree with ya about starting off with 2 rail rather than converting a bunch of common pieces, however, the motion hangers are the furthest thing from being a problem,….they can be moved inboards, or manipulated …..or even swapped around from one frame to another…..this a MTH chassis receiving Kline motion hangers on newly made cross beams…..this ain’t rocket science……😉

Pat 2DB72BB3-56AC-401B-AA82-7A813A8E9F1F

Been meaning to ask this for a few days but life has kept me busy.  How would one go about readjusting the drive gear? I hadn't thought of the extra space created by replacing Hi-rail wheels with scale wheels.

Yes, It was mentioned ( further up ) that there would be a difference in locomotive frame width between 3 rail and 2 rail, but most frames Ive worked with are around one inch wide. So as Bob is saying the rest is washers.   cTr....( Choose the Right )Screen Shot 2022-01-26 at 10.16.51 am This was a Sunset 3 Rail model, has since been lowered ( for two rail ) at the cylinders as this is to high and raised in three rail models for clearance purposes. The reason Ive embarked on conversions is that 3 rail models are more readily available and at a lower price than 2 rail models. I live in Australia so the difference in price, after taking into account the exchange rate, and sales tax, adds up to a lot of $$$$$$.

Attachments

Images (1)
  • Screen Shot 2022-01-26 at 10.16.51 am

Yes, It was mentioned ( further up ) that there would be a difference in locomotive frame width between 3 rail and 2 rail, but most frames Ive worked with are around one inch wide. So as Bob is saying the rest is washers.   cTr....( Choose the Right )Screen Shot 2022-01-26 at 10.16.51 am This was a Sunset 3 Rail model, has since been lowered ( for two rail ) at the cylinders as this is to high and raised in three rail models for clearance purposes. The reason Ive embarked on conversions is that 3 rail models are more readily available and at a lower price than 2 rail models. I live in Australia so the difference in price, after taking into account the exchange rate, and sales tax, adds up to a lot of $$$$$$.

For that model, how much did the washers need to be adjusted?

Its really about side play or lateral movement. The first model that I 2 railed was a Williams brass NYC Hudson ( the not so detailed one ) I replaced the drivers with worn out Westside drivers that a friend had available, I had to turn new tyres and fit them and I turned new axles too ( probably not necessary ). I feel that this model is a little tight. The driver castings vary and frames and bearings vary a little, so exact washer thickness would also vary.     cTr....( Choose the Right )

Been meaning to ask this for a few days but life has kept me busy.  How would one go about readjusting the drive gear? I hadn't thought of the extra space created by replacing Hi-rail wheels with scale wheels.

If it’s got 2 piece motion hangers, just scoot them in, drill and tap new holes, …If it’s got a one piece motion hanger, section it, scoot it in, drill and tap new holes…..as mentioned before, this stuff is not rocket surgery or brain science…..you just have to know how the materials that your working with are going to react to the tools/machines your using……die cast is a funny material, most of the times, no two pieces are of the same density or composition…..testing and sneaking up on how to work the material is a must,…..some components are hard as steel, and some are soft as butter…..sometimes when I begin a boring process, the softer castings will actually re-melt and clog any bits up, that’s when you gotta back up, and redo your process…..I’d suggest practice on some scrap parts, drilling, tapping, cutting and filing on busted broken parts to develop your techniques, …..

Pat

Yes, It was mentioned ( further up ) that there would be a difference in locomotive frame width between 3 rail and 2 rail, but most frames Ive worked with are around one inch wide. So as Bob is saying the rest is washers.   cTr....( Choose the Right )Screen Shot 2022-01-26 at 10.16.51 am This was a Sunset 3 Rail model, has since been lowered ( for two rail ) at the cylinders as this is to high and raised in three rail models for clearance purposes. The reason Ive embarked on conversions is that 3 rail models are more readily available and at a lower price than 2 rail models. I live in Australia so the difference in price, after taking into account the exchange rate, and sales tax, adds up to a lot of $$$$$$.

Nice locomotive !

@harmonyards posted:

If it’s got 2 piece motion hangers, just scoot them in, drill and tap new holes, …If it’s got a one piece motion hanger, section it, scoot it in, drill and tap new holes…..as mentioned before, this stuff is not rocket surgery or brain science…..you just have to know how the materials that your working with are going to react to the tools/machines your using……die cast is a funny material, most of the times, no two pieces are of the same density or composition…..testing and sneaking up on how to work the material is a must,…..some components are hard as steel, and some are soft as butter…..sometimes when I begin a boring process, the softer castings will actually re-melt and clog any bits up, that’s when you gotta back up, and redo your process…..I’d suggest practice on some scrap parts, drilling, tapping, cutting and filing on busted broken parts to develop your techniques, …..

Pat

Yeah, I was thinking that if I go down the conversion path, then I should first try a relatively inexpensive model.

Yeah, I was thinking that if I go down the conversion path, then I should first try a relatively inexpensive model.

You can hit me up if you decide to go down that road, I’ve got plenty of scrapped MTH chassis that are no good but for experimenting…..good way to get your sea legs, ..and join the rest of us looney tunes doing this work …..😉

Pat

Add Reply

Post

OGR Publishing, Inc., 1310 Eastside Centre Ct, Suite 6, Mountain Home, AR 72653
800-980-OGRR (6477)
www.ogaugerr.com

×
×
×
×
Link copied to your clipboard.
×
×