William,

Thank you for your reply.  I am with you on that; Just do it!    The main reason I haven't started on it is we have been faced with increasing responsibilities for caring for older relatives.  Dad had been taking care of Mom since she got out of an extended stay in the hospital in the winter.  This past week Dad was in the hospital briefly, and realized he isn't up to doing as much as he had been.  My mother-in-law lives down the road, and I have an aunt in assisted living, but I am her power of attorney, etc.  

On to the saw.  I thought maybe the saw would make it quicker, easier, and more accurate in making cuts.  Maybe I should just rent one for a day, just to see if that is really true.  I think with outdoor work too, it will be fall until I get at it.  I do have some more track lighting I want to install while I still have an open floor below.

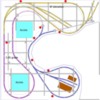
So I see it has been a month since I replied.  Well due to obligations to my elderly parents, aunt, and mother-in-law, I haven't touched this in a month.  Today I got a chance to try to draw some kind of plan for L-girder benchwork.  I have used it before, and I think it would be best here, due to the curved perimeter of the layout.  I do not know how to do it differently, so I added a layer to the last SCARM drawing and put in the gray lines showing the long L-girders, the cross joists, and the almost square looking legs.  Remember, with L-girder, the joists do not have to be even.  There would be cross members joining the L-girder sections. I have not figured out how to put the L-girder layer under the other layers, but I'm sure it is easy, I just need to look it up but don't feel like it now.  It was a busy morning at church, and after this exercise, I'm going to take a nap.  I mainly want to post this photo to see if there is any discussion on the merits or how I could do it differently.  Actually, the L-girders and joists show up better on top for this discussion.

Thank you for looking.

BCL 7-daz-11curve

Attachments

Images (1)
  • BCL 7-daz-11curve

Mark, it gets very complicated because of the way SCARM displays tracks and objects. However, for your purposes, check the property values for the L-Girder rails. You didn't attach the SCARM file, so I can't check myself, but I suspect the vertical position and height fields are not correct. The lowest track (blue) is "0" elevation and the decking is 1/2", so if you want to portray a 1x4 L-Girder rail and have it display beneath the bottom level, try changing the vertical position to "-4.0" and the height to "3.5" (or post the SCARM file and I'll take a look).

The 1st photo shows where I added two beams, both 3.5" tall. The one on the left has values of "0" and "3.5", the one on the right "-4.0" and "3.5". As you can see, the one on the right is properly displayed beneath the track whereas the one on the left is displayed above the track. The 2nd photo shows the 3D view. Once properties are changed for all the rails, your L-Girder should be displayed below the track. Let me know if that works.

Now, please note that the beam on the left is not beneath the Yellow track even though the elevation of that track is 8" and the beam is only 3.5" tall. I first noticed this when I tried to add an object below the tracks in a design I was working on and I had the tracks set to their actual height of 40". I could add a shelf at the 8" point and get it to display correctly in 3D, but they always covered the tracks in 2D. My simple understanding is that tracks are displayed as a singe "object" without regard to elevation of individual tracks and are displayed on top at elevation "0". Therefore any object with either property value set to something greater than 0 will always cover the tracks regardless of track elevation. As you might have figured out, a vertical position less than 0 will display beneath the track and that's why the "-4.0" fixes the display.

Capture1

Capture


Attachments

Images (2)
  • Capture1
  • Capture

I got my beauty nap too Mark...during the first half of the radio broadcast of the race.  L girder is absolutely the best way to go!  The most flexibility by far--easier to revise, etc.  I'm very happy and excited for you.  NOT being negative, my concern for you is that you will get bored with the looping--as my original version had turntables at both "ends" which made an operator: stop, uncouple, get on the turntable, take the caboose off, and place it on the other end of the train.  That would keep a single person busy for hours...
The looping is nice in that you can control one train and let another run freely to challenge you as you go back and forth.  With this set-up, you will have to be disciplined enough to NOT just let this become a loop of track missing its tree.

On smaller ,shorter, layouts, it is imperative to give an operator something to do that provides purpose and participation because it will only take a minute or two to complete the entire main run.  With your spurs at opposite ends, you can use those to switch out trains...in other words when you run a train upward--park it in a spur and return with another train.  Switch trains every time you go either from bottom to top or vice versa...

With sharp curves in yours and the real area--use restricted speed to your advantage.  Regardless, this is a really neat layout--and the theme is good.  Be sure to take pictures every time you do something!  I have 1000s of ours and it is amazing to look back to the beginning.  One day you may discover that the realistic operation that turntables would have provided on each end would have been the way to go...everyone is different in their opinions and preferences... 

Even if you do...the loops on the ends would leave an area for turntables should you ever feel you want a change.

Dave,

I think I got it on how to show the benchwork underneath.  I wasn't even thinking of elevations.  I was just looking to bring the track on top.  That thinking came from limited experience with an ancient version of DesignCAD and Visio.  I am not concerned with the benchwork showing on a 3D view so your instructions will get the results I'm looking for.

John,

Thank you for the comments.  If I had a larger room, I would make my layout in a fashion more like yours and run trains one way then break them up and run other consists.  Considering my short run, I want to be able to do an out and back for a longer run, simulating the Blackwater canyon then back down the mountain again for a longer run.  Yes, passing over the same scenery in the opposite direction takes some imagination, but the looping takes some imagination as the Blackwater doesn't do that in real life either.  Believe me, I do not run my trains now for as long as I would like because I do get bored with the short ovals.  As you said, the real estate will be there if I get tired of this and want to put a turntable in the future.  The L-girder will give me ample room to put shelves or roll out drawers of some sort in for all my cars I want to switch out by hand while running trains.

Thank you both for your comments.

Oh, one more thing John touched on.  During the last few months, I have been converting some of my roster from longer to shorter cars and locomotives.  I sold and traded two large steam locomotives and picked up a 0-6-0, SW-9, and RS-1.  On the passenger car side I got rid of two large sets of 18" passenger cars and bought a 3-car set of baby Madison cars that should look good on the mountain curves.

Today in response to one of my posts elsewhere, John Coy asked me how the Blackwater Canyon Line is coming along.  I thought I should post my reply to John here for all of you who have been so good to reply and follow my topic. 

Thank you for asking. The new layout is temporarily on hold. My 86-year old parents had a rough winter and spring. Both have had extensive hospital stays; in fact I just got off the phone, and Dad will be discharged Monday and I will be taking him to a personal care home while my sister brings Mom from her house. It has been trying on us all, but we have seen God work out some amazing things. Hopefully, things will start to settle down in July and we can just visit them, though we will have to watch the house and mow the grass until we decide what to do there.   As to the new layout, I am still picking up material when I can.  I also have my 91 year old aunt, who I serve as power of attorney, in another facility; and my mother-in-law who now lives across the road from us. No one helps us with those two. We have been blessed, but are usually very tired.  

(After receiving another Ross turnout from a Forum member, I will only need 4 more turnouts and that should complete the track purchases.  I have the lumber I can get from my mother-in-law's house, and I can go through Dad's stash of nice lumber since he won't be using any of it.  That is sad for me to say, but who would have thought he could have kept up with everything to past his 86th birthday) 

Last edited by Mark Boyce

Thanks for taking the time to let us all know what you have been dealing with. I know this is a very emotional time for you. As I have said several times, in the forum, we are a brother/sisterhood in this hobby. Just pop your head in when you can and we will give you your train fix for the day. In the meantime, take care of mom and dad as I know they have done for you. Keep your head up and know we are here for you.

Dave

Dave and Mike,

You are both so right!  Mum has been in decline for a few years, needing a cane, walker, or wheelchair depending on the circumstances.  Also her short-term memory is now not very good.  Dad still insisted on being the caregiver after Mum was out of the hospital in January, but it took a major toll on him and became evident he wasn't up to it.  He was the last of us to figure it out.  Now he has turned all responsibility over to us "kids", and I told him yesterday that it was our turn to take care of him and Mum, just as they did for us.  I say the same thing about our aunt, who was the one who lived closest and was most involved with us growing up!  

I have looked up to Dad, a godly man, as an example for what kind of man to become.  The last few years I have looked to him as an example of how to make the most of the aging process.  Now I am witnessing his example of how to live as an elderly person.  He is to be commended, as he used other men as an example for this since my grandfather passed on at age 56.

Everyone on OGR Forum,

I do use this Forum as a therapeutic agent.  All of you give me that "train fix" as Dave put it, when I don't have time to run trains or work on a layout or other project!  I thank all of you very much for your prayers, thoughts, and comradery!  I hope to meet more of you face to face as the years go by!  Thank you!!

Mark, many of us have walked in your shoes, and we are here for you. 

It's very difficult to watch the decline of our parents.  Take comfort in their love, which is always there for us "kids", and transcends all obstacles (even death), and in the fact that you are truly honoring your mother and father as the Commandment says.

May God hold you and your family in the palm of His hand.

George

Mark sorry to here about the family issues. Like all of use here at one time or another life issues get in the way and take priorities over other things were trying to accomplish.  Forum as a train fix now that's funny. Sometime reading the issues that have come up would seem more of a discouragement. But that's OK too sometimes reading about others issue can make yours seem trivial by comparison.  So I know in the end things will work out  for you and eventually the layout will get built. In the meantime you still have the other one up and running so you can run trains, come here and do a mind dump, after all everybody needs some sort of escape from reality otherwise we would all go crazy.

George and Doug, thank you for the very kind words!  I appreciate it very much!!

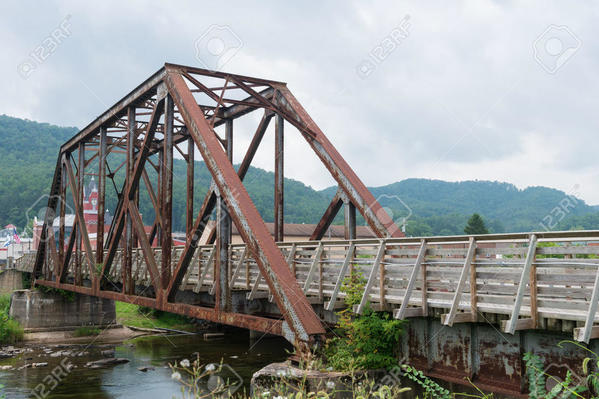
I had a very nice diversion from life.  I have been planning to model the Big Run Culvert and the Tubs Run Viaduct on the Blackwater grade, with some areas from Thomas and Davis at the top, and some of Hendricks at the bottom.  There is a river crossing at Hendricks which I had in the back of my mind to model.  There is a ho hum girder bridge there.  When Menards released their through truss bridge this week, I thought that would be nice, but if I stay to the prototype, I can't use one.  When I saw Cabinet Bob's photos of one on his topic, it suddenly dawned on me that I thought I had seen a through truss bridge at Parsons, just a bit upstream towards Elkins.  Yes, I was right.

31088413-Old-railroad-bridge-converted-for-pedestrian-use-Parsons-West-Virginia-Stock-Photo

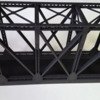
Hmmm...Looks a lot like the Menards release.  Here is one of Bob's photos.

20170623_112445

Yes, it will do nicely!!  I will have items from Hendricks/Parsons at the bottom end of the layout.  Sometime, I will work the scenic items up on a plan to show their general location better.  For right now, it is fun to think about and visualize when I walk into the mostly empty room!!

Attachments

Images (2)
  • 31088413-Old-railroad-bridge-converted-for-pedestrian-use-Parsons-West-Virginia-Stock-Photo
  • 20170623_112445

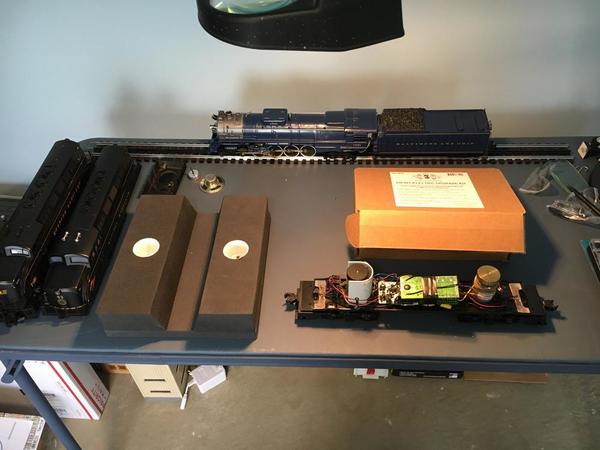
Well here is something related to the layout planning.  As those who have read, I was looking for one or two appropriate engines for the fairly sharp curves.  I bought this ProtoSound Western Maryland BL-2 and non-powered BL-2 from a Forum member a week ago.  The powered one runs very smoothly, but the sound isn't too great.  I bought them with the plan to upgrade, since I have a couple PS-3 upgrade kits.

2017-06-21 23.35.042017-06-21 23.35.24

Since I'm not starting to build the layout until fall, I thought I could setup to start the a PS3 upgrade.  I recalled I loaned my static mat and wrist bands to one of my sons-in-law, who told me today it is at his dad's house.  He forgot about it.  Well, this is as far as it goes on the project until I get the static mat.  

2017-06-25 17.54.15

Attachments

Images (3)
  • 2017-06-21 23.35.04
  • 2017-06-21 23.35.24
  • 2017-06-25 17.54.15
Mark Boyce posted:

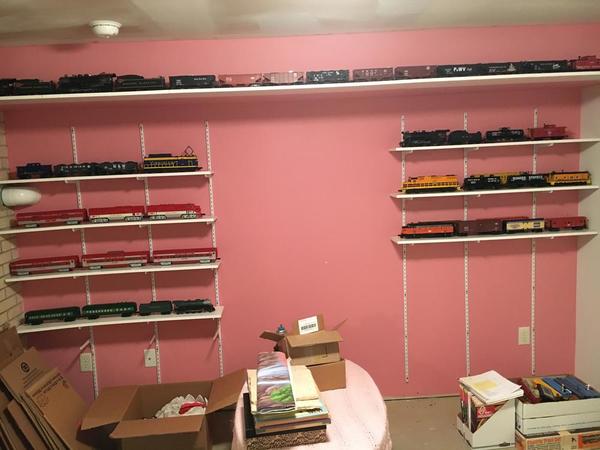
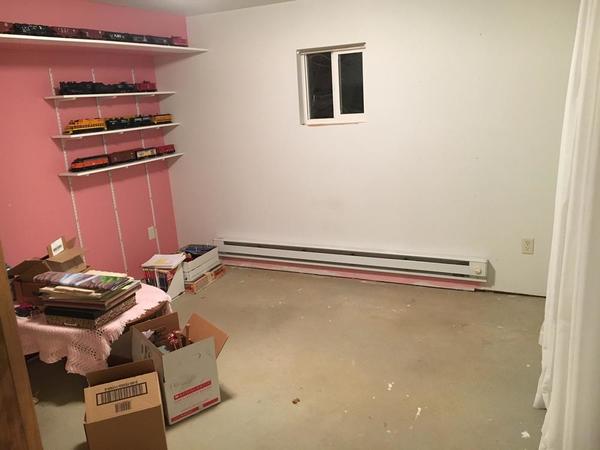
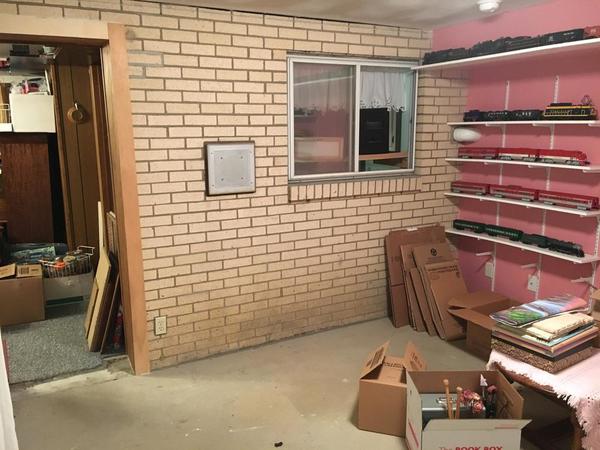
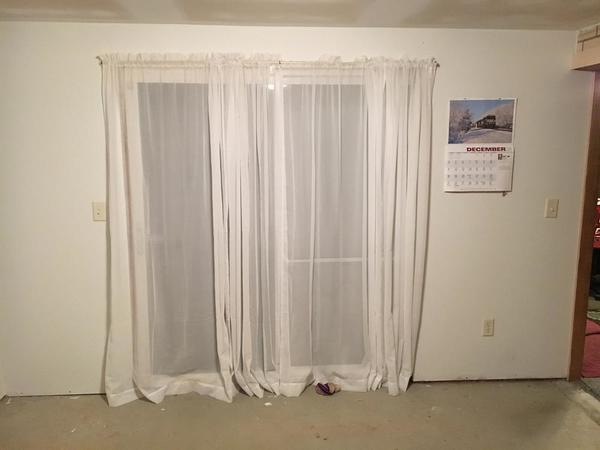
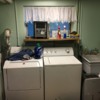
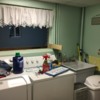
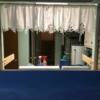
Here are photos of the room.  Yes the pink wall will be the first thing to go.  2016-12-29 23.13.372016-12-29 23.14.162016-12-29 23.15.032016-12-29 23.15.36

Mark, your requirements for your layout are exactly the same as mine, ie; small town, mountains, coal hauling, logging, some operating accessories etc. I was even able to squeeze in a small yard and engine facility! If I can be of any assistance with ideas please don't hesitate to ask. Have fun!CVRR 57GEDC277919260255_10213713719301796_7941072282188064842_nGEDC3032

Attachments

Images (4)
  • CVRR 57
  • GEDC2779
  • 19260255_10213713719301796_7941072282188064842_n
  • GEDC3032
Videos (1)
20140819_193552_001_001
Mark Boyce posted:

Howard,

Thank you!  I have seen so many photos of your layout!  How much space does your layout take?

It's basically a 15'x20' L shaped shelf layout, but only 5' wide or less in most places. It extends through a wall into my laundry room, around my furnace, about 1 scale mile to give it the effect of going somewhere far or coming from somewhere. The 1 scale mile mainline was done so that I can easily compute scale miles per hour.

Attachments

Videos (1)
GEDC1287(1)

Howard,

The scale mile is great!  Your layout always looks good!  As We discussed earlier on this topic, our laundry room is adjacent to the open window in the brick wall of my train room.  I will attach another photo.

2017-07-02 16.29.43

There is a door just to the right of the stationary tub, and the furnace is to the left of the cabinets.  That is a portable heater on the shelf I put on the window sill.  I put it there to blow heat into the train room, because our daughter had the that room jammed with art tables, projects and materials.  I plan to take the heater down and put it in the train room when needed.  My wife is happy with the shelf, so I could run some sidings in over the stationary tub and just under the cabinets.  Once we get to the water heater and furnace, there is another problem, because there is a narrow passage past the furnace to the other door.  I couldn't do a loop, but I could put some sidings in.  The window sill would dictate the lowest track in the train room, which would be about 46 inches.  That makes the highest track 54 inches high, which is about the height I had my last HO layout at.  That is a little higher than I was thinking this time, but not unrealistic for me.  

Thank you for getting me thinking on this again!!

Attachments

Images (1)
  • 2017-07-02 16.29.43
Mark Boyce posted:

Howard,

The scale mile is great!  Your layout always looks good!  As We discussed earlier on this topic, our laundry room is adjacent to the open window in the brick wall of my train room.  I will attach another photo.

2017-07-02 16.29.43

There is a door just to the right of the stationary tub, and the furnace is to the left of the cabinets.  That is a portable heater on the shelf I put on the window sill.  I put it there to blow heat into the train room, because our daughter had the that room jammed with art tables, projects and materials.  I plan to take the heater down and put it in the train room when needed.  My wife is happy with the shelf, so I could run some sidings in over the stationary tub and just under the cabinets.  Once we get to the water heater and furnace, there is another problem, because there is a narrow passage past the furnace to the other door.  I couldn't do a loop, but I could put some sidings in.  The window sill would dictate the lowest track in the train room, which would be about 46 inches.  That makes the highest track 54 inches high, which is about the height I had my last HO layout at.  That is a little higher than I was thinking this time, but not unrealistic for me.  

Thank you for getting me thinking on this again!!

In my opinion, one can never have enough hidden sidings

Mark Boyce posted:

I think you are right about that.  I was reluctant to go into the laundry room because of moisture concerns, but enough good folks commented here they haven't had an issue.  That's good enough for me.  My wife is in favor, so I just have to get back to planning!  

no moisture concern for me. As a side note, my layout is in my basement and I keep a fan circulating the air at all times.GEDC2029

Attachments

Images (1)
  • GEDC2029
Mark Boyce posted:

I think you are right about that.  I was reluctant to go into the laundry room because of moisture concerns, but enough good folks commented here they haven't had an issue.  That's good enough for me.  My wife is in favor, so I just have to get back to planning!  

Mark, before you go too far with planning, here's a little something for you. I didn't take time to check where there access to the laundry room is, but since the elevation is higher on one end, I used SCARM's "flip" tool to flip all the track vertically. For some reason it wouldn't flip the RH switches even though it flipped the LH switches just fine, so I had to manually replace those.

Anyway, depending on where the window to the laundry room is, you might not have to do too much planning. And since all the yellow track is at the higher elevation, the yard can be flipped if the windows in where the thin rectangle is.

Just food for thought to get you started.

Capture


Attachments

Images (1)
  • Capture
Files (1)
Last edited by DoubleDAZ

Dave,

I see.  This version has the highest area near the window in question.  Yes, that could be done.  You are right, the skinny rectangle is the window.  As this stands, the yard lead goes through the block and brick wall over the tub.  I was thinking of coming off the left side of the curve through the window and the tracks would end up over the tub.  

Well tomorrow is another day.  Thank you for the input!!!


DoubleDAZ posted:

You got it Mark, should be easy enough to rework the yard from the left. What is the height of the window opening?

Dave,

Yes, the rework would be the practical one.  The window sill is 45 inches above the floor. So allowing for roadbed, the track height would be 46 inches.  I don't think it would be necessary to have bench framing through the window, as long as it is solid in each room.  The section passing through the window would be like a bridge so to speak connecting two separate 'tables'

If this was the high side of the layout, then the other town would be 38 inches above the floor.  If we flipped back to the original design, and this was the low side, then the town at the other end would be 54 inches above the floor.  The tiny window at that side of the room is 52 inches above the floor.  While I like my benchwork fairly higher than most folks I see posting, I don't think I want track 54 inches high.  My reach would be hampered, unless I stand on a stool or platform.  Since I'm not getting any younger, that may not be the best idea.  38 inches does allow for a better reach, and is still fairly high to roll under on a seat, if I get to not feel like stooping under.  Sitting on this folding chair and my head dropped down, I can duck to about 40 inches.  A seat 6 to 8 inches lower would work fine. 

All that said, if I am to build the staging track through the window, flipping the layout heights as you have shown would probably be best.  Thank you for your consideration on this, and I know you wouldn't fiddle with these if you didn't like doing it.  I still appreciate it very much!!  

Writing about the possibilities of running tracks through the window between the train and laundry rooms, got me thinking of pulling the sliding window and storm window out.  I hadn't done it before, because our daughter filled the train room with art stuff before I had a chance.  I never entered that room after, except when she invited, and then just stood near the door, because I was afraid of bumping something.  That is also why I built the shelf in the laundry room to hold the space heater; no room in the old art room.

Well here it is wide open except for the two brackets for the shelf that I anchored into the block wall.  The first photo shows the space over the appliances and tub.  6' 8" from the left hand end of the window to the wall on the right of the tub.  There is a soil pipe in the corner, then hot and cold water and electric conduit with a ground fault outlet to the right of the window.

2017-07-03 20.30.55

This one shows the other side from the wall to the right end of the door.  I chopped the left side a bit, but the corner is just about at the right hand edge of the photo.  My Masonite backdrops cover about 2 inches of the bottom of the window as they are leaning against the brick wall.

2017-07-03 20.31.25

This one shows better what is beyond the laundry area and why I can't very well run any tracks out into the room, much less a loop.

2017-07-03 20.31.42

Have a happy Independence Day everyone who reads this!  Please remember all those who have fought for our freedom these nearly 250 years, and those protecting our freedoms today!!

Attachments

Images (3)
  • 2017-07-03 20.30.55
  • 2017-07-03 20.31.25
  • 2017-07-03 20.31.42
Last edited by Mark Boyce
DoubleDAZ posted:
Mark Boyce posted:

I think you are right about that.  I was reluctant to go into the laundry room because of moisture concerns, but enough good folks commented here they haven't had an issue.  That's good enough for me.  My wife is in favor, so I just have to get back to planning!  

Mark, before you go too far with planning, here's a little something for you. I didn't take time to check where there access to the laundry room is, but since the elevation is higher on one end, I used SCARM's "flip" tool to flip all the track vertically. For some reason it wouldn't flip the RH switches even though it flipped the LH switches just fine, so I had to manually replace those.

Anyway, depending on where the window to the laundry room is, you might not have to do too much planning. And since all the yellow track is at the higher elevation, the yard can be flipped if the windows in where the thin rectangle is.

Just food for thought to get you started.

Capture


I got to looking at the obstacles in the laundry room area.  I realized the room is offset to the left of the train room.  Measuring shows that there is 33 inches from the left side of the window to the corner and 34 inches from the right side of the corner.  The room looks more like this.

Capture [11)

I redrew the staging yard in from the other side, because the first way, the shelf restricts opening the top loading washer.  This way the tracks are over the front loading washer.  One note, the track closest to the wall is much too close in reality.  I'm still not sure I even want to do this, or just go with the original plan before it was flipped.

Also, I could not figure out how I captured before, so I did a screen shot.  The SCARM file is attached, but I have to click show in the bottom right of the post to see it myself.

Attachments

Images (1)
  • Capture (11)
Files (1)
BCL 7-daz-11.scarm
Last edited by Mark Boyce

Add Reply

Post
The Track Planning and Layout Design Forum is sponsored by

AN OGR FORUM CHARTER SPONSOR

OGR Publishing, Inc., 1310 Eastside Centre Ct, Suite 6, Mountain Home, AR 72653
800-980-OGRR (6477)
www.ogaugerr.com

×
×
×
×
Link copied to your clipboard.
×
×