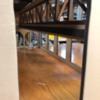
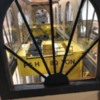
Structure roughed in. 3/8 birch plywood.

Engine shop will be plausible but not prototypical.

Will be equipped with three bays. Will have 4- 125 ton P&H overhead cranes.

Each bay can handle an Allegheny size articulated locomotive

Interior oak floors clear plexiglass windows for viewing.

will be lit up like Yankee stadium (used to be)

Will update progress thanks for looking. Nick

Attachments

Images (3)
  • IMG_1384
  • IMG_1385
  • IMG_1386
Last edited by rockstars1989
Original Post

Replies sorted oldest to newest

Structure built-sanded-mocked up-floor installed.

The floor was a lot of work.Had to cut bevels on each side of 1/2 birch plywood to get it to match up against the Fastrack and still look plausible.If I had to do it over I would have transitioned to Gar Graves inside of the structure.

Next steps:

Build roof (gable/flat)-paint-build/install overhead cranes-windows-wiring/lights.Not including a list of detail 4 pages long. I have 25 hours into this project and the work is just starting. Nick

Attachments

Images (3)
  • IMG_1396
  • IMG_1395
  • IMG_1397
Last edited by rockstars1989
Alan Graziano posted:

Nick,

Your structure looks very nice so far. I do very liitle wood construction. What you have done with wood equals anything I do in plastic. Great job.

Alan yes I use wood for my large models because I am a rough in and finish carpenter (just a couple of my trades haha) and I have every tool known to man.

It just works out easier for me but maybe not so practical for others. I  plaster all the corners-joints and brad nail holes so it looks like a solid structure-then paint.

Thanks for the compliment. Nick

Last edited by rockstars1989

Lighting fixtures made from plastic plumbing fittings-trimmed down sanded and painted.

I will glue them to a strip attached to the removable roofs for easy servicability.

Was trying to get them to look like industrial mercury vapor lights. well I guess they didn't have those back in the steam days lol.

They look big in the pic but for a structure this size they are plausible.

Going to use standard 18v bayonet base bulbs soldered. I was going to use replacement LED's from Town and Country but not sure if they will handle the heat from soldering iron to install leads.-"UPDATE to the UPDATE" I ordered LED bayonet base bulbs and sockets from town&country. Going to have 14 lights regular bulbs are going to put me over budget on Amperage draw.


Attachments

Images (1)
  • IMG_1420
Last edited by rockstars1989

Mark- yes they were probably just a huge metal shroud with a "zillion watt bulb" lol thanks.

Hokie-The foot print is 40''x23" I want to be able to get my large articulated locomotives in there. 1 bay is 22" hight and the other 2 are 13" tall. Will have 4 overhead cranes one bay (I figured) had to be very high in order to remove the boiler of an Allegheny, EM-1 ,Challenger, Etc. Nick

Here is where I am at. I am out of my mind and on the brink of going to the nut house. Here is why:

#1-I can't leave well enough alone

#2-I keep adding things

#3-I am becoming OCD on perfection and detail.

#4-I am obsessed with it being lit up like a football stadium on super bowl night.

#5-I'm an electrician but never connected human hairs together-Can't see or feel them.

My wife has to deliver my dinner to my shop and eats with me-Lucky me.

Any-hooze: I decided not to do the glass work yet. It is easier to add all the detail  inside as I am able to reach in the openings. I am still working on the 4 overhead cranes. The roof tops sit in a Chanel so they can be removed when I crash Locomotives up in the stalls. I am very happy with it so far and having a great time.

Pressing on.....Nick

Attachments

Images (5)
  • IMG_1445
  • IMG_1446
  • IMG_1447
  • IMG_1448
  • IMG_1449
Last edited by rockstars1989

Here we are-Still  having a good time! .. Glass work is complete-(or should I say DRAMA work?).....overhead cranes are built and installed-except for the wheels which will ride on the crane tracks, still not here yet. Each step is about the same process:

Design-cut patterns-mock up-break back down-sand/detail/paint-re assembly(pin nail-glue-clamp) detailing and install. Oh yea  "sometimes" in my case tear back apart fix mistakes and re install.

In some extreme cases-That WONT work-Throw in junk pile-start over.

Next steps: add detail to the interior-wire-install roof tops-add exterior detail

I have decided I will make and install a 30" service platform with stairs and railings between 2 of the engine stalls.

About 140 hours into this project.

PS: clamps, always clamp drama this includes:

1-its not long enough!

2-this is way to long need shorter one!

3-to big!

4-to small

5-I need 3 more like "this one"

6-send wife to Home Depot on emergency clamp run-comes back with wrong ones and clueless.Blames "delerious" guy that helped her.

can't take ourselves too serious.

Thanks for looking, Nick

Attachments

Images (11)
  • IMG_1469
  • IMG_1470
  • IMG_1471
  • IMG_1472
  • IMG_1473
  • IMG_1474
  • IMG_1475
  • IMG_1476
  • IMG_1477
  • IMG_1478
  • IMG_1479
Last edited by rockstars1989

Dave took the words of Darth Vader right out of my mouth!  It is impressive, Nick!  Yes, the cranes look great, as do the windows!  You are so right about all the miscues and items on your list.  The only one that I haven't done was Number 6.  I try to never put my wife under pressure shopping for something she doesn't know about, but I'm sure you had a good reason!

I'm with Bryan, that I want to see it in person too, but won't be able to join you fellows later in the month.

rockstars1989 posted:

Thanks for the compliments guys.

LOU-Mounted plexiglass behind the openings. The grids are all hand laid basswood that I pre painted

I cut everyone to fit. I used Elmers clear glue and hemostats to place them. 

BIGTRUCK-Hours on this project in the high 200's - low 300's (HOURS)


Thanks for looking Nick


They look great. How think was the basswood? I was planning on using thin vinyl tape for window frames on my engine house build.

Lou1985 posted:
rockstars1989 posted:

Thanks for the compliments guys.

LOU-Mounted plexiglass behind the openings. The grids are all hand laid basswood that I pre painted

I cut everyone to fit. I used Elmers clear glue and hemostats to place them. 

BIGTRUCK-Hours on this project in the high 200's - low 300's (HOURS)


Thanks for looking Nick


They look great. How think was the basswood? I was planning on using thin vinyl tape for window frames on my engine house build.

LOU They are about 1/8 thick. I bought them in a variety pack form from Hobby Lobby. Then I spread out spray painted. I cut them to fit with a small pair of electronics wire cutters. 

Add Reply

Post

OGR Publishing, Inc., 1310 Eastside Centre Ct, Suite 6, Mountain Home, AR 72653
800-980-OGRR (6477)
www.ogaugerr.com

×
×
×
×
Link copied to your clipboard.
×
×