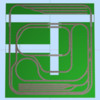
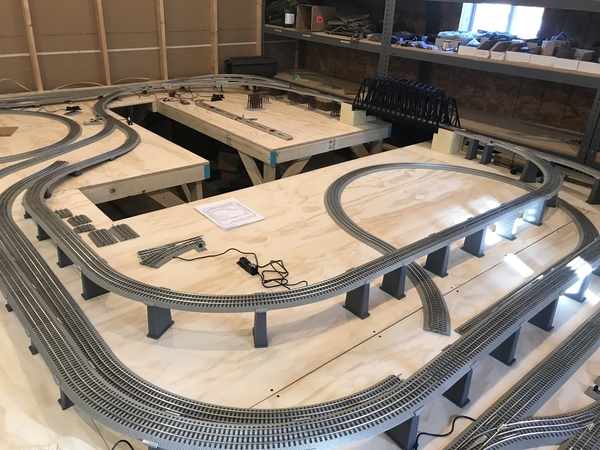
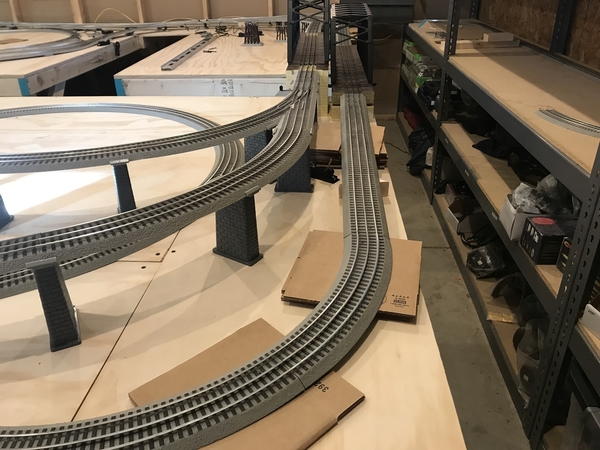
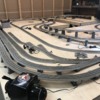
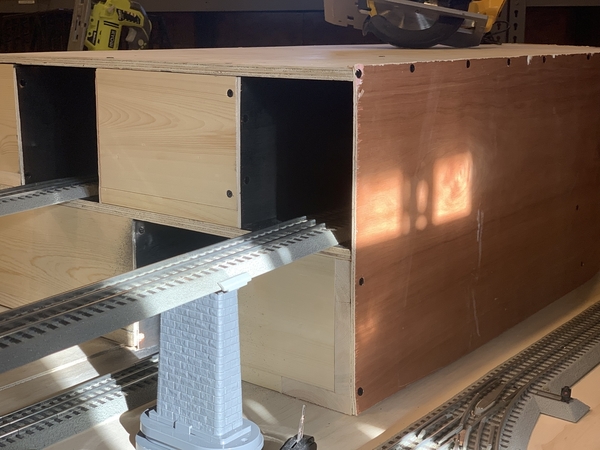
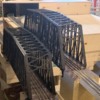
Hello all!!  Here is my first layout design.  The complete area is 16' Wide by 17' High.  Looking at two rail yards for each line.   The first pic is the total table area plus the bridges to the shelf rack for the additional rail yard.  I have already moved the rail yard for more length, by running lengthwise instead of in the middle centers.  Second pic is the rail yard in the rack area.  This is for the main line.  Third pic is the south rail yard for the second line.  Fourth pic is the passing siding.  Last pic is the beginnings of the center rail area.  Still needing to finish the loop and rail yards.  I'm sure there will be more adjustments as I continue to move forward.  I will be adding and elevation of some rails as I move forward as well.  The funny thing is I told my wife, "I'm going to build a train setup for the grand kids and myself."  And here I am.   Looking forward to the help I will get as I move along with this rail road adventure, as well as getting to now all of you.  Thank you for adding me to the group!!


full picnorth rail yardsouth rail yardpassing sidingmiddle

Attachments

Images (6)
  • completed track layout
  • full pic
  • north rail yard
  • south rail yard
  • passing siding
  • middle
Original Post

Replies sorted oldest to newest

Hey thats nice. Lots of real-estate and long mains! I see your using a covered bridge and have to comment. Growing up in upstate NY and travels to Vermont,and other New England states I saw and walked on a bunch of covered bridges and drove a car on a few. Back in the horse and buggy day's it was discovered that some equines just wouldn't proceed over whatever it was that needed to be bridged. But by covering,they would cross. One covered bridge did have rr tracks with planks flush to the rail tops for vehicular traffic. This bridge had a plaque that informed the tracks were for horse-drawn,then Dewitt Clinton type trains. So I  never got the train covered bridge connection. When lionel first introduced them l assumed their use was and reason for them, as scenery for a New England landscape. Any thoughts anyone? happy holidays 


Agreed to what Paul said above regarding the space.

One comment I would look into now is regarding the surface below the Fastrack. I would not recommend placing the tracking directly on the wood platform due to noise. There are a few different options, carpet, homesote, or carpet insulation are just a few.

Any track directly on wood, will sound better with some sort of barrier.

Good luck and enjoy.

Charlie

Charlie posted:

Agreed to what Paul said above regarding the space.

One comment I would look into now is regarding the surface below the Fastrack. I would not recommend placing the tracking directly on the wood platform due to noise. There are a few different options, carpet, homesote, or carpet insulation are just a few.

Any track directly on wood, will sound better with some sort of barrier.

Good luck and enjoy.

Charlie

Great point on the bare wood with the fastrack, I will be looking into those options you have recommended.  Thank you for the suggestions.

Timothias,

Welcome to the OGR Forum and to O gauge trains!  Your plan looks like you will have a lot of routes for your train to go.  I agree with Charlie, about Fastrak mounted directly on wood, it gets loud. 

What trains do you have or plan to get to run on your layout?

How high are you making your layout?  With a lot of tracks crossing open spaces, it looks like you will have a lot of duckunders or sit down and roll unders.  As long as you have a plan, that's great.  At 62, I'm not so interested in ducking under like I used to.  

Please keep posting what you are doing and any questions you have.  I had HO trains from my youth until 2012, when I decided to go with bigger O gauge trains.  There are certainly a lot of differences.  This has been the best place to get questions answered.

Mark Boyce posted:

Timothias,

Welcome to the OGR Forum and to O gauge trains!  Your plan looks like you will have a lot of routes for your train to go.  I agree with Charlie, about Fastrak mounted directly on wood, it gets loud. 

What trains do you have or plan to get to run on your layout?

How high are you making your layout?  With a lot of tracks crossing open spaces, it looks like you will have a lot of duckunders or sit down and roll unders.  As long as you have a plan, that's great.  At 62, I'm not so interested in ducking under like I used to.  

Please keep posting what you are doing and any questions you have.  I had HO trains from my youth until 2012, when I decided to go with bigger O gauge trains.  There are certainly a lot of differences.  This has been the best place to get questions answered.

The open spaces are all lift out bridges, I have two now and will be adding a third. The first engine and caboose I have purchased is the Lionel Marquette GP38 diesel.  Elevation changes will be up to 8” high in some areas, I do not want it all flat.  I’m sure I will have questions as I finalize the layout and have it all placed and test run.  I know that the wiring phase could be a real treat.

I like what you are doing.  As I look at the photos there is discontinuity between several of them but that only tells me you are designing on the fly.   No fancy program to show you how all the pieces have to fit together but instead simple ingenuity.  You appear to be trying things and when you get it just right you will know.  Hats off to you Timothias and keep "designing" away.  It looks fun. 

Tom Tee posted:

Howdy!  Great thought for utilizing the rack! 

Suggestion.  For the rack yard,  use a ladder of left hand switches instead of right hand.  This will lengthen each storage track and make backing in much more prototypical and easier on the train it's self.

I’m trying to envision the switching from the right hand to the left switches for the rail yard.  Any visual layouts would be appreciated.  

Thanks!!


Timothias posted:
Tom Tee posted:

Howdy!  Great thought for utilizing the rack! 

Suggestion.  For the rack yard,  use a ladder of left hand switches instead of right hand.  This will lengthen each storage track and make backing in much more prototypical and easier on the train it's self.

I’m trying to envision the switching from the right hand to the left switches for the rail yard.  Any visual layouts would be appreciated.  

Thanks!!


I agree with TOM TEE.  Using LH switches for the storage yard would also eliminate "S" curves.

Tom Tee posted:

Howdy!  Great thought for utilizing the rack! 

Suggestion.  For the rack yard,  use a ladder of left hand switches instead of right hand.  This will lengthen each storage track and make backing in much more prototypical and easier on the train it's self.

That was my first thought too when I saw the picture. These are "toy" trains but they work better without the "wiggle". These are known as "S" curves and should be avoided whenever possible.

Almost a month since I have posted, been busy on the layout.  Pretty much flying by the seat of my pants.  I am awaiting for two more switches for the under bridge reverse loop.  Also waiting on the extra rail for the yard.  I will be building natural grades, such as hills, on the two elevated tracks (not the 2 track bridge)will be all natural with benchwork for removing the trusses and creating a small ridge line to the left track and a wall going straight up on the right track.  The reverse loop will be partially in a tunnel.  The part I dread is tear down of all track to prepare the tables for wiring and painting as well.  Part of the process.93A40EEC-DC86-4DA4-8629-1FDB6E65448EED66D1CE-12F3-49F4-ACB7-E460FA45359265433931-5244-49D3-AF48-02E7A8902A6CE8F053EE-35DD-4198-AB8E-4C000DC83A7EDBA7A92B-5508-4441-A03F-439A512034E77EC1AEF4-44B9-4418-8CB1-FBC913F263611048B2E5-C78E-4F06-A0E2-C12BFE88366A

Attachments

Images (7)
  • 93A40EEC-DC86-4DA4-8629-1FDB6E65448E
  • ED66D1CE-12F3-49F4-ACB7-E460FA453592
  • 65433931-5244-49D3-AF48-02E7A8902A6C
  • E8F053EE-35DD-4198-AB8E-4C000DC83A7E
  • DBA7A92B-5508-4441-A03F-439A512034E7
  • 7EC1AEF4-44B9-4418-8CB1-FBC913F26361
  • 1048B2E5-C78E-4F06-A0E2-C12BFE88366A
Mark Boyce posted:

Looks like you have a lot of routes for trains to run.  So I take it that the track is just laying on the tables not fastened down yet so you can see ithat it all fits together well before wiring.  Do you have a track plan drawn out that you are following?  Your grades look smooth and even.  

Correct on the track just laying on the table still.  I do use SCRAM, I continued to add to the layout as the basic plan was acceptable,  (which was the two outer loops), then I continued to add the routes one leg at a time.   In the fifth photo you can see the two tracks going up, I will be building a natural hill for both of them instead of the risers.  The track inbetween which also has the reverse loop under one them will go into a tunnel in the hillside.  Then I will do a natural hillside slope coming off the two bridges at the walk in entrance.  This is the seventh picture.  The two bridges are just to the left.  After that work is completed I will then start laying out the wiring.  Painting, detailing and securing the track.  At least that is the tentative plan.  One more thing,...I have test ran everything in both directions to make sure that I had no issues with the layout as well as the many, many different routes you can run on it.

Last edited by Timothias

That looks like a fun layout!

A few suggestions:

1. I second Charlies recommendation regarding the noise. Otherwise your layout with sound like pool balls rolling    across a tile floor. I used pink insulation sheets for mine, not the best sound deadoner, but it made a HUGE difference.

2. I also second SantaFe Jims caution against the turnouts on grades. This raises the risk of a derailment and flexing of  the turnout can cause the switch mechanism to stick or jam.

3. I only see one small pair of power wires coming out of the transformer. I recommend 16 or 14ga feeder wires every 10 feet of track length.  You can use a buss wiring method with a long run of wire that goes around the underside of the layout and back to the transformer.

 Your feeder wires can tap in as/where needed using suitcase connectors. I soldered my feeder wires directly to the power tabs underneath the fastrack sections. Wiring is second only to good trackwork for reliable operation.

Last edited by RickO
SantaFeJim posted:

I see several turnouts on grades.  This can present several headaches.

Nuff said.

Great point, I’m still in the process of building solid ramps out of 3/8 plywood to remove any unevenness.  On all the grades, except the two lane bridge area.  Those two grades will still be trusses.

I appreciate your input.  First time for me building a layout.

RickO posted:

That looks like a fun layout!

A few suggestions:

1. I second Charlies recommendation regarding the noise. Otherwise your layout with sound like pool balls rolling    across a tile floor. I used pink insulation sheets for mine, not the best sound deadoner, but it made a HUGE difference.

2. I also second SantaFe Jims caution against the turnouts on grades. This raises the risk of a derailment and flexing of  the turnout can cause the switch mechanism to stick or jam.

3. I only see one small pair of power wires coming out of the transformer. I recommend 16 or 14ga feeder wires every 10 feet of track length.  You can use a buss wiring method with a long run of wire that goes around the underside of the layout and back to the transformer.

 Your feeder wires can tap in as/where needed using suitcase connectors. I soldered my feeder wires directly to the power tabs underneath the fastrack sections. Wiring is second only to good trackwork for reliable operation.

Will do on the electrical recommendation.  

Input is greatly appreciated.

Hello Tim, and welcome to O gauge railroading'.  You will receive lot's of advice, suggestions, and some criticism.  I speak from experience only.  A few things for your consideration.  #1. This is your layout, it's called rule #1. You do it your way.  #2 Don't become overwhelmed with non existent, could be problems.

You will find, once you think you have the layout exactly the way you want it, you will without question, make significant changes. You will most likely do this several times.  Please be sure to leave room for your landscaping, roads, structures, and accessories.  It becomes more difficult to work around nailed down track.  Ask  any member.  The sound deadening material is a must.  and even with the best of materials used, Fast track is very loud for some reason.

The most important point is for you to have fun, this is a hobby and not a job. some days it will like it is.  But once you have a train operating, the joy and excitement will take hold of you.  O gauge trains are the best running and dependable of all the gauges.  You will also become more prototypical as you move forward as well.  It is just a natural progression.  You have the makings of a first class layout on your table already.  Please don't hesitate to ask any questions on specifics you're not certain of.   When I started there were no forums and no one to ask for help'.. Model railroading has come a long way'..

Best of luck, enjoy, have fun, and  Happy Holidays'...  

Looks real nice, really like the elevation changes and yards. One thing to consider is your minimum radius. I swore I would never need 072 and then proceeded to do additional swearing when I converted my outer main loop to 072. I also made it such that 072 equipment can traverse into inner yards even though they can't run the inner loop. Ton of extra layout work for you to go to 072 but muuuch less than if you try to do it after wiring/scenery is done.

Lastly one question, what are those lantern extensions you have on the switches? I like them in terms of making the switch position a little more visible. Thanks.

Quarter gauger 48, very refreshing on everything you said.  I appreciate it!

Doug Kinsman, I have one piece of 072 and one 072 switch on this layout....😂😂.  I truly understand what you are saying with the much milder 072curves.  

On the lanterns, if I am understanding correctly, they are what came with the switches when I purchased them.

Hi Tim, I was reviewing your layout again and  curiosity got the best of me'... Just two things.  Did you build your bench  work , or is it custom built.  Looks beautiful'.  You have quite a bit of scale  mile track.  Have you given any thought as to how you will keep the rack clean.  I mention this because when building my own layout I didn't.  It took a few years, but then I found  a system that is outstanding for just  PENNIES...  I'll post  it for you if interested.  I have to take a few pics first, so, let me know...

Last edited by Quarter Gauger 48
Timothias posted:

Thank you QG48 for the compliment on the bench work, I did build it myself.

On the cleaning of the track, please send me the pics on how to save money to keep it clean.


Tim, I'll send you a detailed email with photos included.  I already posted here on the forum, but I can never find old posts for some reason.  If another member knows the secret to finding  old threads, PLEASE share the secret'...

Just finished working on an upper level area and creating a tunnel for my return loop.  This has eliminated alot the of elevated trusses so they can be used elsewhere as needed.  I have not secured anything on the new construction.  Next I will be working on removing graduated trusses and installing natural grades.  I must admit, I was very nervous for some reason on this addition.  Now that it is completed I am actually enjoying this type of bench work.

Attachments

Videos (1)
D16021C2-338B-4425-BA67-9D401E962516
Last edited by Timothias

Add Reply

Post
The Track Planning and Layout Design Forum is sponsored by

AN OGR FORUM CHARTER SPONSOR

OGR Publishing, Inc., 1310 Eastside Centre Ct, Suite 6, Mountain Home, AR 72653
800-980-OGRR (6477)
www.ogaugerr.com

×
×
×
×
Link copied to your clipboard.
×
×