My favorites are the N6a and N6b. But there is a charm in aluminum sand cast cars - wish I could find a more conventional caboose in sand cast.
The late Howard Murray gave me one of those Walthers cabin cars but it has since been "lost" during my move. It was well built and I was glad to have it. Right now I have to settle for two K-Line versions; one with and one without the antenna.
Edit: They have yet to be two-railed.
Before I get going on Walthers N5's, want to say Jim's assembly work on that three dome Lobaugh tank, is off-the-chart great model building, humbling skilled technique there, seriously! Wow!!!
Rail Craft hopper:


Very nice.
Saving old rolling stock from the trash bin is a good thing!
Nice scale grabs and wire !
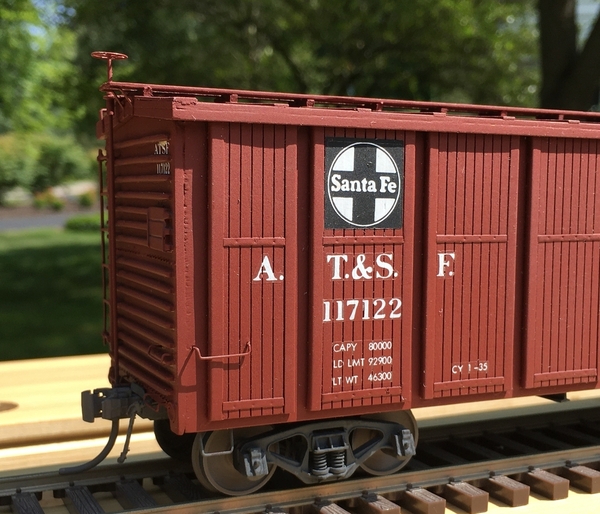
Suncoast Santa Fe panel side boxcar. Overall an average kit, better than All-Nation, not as good as Ambroid/Quality Craft. Best part was the cast brake gear. The construction drawing is very crude and does a poor job of showing details. The panel side edges and horizontal strips are lead tape, punched with a pin for rivet impressions. I tried using Grandt Line rivet heads, but they were way out of scale. Scalecoat paint using original decals. As usual, the old decals are too thick and mostly impervious to setting solutions. Trucks are Protocraft.
Jim
Attachments
Very nice build of that kit!
Now you need to find one of these kits to go with it. Rails Unlimited 50' kit, built by someone for Brass Locomotive Company.

Attachments
Both are very nice!
The finish and weathering on the Rails Unlimited kit gives it a realism my model just does not have. Kudos to whoever did the work.
Well, it all depends on what kind of modeler you are. Some people like weathered cars for realism look in use, some people consider each car a model in itself and want it to look like a model of an as built car.
Fantastic work JJScott - I have one of these Suncoast kits on my workbench now (at the point of adding the roofwalks). Is the lead tape you used like the lead tape found for golf clubs? Did you just use the tape adhesive to keep it attached, or apply other glue as well? I was looking at ways to try to emboss rivets on the brass strips provided with the kit and the lead tape seems like a much more elegant solution.
~Chris
The lead tape I have is on a roll given me many years ago. It's thin and easily cut with a razor. I applied leaving the adhesive on the back. It did have a tendency to move a bit after application if bumped - one or two of the strips are out of alignment. I marked the rivet spacing on a strip of paper, placed in against the tape, then used a pin to emboss the rivets. I thought the same about the brass strips; I'd never get them to work.
Nice job, Jim ! I like the roof platform supports and general crisp & clean assembly. It's a car you can be proud of .
Lobaugh Jones & Laughlin Tank Car. My new build is now complete. Painted with Floquil bright silver with a touch of black and mixed in with a blend of Glosscote and Dullcote. Light Glosscote spray before decals. Decals are home made, then oversprayed with Dullcote. American O Scale Andrews brass trucks.
Jim
Attachments
Very Nice.
Jim, you are a 'natural' for this brass assembly ! I don't think I ever saw a better assembled Brass Lobaugh tank car. It just looks fantastic .
Exceptional! And those decals ![]() -- as good as any I've seen anywhere!
-- as good as any I've seen anywhere!
Best I have seen! Get a load of those pipe tees!
Just reading about J& L . . .
Mines, facilities, railroads, ships - everywhere. Reading NLRB v J&L - a 1937 case that more or less started a liberalization of Commerce Clause activity.
Thanks for all the comments.
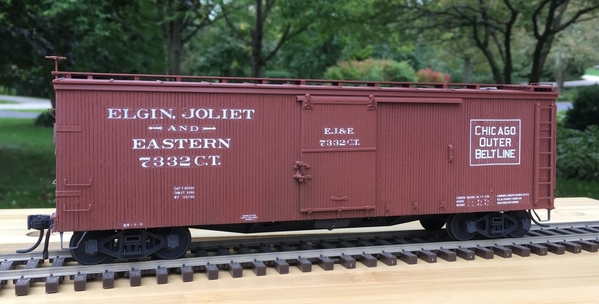
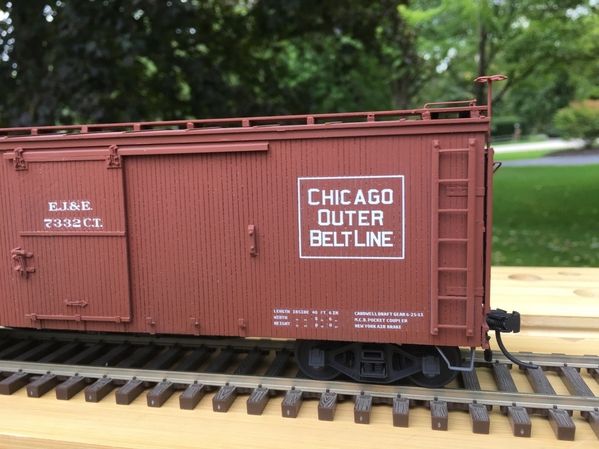
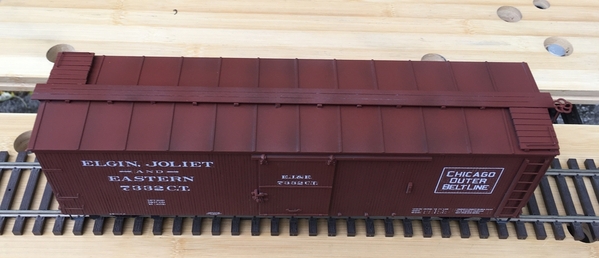
This started out as an All-Nation Toronto, Hamilton & Buffalo boxcar kit. I bought it because I liked the road name. When the kit arrived the poor quality of the pre-painted and pre-printed sides was apparent. The paint was globbed on in places, completely obscuring the grooved siding; in other places it was thin. The lettering was blurry. If the basic box was to be assembled, the roof sheeting would have been 6" thick. The metal ends supplied did not match the roof pitch.
The kit came in that dark red box with a LaSalle Street label. The instruction sheet was for several versions of double sheathed boxcars. It was labeled Zimmer. The hardware pack didn't match the kit number.
Back in the 1950s, this would have been a welcome kit for any O scaler. It could, and still can, be built as is into a nice model. Today, our expectations are so very different. We expect fine detail and quality parts. As a kit builder I'm kind of floating between both worlds. I really like these old kits, but the crudeness sometimes just doesn't wash. So, I modify, as many of us do. A fine sale modeler I am not, nor am I a rivet counter or prototype detailer.
The sides were completely sanded down then rescribed in the original grooved lines. The roof was sheeted with styrene after sanding off the eaves and overlapping ends. A horizontal trim piece topped the siding under the new eaves. The ends were replaced with styrene in a "maybe someone could have built one like this back then" design. The original A-N end sills were used. Some home made brake gear was added. A Precision Scale door hardware set was used. It had to be modified to fit the non-scale doors and tracks. I would have liked to have used the lower door tracks; they didn't match the door depth. Their glueing area was too small to have held.
Paint is Tru-Color Rich Oxide Brown thinned with automotive synthetic enamel reducer. The reducer worked fine. Decals are K4. Trucks are San Juan T Section Bettendorf. The air hoses are Lobaugh.
Jim
Attachments
Very nice!
Exceptional upgrade to this car kit into fine scale. Beautiful!
You got the touch!
Love the EJ&E too!
Jim, This is an awesome up grade to a rather privative kit . I think the AN metal kits were Ok, but the wood sheeted ones had all the issues you mentioned --but you addressed them all and now have a car that looks GRRREEAAAT !! One I built 40 years ago had the roof issue and I looked at it last year and felt like ripping it apart even though I did fix other stuff.
We are in total agreement with these kits and I like how you expressed it . I probably would not do another AN wood side kit, but the earlier Westbrook, I had good luck upgrading even using the original paper sides (!) Most all model scribing is waaayy too deep and big--I mean the real thing is just chamfers on the board edges and a groove in the middle , no more that 1/2" or 3/4 wide & 1/2" deep -so what's that ?-- 1 inch equals .021 in O scale , or about 2/3rds of a 32nd, so the scribe really should be only 10 or 15 thousands. But , probably if you made the scribes scale, they would not look right -especially after paint fills them in, and that's exactly what I do to reduce the scribes--fill them in with primer part way before ANY detail is applied. I think all the Ambroid and LeBelle kits are worth it as they were produced to a higher standard . but about half of these wood side kits need to be treated as just blocks of wood that need new sheeting and forget about the ways they thought of doing the roof overhang--it's just wrong .
But, bottom line , you made a great car, and proves two things--One, that with care , you could make nice models even 50 years ago, and secondly, just because it's a "kit" does not mean anyone ever looked at a real railroad blueprint or measured a prototype.
@jjscott posted:It was labeled Zimmer.
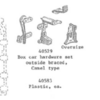
A Precision Scale door hardware set was used. It had to be modified to fit the non-scale doors and tracks. I would have liked to have used the lower door tracks; they didn't match the door depth. Their glueing area was too small to have held.
Which PSC hardware set did you use?

I used PSC 40529. The package indicated only the number. Following your question I looked in the PSC catalog and found the set was for a single sheathed car. Perhaps that is why I had trouble with the thickness issues. One of my castings, the part that attaches to the body side, was short shot and missing the upper lever. I made a styrene one to replace it.
For the upper door slides I ground back the rollers so I was left with a "pin" that slid over the top of the A-N metal track. That worked well.
That door handle is a Berkshire Valley white metal casting.
Attachments
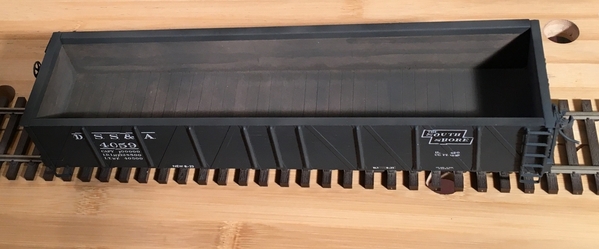
This is a Walthers composite gondola. The kit supplies a 4-sided wood body to which sheet metal is to be attached to the exterior of the ends. This results in a wood interior and metal end exterior, which seems wrong. So, I just kept the sides and ends as wood. The bracing was changed a bit, brake gear added, and Walthers non-sprung trucks used to keep in the era. The Milwaukee Road decals disintegrated. I used Duluth, South Shore & Atlantic decals from K4, primarily because they fit the spacing of the vertical braces. Paint is Scalecoat black lightened a bit with white and a touch of brown.
Attachments
Nice!
Dan Weinhold
All-Nation Zimmer freight trailer.....I'll letter it when it gets warmer so I can seal the dry transfers...


@jjscott posted:This started out as an All-Nation Toronto, Hamilton & Buffalo boxcar kit. I bought it because I liked the road name. When the kit arrived the poor quality of the pre-painted and pre-printed sides was apparent. The paint was globbed on in places, completely obscuring the grooved siding; in other places it was thin. The lettering was blurry. If the basic box was to be assembled, the roof sheeting would have been 6" thick. The metal ends supplied did not match the roof pitch.
The kit came in that dark red box with a LaSalle Street label. The instruction sheet was for several versions of double sheathed boxcars. It was labeled Zimmer. The hardware pack didn't match the kit number.
Back in the 1950s, this would have been a welcome kit for any O scaler. It could, and still can, be built as is into a nice model. Today, our expectations are so very different. We expect fine detail and quality parts. As a kit builder I'm kind of floating between both worlds. I really like these old kits, but the crudeness sometimes just doesn't wash. So, I modify, as many of us do. A fine sale modeler I am not, nor am I a rivet counter or prototype detailer.
The sides were completely sanded down then rescribed in the original grooved lines. The roof was sheeted with styrene after sanding off the eaves and overlapping ends. A horizontal trim piece topped the siding under the new eaves. The ends were replaced with styrene in a "maybe someone could have built one like this back then" design. The original A-N end sills were used. Some home made brake gear was added. A Precision Scale door hardware set was used. It had to be modified to fit the non-scale doors and tracks. I would have liked to have used the lower door tracks; they didn't match the door depth. Their glueing area was too small to have held.
Paint is Tru-Color Rich Oxide Brown thinned with automotive synthetic enamel reducer. The reducer worked fine. Decals are K4. Trucks are San Juan T Section Bettendorf. The air hoses are Lobaugh.
Jim
What do you use for rescribbing? I’ ve had mixed success on a few Scalecraft reefer sides. On the other hand, I'm not sure it if it is the old hard wood, the wrong tool or the operator lol.
My kit had pre-painted plywood sides. The paint varied in thickness, with many areas having the scribed lines fully filled with paint. I sanded the sides enough to take off the lettering and provide a generally flat surface. Sprayed a coat of Krylon gray primer. Using the back of a #11 Xacto blade with just the tip filed off I rescribed every line. This was done by hand using a 6" steel rule as a guide. It took a couple of re-primings and rescribings to get something close to reasonable. One problem was at the top and bottom of the sides where the paint was globbed on and where it was difficult to scribe. It seemed to take forever. An easier, better result could have been obtained with new scribed siding.
Hi Jim - I applaud you saving he orig sides even though replacing with new makes a lot of sense. either way,, you sure got results ! On all my wood scribed cars , I drench em with lacquer and go over once with a soft brush in the direction of the scribe, the shrink of the paint seems to leave a believable scribe ( That everybody should remember is in real life only about 1/2 inch X 1/4 deep --and a 'V' groove !) After drying, I vigorously scrub in the direction of the the scribe only with a firm tooth brush --this eliminates the fuzz caught in the scribe . I keep telling myself how I like the wood and it's texture is better than styrene --even Cliff Grandt lamented after looking at one of my models that he couldn't get wood texture on his plastic castings. But maybe I am just kidding myself ...sort of like an adult version of thinking sewing snap buttons make OK brake wheels --Was I THAT dumb ? ....Uhh, yeah.
@J J Davies posted:........vigorously scrub in the direction of the the scribe only with a firm tooth brush --this eliminates the fuzz caught in the scribe .
I use a soft brass wire brush for clearing scribed siding prior to painting. Does a great job at clearing out all the debris.
This is one I’ve been looking for, finally found one. It is untouched except the corners of the roof were notched but done poorly. I am glueing some strip stock in the notches so I can re-cut them. I’m in the process of sealing all the wood first. It looks like it will make a nice car IF i am careful and patient.
Attachments
Nice kit Malcolm, great looking model once built too, albeit tricky to get the end grabs and railings straight, though clearly more an issue for me than you 8^)
What is your regimen for sealing the wood prior to assembly?
Pete,
I use Minwax acrylic varnish. I use 5 coats and steel wool between each coat. Makes it super smooth and no grain shows through.
Malcolm
@Brother_Love posted:This is one I’ve been looking for, finally found one.
Got one of those on the shelf to build myself.........well, it's there somewhere. Looking forward to seeing what and how you do with it.
Thanks for the recipe Malcolm, hope to see you next weekend, but if not keep us in mind for next year.
Pete


