how hard is it to run buss wires in 2 rail o scale,and what do you do when you get to a switch??????
Replies sorted oldest to newest
First, make sure your control system can work with a buss wire set up. You may need a star system.
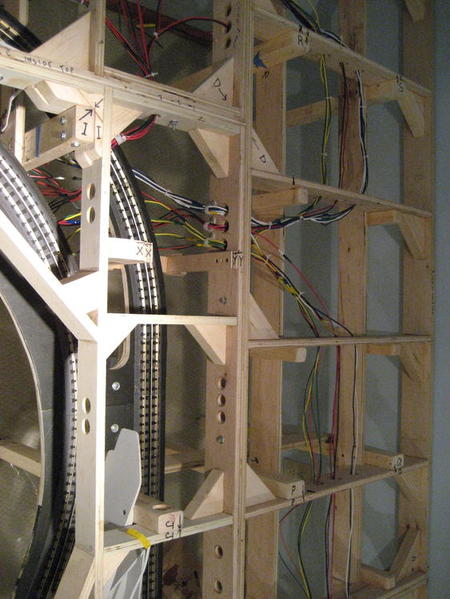
Running busses is somewhat straight forward. I usually predrill all cross members in all the modules which constitute the layout then run the block wires and buss wires standing up before any decking or sub roadbed is installed. This calls for slightly longer excess wire where the ends are thought to be needed but is so much easier than laying down & reaching up.
I predrill the crossmsmbers with at least one continuing set of holes for each buss or main line set of wires. The best one piece of advice I can offer is to use a different color of wire for each basic seperation. Keep you wire hole size to 1/3 of the height of the cross member and placed in the center 1/3 of the member. I use 3 1/2" members and 1 1/8" chamfered holes in the center.
There are also I.D wheels thru which you can run all white wires for a numbering system.
IMO,prewiring is preferred.
Is your system DC, DCC, DCS,___? The answer will affect your method. tt
what's a star system?????????
When using DCS it is recomended not to use a buss but rather a star pattern or daisy pattern. Run wire individually from a central source directly to each and every rail/wire connection.
Use a 12 port MTH#5010-14 or a 24 port MTH#5010-20 for each circuit to feed directly from the power source every so many feet along the right of way. The frequency has been stated in a variety of numbers from reliable sources. I use about 10' intervals.
This method does provide an excellent level source of electricity all along the rails. For three rail I find it best to also feed alternately on each side for both 2 & 3 rail feed between all turnouts/crossings. tt
This is a three rail job but would be very similar in two rail DCS.
Just found some photos of a job in progress several years ago. The first photo is of two MTH labled 12 port panels (part numbers in above post) and one Miniaturonics panel part #PDB-1.
At the time of photo there were two main lines and one subway hence the three panels. Each circuit has a specific color code wire pair. Much has been added since.
The second photo shows how each pair of one circuit are differentiated by adding a colored tape at intervals along it's run.
The last photo shows how the wires leave the control panel vortex and travel to their points of connection through their designated wire management hole. This is a 3 rail around the wall layout in a small room.
This layout will receive full decking so you can well imagine how much easier it is to wire pre deck. tt
First photo posting with new forum....![]() .....nice.
.....nice.


