You may want to consider printing some of that stuff directly on the build plate without supports. The steps would almost certainly print nicely. The posts would be more dicy, but worth the experiment, IMO. I don't know what is like trying to remove very delicate lattices from the plate. Maybe a single-edged razor blade would work.
I've only done little things that way. I'm a little squeamish to do it for more substantial projects. I lied. I did take a picture of last night's disaster. There was a significant chunk of stuff stuck to the FEP which I was able to remove carefully with no damage to the FEP. That's a good thing since it was the first print with the new film. The supports completely gave up based on what you see.
So I went downstairs to print it and my thumb drive (the only means to transfer files into the Machine) produced a series text some in Chinese, but no images of the print files and it did not run. I then went and reformatted the drive, and this time it produced some empty squares on the Machine's screen with an error message saying the USB drive was not correct. I formatted it in MSDOS Fat32, which is the correct formatting I believe. After some discourse on Facebook, I was led to believe that the thumb drive itself may have failed and I ordered two more on Amazon. They'll arrive in a couple of days. So no test of the new scheme. Stay tuned to this space.
I then got to work on THC. Got the add-on room's sheathing completed. This sheathing is applied vertically and will have added battens. I trimmed out the two windows after I took the picture, but still have to trim the sheathing to conform to the pitch roof angle. Nothing looks like real wood as well as real wood. pre-staining is essential.
The front wall had a owner-built repair as per the instructions. It is purported that the door hinge line was damaged in a high wind and some vertical planks were put in to rebuild the hinge. I measured and cut the spacing AFTER the wall was completely sheathed. Putting the repair in BEFORE the sheathing would have been easier, but my way did produce the desired result. While they're not easy to see, I did add nail holes to the completed walls. Some more stain will highlight them.
Couldn't help myself… put all the walls together with the cast plaster chimney for a photo op. All the angle plates are necessary to keep it from all falling down. As sophisticated as my recent buildings are, this one is very rustic.
It's nice to have another project upon which to work while waiting to solve all the House's printing problems. Besides, Real Scale is not ready to cut the House's walls. There's no rush. I could build the House even without the stair case and install it later since all the roofs and floors will be removable. I'm thinking about the House's lighting… it should have a chandelier in the dining room and foyer, but I'm not sure about creating one in 1:48. This isn't "Doll house scale" so nothing would be available commercially. I do have a bunch of fiber optic elements that could possibly be put into use. Any ideas out there?
Attachments
Mes, This is a great little project to fill in until everything is ready to start the Big House. pun intended.
No 3D printing today since the USB thumb drive is still not working and I'm waiting for two new ones to arrive from Amazon. I did get a response from the Elegoo people on how to test it. And they gave me a link to reinstall the native files that were on the OEM thumb drive that came with the printer.
But I did do a lot of Hacker's Cabin work. I built a stick-built front door and fit and framed in all the windows. It was finicky, but fun work. I like working with this kind of project.
The front door was a laser cut piece that had a printed pattern of a rough lumber door. You could either use it as is, or you could build a 3D door over top using strip wood. There was one more option, not using the laser cut part as a backing. I chose option 2. It was a straight forward build. The door opening was too big even though I was careful in putting the framing directly over the inside edges of the drawing as instructed. No problem. I added framing lumber to build out the door opening and it fit like a glove. I also added stops behind to keep the door from falling through. I did the same for the windows, although this was not called out in the instructions. I'm always afraid of a window falling into a finished building.
I stained the door and the framing and put them together. I used the laser cut outer frame and made saw cuts in the corner to simulate that it was a miter joint. Need to install a door knob.
Each of the windows fit slightly differently. One opening required a piece of strip wood. Others required one slip of manila file folder and others required 2 slips to enable the window to fit snuggly. I then added stops to all the window spaces. In order to correctly fit the laser cut window sills I had to notch the backstops. The arrows show the relief cuts.
Here is a front view of the fitted windows. The windows are supposed to be double hung, but were laser cut as a single part which you need to separate. The sill takes up some space so you also need to size the hole top to bottom. Again, some needed strip wood, others needed manila stock. I'm going to have some windows open so the fit isn't so critical for those. This was shot before I separated the window sashes.
Here is a back view of same.
Before gluing in the sashes, the windows have to be glaze. The kid includes a piece of thin acetate. I may use that or go to my standard, clear styrene sheet. Either way, I will use pressure sensitive adhesives to hold the glazing to the windows. The instructions said the laser cut parts were adhesive backed. They were not.
Real Scale Models is going to re-issue this kit and I would hope that Stephen uses the adhesive-backed laser board that he uses to make his windows. I used them on the engine house.
Last up today was cutting the parts for the battens that will go onto the vertically planked add-on room. These are called out just to "add interest" to a basically simple building.
I maybe should have sanded these walls before doing any further work. The planks are not all the same thickness. There is some variability with Northeastern strip wood. As a result, the thicker boards sit proud of the thinner ones and will complicate adding the battens a bit. That said, it would defeat the purpose of pre-staining all the lumber if I sanded it all off evening out the planking.
Because I added those window stops, I can wait until glazing and installing the sashes. The instructions show using the tissue paper that protected the acetate as window draperies. If I chose to go that route, those windows will need to be finished before the roof goes on.
Attachments
The door looks great! Those are good tips about the stops to keep doors and windows from falling out. As always the step by step photographs are a great help!!
Myles, the cabin looks like a fun project. I like working on wood kits.
Thank you!
This is Friday's post. First I'll talk about the Cabin and then give you some more 3D printing minutia.
I finished installing the battens. It was a simple, repetitive job that took the afternoon. I pre-stained them. I had cut them a bit long and aligned them with one edge and used a fresh, single-edged razor to trim them to length after dry. Before attaching the short pieces above and below the windows, I had to install the laser-cut trim pieces so I knew where the battens would stop.
Here are the add-on walls completed and ready for windows and glazing. After windows I'll be assembling the four walls. With all this added wood, the walls are strong, straight and quite stiff.
Onto 3D printing. Still waiting for my new thumb drives. I did the test suggested by the Elegoo support team; removing the rear cover and plugging the drive directly into the USB connector on the mother board. I got the same error message so I'm still thinking that the drive is defective. The new ones are coming today. Elegoo also said that if the mother board has failed, they would send me another. They're good to work with.
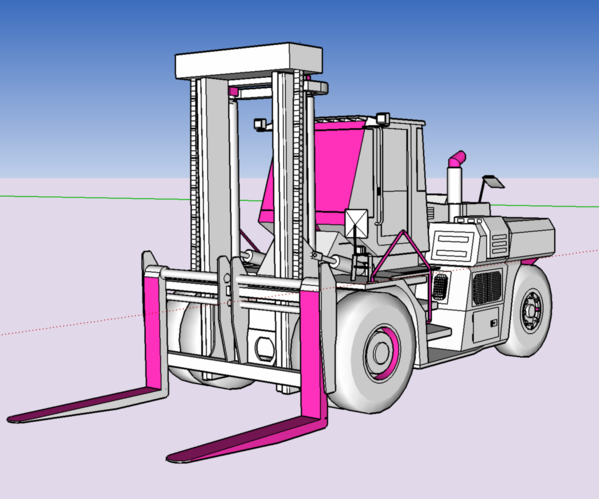
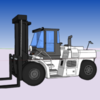
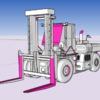
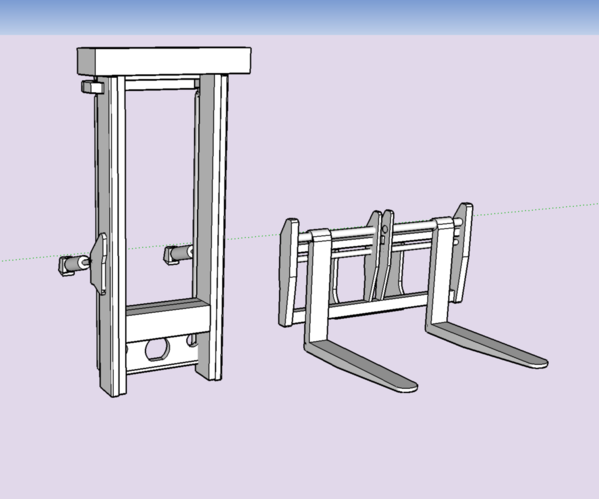
I wanted to print a heavy-duty fork lift truck that had the capacity to lift the 34,000 pound prime movers. I found a nice drawing on SketchUp that looked up to the task. It's a complex 3D model.
The model was a good starting point. It is NOT 3D print ready… not by a long shot. First of all there is the typical "not-normal" reversed face situation. I set the program up to show the reversed faces in a brighter color. The program defaults to a darker gray which is easier to miss.
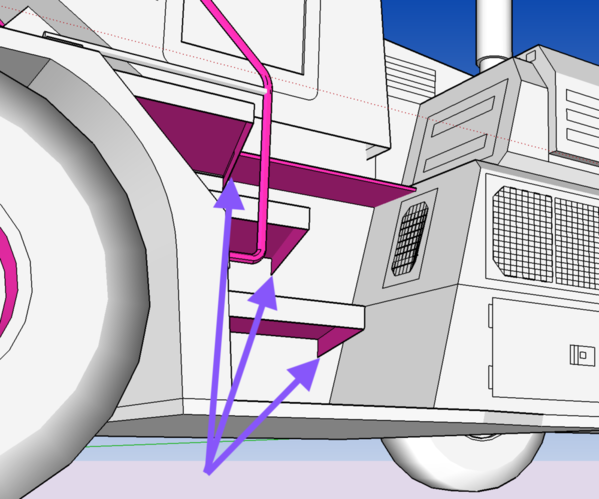
This problem, while tedious, is easy to fix. But this next problem was much more trouble. The artist who drew this made his surfaces as if they were scale thickness steel. In other words, they're surfaces with no depth. Surfaces with no depth DON'T PRINT!
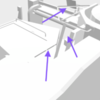
Here are those thin areas. And they're all over the place. The entire cab was single plane thick as was the entire body.
When you convert this to an STL which goes to the slicer, these surfaces simply disappear. If I continued to rotate the object and take these screen shots, the missing surfaces would continue to appear.
Literally every surface on the model needed to be thickened or completely redrawn so it could even have a chance to print.
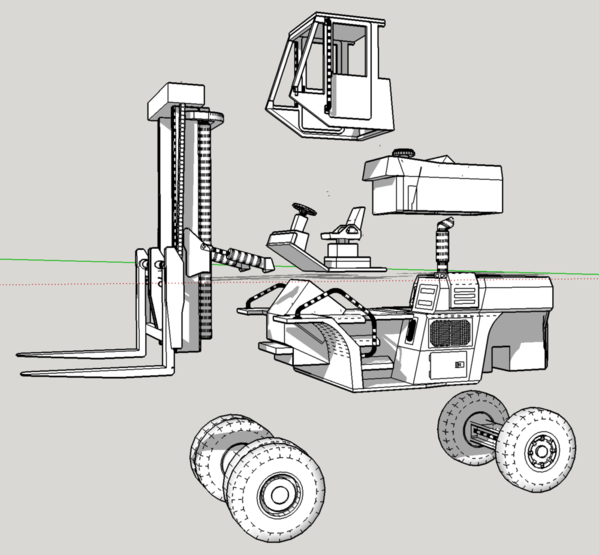
Then I had to break it up into sub-assemblies so the prints could be oriented well enough to be successful. Another thing the model's artist didn't do was separate the pieces into groups. The entire lift truck minus the wheels and fork assembly was ONE PART. That meant that all the surfaces were connected to each other. If I wanted to lift the cab off the body (which I had to if I wanted to print it separately), it would drag and distort every surface connected to it. What to do?
What I did was copy the surfaces and shapes that I wanted to modify, and build them off the model. After they were correct, I went back and erases all of the original surfaces and lines making up the original. This took some serious drawing time.
When I pulled off the wheels and axles I needed to ensure that there was a socket into which I could reattach the axles. Even if a surface had thickness, I had to make them thicker so there would be something there in 1:48. Remember, 2" inches in 1:1 is only 0.040" in 1:48 and that's a thin 3D printed surface.
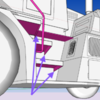
I broke the model apart and redrew all the things needing re-drawing, created STLs in 1:48 and sent them to the slicer. It was then I saw the mass of the body that was printing in one chunk. It was $5.00 worth of resin and would present a huge surface area onto the FEP that needed to be lifted each layer. I had to hollow it out, and that REALLY took some time. It's why it's actually easier sometimes to create an object from scratch, then to download somebody else's. ChiTuBox slicer has an automated "Hollowing Out" function, but I'm not comfortable with it. As I started to put in the hollows I realized that I needed to print the engine cover as a separate part. I made hollowing the lower portion much easier. I also removed the interior and will print it separately. Glazing will have to be scratch-built. Notice that the handrails are much thicker than the original, AND I removed the appendages that wouldn't print either.
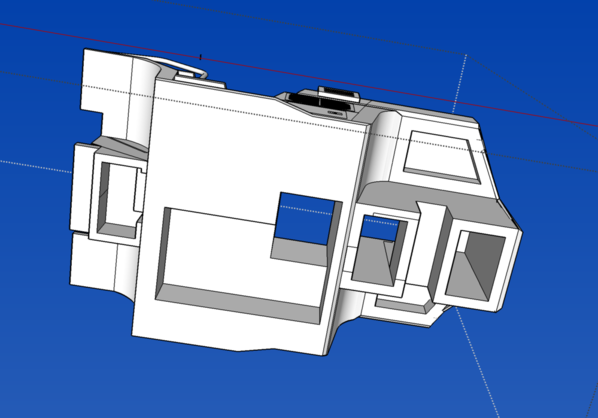
Here is a view of the hollowing of the body. The engine cover too has matching chambers. The chambers must be open so the uncured resin can escape. Otherwise, it will eventually leak out of the model over the years. I removed almost $2 worth of resin with this lightening effort.
So even when I'm not in the shop, I'm still modeling. 3D printing is not for the faint hearted. It's one thing to go to Thingaverse and download a completely sliced or STL file that's ready to print. It's quite another to download somebody's 3D rendering and make it printable. Even with all my changes, there's no guarantee that it will print successfully. That's a whole other kettle of fish. I'll keep you posted… of course.
Happy Mother's day tomorrow. It's the first one is 52 years where I haven't bought any cards and my wife insists that I don't this time.
Attachments
That cabin is going to be a nice looking model. I was surprised in the fork lift, that you didn't separate the fork by itself. That would allow you to place the fork at any height.
That's a good suggestion, especially since the print was pretty much a total failure. The big base separated from the build plate at some point in the print and gave very poor results. I'm going to take the fork assembly apart (graphically) and print the pieces as separate items on the platen.
I followed Pat's advise and decoupled the forks from the mast. I then further modified both to make them even more substantial for printing. The new design (mast) is on machine now and will be done around 10 p.m.
I got some major work done on the THC. I put all the walls onto the base. I used a combination of angle blocks, corner clamps and quickie clamps. I used both Aleen's and some thin CA to reinforce areas. You start with the back long wall, then the two sides, the front wall and finally the add-on room.
The instructions called for glazing and placing the sashes before erecting the walls. I'm doing it after. I don't want to screw them up and with the clamps and glue, there's a good chance that I would.
I ran into an interesting problem. The add-in room is wider, by a statistically significant amount, than the base it's supposed to sit on. The main house is supported by a plaster "stone" foundation, but the add-on room is held up by posts in the ground. In fact, the instructions show junk stored under that part of the building. I filled the gap with scale 2 X 6s and a 6 X 6. There was also a little space on the back edge that needed filling. This will provide a good surface to attach the support posts.
I don't know how this error occurs. All the parts were build directly over the drawings. So the only way stuff didn't fit was the drawings are WRONG! Not a show stopper. I'm particularly good at fixing screwups. I slopped some stain on the new wood to get it match the rest of the structure.
I stuck it on the layout in its future location while all the glue dried. This site will be drastically contoured before the building is finally sited. It won't be just plopped on a meadow as you see here. It gives the impression of scale.
Attachments
The cabin looks great! I know you will make a credible scene for it to sit in.
Love the cabin. Definitely reminds me of Johnny B Goode.
Put only one stick on the Cabin, but did work on Fork Lift Truck print. I also figured out where my error happened on the add-on room. On the main cabin, the ends glued in between the front and back with the siding boards extending out from the ends to hide the front and back wall framing. I didn't see in the instructions that the add-on room end wall glued to the ends of the side walls, not in between. I had extended the siding on the end wall as I did on the main cabin. The result: the side walls were one wall thickness out beyond the base perimeter. The only thing this actually affects is the roof sizing, which are already laser-cut. I tested the roof and the eaves will be short (by the sine of the roof angle.) I may recut the roofs to give more overhang. Or I can just extend them a bit.
The separated flag truck mast printed very nicely and I was encouraged to see it hanging there all intact last night.
The print was error free. Unfortunately, the vast forrest of supports was a real challenge to remove and damage was done… by me.
The two tilt cylinders were too fragile to handle the clean up as were their gussets. I will scratch-build these parts out of plastic or brass.
After cleanup, I started to add back the gussets using resin left over from the raft. I chose using resin since Bondic can be used to weld the parts together. The resin, even though looking opaque is almost transparent to UV 405nm wavelength so the UV penetrates the part and cures the Bondic even when it's hidden. On non-UV transparent materials hidden Bondic wouldn't cure.
I filled all the damaged areas with Bondic and did a lot of power sanding and diamond burr cutting. In this picture I got one gusset attached. I also removed the vertical lift cylinders and will replace them with scratch-build. On the perforated bottom plate, I will add doubling which was removed during the cleaning. There were too many blemishes to salvage that area. When completed it will work fine.
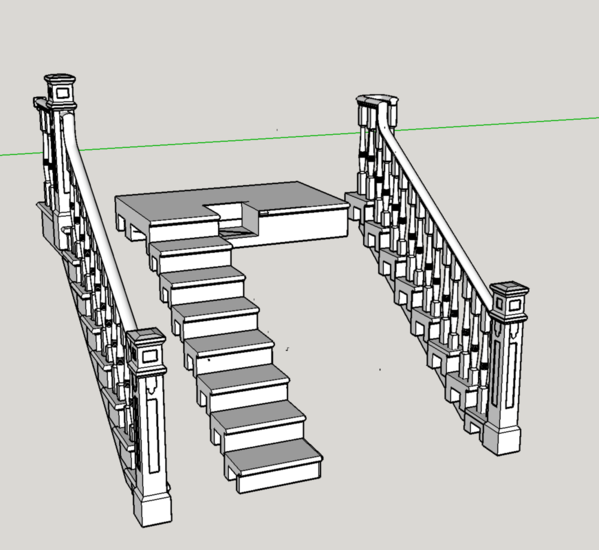
Some House updates: I completed separating the 3rd stair flight to improve its chances to print well and make cleanup less destructive. It took a long time to do this vivisection. I had to make sure everything lined up perfectly so the stair can be reassembled into a complete flight. The cubic socket in the landing captures the like-shaped extension under the turned portion of the railing. I needed something under this delicate section so the spindle wouldn't be destroyed in handling. There were tons of faces that kept reversing which I had to constantly chase down and get them facing correctly so they'd print.
Here's how it arranged in the slicer. It will be a crap shoot if it all prints well, but you gotta try. Most of the supports are not on the spindles, but that doesn't mean it's right. There are some pink areas under the upper square section of the spindle that indicates a possible island-forming area.
I learned something else today. Part of the reason the first lift truck print failed was there was almost no attachment to the build plate. It was delaminated and when I went to scrape it off, it just fell off. Problem? Answer! I had pre-coated the plate as usual, but because of doing some other tasks, I left it in the UV Curing box for a full 15 minute cure. The resin was too hard! The new resin can't attach well to fully cured resin. The normal way I pre-coat is to leave in the curing box for a couple of revolutions of the turntable; about 2 minutes. The resin is no longer flowing and is quite tacky, but it's not cured. The second print worked perfectly because the resin was correct. It's also the reason why exposure levels are so critical in the printing itself. Too short: the resin won't be cured enough to provide the lifting force on the next layer. Too long: the resin will be too cured and the new layer won't bond with it properly, again leaving the resin stuck to the teflon.
The lift truck forks will be done tonight around 9 p.m.
Attachments
Myles,
I have noticed that sometimes the pink area's won't accept a support , but print without a problem. Good luck with the stairs print.
Yeah… I've noticed that too. I went down to check the fork lift forks print. Perfect hanging on the machine. Tomorrow I'll have my chance to screw it all up getting rid of all those supports. It's hard to see the geometry from this angle, but it's all there and not distorted. I had thickened all the members including the forks so they would be more substantial.
Attachments
Missed posting yesterday, buy y'all aren't going to miss any progress. On the 3D printing front, I got a successfully cleaned and fitted fork assembly for the fork lift project. I had to so some sanding of the inner surfaces of the main guide rails to get the forks to slip inside. I also had to do some Bondic repairs where I was a little over-zealous in my Dremel support removal operation. The forks are not glued into the mast in this image. I have to scratch-build the lift and tilt cylinders as I removed them in the clean process. I had thickened the forks a bit so they should be strong enough to support one of the prime movers. It's a BIG fork life truck.
Now to the House stair printing saga. I got the center section printed and cleaned successfully. It will work.
That said there was some plate separation on this part, but it still printed successfully. Can't say the same for the railings. They separated early and were non-existent.
I reset the railings and attempted to print them today. They printed, but many of the spindles failed and I'm scrapping the "fancy spindles" design and going to simple square section spindles and a simpler newel post as well. I can't keep making failure after failure just to make a stair case that no one will ever see. Luckily, I made the spindles a "Component" in SketchUp terms. This means I only have to modify one spindle and ALL OF THEM CHANGE. It's the advantage of using "components" when designing multiples of one object.
The Cabin: I added some extensions (Arrows) to the roof peaks on the ends to properly raise the roof to fit over the side walls. I then added some trim pieces to fill some blemishes which could have been avoided had I made the filler pieces just a tad longer. I was using scrap wood and was stuck with some sizes.
The roofs needed to be modified too. I added thickness to the laser cut roofs and then cut a new and bigger skin to extend the roof both in length and width so it has some eaves. I use balsa to add the thickness and some very thin, 1/64", ply for the new skin. I used 3M 99 high-strength adhesive to laminate the three layers. 3M 99 is much more secure than the more usual 3M 77. 3M 77 will let got after a while.
The new roof fits nicely and will work well. Because I packed out the peaked end I had to add packing to the sloped junction on the main roof. Otherwise, the roof would have tilted inwards to the main cabin.
The roof can't go on until all the windows and lighting are in. Also, if I intend to add any interior that needs to be done now also. I'm reluctant to do so. It will be very hard to visualize.
For glazing, I applied MicroMark Pressure Sensitive Adhesive to the insides of the window frames and then, when dry, stuck them to the acetate sheet. Then, using a new #11 blade, I trimmed the windows out of the acetate. I tried one of them into the frame.
Some of the windows will be closed and some open. I'm going to use Testor's Canopy cement to glue in the windows. It dries completely clear and doesn't fog acetate.
If I don't put in an interior, I may fog the windows with dull coat so you won't see inside and diffuse the lighting. If I use LED, I'm going to cut down their brightness by painting the lenses, else it will be too bright for such a structure.
Attachments
When I had build-plate separation problems, I simply cranked the "first layers" exposure time way up. Fixed the problem immediately, and I don't do any special prep of the plate. There is little downside, since it is only for a few layers.
Myles, Those are great tips as you built the roof for the add on section of the building. A mocdel building always seems to look better if some of the windows are in the open or half open position.
Thanks folks!
I adjusted the raft's exposure from 65 to 80 seconds. I also increased the layer exposure from 8 to 9 seconds. I got one railing assembly printed well and the other (in the same run) had supports fail in part of it and lost the spindles. It's the one with the reversed railing and is thus a bit more complicated. I'm going to reprint that part with three different setups to see which one is most successful. With one good railing I know it can be done.
Same goes for the forklift truck. The interior printed (although the steering wheel got destroyed in cleanup), but the cab in the same run failed to connect to the plate and was just a blob on the teflon. I'll scratch-build a wheel. Also lost the rt hand arm rest. Shapeways makes some very small parts and don't seem to use supports. I'm thinking they're using an expensive laser machine where the parts form in a bath of powdered resin which supports the forming parts. The supports are a necessary evil. I'm going to print another separate cab and see if it works.
Put all the windows into the cabin and got the lighting almost finished. I'm using grain-of-wheat incandescents instead of LED since I don't want them too bright. To do this I first added a piece of 1/4" square basswood from side to side to support everything. Overkill! Then I used my n-gauge-track-bus-bar scheme to provide the parallel circuitry. It simplifies the wiring. I held the rail to the basswood using some soft twisted floral wire.
For the add-on, I needed to add a false wall to hold up the other end of the lighting support beam. I traced the peaked end and then added some reinforcements and some stock on the bottom to glue it to the inner wall. I had to keep adjusting the support's length so it didn't distort the geometry.
I didn't need the n-gauge track to the add-on since it was just a single bulb. I used the RSU to solder the fine leads to the track. The Tweezers hand piece lets you hold the wire in place and heat at the same time.
I tested the whole deal and everything lit up correctly. I put a drop of thick CA to hold the single bulb in place on the support. I'm toying with some furniture ideas. I had some old styrene stuff left over from other projects, and I may purchase some from Shapeways which has a broad selection of O'scale furniture. And I may attempt to print some of my own. All those power leads in the picture is my LED test rig. It's a 12vdc power supply with open ground, ground with 430 ohm current limiter, open positive and positive with CL2N3 LED driver. This gives me the freedom to check LEDs in or out of circuits.
Attachments
Yesterday's post this morning.
Finishing up the cabin roofs. Got a successful stair railing print and followed with a test producing another good one.
I decided to make the roofs completely removable. This meant more internal bracing and gluing the main and add-on roofs together. I'm also noodling putting the lighting into the roofs themselves so when the roofs are removed the floor is completely open. I thought about this this morning lying in bed. I put on the Real Scale Models laser-cut shake shingles. The kit instruct's using some of the corrugated roofing to act as a peak capping. They also suggest using Sculpey for the valley flashing. I'm thinking of using wine bottle foil chemically blackened to simulate lead sheeting.
The roof angle is 90 degrees. I cut the trusses out of some scrap ply and used Aleen's augmented with CA to hold it together. Because of my added trim pieces to fill the roof angles, I had to remove some added stock on the main roof to clear the added stock on the angled roof doubler on the main roof.
I wanted both roofs as a single unit. I added glue, put them together and taped them together until they set. Notice I added the shingle guidelines on the new add-on roof surface. These lines were laser engraved on the original (Smaller) roof parts.
I added the shingles to the assembly. I've had a lot of experience with Rusty Stumps shingles which are now offered by Real Scale. They're a terrific product! The shakes beg for weathering.
The left side railing for the House's 3rd stair flight was finally successful. One newel post had some deformation at the bottom so I cut a good one from the scrap pieces I've been creating and grafted to to the good railing. After truing mounting surfaces I used Bondic to weld the railing part to the mid-stair part. Bondic literally welds UV resin together since it's the same material, and it fills gaps in the process just like metal welding.
The notch in the landing receives the base of the railing turn portion.
Then I printed the right side in three configurations to see which was successful. The one that I surmised had the LEAST chance of success was the only success. I set them up at the same angle as the stairs would fall, a flatter angle to shorten the supports, and the middle one, a much steeper angle to reduce large pulling forces with larger flat surfaces. On both outside setups spindles and rails had failures. Only the middle one came out perfect.
The next staircase, from the landing to attic, is longer by about 6 steps and will present another challenge. Hopefully setting it up like this one will work, but I'm dubious because the supports are going to be very long on the upper ends. The square spindles were definitely the way to go with this part. Shapeways produces their tiny parts using different technology, most likely an expensive laser machine that prints parts in a powder that don't require all the supports. The supports are the Achilles Heel of LCD Matrix printers.
Attachments
Myles, the roof looks great! Yes I agree, shake shingles do need weathered to be convincing!
I'm glad you are making headway on this wonderful staircase!! It does look to be quite a challenge.
Thanks Mark for your undying loyalty!
Today's a twofer. Progress on all fronts! First 3D printing. The first stair case is now assembled and works as I envisioned it, once I was able to get successful prints. Here's the right hand railing and steps portion finally bonded in place. After putting the bonding on one of the parts and bringing the other into contact, I just put it into the UV curing chamber. It's quite bright and penetrates deeply into the parts so the joint was fully cured. I had to relieve the rectangular slot for the upper part of the rail so it would slip in correctly.
The joinery between the three parts is not objectionable in my estimation.
The upper part of the rail fit into the slot. If it were going to be in a highly visible place I might fill that little joint line. I'll prime them and see how bad it looks.
Buoyed by that success, I tried again to print the lift truck cab. It's a fragile piece with fairly thin elements. I also drew in some reinforcing braces that I will carefully remove during the cleanup. It stiffened the structure and made the support system more trustworthy. The two hand bars printed perfectly. One on the unsupported side is great. The one on the other side has some medium density supports and will need to be removed very carefully. In fact, clean up is going to be a challenge, but at least I'm starting with a perfect print. I did not pause this to check it. I'm finding that pausing is one of the failure modes. I'm trusting that the raft will hold to the plate with my pre-coat step so I can just let it print and see what comes out. The next step print is going to be the longer one. I hope the supports work as well as it did for this one.
I will be happy to get the supports off without wrecking anything. If this print didn't work I was seriously thinking about scratch-building it out of styrene a la Al Graziano.
Finished the porch including the roofing materials. I had glued up the framing yesterday so it was nicely cured. The instructions call for putting on the faux tarpaper before the roof is attached to the building. I chose to do it on the building so I could wrap the back edge up the wall as flashing. I used the MicroMark Pressure Sensitive Adhesive since it's perfect for this kind of application.
The gluing surface on the porch supports is, to say the least, very tiny. The only thing that makes it work are two members that tie it to the building and the roofing ply. The original building porch was planked with the 1 X 10s, but with the kit you have an option to use the ply. I chose the latter. I then put saw cuts on it front edge to simulate individual planking. Once I got the parts glued in place I had to load it to ensure that the four posts all were fully in contact with the porch. I attempted to ensure that all four were exactly the same length, but the porch planks themselves had some minor thickness variation.
The tarpaper is a black specialized paper with a gluable backing. It was not self-stick. The instructions said to give it a dust coating of gray primer, which I did. They also call out putting a "Tarpaper Patch" to simulate some roof repair. I painted the tarpaper with Tamiya Rubber Black and used PSA on its backing. I then added some NATO Black on the seams to simulate tar sealant. I don't think I'm going to change the lighting installation. It seemed like a good idea at the time, but I'm not going to be taking the roof off very much.
Here's a WIP shot of where I am so far.
I cut some wine bottle foil for the roof capping. I soaked it in vinegar to etch it, but I'm not sure how good that was. I then primed it with Tamiya primer. Tomorrow I'll give it some color. I'm thinking about using the PSA for this, but metal always is an interesting case. I just ordered some 3M adhesive transfer tap which is a stronger adhesive than the PSA. I may use that when it arrives. It will also be good for gluing on windows simulating the pre-stick that some manufacturers are using.
Attachments
Nice work, Myles. The stairs look great. The 3D printer gives you the ability to make some amazing detailed parts but it doesn't seem to save time and maybe not money with all the pre printing trials and multiple prints.
The building looks great! I think you did a great job on the porch.
Going back a day and to what Pat said, it does seem like the support system is a challenge to get perfect parts. I did not know about the probability much more expensive printers that use the powder and don’t need the support. In all fairness to the printer, I think you are really putting it to the test with the fine, intricate Spindle and railing parts. Well done!
Thanks guys! While it may seen not to be cost effective, I think it actually is. Each print uses around a buck's worth of resin. In my usual compulsive truth telling, here's the skinny.
There was the initial investment of $542 for the printer, UV curing light, ultrasonic cleaner and timer. There's other costs too including the FEP film, 99% IPA (getting hard to source) and the filters used to remove any cured resin debris from the vat if I've had a failure. Y'all may be right. I just did a bit of bookkeeping and added all of the costs (and I mean ALL) from inception in June 2019 to the present at $1,202.00. From that I've made $500 in print parts sales so the net cost has been $700. At about $40 per print job, if I had them done commercially, that's around 17 jobs. I have GREATLY exceeded this amount. I haven't counted, but I'll bet I've printed over 30 loads just for the House. I've equaled that amount for the machine shop and another 20 for the Engine house. So… I believe it has been a good decision albeit a steep learning curve. This year I'm expecting no additional capital outlay, only consumables and maintenance supplies. If you look just at resin costs plus film and alcohol, the costs are very much less than the parts I'm getting. Elegoo is coming out with a larger model, the Elegoo Saturn that may be enticing. A larger machine means more parts on the machine per run or larger parts.
Yes, absolutely beats the cost of sending the drawings out to a professional. Besides, I see it as a new, very rewarding challenge to you who is at your best noodling around ideas and putting them into action. Priceless!!
The big cost in time and expense is getting the first product. If you were doing this as a business, you would make up that time and expense making multiple copies. This is shown by the $500 you made selling parts. Since you're a hobbyist, you don't count the time that you put into this. If it was strictly a business the time would represent a lot of money too. Bottom line is you are making beautiful pieces and enjoying yourself while you're doing it. That's what counts.
@Pat Kn posted:The big cost in time and expense is getting the first product. If you were doing this as a business, you would make up that time and expense making multiple copies. This is shown by the $500 you made selling parts. Since you're a hobbyist, you don't count the time that you put into this. If it was strictly a business the time would represent a lot of money too. Bottom line is you are making beautiful pieces and enjoying yourself while you're doing it. That's what counts.
And we are having fun seeing what you are up to!!! ![]()
Yes… it's fun to tell you what I'm doing.
Yes… the upfront costs would be amortized over more jobs. And yes… I'm not counting the hundreds of hours I've spent learning to design on SketchUp and another huge chunk of time learning how to make the Machine work. My wife says, "It's your hobby, so what do you care how much time it takes." She's right. I'd spend the time whether I ended up selling anything or not. But with the learning curve behind me, I'm more successful sooner.
The forklift cab cleanup went well except for losing one handrail. They're a little fat anyway, so I'm going to replace both with brass. I test fit the interior for the picture. The interior needs more work, but it will all work. Right now the forklift body is one the Machine. It's a big part, but now that the build plate is rising high enough to get a glimpse underneath I can see all the supports are in place. I'm not going to pause it to see. I said earlier that pausing is in itself is a cause of failure. I had thickened the handrails to make them more successful.
I made a roofing sample to test some new pastels I want to use in weathering.
I bought the pastel sets from Brennan's models. I've been using powders for years, but I like the color selection and just stubbed them directly on the shingles. I also thinking about a wash, but the shingles are paper and I'm not sure that a wash is going to work as I would want.
I got the first frame completed for the big shed wall. I've started working on the side walls. Today was an exercise day so my work time is curtailed. I should be working on the recumbent bike and elliptical every other day, but in reality I'm doing it twice a week. With the AFib I take it easy.
I also put a coat of galvanized steel color to the capping strips I primed yesterday. I may doing some selective rusting on them.
Until tomorrow...
Attachments
Working on two projects simultaneously keeps me busy. I spent about half the time cleaning and modifying the Lift Truck's body and the other time continuing to build the shed walls for the Hacker's Cabin.
The lift truck body print was about 90% good. I lost the hand rails (expected), there was a malformed step and some aspects needed removal which I explain in more detail.
Here's what it looked like off the Machine. In the original drawing, that angular lump was actually part of the cab. When I removed the cab sides and then redrew the interior, I actually duplicated this shape. Either the cab interior needed to be scrapped or the lump had to go. I chose to remove the lump. You can see some broken supports on the foreground that caused the failure of that footstep.
I started the removal with a normal razor saw, but it was slow going so I put a diamond coated abrasive wheel into the Dremel and went at it. One cut penetrated the body too far and I filled this with Bondic. In this image you can also see part of a foot step missing on the lower edge. I removed that piece entirely and routed out the underneath so I can replace it with a piece of 0.040" styrene. All of the handrails are going to be phos-bronze which is better anyway.
Here it is after the first cleaning and before post-curing. I laid on a lot of Bondic to repair that lump area and more spots around the tail end.
After post-cure and more sanding/grinding I've got it ready for paint. It's massive part. I had forgotten that I included the engine cover in this print and don't have print that part too.
After cleaning the body looks pretty decent.
Here's the underneath showing all the cavities I drew to reduce the quantity of resin needed to print. I tried using the slicer's built-in "Hollowing Tool", but it didn't give me enough reduction. The other reason for opening these spaces is to reduce the contact surface area on the FEP and reduce the suction forces that could break supports and cause failure.
Couldn't help myself and try all the parts I've gotten finished as an assembly. The mast is clearly not at the proper angle, but you get the idea.
The last thing I need to be printed is the wheel sets and I'll do that tomorrow. Right now the 4th flight of stairs is on the Machine. Long print, over 9 hours so it will be waiting for me tomorrow morning.
I got the three shed walls framed up and cut 62 slats for it's sheathing. My solid depth stop is really earning its keep.
I stained all the slats en masse.
The instructions tell you that the shed's construction is pretty crude so I roughed up each piece (before staining) with my wire brush thingy that I got from MicroMark several years ago. I also roughed up the bottom edges a bit more. I damaged a couple of pieces, split a couple of others to make some joints and added one bright shiny new piece that was used to repair a really bad board. This is one of three walls. All that's missing are the nail holes which I will add later.
Next up are building the four shed roof trusses, sheathing the end ones and assembling the building. There is a front frame similar to the one holding up the porch. The roof gets some hurlings and then corrugated metal. I have to prepare and age that before installation.
I will continue with the lift truck too. I need to finalize the interior and do the scratch-building.
Attachments
The lift truck is shaping up nicely.
You do some fabulous work. I really look forward to your entries.
Thank you all. I posted something on Monday, but forgot to hit send, so it didn't. I'll include it now. Hope all had a nice, safe, healthy and socially distant Memorial Day.
I finished the shed big wall, again sprinkling in some damage and new boards for interest.
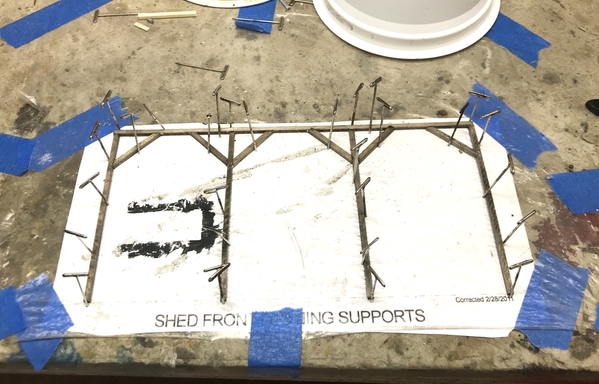
Yesterday I glued up the shed front frame. This was a very simple unit that followed the same routine as the other parts. You need a good surface to hold T-pins and lots of T-pins to do this kind of work.
I then cleaned up the mating edges and glued up the three sides. I used the special corned clamps, angle plates and clamps to hold it together. Unfortunately, the left rear corner side piece is a trifle higher than the back. With these corner clamps it's sometimes hard to see the uppermost corner to ensure it's fully aligned. It's not a show stopper. Just annoying.
After this set up I moved the angle plates and glued in the front frame.
So here's the shed complete ready for me to produce the trusses and roofing.
I cut all the truss parts. There are four trusses. The two on the end get some vertical sheathing.
I also was printing another 4th section of the stair case. It was printing fine and then abended prematurely with a USB read error. I removed the partially formed objects and used the other Thumb Drive with the same file. As of late yesterday it was printing well. It was a 12-hour print and finished around midnight, so I won't know how good it is until I go down to the shop and check it out. This was one of the long staircases and I was afraid about the extended supports on the railing portion. But so far so good. I'll keep you posted.
Attachments
The shed is looking great! I don't know how many times I have typed something out and forgot to hit send/post....
Myles
I hope you enjoyed the Memorial Day holiday with family.
Your success with the printed stair case and cabin and shed are looking just great as expected.
I'm not having the same success as you with multi projects. While testing my dwarf signals connected to the few DZ1000 switch actuators on the layout, I have tried printing a couple of circus related wagon prints on my Mars printer. I have been experiencing USB read errors and more recently key pad failures similar to those you had early on with your printer. Still waiting for response from Elegoo customer service to reply to my request for help.
Gerry
Thanks folks!
Gerry, first of all, try changing your thumb drive. What kind of keypad problems have you incurred? In my case it was the registration that was off, but after some calibration it's more or less cured. Meanwhile, they sent me another one which is in my Mars Repair Inventory. I'm surprised they haven't responded. They've been pretty good with me.
The print after the abend was almost perfect. I used the other thumb drive just to be safe. I had two spindles not form and replaced them with some I cut from a couple of the scrapped ones that I kept just for this purpose. With the Bondic, the new parts are pretty well-hidden. I cleaned up the long stair and assembled it to the shorter one. I now have the 2nd to 3rd floor stair complete and ready for paint. It's welded to the landing with not a large surface area, but the Bondic is really good with the U-V Resin. Considering how this elaborate structure will be buried in the bowels of the building, I am greatly overbuilding it. I'm considering it more of a proof-of-concept and just more of my indoctrination in the art of 3D printing. I'm going to be 75 at the end of July and keep learning! I'm doing modeling I didn't even dream of 20 years ago.
The tuned rail needed to be trimmed so it would nest into the existing turned rail. I removed a little bit from the upper stair rail and carefully sawed off about 1/8" of rail from the turned portion. I said "carefully" because I needed those spindles to be intact. This joint is now invisible.
The 2nd flight from the 1st floor landing to the second floor is now on the Machine and, so far, is printing nicely. That leaves the long 1st flight to the 1st landing. I suspect it will print successfully since it's basically the same length as the one that I just completed. What's left is the railing that surrounds the attic stair opening which I'm sure will print okay since I already printed it well with the original spindle design. The print was good, is was the spindle design that wasn't so hot. I seriously was considering NOT continuing with the stairway project. It was looking bleak in the beginning, but as I've said many, many times. I am nothing if not persistent.
I'm trying to come up with a way to make illuminated 1:48 chandeliers using fiber optics and LEDs. I have some fiber I bought from eBay and have yet to build anything with it. I may make the fixture out of phos-bronze wire and have the fiber running concurrently with it. We'll see… stay tuned.
The Cabin: finished building the four shed trusses and prepared the sheathing that goes on the two end ones. I used the precision sander with the adjustable miter gauge to sand the peak adjoining angles, but then eyeballed the rest of the miters for all the intermediate pieces. I also used the precision sander for the 2-sided miter on the center truss post that nests into the peak trusses. Tomorrow I'll sheath and mount them on the shed. I used almost entirely scrap cutoffs of the 2 X 10s. I didn't throw out any cut ends just for this purpose. There is a floor for the shed that needs to be built plus the foot steps that go up to the porch once the model is mounted on its stone foundation.
I've already put in some furniture, but created some more in SketchUp that I'll be printing some time. I'm going to put in a single light bulb for the shed also.
Attachments
The shed is coming out nice,Myles. The staircase looks fantastic. It may be a lot of work for something out of sight but if you are enjoying yourself, that's all that counts.
Didn't post last night, but I'll do it this morning. Let me talk 3D printing first. The 2nd flight came out great except for some voids in the stair treads themselves, which I have no idea about why it happened. Some heavy Bondic use filled the voids.
After lots of sanding with the power unit and filing with needle files I was able to re-create the stair and use it. I bonded it to the railing which was pretty good and then joined this flight to the two above it. I'm going to insert the entire staircase into the building as one piece. I didn't relish the thought of attempting to glue them together in the building.
Here's the junction of 2nd to 3rd flight. It's just held at the newel post. Bondic in this UV resin is very strong.
And then this beauty greeted me this morning. It's the largest and most spindly print I've ever made and it came out perfect. Not a single spindle is out of place. The steps with the attached landing are behind it and that too looks perfect. I will get it all cleaned up when I get into the shop later this morning. I was amazed that this thing came out. Mounting the rail on such a severe angle kept no supports off the handrail or the spindles and limited supports on the detailed newel posts. I did the same thing on the steps by keeping the side with the supports away from the sides with the details. So you hope that positioning for detail preservation also gives sufficient support for a good print. It's a bit of a gamble.
This was the last stair unit. I will print the attic railing system today. It's in three parts. They all straight rails and I'm not anticipating any trouble with it (famous last words).
I did some more stair fitting into the building to get the stairwell openings figured out. When I changed the stair configuration it changed the openings. Real Scale can't cut thicker than 1/8". I want the floors to be a full scale foot thick (1/4") so if I use his services I will have to make the floors in double layers. If the U of L ADMIST lab ever opens again, I can still cut it myself. They have laser cutters of larger capacity there. Regardless, I'm going to print out the drawings on my inkjet and mockup the walls, and floors to test fit everything before spending time and $$$ on laser cutting with real materials.
The Cabin:
I got the two end trusses sheathed and then glued on all four. The end two I glued with some squares to hold them vertical until the glue cured a bit.
I cut the required 10 pieces of 2 X 6 purlins and stained them. They're waiting for installation today. Here are two views of the trusses installed.
This building gets a corrugated 'tin' roof. I will pre-age all the pieces. I've been looking at how tin roofs degrade and it's a varied mess. I don't know if the material is tough enough to withstand using liquid mask. I would think that an overall galvanized steel color with a rust brown primer. Then using the mask to hide the primer in various spots. Removing the mask with the galvanized color would reveal the rust. Heavier rusting is done using raw and burnt sienna artist tube acrylics to build up any texture. Then a final touchup with weathering pastels. I just received some 3M transfer adhesive tape. It lays down a layer of strong contact adhesive similar/identical to that used in laser cut pre-glued parts. I'd love to use it on these roofing panels. Adhesive lining each purlin would do the trip.
Attachments
The staircase is looking great!!! So is the shed. I never knew the boards that are across the trusses to hold the roofing material are called purlins. The word for the day! ![]()
Thanks Mark! That's what they're called in the instructions. Learn something new every day!
While the 1st stair case print was successful it did have its problem. It wasn't the printer's fault. In the other three staircases, I had stringers drawn on all the stairs to add to their heft. In this case, I didn't have that because I erringly thought that the stair wall that was drawn would provide that support. It would if the stair was a solid unit. By splitting the stairs away from the railing area, I no longer had any support other than the steps connected to one another. This connection was very tenuous. It was basically the thickness of the stair tread, about 0.030". As a result the stair fell apart when the supports were removed. It was the supports that were holding it together.
You can also see the stair tread delimitation that I mentioned on the previous print. I also found out why that was happening and, again, it was in the design, not the printing. The stair tread was a separate drawing from the stair body. This design was inherited from the downloaded original stair design. This resulted in the printer forming them as separate objects that were not actually connected to each other. The body formed okay, but the tread has interruptions. These interruptions caused failure. I briefly entertained the thought of gluing it back together, but quickly dispelled that thought as folly. One break definitely, two breaks maybe, this mess, no way.
I went back and re-drew the stair to correct both problems: the missing stringers and the separated stair tread.
It will go on the printer when the attic stairs are complete, which, so far, are printing correctly.
I cleaned up the railing portion, which also didn't have a stringer. It was very delicate and broke in several places during the cleanup. In the rail's case, I was able to fix the fractures with Bondic since the handrail added some more support to keep it from completely separating as happened with the stairs. Since this portion did have the stair wall under it, I decided to build it now so the stair would have support moving forward. I needed to match the stair's profile to get a good fit. My first attempts (2), were to trace the steps onto a piece of 0.040" styrene, first with pencil and then with a scriber. The first attempt produced too many errors due to the pencil's width and distance off the stair. I cut the profile, but didn't like it at all. The second attempt proved not much better. This was the pencil tracing.
I hit on an idea to get a better fit. I used some double-sided tape to hold the stairs to the styrene and then shot it with some Tamiya Primer. It gave me a perfect shadow of the stair profile which I was then able to cut out.
I used thick CA to initially hold the piece to the stairs. I then went back and filled all the gaps with more CA and accelerator.
I then filled the gaps with Tamiya filler.
I sanded it, primed it again and then realized that I wanted to have a cellar door that went under this flight of stairs. I traced one of my fancy cellar doors and cut away the styrene for the door. These doors are huge and it also required some surgery to relieve the top step. I glued the door in with Bondic. The door isn't a very good print. I had trouble removing the supports in the top trim and you can see the grinding marks. It will be view in the most oblique angle when it's in the building. This wall now stabilized the stair and nothing more will happen to it.
The Cabin:
The purlins are installed along with some more angle braces for the middle trusses. This will dry overnight. I now have the work platform on the Homosote in preparation for building it tomorrow.
I painted the tin roofing with the Rust-o-leum oxide red primer which will serve both as a primer and an underlying rust layer that will be selectively exposed.
And that's today's work.


