I really appreciate that all the forum folks appreciate these efforts. I feel exactly the same way about other's projects. It's a great community of which we're all a part.


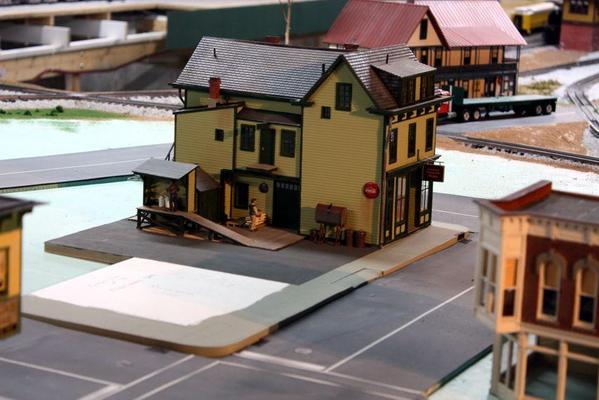
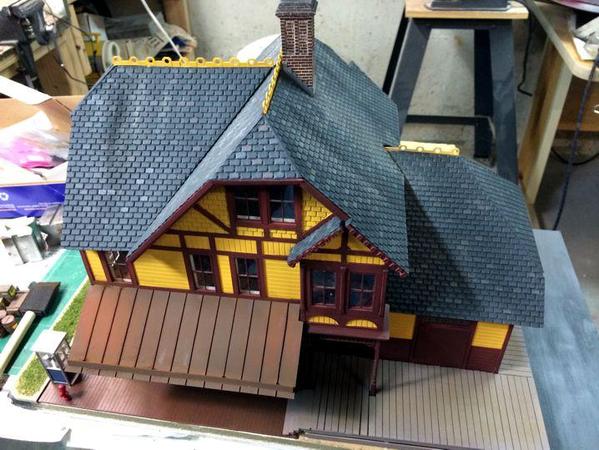
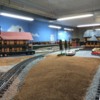
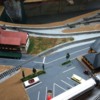
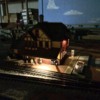
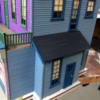
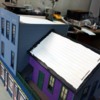
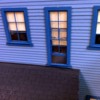
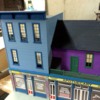
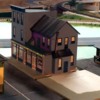
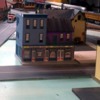
The grandsons were here today. I had younger one make the concrete bumpers for the parking lot and we installed them together. Then we did a mild weathering job on the station. I don't think we ruined it. I used Dr. Brown's weathering powders. For the roof it was a mixture of white and dirty brown, and then some weathered black. For the loading dock we used dirty brown and the wooden ground-level deck used brown. For the shed roofs we used some rust red, rust brown and brown. I may tone the red down some more tomorrow. We added two mail boxes, a phone booth and a fire plug. Tomorrow we'll install some crates, pallets, drums, etc and a couple of folks on the outside, and then IT WILL BE DONE.


Weathered 3

Weathered 2

Weathered 1

Attachments

Images (3)
  • Weathered 3
  • Weathered 2
  • Weathered 1

Thanks Mark! We've been in L'ville for almost five years and have seen tremendous changes in the boys. The young one was just five when we started working on the basement. Now he's going to be 10, is a computer wiz, does nice work and follows instructions well.


The older one is going to be 13! He's an excellent model maker now and is very creative. Both really appreciate what we've done. They treat stuff really well. I never have to worry that they'll do something dumb. It all started when the old one was 1 year old and he'd sit on my lap while I ran the MS Train Simulator on my laptop. I showed him how to blow the horn at grade crossings. 


I bought them the "I Love Toy Trains" videos and they'd watch them over and over for hours. When the older one was two or three, and living in CA, when we visit I'd take him to places where we could watch trains, and took him to the California State RR Museum in Sacramento. 


In other words, this has been a carefully orchestrated plan from the get go, like "The Boys from Brazil" only not so sinister.

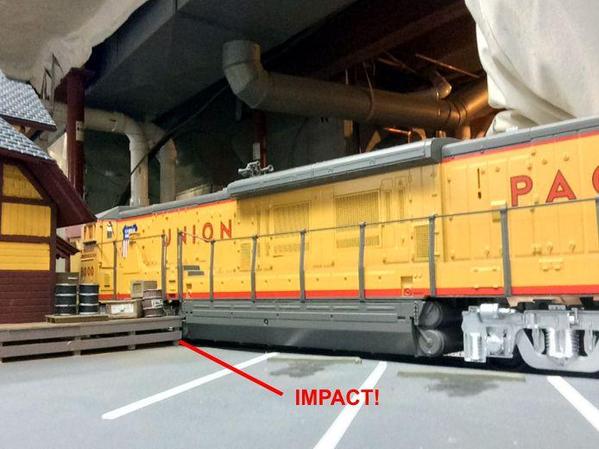
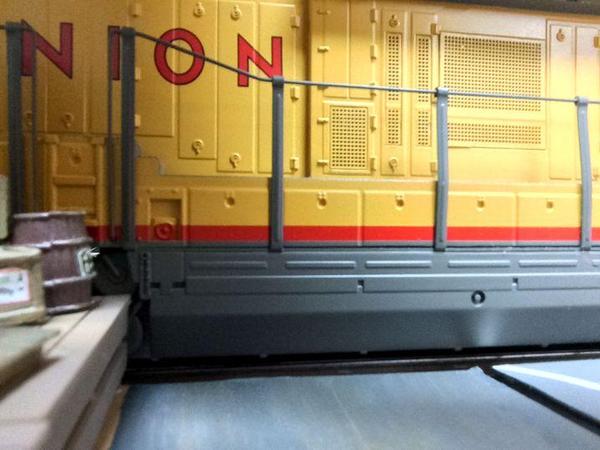
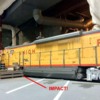
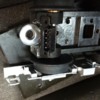
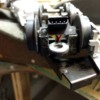
The Victorian RR Station is officially complete, but not without one more heart attack. After positioning the hole for the wires and setting it down, I decided to run the U50C by it to see how it looked. Running at about 12 volts the engine entered the station area and BANG! It smacked into the loading dock. Not the trucks... the fuel tank! 


IMPACT 1


IMPACT 2


Since the station was firmly glued to the building pad, I couldn't move it back any further, but I was able to trim some more off the pad itself. With this I was able to push the whole deal a bit farther from the tracks and the engine cleared. Whew!


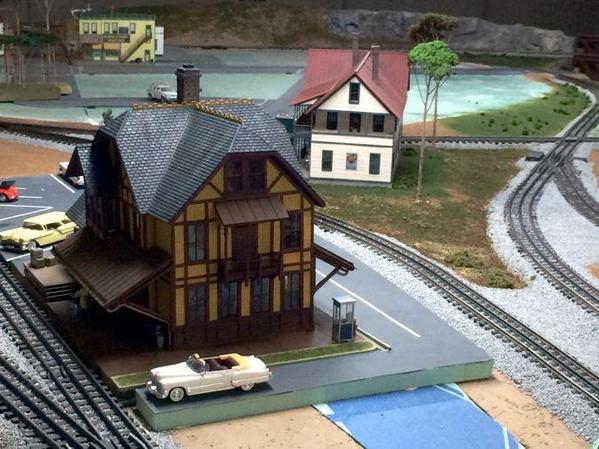
With that, I was ready to start adding more decoration, and trees. I also placed the Idaho hotel which is adjacent to the station.


Station Complete 13

Station Complete 11

Station Complete 09

Station Complete 08

It was time to get underneath the platform and get some power to these new buildings. I found another DC power supply that was used for an old external hard drive about 4 computer generations ago. It put out two DC voltages: 5 and 12. Since I had used current limiting resistors for the LEDs assuming 12VDC, I taped off the 5V lead for use at a later time. I have a bunch of terminal strips under the platform so there's no shortage of places to tap. I strap the converted up to the joists with cable ties.


Since only the LEDs NEED DC, all my older buildings with grain of wheat bulbs will be powered by the 10VAC tap on the Z4000. All the new buildings will be 100% LED and will be driven by the new power supply. It puts out 1.5 amps so it will drive 75 LEDs.


Here's the station with the lights on.


Station Complete 02


While under the platform I got a call from Roundhouse Trains that my trees were in so I quite work for the day and picked them up. They have a fellow who makes architectural models who mass produces really nice tress for modest prices (less than a buck each). I bought two flats (tall and medium). I immediately went and added a couple of of the tall tress behind the hotel. Having a reasonably priced tree supplier will be very helpful.


Station Complete 01 

The layout now has a station. It's now a "real" railroad that can handle passengers and some freight. So what's next? Cleaning the shop! I am not starting another project without doing that. 


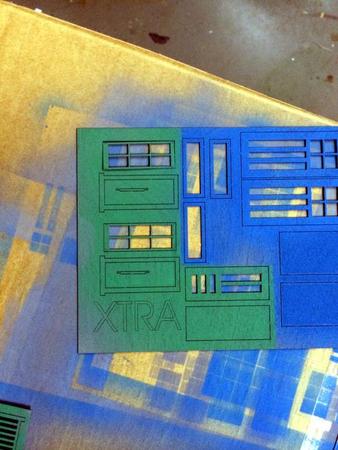
I've sent drawings of windows and doors for four more scratch-build projects: Engine house, our Pennsy house, our Louisville house, and the Night Hawks cafe. I also have Bar Mills Gravely Building, Les Lewis' wonderful fire house, interior detailing a corner store that I have,  the substation project and finally, the telephone poles (which goes hand-in-hand) are last. It's a nice problem to have.


Attachments

Images (10)
  • IMPACT 2
  • IMPACT 1
  • Station Complete 13
  • Station Complete 11
  • Station Complete 09
  • Station Complete 08
  • Station Complete 02
  • Station Complete 01
  • Real Station 1
  • Real Station 2
Last edited by Trainman2001

Wow! After those comments, I'm afraid I'll disappoint on my next projects, but I won't let that stop me.


I only worked about an hour and a half today, but did get all the installed building wired up for lighting. I'm using terminal strips left over from my German experience. One type, known as a Euro-style terminal strip has little holes in a plastic structure each with it's own slotted head set screw. The other is a solid brass grounding bar like found in most electrical panels.


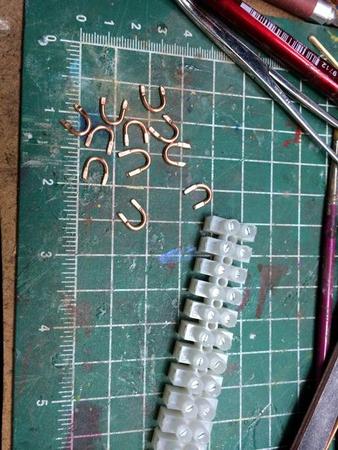
Unlike American barrier strips where you can by bus bars to connect them all together, I had to fabricate my own bus connectors for these out of 14 gauge bare copper solid conductor wire.


Buss Bar 1


To piggy-back them into a single hole I had to squash the end with a Vise Grip so they'd stack on top of each other in the holes. I'm sure that Conrad electronics in Düsseldorf, Germany would have some kind of bus connectors for this kind of strip, but I don't have any.


Buss Bar 2


I'm using these plastic buses for the DC+ circuits and the solid brass bus bars for the DC- and AC circuits. As noted in yesterday's post, my plan is to use the 10vac tap from my Z4000 for incandescent bulbs and the DC for LEDs and miniature florescents (the Sinclair gas station has a miller engineering miniature florescent in it). So in this picture you see the Bar Mills Idaho Hotel which is all incandescent and is powered by the 10 vac.


Lighting 4


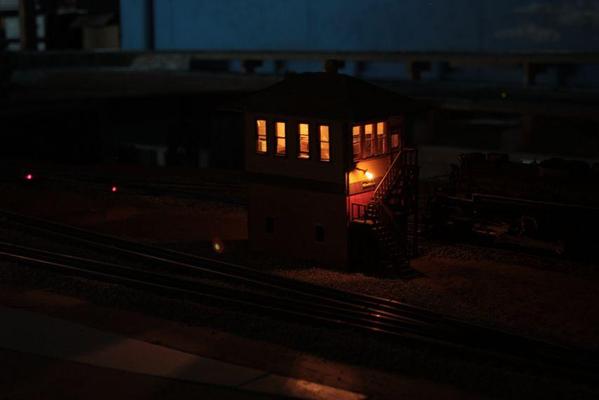
I also powered up the lights in the control tower with AC. The following pics were taken with the Canon EOS. The iPhone 5s really sucks at low-light exposures. I was able to bracket the Canon all over the place.


 Lighting 06


For the engine service area I decided to go against my own strategy and run DC to that area. I did this because the engine house is going to be all LED and I wanted to have a DC source at that end of the layout. I should put an ammeter in the line to ensure I don't exceed the 1.5 amps that the power supply is rated. I found two more surplus 12 VDC converters upstairs in the "electronic graveyard", both could be called into service if I need more amps. I may also run a second 10 VAC line out there. The lights under the water tower seemed a bit bright. This was a Frank Miller building and it's using a bulb that's larger than a grain-of-wheat.


 Lighting 05

Lighting 09

Reverse View:

Lighting 07

The DC lights are on all the time unless I use the "kill" switch on the basement wall that switches off the outlets feeding all train power. The AC power is governed by the Z4000's power switch.


Electric question: Can DC power supplies be ganged? Can I combine all the pluses and minuses and gain a power supply with higher amperage capacity? Another thought is that I'll bring on of the power strips to the front of the layout so I can use its on-off switch to shut off the DC powered lighting.

Attachments

Images (7)
  • Buss Bar 1
  • Buss Bar 2
  • Lighting 4
  • Lighting 09
  • Lighting 07
  • Lighting 06
  • Lighting 05

Those euro-style power strips are the best.  I use them everywhere.  BTW: They can be found for $1 each on eBay.


You generally cannot gang DC power supplies, unless they were explicitly designed to do so.  You can, of course, tie them together with a common ground, which can be switched. You can even share the ground with your AC neutral, which lets you run signals and switch motors on DC and still control them with insulated ground sections.

Thanks Avanti. I just add separate terminal strips from any new DC sources I use.


Today I added more power to the city area and powered up Saulena's Tavern and the Sinclair Station (sort of).


Before doing this I had to add the sewer inlet into Saulena's front curb, Then I located and drilled holes for the wires and plopped them where they belonged.


I post pics when I get home right now I'm working on another computer.


I decided to power Saulena's with AC and the gas station with DC since it has the Miller Engineering florescent light in it. Saulena's went well. BTW: I also switched the engine service area lighting to 10 VAC from 12 VDC to tone down the lights a bit under the water tower. When I get the engine house done, I run another lead for DC. 


As for the gas station. In my haste/dyslexia/mass confusion, I inadvertantly got the + & - mixed up. Hey...things like that happen sometimes. I went over the wall switch, turned on the power and went back to the gas station. No lights! Pulled off the roof (held by magnets thankfully) to check the wiring. Wiring okay, but the smoke coming out of the melted hole in the rubber shrink wrap over the driver board was not a good sign. FRIED! Didn't smell so good either. I called Miller Engineering and they will send me another board for $10. 


So how did this happen? On all the DC wiring I'm now doing, I'm using red and black ferrules to denote polarity regardless of how the wire looks. But on the gas station, I had two black ferrules. The wires were red and black, but not the connectors. I simply wasn't paying close enough attention under the layout. Here I was worried that I was substituting a 1000MA 12 VDC converter for the 800MA unit that I bought from Miller. Miller said that amps didn't matter as long as it was 12 volts, AND  THE POLARITY IS CORRECT. DUH!


This was another great reason TO NOT GLUE YOUR BUILDINGS DOWN. I was able to take the gas station back to the now-clean workbench and properly asses damage, remove the blown board and get it ready to receive a new one.


On another front, my windows and doors for my next projects came in the mail today from my laser cutting guy. I was just able to clean the workbench and we're ready for another project. Life is good!  

Last edited by Trainman2001

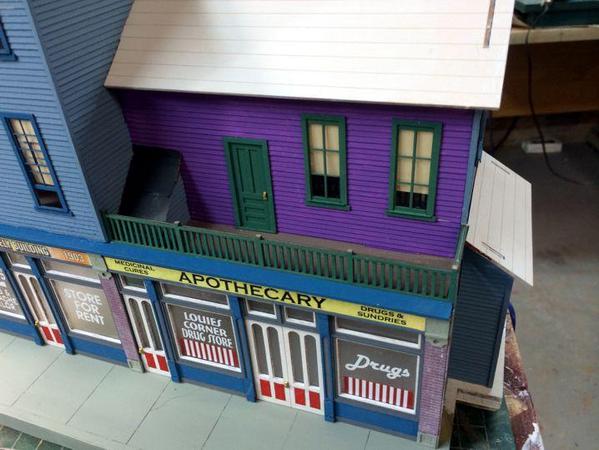
Thanks to Miller Engineering, the new florescent driver came yesterday and I was able to install it in the Sinclair station and get it back on the layout. I also finished detailing the base plate for the candy store and the future site of the Night Hawks Cafe. Both of these are now on the layout.


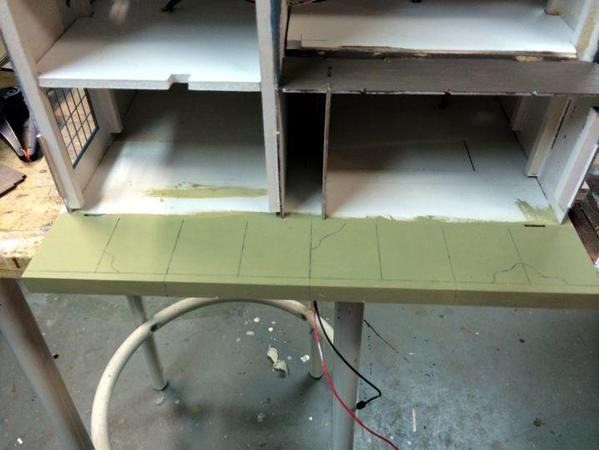
The candy store's base was a hodge podge of foam core pieces that needed to be covered with something else before painting. I also needed to put edging around the perimeter to better simulate a curb.


Because I was covering the base with an already-finished model stuck to it, I didn't want to spray the base with spray adhesive to stick on the next layer, so I used Aileen's Tacky Glue. If I was to do this again I would not use a water-based glue since it caused the paper covering to buckle as the paper absorbed moisture.


I carefully cut the paper to work around the building. Of course the building's walls aren't exactly straight nor square so I had to custom fit the paper in many places.
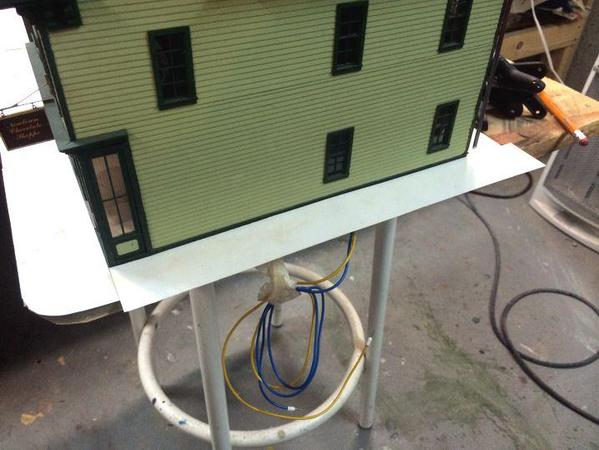
 Base plate 01

Base plate 03


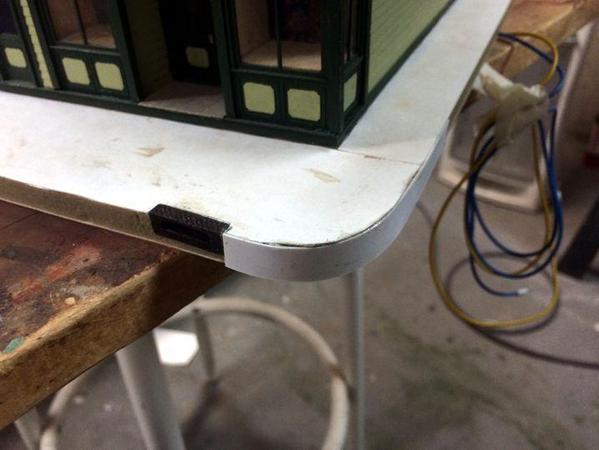
I used 0.010" styrene to trim the sides held in place by CA. The large gaps you see were subsequently filled with CA and after painting are not noticeable. 


I mixed a batch of paint to match the concrete color of Model Tech paint, but it came out a little to "wet cement" looking. I'll live with it, but I need to prefect the mix.


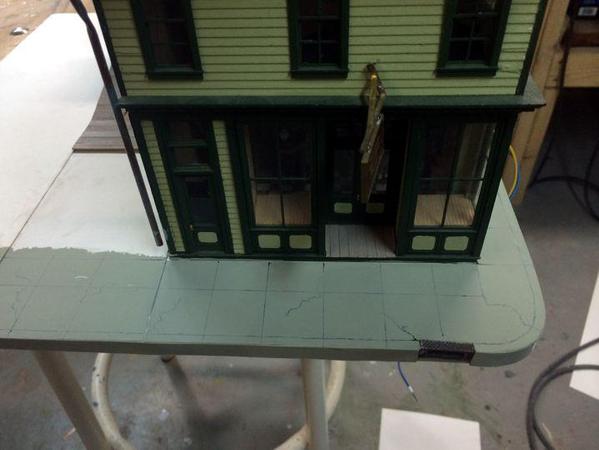
Before painting the sidewalk, I measured and scribed the expansion joints on four scale-feet spacing, plus an 8 scale-inch curb line. After painting the first coat, I went back over every line with a thin-line Sharpie adding some simulated cracks and then put another lighter coat on top to tone down the joint lines a bit.
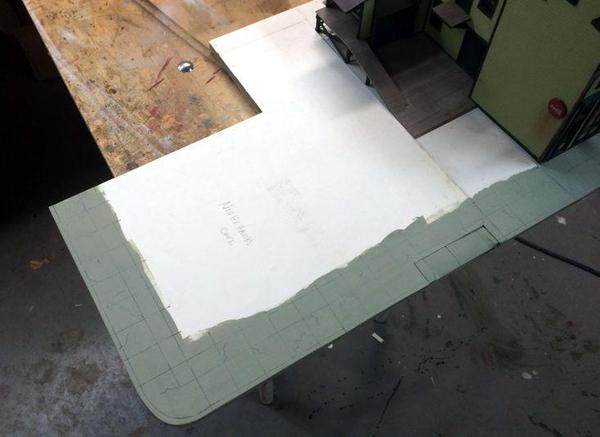
 

Base plate 07

Base plate 06


It was a little touchy getting the edging to join under the curb cut, but after slicing it and removing a tiny bit of stock, it stopped bulging out at that spot.


After painting the sidewalk I masked and painted the asphalt portion of the loading drive, and then used my earth tan acrylic house paint to paint the back yard and under the loading dock. Before this dried I sprinkled it with light gray gravel for the back and light buff for under the dock.


I painted and aged the fuel oil tank, glued some other details around the property and added a couple of W-S figures, and it was ready to go onto the layout. 


Buildings 08

Buildings 06

The white bare lot next to the candy shop is the future site of the Night Hawks cafe. Behind this on the right could be the Bar Mills Gravely Building if it fits, if not, I'll check the base board size when I start that kit. The side street sidewalk is about 4 scale feet, the main street's sidewalk is a scale 7 feet.


I also installed the Sinclair station and dropped its wiring through the layout.
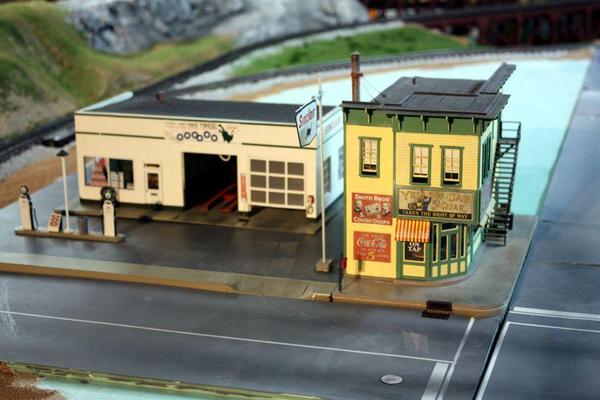
 

Buildings 07Both new buildings are waiting for the electric company to hook up their service. I've been told that they going to do that on Monday. BTW: I tested the new driver board before putting it on the layout and it worked fine.


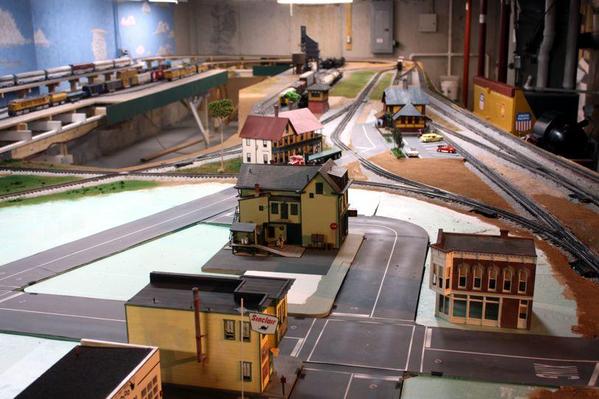
So here's looking down the layout to the buildings that are now in place. It's like watching a real-life community being built with the good lots being taken first.
 Buildings 10


If the laser cut parts don't arrive early this week, I'm going to start the kits that I have.


Attachments

Images (8)
  • Base plate 03
  • Base plate 01
  • Base plate 07
  • Base plate 06
  • Buildings 08
  • Buildings 06
  • Buildings 07
  • Buildings 10

I will keep sharing as long as folks keep reading. 


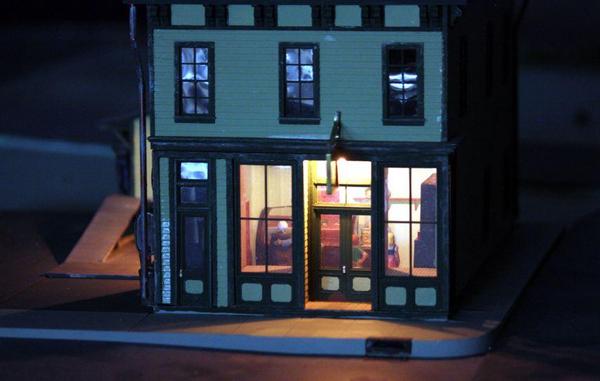
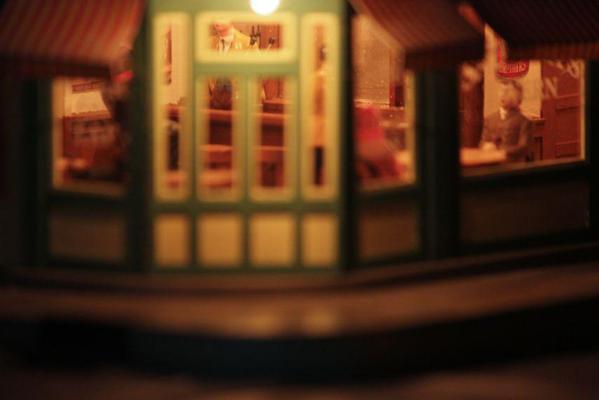
I powered up the candy store (hereby known as The Newtown Chocolate Shoppe) and the Sinclair station. It's amazing how well it worked when I had the polarity right.

 Lighting 15

 Lighting 11


Lighting 13

Here's the interior. If you look really closely, you can see images of candy in the show case. If I were to make that case again, I would have use clear styrene instead of acetate. Acetate couldn't hold the curved shape in the middle and bowed out. Styrene is stiffer and would have worked better. Oh well...

Lighting 14


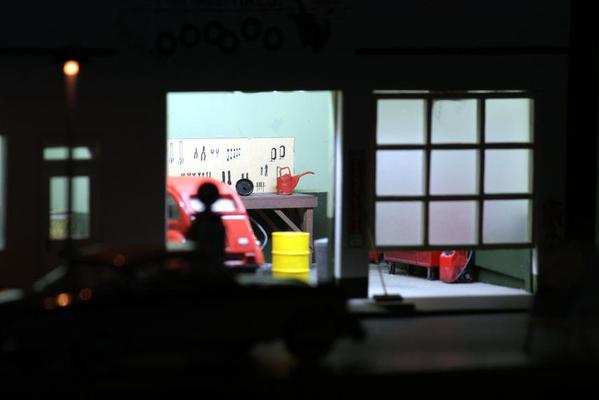
The florescent lighting really works for a 1950s gas station interior. For the incandescents in this part of town I switched from the 10 VAC to the 12 VDC since it made the grain-o-wheat bulbs a little bit brighter.


Here's a closeup looking into Saulena's. You can just make out the tops of the beer taps on the bar. This was hand made out of brass. I dipped the ends in CA and then gloss black paint to build up the end handle ends. 

 Lighting 12

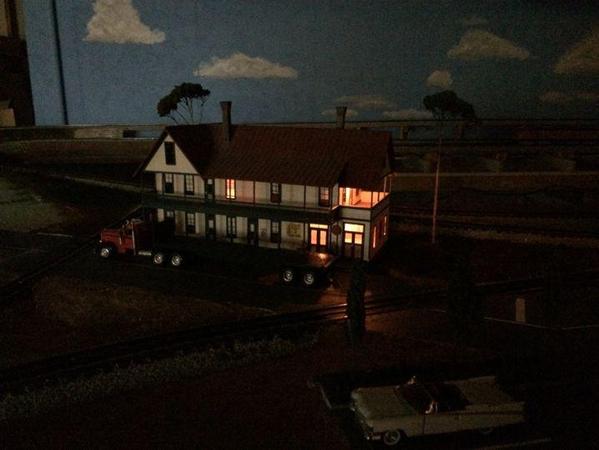
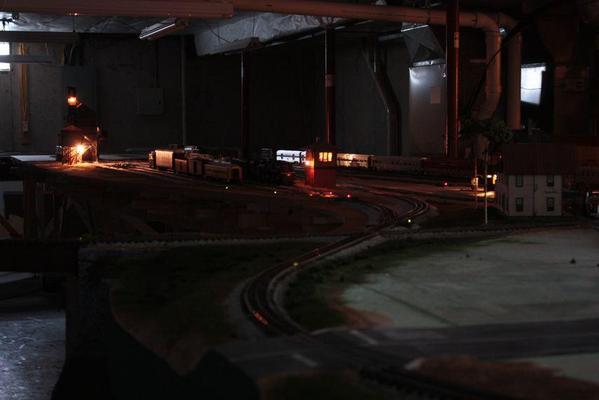
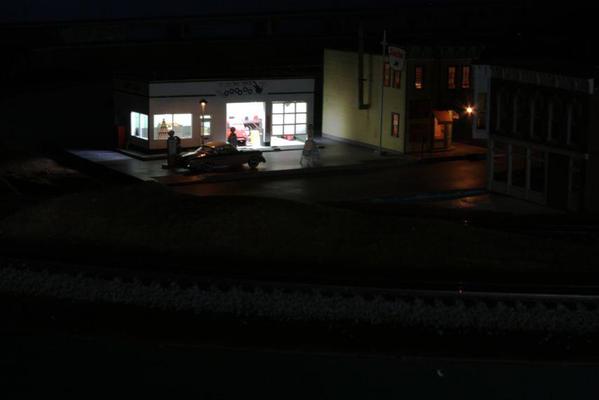
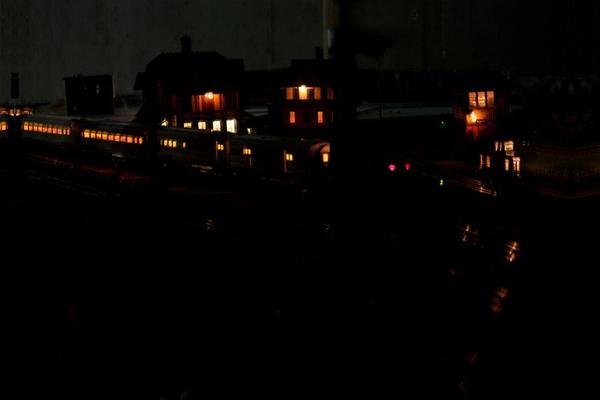
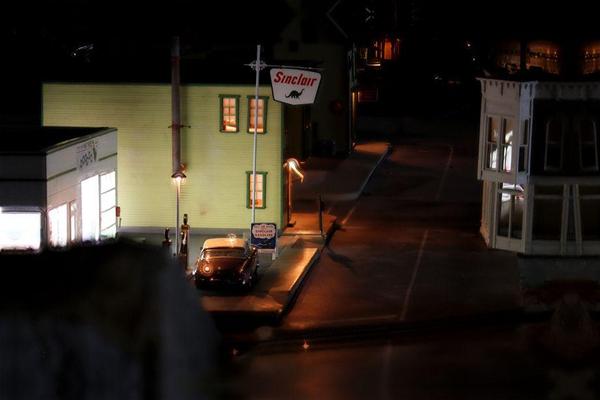
With these added illuminated buildings in place it was time for some more night shots. These were taken with the Canon. I experimented with various exposures and then after finding one that worked took a series at different focal points and use the CombineZP depth of field software to blend about 7 shots. This scheme works pretty well, but had a little problem with the bright points of light. You can see this as a sharp halo around all the light sources. 


Night shot 3

Night shot 2

Night shot 1


While waiting for the laser windows, I started the Gravely Building by Bar Mills. Bar Mills kits are among my favorites. They're very carefully engineered and laser cut. Windows and frames are assemblies that are self adhesive. This is my third kit with Saulena's and the Idaho Hotel being the other two.
 

The come in these splendid wood boxes with sliding lids which you can't throw away.


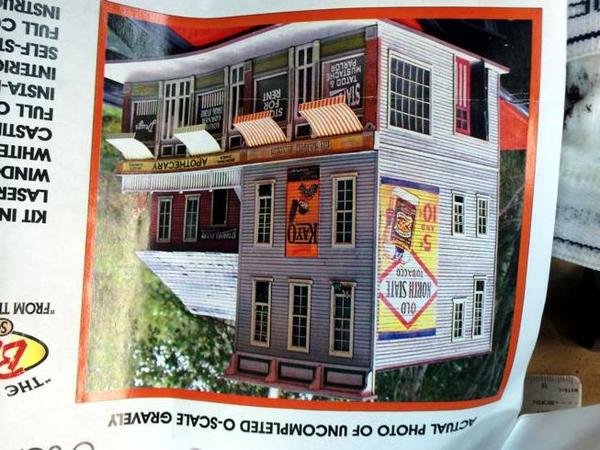
The footprint will fit perfectly down main street behind the Night Hawk's location. (Why is the picture upside down? I re-formatted it and reloaded it three times and it's still showing up upside down!!!) 


Gravely Bldg 02


The base plate is glued to 3/16 foam core which in turn is glued to 3/16 Masonite for stiffness and flatness. It's in two parts which I glued together at the same time as I glued it to the substrate.
 

Gravely Bldg 03


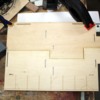
And would you believe it, this was the "clean" workbench just a few days ago. Most of the big walls are in two sections which I glued together using the technique I adopted when building the wings skins for the B-17. You press the edges together and tape the top side completely together. Turn it over, bend in half at the tape line and apply the glue into the gap. Fold flat again, wipe any excess glue and then tape that side shut. When it dries it's flat and strong. For balsa skins you use SuperPhatic aliphatic glue. It's very thin, leaves no excess, and sands beautifully. In this case, I used Aleen's Turbo Tacky Glue.


Gravely Bldg 01


All of the wall pieces get generous amounts of stiffeners as also seen in the above (messy) shop. 


Because this building is going to face in towards main street, it's going to be very hard to see inside. So... I'm not going to put an interior in it. It's not worth the effort. I will light it.

Attachments

Images (11)
  • Lighting 15
  • Lighting 13
  • Lighting 11
  • Lighting 14
  • Lighting 12
  • Night shot 3
  • Night shot 2
  • Night shot 1
  • Gravely Bldg 02
  • Gravely Bldg 03
  • Gravely Bldg 01
Originally Posted by Trainman2001:


Gravely Bldg 02


The base plate is glued to 3/16 foam core which in turn is glued to 3/16 Masonite for stiffness and flatness. It's in two parts which I glued together at the same time as I glued it to the substrate.


Gravely Bldg 03


Gravely Bldg 01


All of the wall pieces get generous amounts of stiffeners as also seen in the above (messy) shop. 


Because this building is going to face in towards main street, it's going to be very hard to see inside. So... I'm not going to put an interior in it. It's not worth the effort. I will light it.

Congratulations for the progress, It is very beautiful.

One question, Where you bought this item ?

Thanks,

Before I got to train work today I had to save our 35 year old Plycraft Eames chair. We had just had this refinished and re-upholstered last year for big bucks. This is not a real Herman Miller version, but is a well-designed knock off that was built in numbers in the 1970s. I leaned back last week and heard a loud "crack" and the chair tilted all the way back and was very floppy. I thought a screw broke, but it was significantly worse. The base plate fractured at a boss where the long screw holds the rubber snubber in place The fracture was over 300º around its circumference. It was attached at the rear and was flopping up and down instead of providing a firm anchorage for the tilt mechanism.


I found a source on the web for replacement parts, but it would have cost more than $270 and would have required a lot of re-fitting. Instead, I looked at the damage and thought that someone could TIG weld the crack. I found such a person on the internet and asked if he could do it. I brought it to his shop (RLC Welding in Louisville) and in 10 minutes and 20 bucks had an as-good-as-new mounting base, and the chair in now fully functional for another 35 years.


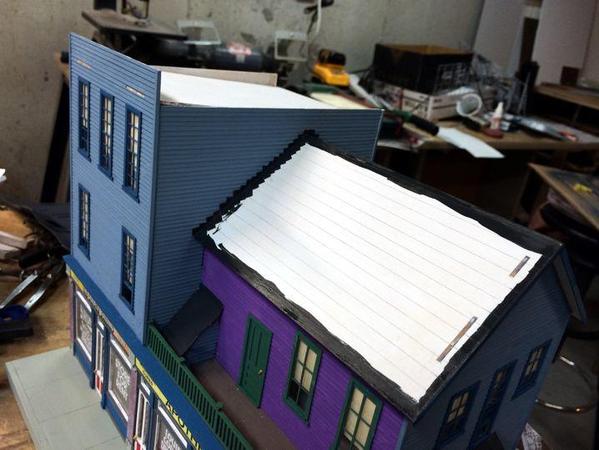
With that done, I spent the rest of the afternoon primer painting all of Gravely's wooden walls and spraying the many sheets of laser cut detail parts. It was very chilly and windy outdoors so spraying the walls was out of the question. Instead, I brush painted flat white Rust-o-leum oil-based paint. The main reason for this choice is to seal both sides of the walls so when water-based color is applied to the outside the walls won't absorb the moisture and warp.


Spraying the detail parts with Krylon grey primer didn't smell up the house too bad since I was able to spray it all in less than five minutes.


Gravely Bldg 18

Gravely Bldg 17


Next work session will be more fun... applying finish coloring. I'm planning on doing some of the building in two shades of Federal blue, and the other either a light green with darker trim. The front has lost of detail that will use color to pick them out.

Attachments

Images (2)
  • Gravely Bldg 18
  • Gravely Bldg 17

With only an hour about all I could do was get a color coat on the all the wall and start painting the window frames.


Gravely Paint 1


All the walls are a lighter shade of Federal blue with the exception of the second story office front which I painted a hand mixed blend of Vallejo magenta and craft colors Victorian Blue and white. It's a nice plum color.


For most of the windows, I'm painting them straight Victorian Blue. The office windows are going to be a non-lightened Plum. I still have to decide how I'm going to color the many-layered store front details. On the instructions they show antique white, white, orange bricks and red and concrete trim. I'm not sure I'm going to adopt that scheme. I may experiment in the computer to see if I can get what I want.


Gravely Paint 2


I'm brush painting the windows. It's difficult since it's so easy to get runs and blobs at the corner of the very fine frames. I'm going to try and use a diluted Victorian Blue and air brush the rest of the trim. I have some Testor's acrylic dilutent which should make it air-brushable. I won't use alcohol. It can clause clumps and it causes it to dry too fast and clogs the front of the air brush too quickly.


 I will start gluing things together tomorrow.

Attachments

Images (2)
  • Gravely Paint 1
  • Gravely Paint 2

Did some more painting. The first color coat needed some additional color and the acrylic paint sitting in the Chobani Yogurt dish was still usable from the day before so I threw a quick second color coat on all the walls. I then used the Testor's acrylic solvent and was able to thin the craft acrylic paint to an air brush consistency that worked really well. Actually, it exceeded my expectations.


I'm using Victorian blue for most of the trim and a custom mixed green for the trim that is around the plum-colored second floor office. 


Gravely Paint 3


Pre-painting all the laser-cut windows makes it real easy to assemble. 


I started gluing the building together with the rear and left walls, but caught myself up short realizing that with the floors in place it would be difficult to get the windows installed if all the walls were in place. So I stopped adding walls and built windows and doors for the still-open left side. 


Gravely Bldg 20


For the uninitiated, Bar Mills windows consist of: an external frame, the window with the upper sash, a separate lower sash and a small external window sill. All these 1/64" ply pieces have an effective pressure-sensitive adhesive on their backs, again making assembly pretty slick. After installing the windows and while I still had access, I added window shades made from manila file folder stock and some laser cut curtains that I bought from "Builder's in Scale". They're for HO/S, but they work okay in this small installation.


After installing the right side windows and wall, I finished up wiring the internal lighting by bringing all leads down through holes through the floor and base. Once outside, I then combined the red and black wires from each side of the building, insulated them with shrink tubing and used more tubing to hold the cable together. I added red and blue ferrules to their ends ready to be tied into the layout's DC lighting power.


Gravely Bldg 19


In the above I also show the pavement which was painted before anything was glued to the base. I also add a styrene strip on the front curbing to nicely cover the three layers of the base plate. Again, I custom mixed the "concrete" color. It still looks a little too much like wet cement, But I didn't want it to be too different from the building next door.


I tried the lights again...


Gravely Bldg 22


Here's the right side walls with its windows. The addition in front is trial fit. I'm going to put windows in that before gluing it to the building.


Gravely Bldg 21


Notice too that with Bar Mills two-piece windows, you can have them open. It makes the building look more lived in.


Here's the front showing the painted deck that fronts the 2nd floor office.


Gravely Bldg 23


Tomorrow, the rest of the structure will be in place. Roof will take some time and then details and bits of weathering. Unlike so folks who like to model backwoods narrow gauge where every building looks like it's about to "re-kit" itself, I want this town to be prosperous, well kept and looking towards the future.

Attachments

Images (6)
  • Gravely Paint 3
  • Gravely Bldg 20
  • Gravely Bldg 19
  • Gravely Bldg 22
  • Gravely Bldg 21
  • Gravely Bldg 23

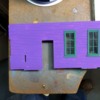
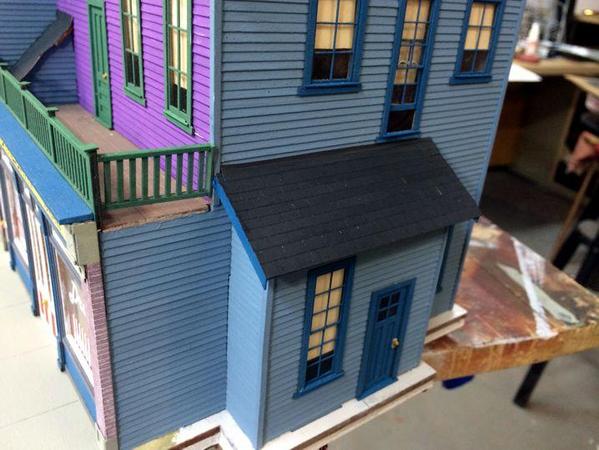
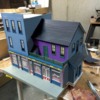
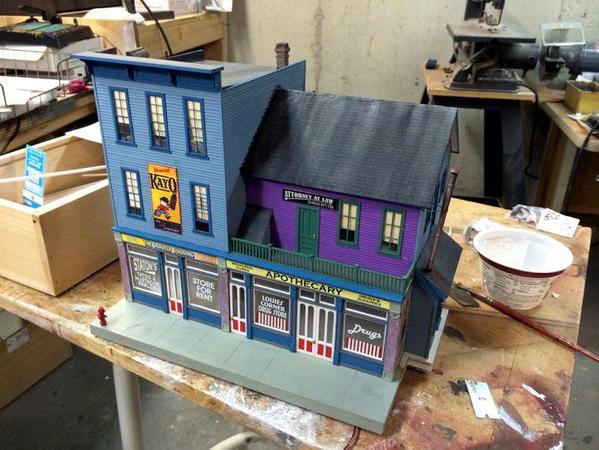
Progress continues to be made on Gravely's. The office front was completed, and glued in place along with the little diagonal roof covering the stair well to second floor. From this I moved to finishing the little addition on the right side. I then tackled the main store front. I can't believe how much faster it is to build a laser-cut kit than it was to scratch build that station. Whew!


Gravely Office Wall


Gravely Bldg 24


For the addition's roof I haven't decided whether it's going to be shingle, tar paper or standing seam metal.


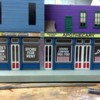
The front is made up of layers of laser-cut, self-adhesive, 1/64 ply with a laser base piece of solid wood. I had primed the base piece white and left it as it was. The main layers are painted primer gray and I also left them like that too. On top of these two layers when various layers of trim, some of which I painted Victorian Blue or a masonry grey color. The little sloped roof will also receive roofing material.


Gravely Bldg 26The above picture shows everything done except the glazing. The brick columns are painted a light brick red with rubbed on white weathering powder. The paint (brushed) filled up the laser-cut grooves denoting mortar lines. I took a #11 Xacto blade held upside down to re-engrave these lines before adding the weathering. I then wiped off the excess powder with a slightly damp rag. 


The signage was included with the kit. I cut out and glued the signs to the backing piece before laying down the laser-cut trim piece. This insured that the signage was glued and flat. I also put several coats of clear gloss to seal the images.


Here's the same piece in place with the glazing. 


Gravely Bldg 27


I came up with a better concrete color; Vallejo barley gray and some light yellow craft acrylic. It looked so much better that I repainted the pavement in front of the building to match the masonry trim on the brick columns. This front is not glued in place. All that's left on the front are the door knobs.


The front windows are mildly frosted which is nice since it makes it even easier to forego installing an interior and it will hide the ugly wires.


Next session will see the front permanently in place, finishing the main building second story front, roofs, roof coverings, and then details. The model only comes with one tall smoke stack that's supposed to come out of the right-side addition. No other roof penetrations were included. I may put a regular chimney which I have in my parts box. It also needs some plumbing stack vents since I'm assuming that a building such as this would have inside plumbing.

Attachments

Images (4)
  • Gravely Office Wall
  • Gravely Bldg 24
  • Gravely Bldg 26
  • Gravely Bldg 27

First thing I did today was run some trains. I dug out my MTH Rock Island A-B-A E-8. It had been in the box for over five years and fired right up. Ran well except from one strange problem. The B unit kept derailing on the one of the bridges. It would drag the derailed wheel until it past a switch and then derailed a bit more. The the derailed truck clobbered the loading dock on the Victorian Station. I didn't even realize it was actually derailed at that time. Instead I thought that one of the steps was protruding out beyond the truck too far. It was out further than the others so I fixed it.


But that wasn't the problem. In fact, I don't know what the problem is. I tried to isolate it, but it was binding as it came through the bridge and it would cause the truck to rise up. It also seemed to be dragging on the small curve after the bridge. I thought the track might have been out of gauge, but it was within a couple of thou to all the other track. It may be that an axle is out of gauge on the unit. I have to check that. The bridge has Ross bridge track with guardrails installed. The wheels seem to be binding in the guardrails. I have no problems with any other engines on these areas including the four-truck MTH Veranda. It tracks through it without a hiccup. With just the A-A lash up it had no problems at all. Same trucks! I may put some lead weight in the unit to keep it from riding up.


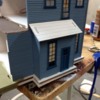
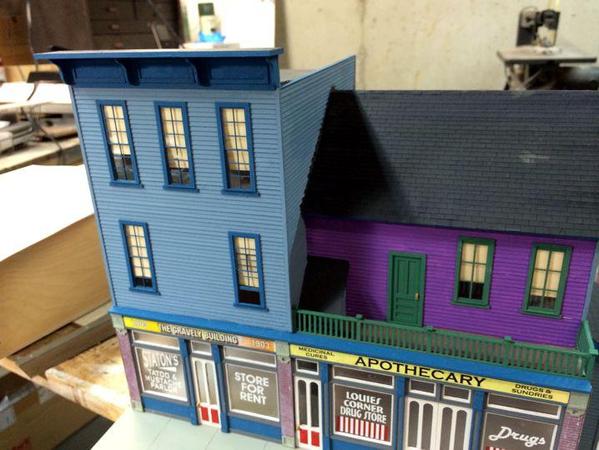
Then I worked on the Gravely Building. Got the front on, the upper front with its windows and then put on the roofs. Next session I'm do some roofing and get the porch rail installed.


Gravely Bldg 28

Various details go on the top of the 3 story portion and capping onto the wall edges. As I noted last time, I think these roofs will need some more chimneys and vent pipes to add interest.


Gravely Bldg 29


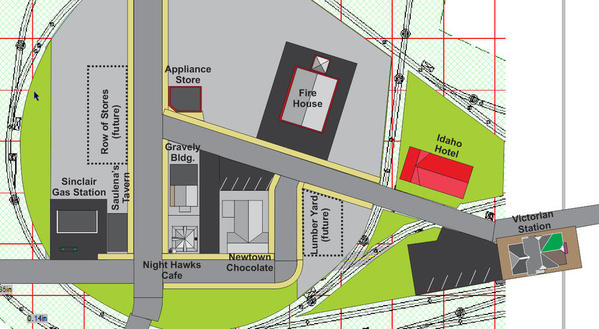
I spent some time with CorelDraw and redrew the "downtown" area using the actual buildings that are already there or about to be built. This shows how Gravely will be situated and why an interior would be a waste of precious creative time.


City Plan May 14


There's lots of prime urban real estate left so there's still some good prices on some great lots...

Attachments

Images (3)
  • Gravely Bldg 29
  • Gravely Bldg 28
  • City Plan May 14

Thanks Mark! What was the other site. I'd like to check out the work.


Before getting to work this afternoon (my wife cracks up when I refer to this as "work") I tried to pin down why that E8 B unit is tracking badly. I took the hood off, rolled it across the bridge area and watched one of the trucks binding. It appeared that the blind wheel set was riding off the rail and binding. I then measured everything with the digital caliper. Everything checked out and was within tolerance of the other truck's wheel sets AND the A unit's which showed no tracking problems. I then removed the bad truck and rolled it separately. I wasn't able to actually figure out what was happening but it seemed to be rolling better. 


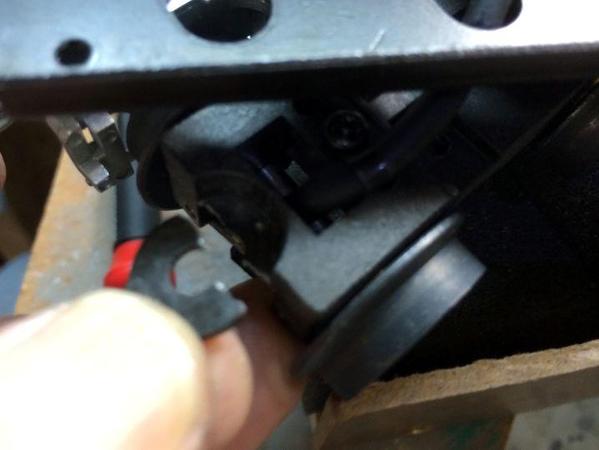
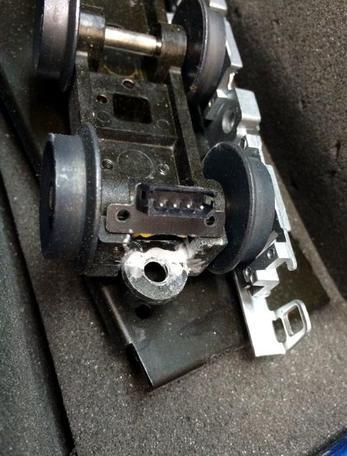
So I started to reassemble. I looked up and saw the dummy coupler sitting on the work bench. What was that doing there? I hadn't removed it. It was there because the casting had fractured and the mounting boss had split in half. I must have put undo pressure on it during the reassembly. Darn!


E8 Catastrophe 1


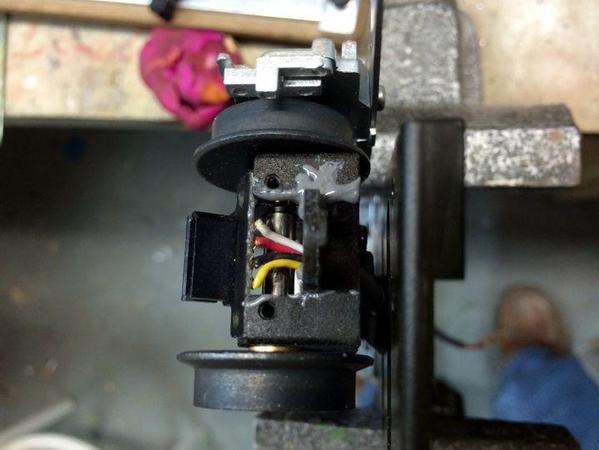
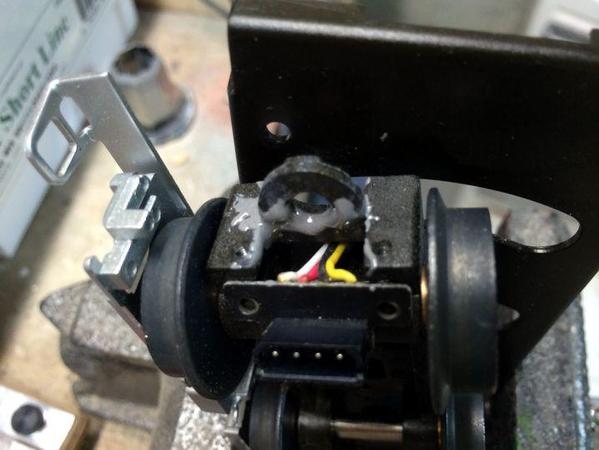
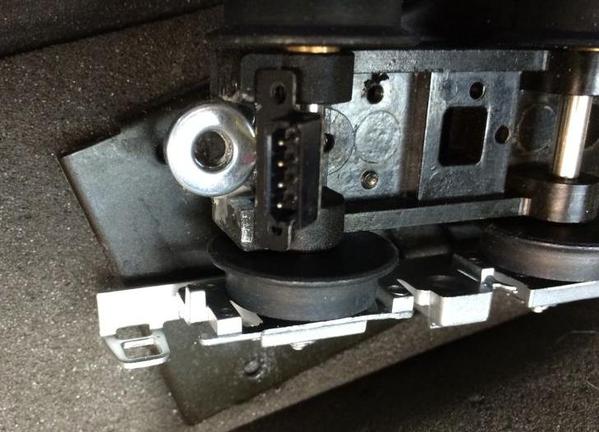
It's probably not going to ultimately work, but I decided to J-B Weld it back together just to see. I'm probably going to have to spring for a new truck so I might as well try it.


E8 Catastrophe 3

E8 Catastrophe 2


It takes a full 24 hours for this stuff to cure. Then we'll see. It has to support the whole pulling strain of a passenger train up a 2% grade. I'm going to research getting the new truck now since I want to prepared when it fails. J-B Weld is amazing stuff, but there's little surface area here and the excess has to be on the bottom, not the mounting surface for the coupler. I may go back and put and second layer to build up the casting a bit more. The connector screws to the face of this casting and that can't be too fouled by the resin. In looking at my picture, I'm wondering if I can add a washer underneath and J-B that also. It would greatly reinforce the joint. I may have to refit the connector's circuit board so it would clear this. I'll wait till it cures, level off the bulge on the bottom and add the reinforcement.


After all this tumult I got back to building Gravely's. I only got the tar paper roofing on the stair well and built the railing and installed it. For the last month I've been using the recumbent bike and the elliptical apparatus upstairs in our bonus room. Both my wife and I want to lose some weight, but more importantly, I just want to get in better shape so we can go hiking on vacations without passing out. With that, on exercise days I only have a couple hours to work downstairs.


Gravely Bldg 30


There's little cap pieces that go on top of the railing posts which will go on next session.

Attachments

Images (4)
  • E8 Catastrophe 1
  • E8 Catastrophe 3
  • E8 Catastrophe 2
  • Gravely Bldg 30

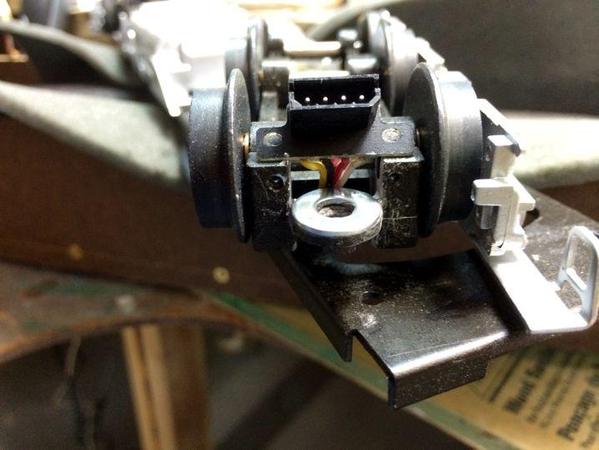
Before getting to Gravely's, let me update everyone on the fix for the broken coupler boss on the E-8. Like I noted when posting yesterday, the surface area of the broken casting was maybe a 1/32" thick and wouldn't handle the stress of pulling a train, but while writing I thought that if I could J-B Weld a washer to the underside of the lug it would multiply the surface area many times. Today I found a washer that not only was the same diameter as the lug, but had a hole of sufficient size to clear the screw head that holds the coupler to the top side.


Before putting the washer in place I took the Dremel with a diamond, tapered grinding burr and leveled the cured J-B weld. Doing this in two steps made sense, since it was good to have the lug solidly fixed to the truck body before fixing the washer with more J-B.


E8 Fix 3


The washer just dropped in place and fit perfectly.


E8 Fix 2


I checked to make sure the bracket holding the umbilical socket would clear the washer. It it didn't I was prepared to shave a little bit off the bracket's top. It actually clears which makes me think that the lug could have been engineered with a little more material in it.


Here's the washer with the J-B in place. Tomorrow, I'll reassemble the whole deal and put some more weight into the car body to help in tracking.


E8 Fix 1

I'm pretty sure that this fix will work. If it does, it's another positive reason why I spend the time making all these journal entries. Besides giving others ideas, I give myself some too.


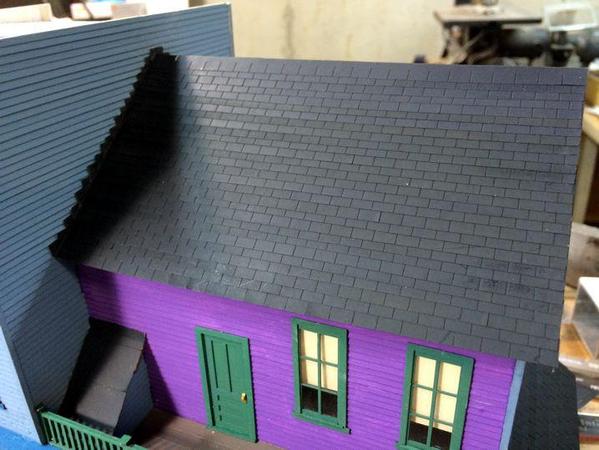
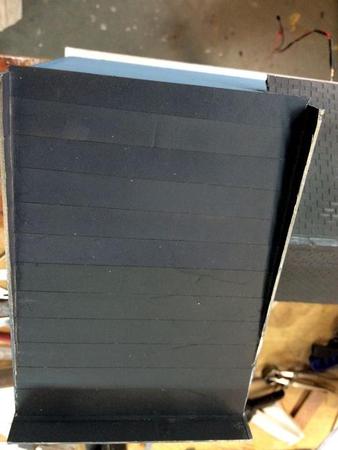
Now back to Gravely's. I put the railing post caps on and did minor touch up painting on the rails. I then air brushed all the laser-cut roofing materials weathered black and then a coat of Tamiya Flat Spray. I was using my trusting Model Tech Weathered Black which I can only buy directly from Badger Air Brush Co., and ran out halfway through so I mixed my own. It's just a dark gray.


I then roofed the right-side add-on first to get a feel for the self-stick shingle strips before tackling the main roof. It went quickly.


Gravely Roof 3


I hadn't painted the primed-white roof prior to shingling and the white was showing through the starter row of shingles in their laser-cut slices. In all other rows, it's hidden by the previous row. So I hand-brushed this area along with touching up the edges.


For the main roof I pre-shaded the edges with the same black so I would have to worry about white showing through.


Gravely Roof 4


You will also notice in this picture that I installed counter flashing where the roof meets the siding. As usual I overdid this a bit using individually cut pieces of pre-stick roofing scrap to stair-step the flashing up and down both sides of the roof.


Putting on the shingles themselves went smoothly and I was able to complete one side before ending today. I also primed a metal smoke stack that goes on the add-on's roof. I'll paint, weather and install it after the roofing is complete. There should be a bracing wire to the building halfway up. That's a simple addition. I also found an extra Grandt Line chimney that will look nice on the high roof.


Gravely Roof 2


All this black roof will respond nicely to some mild weathering.


Here's the progress shot:


Gravely Roof 1


Getting near the end.

Attachments

Images (7)
  • E8 Fix 3
  • E8 Fix 2
  • E8 Fix 1
  • Gravely Roof 3
  • Gravely Roof 4
  • Gravely Roof 2
  • Gravely Roof 1

Gravely's is almost finished.


The E-8 J-B Weld cured rock solid and is probably stronger than the other intact truck. 


E8 Fix 4


As planned the screw fit perfectly in the washer's hole and I was able to re-install the connector's circuit board without having to shave any material off of it. The wire harness was pressing pretty tightly against the washer, so just to be safe I cut a circle of electrical tape and placed it on top of the washer to isolate it from the wires before tightening down the connector. 


I also added some weight to the unit. I added probably 3 to 4 ounces of lead weight to the speaker housing (it's a dummy B so it's just an empty detail) to keep the center of gravity nice and low. And the unit tracked perfectly. What ever I did seemed to solve the tracking problem. I took a quick little video showing the lash up crossing the out loop bridge.


https://www.youtube.com/watch?...eature=youtube_gdata


With that out of the way I got back to Gravley's. I was about 1/2 done the second pitched roof and realized that I was probably going to run out of shingle stock. Sure enough, I was 4 rows short. Why? Partly because I spaced my shingle rows a little tighter than I should have creating more rows, but also because I chose to shingle the add-on building's roof which used up shingle stock. 


What I was left with were little bits of the ends that I pieced together to make two more rows. Bummer!


Gravely Roof 9


Gravely Roof 8


For the last two rows I used the cut off edges of the shingle stock and cut my own shingle slices. This completed the shingles.


For the peak cap I again used some of the "tar paper" stock and made cap shingles that were twice as wide as the body shingles. These were overlapped and bent over the peak on both sides.


Gravely Roof 7

Gravely Roof 6


I was also afraid that I'd run out of tar paper stock, but I had a stash of this from the Idaho Hotel. I used Evergreen Styrene standing seam roofing for that project and saved all the self-stick tar paper strips.


With the peaked roof complete, I went onto the flat roof. I had to air brush more tar paper stock with the weathered black so I also quickly shot the roof too and the back off the false facade on the building. This turned out to be pretty dumb. First of all there was the over spray which I was able to quickly re-paint, but then I used the hot air gun to force dry the roof and inadvertantly melted one of the side windows. It's in the window shade area and is what it is. I tried to remove the window, but I reinforced all the window's corners with CA and would have destroyed the window in trying to get it apart.


Gravely melted window


The tar papering went nicely. I ran it up each side wall of the parapet as would be done in practice. I also ran it up the end wall a bit.


Gravely Roof 5


This picture is upside down!!!


After roofing I finished up the facade with the addition of the decorative panel, the corbels and the roof topping. I added the remaining trim pieces all over the model and did some more touch up painting. 


So... other then some add on details (stacks, chimneys, vent pipes, etc.) and light weathering, Gravely's is almost done.


Gravely Bldg 31


It is a nice building with lots of character.

Attachments

Images (8)
  • Gravely melted window
  • Gravely Roof 5
  • Gravely Bldg 31
  • E8 Fix 4
  • Gravely Roof 9
  • Gravely Roof 8
  • Gravely Roof 7
  • Gravely Roof 6

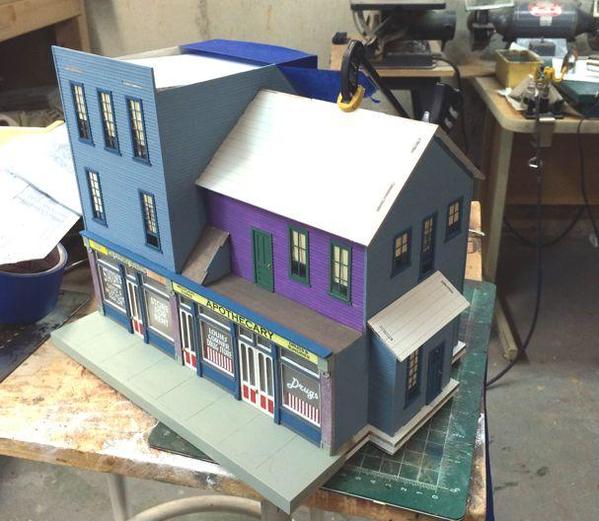
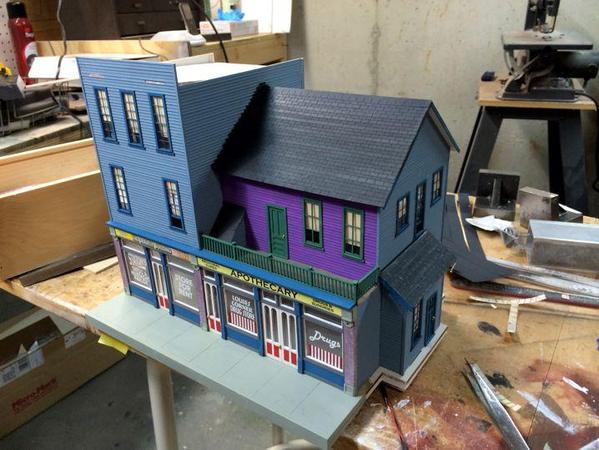
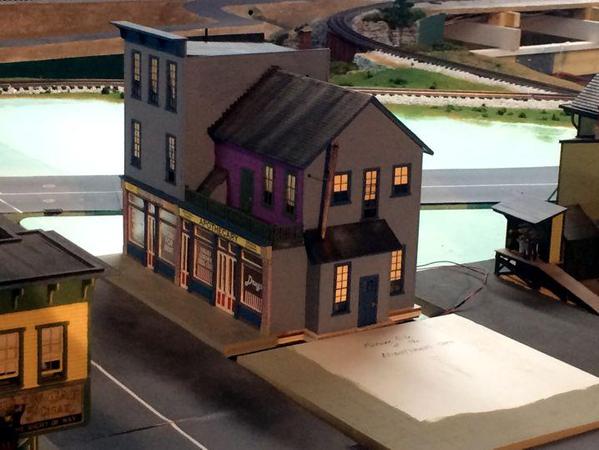
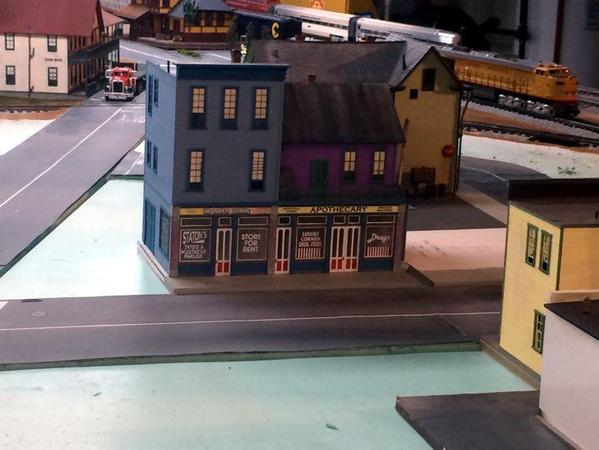
Gravely's is finished except for final siting on the layout. Added some details, signage, stacks and chimney. All in all it's a neat kit. Bar Mills' stuff is engineered so well that if something doesn't fit, the builder has put it together wrong.


I had some fun running trains for almost an hour today and made a longer composite movie on the iPhone showing off some more engines. This will be the last movie I make until I get my son in law's GoPro camera and mount it on a flat car. I have an Ap on the phone to control the camera remotely. I'm also limited when making the movies by myself since I can't operate the trains, features or switches and hold the camera at the same time.


https://www.youtube.com/watch?...eature=youtube_gdata


Gravely Finished 02

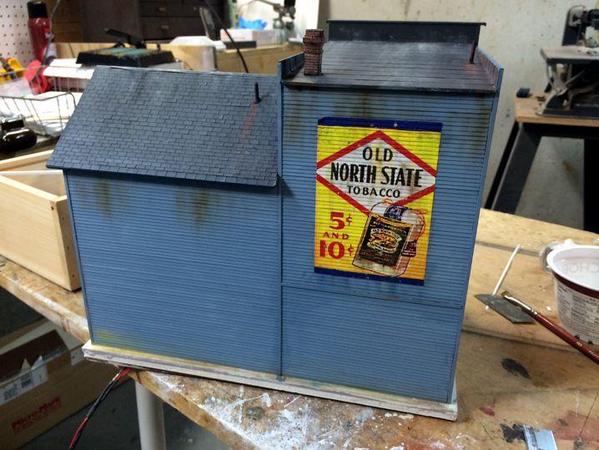
Gravely Complete 01I did some mild weathering mostly on the roof and the rear. The signage was printed paper included in the kit. I followed their instructions by first thinning the image by sanding on the back and the embossing and then slicing the glued-on image along each clapboard. This gives a nice painted-on illusion. I then used Dr. Brown's weathering powers to bleed the colors down.


Before putting the signage on the building I placed it where it's going to end up on the layout.


Gravely Trial Fit 2

Gravely Trial Fit 1


The final location will be more to the left than it the above. There will be a walkway and maybe a drive between Gravely and Night Hawk's.


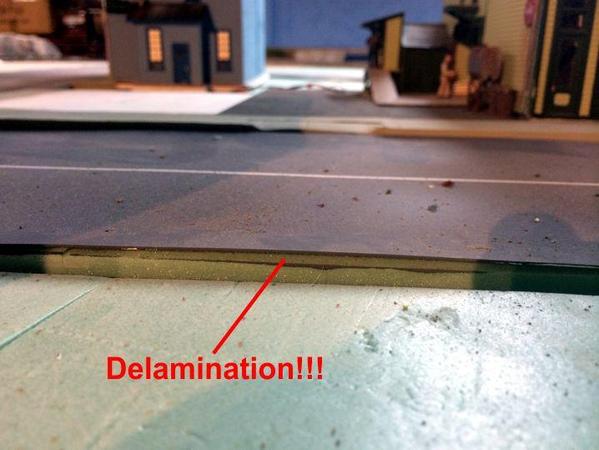
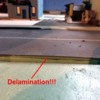
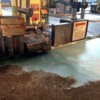
Meanwhile, another horror reared its ugly head. As I was putting the model into the town I wondered why some of my sewer inlets were now way below street level. How did they sink? They didn't! The edges of all the laminated Bristol Board/foam streets were delaminating. ALL OVER THE PLACE! Some are fixable and I began a campaign to do just that.


Street Repair 1


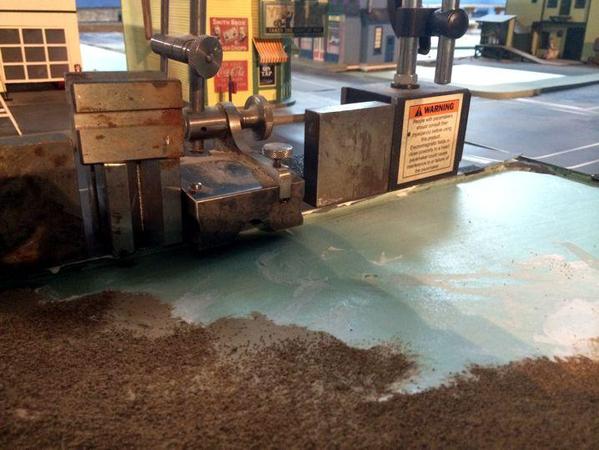
It's not a sophisticated fix. I just squirt gobs of Aleen's tacky glue into the gap and load the thing up with all the weight I could find. In a half hour, the edges are firmly glued. I did four edges today and will do more in the next few days. Of course some are not so easy to access—like the seams in the middle of the street.


Street Repair 2


Speaking of access... I'm seriously thinking about making an access hatch in the middle area of the city. It's really not easy to get to the middle, and I worry about putting too much weight (me) on these streets and foam panels. I did some surveying and there is an area that may be cut out without too much surgery. 


Again... and this bears repeating. I made two errors on this layout that I now regret. First using just the 3/16" Masonite to save $$ and effort of paving an 8 foot circle with the 1/2" OSB. To build up the correct rail height I used the foam insulation. This meant that the streets needed to be built up also and that led to blunder number 2: using Bristol Board to surface the foam instead of just painting the foam directly. This lame process cost me many, many prep hours and didn't produce the results I wanted. And now I have road maintenance!


Attachments

Images (6)
  • Gravely Finished 02
  • Gravely Complete 01
  • Gravely Trial Fit 2
  • Gravely Trial Fit 1
  • Street Repair 1
  • Street Repair 2

I'm leaning in that way too. Using EZ-Line, which is a very springy polymer, makes great wires, but they're taut. The HV lines are so small in gauge in 1:1 scale that in our scale really would be invisible. On the other hand, I bought two kits several years ago from Valley Model Trains which are super detailed house/transformer service hookups including a miniature electric meter. I'd like to use these on foreground buildings. But if I use the service hook ups how can I not wire the poles too?
Yes! I can empathize with that. Before retirement, all the train work had to be done at night when I could barely function. When I first put up the trains in Germany, it was when my wife made a 6 week journey back to the USA. I could do one of two things... go to bars and girlie shows or... build my dream layout. There simply was no debate. So I was able to come home from work, grab dinner and then disappear into the basement without any concerns about bed time until I couldn't see straight. Now, I get down to the shop at least four days a week usually for 2–3 hours. It's great to see how much progress you can make when you keep providing slow, but steady force on something. Literally every day I can see something happening.

I started, and almost completed, the second pole. I'm working myself up the learning curve. I'll have it all figured out by pole number 4 I figure. The first thing I did was add a mounting system for pole #1. Ashe Rawls admonished me to not permanently glue things to the layout, including telephone poles. Instead, he cements a sleeve onto the pole and glues a telescoping larger sleeve into the layout. The poles are inserted in the sleeves and can be removed whenever needed to be. I don't believe he strings wires on the poles and I don't think I am either.


T-Pole Mounting

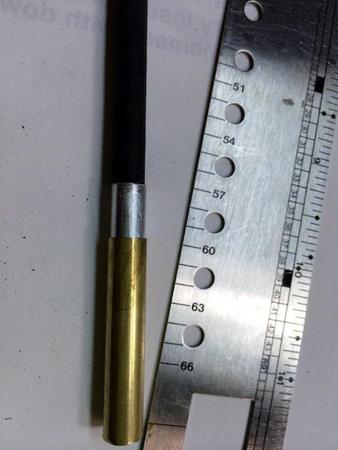
The only complication to this scheme is the inch and half depth of the sleeve and the 1/2" depth to the building bases I'm using. This means that the external sleeve would penetrate below the building board into the sub-surface foam and beyond through the Masonite. Since I don't want to permanently fasten the buildings to the layout, I'm going to have to be careful to only glue the sleeve into the building board part and not to the substrate below. To keep the pole from falling all the way through the outer sleeve, I crimped the end of the brass tube slightly to act as a stop.


For pole number two I changed the following:

  • Pre-coloring the poles with thinned Tamiya paint rubbed on with a paper towel and then wiped off. It's thinned with alcohol so it acts like a penetrating stain. Already looks better.
  • I used all the smaller sized NBW castings.
  • Used a fine-toothed razor saw to start the notches for the cross-arms and finished with a Xacto and then minor filing. 
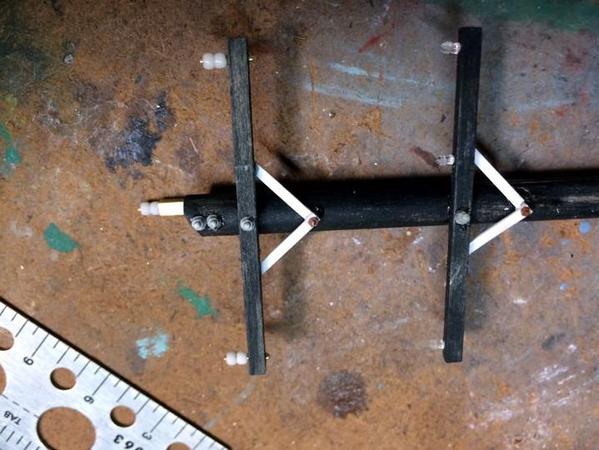
  • The small Tichy NBWs are so small that you can't hold them to file their backs flat so you need to mount them using their attached spindles. This required drilling a .030" hole right through the junction of the diagonal braces into the wood below. Really delicate operation.

The results look even better (to me) than the first iteration. I'm going to make this pole without a transformer. Probably every other or third pole should receive one.


T-Pole number 2


All I need to do to finish this one up is paint the metal parts a weathered aluminum/NATO black mixture and then add some weathering powders.


The diagonal braces are still a little to wide, but the narrower strip that I have is so fragile as to be unworkable for this application.

Attachments

Images (2)
  • T-Pole Mounting
  • T-Pole number 2

Before working on T-poles today, I did this:


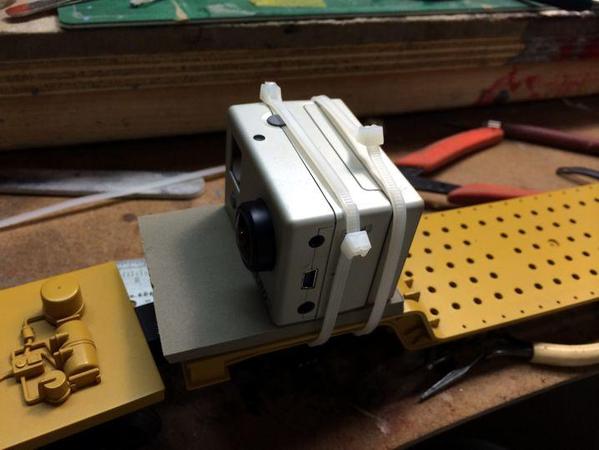
GoPro on TrainThat's my son in law's GoPro Hero2 mounted to a MTH heavy duty flat car. I used a piece of Flexibed roadbed underneath to isolate the camera a bit and then sent it on its way. I made 8 takes and then used MicroSoft Movie Maker to edit it down to something workable. I'm still learning how to align switches on the layout. As you'll see in the YouTube video, there's a lot of different routes you can take on the inner loop. I didn't run trains on the outer loop this time since I had my hands full with camera and train ops. I have a GoPro app on my iPhone which allows you to control the camera via its own WiFi connection. Pretty slick!


https://www.youtube.com/watch?...eature=youtube_gdata


After doing this for about an hour I started working on T-pole #3. I'm still moving up the learning curve and with each on I build I'm getting faster and more accurate. I upload more pics tomorrow. Grandson #1 is coming over tomorrow and we're going to work on trains together. We have a little time together between school and camp.


Attachments

Images (1)
  • GoPro on Train

Thanks all! Regarding speed... I didn't realize how fast it looks until seeing the footage. The camera was set for "medium" viewing angle. Even at that it's still a very wide angle shot which both distorts horizontal lines making them curve and makes things much longer looking and going by faster. Those E-8s on the hi-line looked like "E-10s" going on seemingly forever. The next time I do it will be with the train switching between outer and inner loops. And I will go slower.

Add Reply

Post

OGR Publishing, Inc., 1310 Eastside Centre Ct, Suite 6, Mountain Home, AR 72653
800-980-OGRR (6477)
www.ogaugerr.com

×
×
×
×
Link copied to your clipboard.
×
×