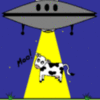
Hi there, just thought I'd share my latest fun layout project.
Our club layout has a farm with cows in it, so I wanted to add a cow abducting UFO for quite awhile. Surprisingly no one makes anything like this so I had to develop the accessory myself. I have most of the electronics worked out but am still working on painting the outer shell. I figured other people might also want to make animated accessories with sound, so I'm providing the details on what I built as a roadmap. I use a basic microcontroller as a sequencer, then just a sound and motor control accessory, and just use some discrete I/O for lighting.
----------------------
Design details:
----------------------
STRUCTURE: For the main saucer structure I used a hubcap from a Toyota Camry (although I don't own a Toyota Camry). I seriously went into a dealership and asked to buy 1 hubcap (like not a set of 4). The clerk was confused so I clearly explained it was for my flying saucer.
Originally I planned to house all the electronics and stuff in the saucer, but there's too much going on so it was just getting too heavy too fast. In the end I just had the lights and cow-lifting motor in the saucer and had a motherboard like thing under the layout with all the boards. The two are connected by a ribbon cable umbilical I hope to paint to hide in the coming weeks.
MOTHER-BOARD LIKE THING:
Okay so the electronics are broken up into 3 parts: The motor control, the audio and the sequencer.
SEQUENCER: I used one of those nice sparkfun redboards for the main controller which are just an arduino compatible board with an atmel 328p on them. You can use the Arduino IDE so it's easy to program up. Some of the parts are 5V and some are 12V so there's a handy DC-DC module I found for a few dollars on Amazon I use for all my projects now.
SETUP: First you wait for a trigger button on the side of the layout (it's labelled "abduct" of course). Once you receive the trigger you turn on the saucer lights (green ones). For the lights themselves I used these LED strip ones I found at a Frys for $70. You also send a trigger to the audio board at the same time. After you count a few seconds you turn on the abduction beam, start winching up the cow, and make the moo noise. Once the cow is close to the saucer you stop winching (it's a stepper motor so you count steps), turn the stuff off, wait a sec, then put the cow back down to the same spot. The kids will keep pressing it so a 60 second timeout on the trigger button is a must. For the abduction beam itself I just used an LED flashlight from Home Depot, took the battery pack off and wired the LED array directly. The redboard is a low TTL output so I use a simple IRF510 to close the circuit on the negative side for the LED strip and flashlight. Source goes to ground, drain goes to the light, gate goes to the TTL signals from the redboard.
AUDIO: For the audio I went with the wavtrigger board also from sparkfun which is polyphonic (it can play more than 1 sound at a time). It's pretty simple, there's 8 trigger pins for 8 sounds. When a trigger pin goes from low to high or high to low it makes that sound play. The sounds are loaded as .wav files onto an SD card that sits in the back of the board. The cow moo noise I just found somewhere on the internet. The Thermin sci-fi music noise was ripped from "it came from outer space 1953". The wavtrigger board has a stereo audio jack so again I just bought a cheapo speaker set from frys for $20. The speakers are placed under the layout and when turned up to give pretty good ambiance to the set. The only thing to watch out for is the .wav file needs to be 44100 KHz and a stereo file or it won't play properly.
MOTOR: By far the trickiest part was having the cow come back to the same spot so over time and many uses it doesn't drift and either snap the wire against the bottom of the saucer, or have the cow floating when it's supposed to be down. I used a stepper motor for this one since it's easy to count steps to keep track of position (easier than an encoder). The motor controller is also the big easy driver board from sparkfun which is simple, one input for step (a TTL pulse) and one input for direction either high or low. The last step was to tie the wire to the cow. For this I just used some transparent thread which is invisible enough for practical purposes.
SOURCE CODE: The arduino source that runs the thing is attached to this post so you can see how it's done.
Happy abducting!
~Adrian


