
Post 61          5/1/2020, (revised 10-23-2023)

Addition of a Wye to the Layout

No new tracks or major track changes have been made since I added a New Layout Addition board and control panel making an "L" Layout in 1988-89.  I love reversing of the trains and engines and have a reversing oval and figure eight on the main board inside loop and a double reversing dog bone on the New Addition board on the outside loop and can serve the outside loop of Main Train Board also.  I also have a turntable on the main board inside loop to turn around engines.

I now see that in the 1990's I noted on my "Train To Do List" to add a Wye to the layout.  This was found after this current project shown here was complete.  The installation of the Wye at that time would have made it more complicated to put down and take up the train boards from the floor it was on in those days.  I have made a "Train To Do List" every year since 1980.  It was necessary for me as my train layout was down on the floor for a month or two and many changes could not be made without access to under the train boards.  So I needed a list to be made when the board was down so I would remember what needed to be done when the layout was in storage in the work shop.  It is simply a piece of lined paper with ideas or things that need to be done on the layout or things I thought of finding at a train show or internet.  I start a new list every year and check the items off when done often adding a date.

After studying the layout recently, I thought a Wye would be neat to have on the outside loop where the two train boards form an L.


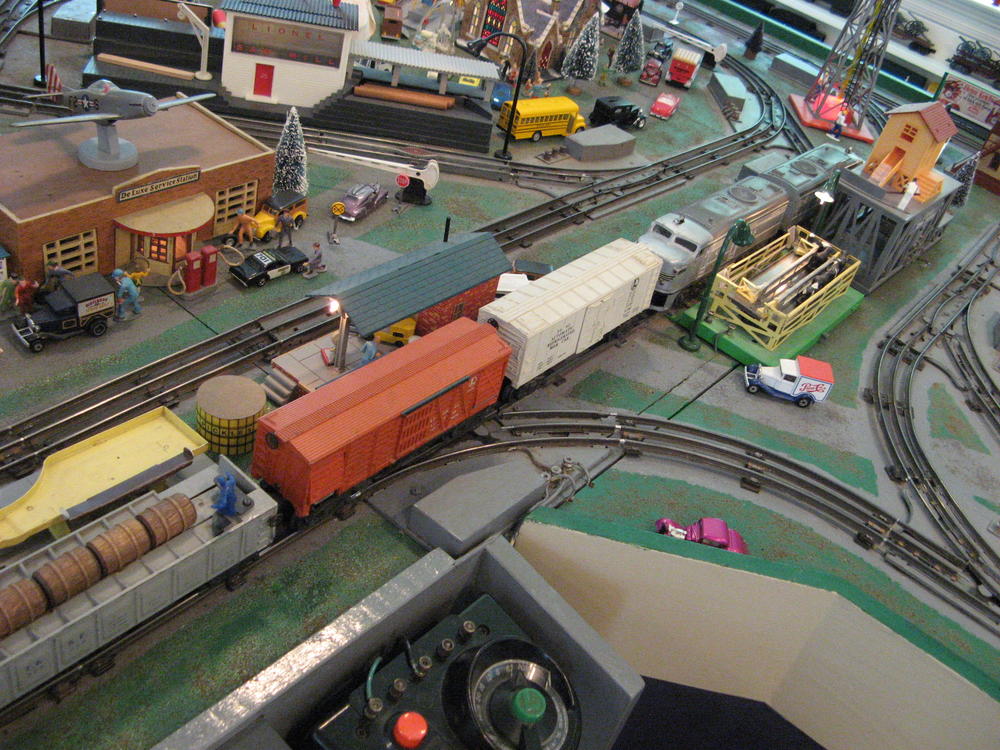
The Wye would go where the green and yellow Lionel 3656 stock or cattle corral is in pictures below

Train Overhead views 9-21-016 2016-09-21 019


The main problem was figuring out how to fit the two Wye additional Marx 1590 switches in.  I spent time with two right hand switches (shown as black below) between the two outside loop straight sections near the two switches that let trains move from one board to the other.

IMG_1312


The next challenge was when the switches were added, the two ends of the track on the switches would not line up to be joined with a small section of new track.  I needed more distance between the two new Wye switches to allow them to line up, as there were other switches that could not be relocated to give more room.  I gave up for a while but then figured if I cut about ¾ inch from one end of one switch and ¼ inch off the track rail ends of both switches near the new addition outside loop, they almost lined up.  I decided to go for it and cut off pieces of the two switches.  I unscrewed the track in the area and bent and pulled enough to get the two switches in place.


Picture of sawed off piece of switch on top of the switch, it was sawed with Dremel Moto Tool with fiber cutoff wheel

IMG_1426


IMG_1351


Playing with the straight track between the two switches I found a 1/2 section of straight track would almost fit and be only a little crooked.  I then cut the ½ section in half and added it to a ¼ section of curved track and it all fitted fine.

IMG_1373


I tested my largest loco with the most over hang on curves, a Williams BL2, and thankfully it negotiated the new Wye very well.  I added an uncoupling and operating car track section in the Wye, on the main board outside track also.

The new switches, now painted grey, are shown in the middle below.

IMG_1365


Another issue came up with the Wye instillation.  The Wye occupies the space where the Lionel 3656 Cattle or Stock Corral was located.  I wanted to keep the corral on the layout and came up with installing it on the inside loop of the main board, between the outside and inside loop track.  This location is close to the main control panel which is a must as the cows often need help moving between the corral and cattle car.  The 3656 corral platform was too wide to fit in this location between two main tracks, but that location is the only option.

The 3656 cattle corral on the right below is the normal size and butts up against the out side loop, seen as the bottom track below.  The 3656 cattle corral on the left is the modified one, with 5/8 inch cut off, detailed in the next paragraph.

IMG_1342


I found out the corral platform was 5/8 inches too wide to pass the BL2 loco and decided hack saw off 5/8 inches off the corral platform which was project in itself.

I  J B Welded part of sawed off platform to fill in the gap in the platform that was left and added two bolts to allow the top and bottom of the platform to be separated for repairs  (see below) .  The cows have to be careful with their tails!

IMG_1431


There was space next to the 3656 cattle corrals new location for a another Lionel 3462 milk platform.  There is a milk platform on the new addition train board which is very popular with younger visitors so a second milk platform is a nice addition for the Main train board.

IMG_1349


You can see on the picture below, the Wye and other switches can total 5 switches in a row if the train goes from the outside loop of the New train board to the inside loop of the Main layout board.  You can also see the new uncoupling and operating car track section on the Wye near the cattle corral. Note:  bottom switch not thrown in correct direction in picture below.

IMG_1353


Later picture after road way has been painted over with grass

IMG_1595


Picture of main control panel with two new mini push button switch control switches at the bottom.  The two Wye Marx switches operate in tandem with both being controlled by one push button switch for each direction as they always will both have to be worked as a pair.  Mini push buttons were added for the new uncoupling section (blue button in top of Y section) and the milk platform (located to the left of the track diagram with other accessories switches).  Wires were run to install push buttons for the Y switches for the addition train board control panel but not the push buttons as this control panel orange transformer only can operate the addition train board.


Main Control Panel push button switches and Y diagram tape at the bottom of picture below

Control Panel Main 12-28-2022 2022-12-28 016


The Wye push switch buttons have been painted yellow to help identify more easily.  The white, with blue top, mini push button switches are for Lionel Uncoupling or operating track sections for accessories like the cattle pen.

Control Panel Main 12-28-2022 2022-12-28 018


I am pleased with the new Wye and other changes.  The Wye adds new routes and a reversing route to the outside track for both train boards.  The Wye works easily going clockwise from either end but when going counter clockwise, a train must back into the Wye to turn the train around, just like the real train Wye's.  Even long trains do not have a problem backing up through the 5 switch gauntlet.  I wish I had figured out how to add a Wye on my layout years ago.

Picture below shows a long train navigating the 5 Marx switches in a row and the Wye going from the inside loop of the main train board to the loop on the new train board.

IMG_1356

IMG_1419

Operating trains on the outside loop is now more involved and requires more planning before throwing a switch as there are two more switch choices.  The layout now has 31 Marx 1590 switches.  Every model train layout should have a Wye.

Charlie

Attachments

Images (18)
  • Train Overhead views 9-21-016 2016-09-21 019
  • IMG_1312
  • IMG_1422
  • IMG_1351
  • IMG_1342
  • IMG_1349
  • IMG_1353
  • IMG_1356
  • IMG_1426
  • IMG_1373
  • IMG_1365
  • IMG_1431
  • IMG_1419
  • IMG_1595
  • Control Panel Main 12-28-2022 2022-12-28 017
  • Control Panel Main 12-28-2022 2022-12-28 016
  • Control Panel Main 12-28-2022 2022-12-28 018
  • IMG_1373
Last edited by Choo Choo Charlie

I am working on getting some flood lights on the new milk platform and the relocated cattle corral.  I am also installing more flood lights on the barrel loader and moved Ice station.  Notice the hobo camp in the Wye.  They moved from the left bottom corner of the main board layout.

I am finding the Wye requires a little mental planning to operate but I am learning.

IMG_1374

Charlie

Attachments

Images (1)
  • IMG_1374
Last edited by Choo Choo Charlie

Post 62   5/10/2020

New Flood Lights on Cattle Corral and new Milk Platform after Wye

Below are pictures of the new flood lights for the cattle corral,  milk platform and Ice Station.  I did a check on the load of the small 12v transformer that most of the lights on the main board are on except the Building lights.  The smaller transformer was running warm when all lights were on for 30 minutes and I checked both transformer outlet voltage with various lights on and off and determined to lower the load on the smaller transformer.  So I move the flood lights from the small transformer to the larger one was loaded much more than the other 12v transformer rated at 40 watts.  I have a clip on ammeter but it is for higher amps and would not read changes in the 0 to 4 amp range.

IMG_1453


This is a good picture the flood lights with room lights dimmed and of my Operating car train.  First is the barrel car with the barrel loader in the back ground, the second car is a the refrigerator car with the Ice station in lower right corner, next is the cattle car and corral, followed by the Milk car and the milk platform and the last car is a gondola which can receive barrels, canisters, atomic canisters from the gantry crane and logs or coal or whatever.   You can see working turntable and operating gantry crane in the back ground, three operating accessories in a row on the outside loop and an ice loading station in the foreground.

IMG_1476

IMG_1474

These light poles were made from Christmas plastic bells and plastic balloon sticks curved with a hot air blower heating gently.

Charlie

Attachments

Images (3)
  • IMG_1474
  • IMG_1476
  • IMG_1453
Last edited by Choo Choo Charlie

Balidas

Thanks for the kind comment.   I have been going back to old posts, mostly on page 1 and adding more detail and revised the post on the the control panels.

And thanks for the good question.  I have about 15 uncoupling tracks on the layout and only three are operating track sections including the new one.  I have one homemade operating section at the barrel loader that I made by adding one contact between the rails to unload barrels on the barrel loader.  I added the new operating section because it was easier than tearing up the tracks to add a regular operating section and it does not have to work in both directions at the barrel loader.

Half of my uncoupling sections were operating sections and I tore out the operating sections as they were uncoupling my old Marx tilt couplers if I have remembered correctly.

I desire more operating sections because I have the following cars that will operate with the operating section:  two 356 225 operating barrel cars, three milk cars, two cattle unloading cars and a 3459 and a 3469 coal unloading cars that will also unload logs.  Some can be placed almost anywhere with a Lionel dump tray but some have to have a platform.

That spot on the Wye seamed like a good spot to put a uncoupling track and I really have not decided what to do with that Wye triangle.  The operating part of the section has a wire that currently goes no where.  I could hook it up to a new push button and dump log or coal into a tray for the kids as the least thing to do.

More places to operate the operating cars gives the youngsters more things they can to do.  Even 3 year old's can operate the milk car at the milk platform.

Charlie

Last edited by Choo Choo Charlie

A couple of pictures of giraffe train in new Wye.

Lionel 2035 pulling the giraffe train into the Wye curves

IMG_1487


Picture below:   Navigating the curves and then Wye.  The giraffe train is going from the inside loop, through the outside loop of the main train board, then through the new Wye to the outside loop of the new train board and changed direction from Clock Wise to Counter Clock Wise.

IMG_1481


Giraffe train heading to the top of the Wye

IMG_1493

Charlie

Attachments

Images (3)
  • IMG_1481
  • IMG_1487
  • IMG_1493
Last edited by Choo Choo Charlie

POST 60   Homemade Lionel 9278 Life Savers Tank Car

...... I do not know what Mars- Wrigley Co., the present maker of Life Savers five flavors hard candy, would transport in a Tank Car.

Almost certainly Mars-Wrigley uses tank cars to haul corn syrup and high fructose corn syrup to their plants, both of which are prime ingredients in Life Savers candy. In fact, tank cars are used to haul these syrups (they're ubiquitous in American food products) to a variety of food manufacturers, including soft drink makers. I see lines of them all the time outside a nearby Coke-a-Cola bottling plant.

Nice job on your "home made" Life Savers tank car. I have the two Lionel-made ones, the MPC era no. 9278 from 1978-79 (love those MPC era tank cars), and the Cal Steward special production version, no. 52476, from 2007. Really like your 2-dome version.

This post-war style layout is great. There's something magical about these layouts that modern-era stuff can't match, particularly, I suppose, for those of us old enough to remember them from the 50s and 60s.

Last edited by breezinup

breezinup

Thanks for the comments and insight on tankers for corn syrup.   I am still looking for a Lionel Life Savers tank car.  On several occasions I made a Lionel copy car and later found and bought the Lionel car. That is okay as I enjoy making or modifying cars.

Yes I am a product of the Lionel 50s style layout and in the 1970s when I started my layout for my young children that was the obvious choice for me.  I have been a modeler since childhood and it usually revolved around making a model to float or fly and I made and flew or floated model airplanes and boats through college days.

Charlie

Train Nut

Thanks for the below comment and picture of yours on 2-9-2020 and I apologize for being so late.

Quote from Train Nut on 1-9-2020       "Very nice work. You really should post this on a separate thread so everybody can see the nice work you did on it. I was able to picked this one up at the train show in West Springfield a few weeks ago for $10.   It's in pretty good shape.  Had a little rust that I had to clean off on two of the wheels.  Personally, I think they could have got a little more for it.  I would say yours looks every bit as good as the original ! "

I usually post homemade cars on a separate topic I started on Homemade cars that has been running for a few years.  I liked the picture of the super Lionel Live Savers car you picked up at a great price.  I see they left a silver ring where the hand rail brackets were.  That would have been an easier way than my cutting around them with the colored tape.  They also used pre-printed colored plastic tape to install the life savers colored rings.

Thanks for the comments on this project.

Charlie

Last edited by Choo Choo Charlie


There is now a Table of Contents for this Topic.  It is located on Page 1 and the end Post 1 for your and my convenience.

Example

                                           Table of Contents

Page 1

Post 1  5-16-2016   Table of Contents & Overview of Action Packed 50’s period 027 Operating Layout

Post 2   5-17-2016  Layout videos and comments posted

Post 3   5-20-2016   The Beginning - Childhood Layout

Post 4   5-24-2016   Resources- Books and Magazines & Layout Track Plan and Features

Post 5   5-27-2016   Procurement of Trains, Track, Switches etc.

Post 6    6-4-2016   Project during planning – Tootle Wooden Pull Train

Post 7   6-11-2016   Main Board Construction

Post 8   6-20-2016    Active Touch Track Plan Diagram Control Panel Construction, Wiring and Transformers  revised 4-10-2020

Post 9   6-25-2016   Turntable Construction & Operation - Scratch Built and Inexpensive  revised 9-2019

Charlie

Last edited by Choo Choo Charlie

A couple of pictures of giraffe train in new Wye.


Lionel 2035 pulling the giraffe train into the Wye curves

IMG_1487


Navigating the curves and then Wye

IMG_1481


Giraffe train heading to the top of the Wye

IMG_1493

Charlie

Charlie:

Your layout is GREAT! You and Mitch Marmel should do "Dueling Giraffe Trains". Also, I love the church in your photos. Is that scratch-built or is it manufactured?

Randy

Thanks for the compliment on the layout.

The church is a Dept 56 ceramic building, a Christ in the City Series, Church of the Holy Lights model.  I am sure it came from a garage sale several years ago.  It is a real up grade from the small Placticville Church I had for several earlier years.  I really like the great stained glass windows on the Dept 56 church and they look great with when lighted.

This church is my only better quality Dept 56 building as most of my buildings are Plasticville, modified Plasticville or scratch built from 1/8 inch Masonite with often brick paper glued on.

Train Lots 5-10-2016 127

Train layout & room 1-19-2015 010

Train layout & room 1-19-2015 014

Charlie

Attachments

Images (3)
  • Train layout & room 1-19-2015 010
  • Train layout & room 1-19-2015 010
  • Train layout & room 1-19-2015 014
Last edited by Choo Choo Charlie

Post 63    7-2-2020

Marx Trains Run on the Layout

My childhood train was a Marx 999 freight set and an oval and figure 8 track plan with four Marx 1590 metal frog switches.  I stayed with Marx switches since I had four and they would pass fat wheeled Marx engines like the 999.  Here are some  pictures of many of my Marx engines and cars.

Marx 400, 0-4-0

IMG_1585

Marx 999, 2-4-2

IMG_1517


Marx 666, 2-4-2

IMG_1583


Marx 333, 4-6-2,  re-numbered

IMG_1601


Lionel 3435, with shell casting from Marx 333 4-6-2, with DC motor

IMG_1579


Marx 961, diesel switcher, 0-4-0, no reverse, w/999 motor

IMG_1554


Marx 8769, 0-4-0 Republic Steel diesel switcher w/ 999 motor, no reverse

IMG_1555


Marx ( no number, Like 702), 0-4-0 diesel switcher with reverse w/999motor and front  coupler installed

IMG_1548


Marx 1998  ALCO S-1, 2-4-2 diesel switcher.  I consider the Marx 1998 the best running engine of all the Marx, Lionel, Williams engines I have.  It will hold the track (without magnatraction !) and win a race through my oval and figure 8 track every time.

IMG_1506


Marx 1998  ALCO S-1, 2-4-2 diesel switcher with Lionel SW 1 body with 1 inch of body removed to fit

IMG_1507


Marx 1095, F7, A  Repainted

IMG_1522


Marx 1095, F7, A  Repainted

IMG_1520


Marx 1095, F7, B  Repainted

IMG_1521


Marx tin Passenger cars two 3152 coaches

IMG_1512


Marx tin Passenger, 3197 parlor car, added pickup and lighted marker lights

IMG_1513


Some Marx Cars

IMG_1592

IMG_1587

IMG_1526

IMG_1595IMG_1596

Happy 4th of July 2020

Charlie

Attachments

Images (20)
  • IMG_1517
  • IMG_1526
  • IMG_1506
  • IMG_1507
  • IMG_1522
  • IMG_1520
  • IMG_1521
  • IMG_1579
  • IMG_1585
  • IMG_1583
  • IMG_1601
  • IMG_1587
  • IMG_1595
  • IMG_1596
  • IMG_1592
  • IMG_1548
  • IMG_1554
  • IMG_1555
  • IMG_1512
  • IMG_1513
Last edited by Choo Choo Charlie

Post 64   8-14-2020   revised 9-7-2023

E Z Wooden Ties Added to Layout to make Semi-Super O27 Realistic Track

I have a 42 year old layout and always felt it would be a lot of effort and trouble to add ties but with lots of Chinese virus time on hand I decided to go for it.

In late July and into August 2020, I made over 600 wooden ties and added them to this 027 50s era train layout.  I looked at adding two wood ties between the actual track metal ties and adding three wooden ties and chose three as being better.  I chose to make the ties ½ inch wide by 2 inches long and 1/8 inch thick which is the size of the metal ties on Lionel and Marx 027 low profile track and these unrealistic sizes and spacing fit my 027 train layout.  About 150 ties were made bigger, 2 1/8 inch and 5/16 inch wide to be used on the new train board. This New train board deck is made from noisy plywood and the ties appear larger because pieces of truck inner tube was used under teach metal track tie, to quiet things down.

1/8 inch thick, one side smooth Masonite compressed wood was used for the ties.  It is already 1/8 inches thick and I had scrape pieces lying around, some being old used peg board.  A band saw and adjustable miter gauge were used to cut the ties out.  1/2 inch wide strips were used and cut into 2 inch long ties, 5 or 6 strips at a time, by holding then together by hand.  This way of cutting and the use of 1/8 inch thick Masonite made them EZ wooden ties.  Then the ties were filed to remove the rough edges.

One problem was the fine saw powder produced by the band saw cutting Masonite covered the whole shop.  This powder dust was much finer than typical saw dust.  I did not notice the dust at first and it was too late to put a vacuum hose on under the saw table for the first 150 ties.   A cut down 1 gallon milk jug was added under the band saw table and hooked up a small Red Devil vacuum to the milk jug hole.  A shop vacuum hose was set under the band saw table near the milk jug.  This solved the dust problem as most of the dust on a band saw is carried under the table by the blade.

The ties were painted with cheap Walmart black gloss paint.  Black was chosen because most of my track had black ties except for a couple sections that had silver and brown ties.  The black was too black and I spray a mist of light gray paint over the black painted ties to lighten them up.  It took me several part time days to cut and paint 600 ties.

I installed the ties by putting a couple of dots of Elmer’s white glue on between the tracks and thin bead of white glue on the ties.  The ties ties were cut with a pair of diagonal pliers to make small pieces to fill in spots blocked with soldered on feed wires, etc.  The glue holds them in place and they can be easily removed by tapping with a screw driver and tack hammer if necessary.  I had to remove a few that did not get lined up properly.  I would work on installing them about an hour an evening at time while watching TV news but found out I could not watch SEC replay football games as I missed  too much football !

The pictures below were taken while the tie installation was in progress and show some track before and after the wooden ties.

IMG_1732

IMG_1733

IMG_1738

I like the looks of my new ties and they break up my painted light gray attempt of ballasting.  The extra ties make the layout look a little less Toy Train like layout look.  But now the 31, Marx 1590 light gray painted switches really show out ( but not as much as the original Marx 1590 black and red paint job from Marx).  I now call my track Semi-Super O27 Realistic Track !

Charlie

Attachments

Images (3)
  • IMG_1732
  • IMG_1733
  • IMG_1738
Last edited by Choo Choo Charlie

Thanks for the replies fellows.

For now I am leaving the spur tracks around the roundhouse without wooden ties.  I have checked pictures of real roundhouse spur tracks and they show rails with gravel over the ties if they are on ties.  The modern or rebuilt RH may have the rails on concrete.  The RH spur tracks will not be very visible since they are covered with engines most of the time.

IMG_1801

JR I do not plan on adding ties to the switches at this time.  Only a few can be added  per switch as the center part of the switches occupied with the moving track section.

Charlie

Attachments

Images (1)
  • IMG_1801
Last edited by Choo Choo Charlie

Post 65  9-2-2020

Homemade Lionel style 193 Industrial Water Tower added to Old Train board

I have an American Flyer 772 Checker Board Water Tower on my new train board but none for the old train board.  The AF 772 water tower came without the checker board decal or plastic film so I painted a checker board pattern on it.  I had a Marx beacon light tower without a top.

I decided to make a Lionel style 193 Industrial Water Tower to fit on the Marx tower.  I used a mailing tube to make the tank and card board for the sloped roof.  I installed a flashing light on top from a mini Christmas tree light flasher bulb painted with red latex paint and installed a 20 ohm resistor in series to cut the voltage a little to increase the bulb life.  I added a ladder up the side of the tank and plan to make a pump house to set at the tower base in the future.

I chose to label my Industrial Water Tower with the town name of Spencer, N.C.   The location of the water tower will be on the old train board near my mountain as well as close to my turntable and round house.  I picked Spencer, N.C. as the location because it is mountainous and the old Southern Railroad repair facility, Spencer Shops Roundhouse and Turntable are there.  It is now called the North Carolina Transportation Museum with most buildings restored, and now includes many steam locomotives, diesels and old automobiles and planes.  The N.C. Transportation Museum is well worth visiting as well as the General 4-4-0 in Marietta, GA. as we did in 2017.

IMG_1788

IMG_1783

IMG_1785

Charlie

  • IMG_1788
  • IMG_1783
  • IMG_1785
Last edited by Choo Choo Charlie

Post 66   9-8-2020

Building a Lionel 6407 Flat Car with an Improved Rocket

Lionel took a red unpainted flat car, with no number but the word LIONEL on the sides, classified as 6407 and mounted a gray cradle from a boat carrying car.  They then bought a No, 529 rocket missile pencil sharpener from Sterling Plastics for a dollar or so.  The rocket has blue plastic Mercury capsule with pencil sharpener at its tip.  Lionel mounted the rocket to the flat car with elastic bands.

Picture of Lionel 6407.  This picture shows the rocket to be even a bigger Fat Boy rocket than real.


This car was made only in 1963 and is the rarest car in the space and military category.  The original 6407 flat car with the original rocket missile has sold for hundreds of dollars as most are found with missing or broken rockets.  The Lionel 6407 flat cars, with reproduction rockets, sell for less than $50.

The Lionel 6407, with the white oversized rocket, always attracted my attention.  I got more interested when I found out the rocket had a Mercury capsule on top of since I recently had built a Lionel 6413 Mercury Capsule transporting car and two Mercury capsules, which are on  Post 52, Page 6 of this topic.  The Lionel 6407 flat car with rocket would fit into my space train very well.  Then, I found out how rare and hard to find they are so I decided to build one.  I had a new red flat car body minus the trucks but I had some Lionel trucks as well.

All that was needed was to make the Rocket using a card board mailing tube.  I reinforced the mailing tube with Popsicle sticks glued with Elmer's white glue.  Fins for the rocket were from balsa wood.

IMG_4002


Bottom of rocket and balsa wood rocket engine nozzle

IMG_4003


A transition section between the rocket body and the Mercury capsule was made from balsa wood and wood filler and painted blue latter.

IMG_4001


Cradles for the rocket to be held on the flat car were made from hard balsa wood, shell lined with Popsicle sticks, 1/8 inch dowel pieces and painted grey.  A total of three cradles were made with two for other flat cars.

IMG_4051


I spray painted the rocket white and painted the fins red.  Red plastic colored tape was used to add designs on the rocket body and black, press on USA letters, were added.

I improved the Lionel's plastic toy pencil sharpener rocket by making mine support my Mercury capsule on it's tip.  The Mercury Capsule is one I made for my homemade Lionel 6413 Mercury Capsule transporting car, written up on OGR forum in a prior topic and here on page 6, post 52.  A false bottom was added to one of my Mercury Capsules to allow it to be stuck on to the blue transition piece with double sided tape.

The Mercury Capsule is show on the rocket tip in photo below.

IMG_1891

IMG_1894

IMG_1898

The rocket can be transported with or without the Mercury capsule attached.  Real rockets would not be transported with the Mercury capsule attached.


Picture below with recently built a Homemade Lionel 6413 Mercury Capsule style transporting car

IMG_1915


Pictures of Rocket Train

IMG_1899


The white rocket is a Lego toy.

IMG_1923

I like my fat rocket and flat car and it shows out well.

Perhaps I will letter it FAT BOY !

Charlie

Attachments

Hide
Images (9)
  • IMG_4002
  • IMG_4003
  • IMG_4001
  • IMG_1891
  • IMG_1915
  • IMG_4051
  • IMG_1894
  • IMG_1899
  • IMG_1923

Attachments

Images (1)
  • IMG_1898
Last edited by Choo Choo Charlie

Post 67     10-19-2020

New and Last Train Shelf added to Train Room

Still plugging away on the train layout and train room.  Sometimes you just have repeat a project if you want the result.  I was out of train shelf space.  For the last few months I have been slowly working on construction of a new and probably last train shelf for the train room.  It has been built as outlined on page 4, Post 36, dated 7/25/2017, and titled  "Train Shelves Built and Under Window Shelves Added" on this topic.

IMG_1925


The 1 inch X 4 inch x 8 ft boards were picked out at Home Depot.  It has been over 35 years since the last large train shelf was build and selection of number 2 lumber at Home Depot has deteriorated with straight boards being very hard to find.  I had to pick the straightest board and accept the knots. I had knots in a few boards before and some of the knots bleed though the primer and paint.  This time I resorted to coating the knots with clear epoxy glue in an attempt to seal in the knot rosin.

This shelf was made in two sections to allow easy moving, especially up and down stairs and is free standing with weight held on the floor.  Two screws into studs are used in each section to hold to the walls.  A backing of 1/8in thick Masonite was used to keep the shelves from sagging, true up the frame of the shelves and keep trains from marking the walls behind the shelf.  I had to arrange for my son to pickup a 4ft x 8ft Masonite sheet as I no longer have a Chevy Beauville van.  Grooves were routed into each shelf to keep train cars from rolling off the shelves.  Knots and gouges were covered with DAP Plastic Wood Latex Based Wood Filler and then epoxy glue applied to the knots.  A coat of Kilz water based primer was applied and followed by two coats of semi gloss off white latex paint.

The new shelve has one 8 inch wide shelf on top and two 6 inch wide shelves near the middle to allow showing of accessories or wider items.


A view of all my shelves, with the new one on the right

IMG_1933


All the train shelves are close to the train layout

IMG_1938


There are now 425 linear feet of train shelves that can hold about 425 cars or engines on average.  It will take some time to fill the new shelf section with cars and engines.  I like to keep at least four shelves empty to be available to store the trains on the layout.  When I get that many trains I will cull through the shelves looking for lessor cars or engines that will be stored in boxes under the train board.

Charlie

Attachments

Images (3)
  • IMG_1925
  • IMG_1933
  • IMG_1938
Last edited by Choo Choo Charlie

Lionelski

Thanks for the generous works and the response.

I just attended a grandsons 9 th grade football game (he is the part time kicker and mostly a soccer player) and realized 425 linear feet of train shelves is one and a third football fields long !  That is a lot of train shelves and a lot of trains.  That is how long a train all the cars and engines would be if all the shelves were full.  Before I sound greedy or like a big spender, only one of the engines and cars I have cost $100 and I have been collecting for over 40 years and never sell.  Most cars cost very little and many have been repaired or scratch built.

Charlie

Post 68   10-28-2020

Signal Bridges Fixed and Now Visible to Train Engineers

It is a rainy day waiting for small Hurricane Zeta to hit nearby so I have time to post.

I have had two Plasticville Signal Bridges on the layout for several years. One is seen between the mountain and bridge in the upper left and other by the Round House in the lower left below.

IMG_1942


I have looked over my layout and there were only two locations were a signal bridge would make sense on my layout track plan.  I have a third Plasticville Signal Bridge kit but no present location to put it.  The lights were hooked up to a section of track near the signal bridges.

In the case of one signal bridge, the lights could not be seen by the engineer at the control panel as it was not facing in that direction.

It was decided to make them visible to engineer and hook up the track sections under the signal bridge to indicate when power is applied to the track section.  They will not be used as real signal bridges.

It was decided to remove the signal light assembly from the bridge and remount it at a 45 degree angle from facing down the tracks.  This probably is not realistic for a real railroad but it does allow the engineer controlling the train at the control panel to see the signals on the signal bridge!


Signal Bridge with light assemblies turned toward control panel 45 degrees

IMG_1959

IMG_1957

I then wired each signal bridge light assemble to the track section below its spot on the bridge.  A light was added only on the green lens of the signal light assembly.

One signal bridge legs were too close together to span the distance over the pair of tracks and I had to spread the bases out making the legs bowed.  The attachment of the legs and the bridge was separated and 1/16 inch blocks were added on the bottom bridge joint.  This allowed the legs to be straight but were attached on, at an angle.  This option was chosen verses adding two inches to the width of the bridge which was much more involved and difficult.

IMG_1963


This Signal Bridge is over two of the outside loops tracks.  When this track section is switched to ON, and there is power on the outside loop tracks the green signal light will glow ON.  The engineer can see if these track sections are live by looking at their slide switch positions on the Active Touch Track Diagram Control Panel also but the signal lights are now active.

IMG_1955

IMG_1987


There is another outside loop track behind the wall shown to the left above.  There is another signal on the building near the round house that shows if this track is occupied.  This signal has three lights to show occupancy of the left, center or right of the hidden track.   Details of the signal is on Page 3, Post 22  of 9-9-2016  "Hidden Track installed behind Background and Industrial Bldg." of this topic.

The lights on below indicate the train is in the center and left of center part of the track behind the background

IMG_1982


The other Plasticville Signal Bridge is installed on the main board to the left of the turntable and cover tracks on the outside and inside loop. It is easily seen by the engineer at the main control panel.

IMG_1946

Charlie

Attachments

Images (10)
  • IMG_1946
  • IMG_1957
  • IMG_1959
  • IMG_1963
  • IMG_1955
  • IMG_1982
  • IMG_1947
  • IMG_1946
  • IMG_1987
  • IMG_1942
Last edited by Choo Choo Charlie

Post 69   11-18-2020

Homemade Lionel 6805 Atomic Energy Disposal Car & Homemade Electrical Pick Up (also see Page 7, Post 74 for additional details)

I have made a homemade Lionel 6805 Atomic Energy Disposal car,  a red flat car with flashing light radioactive canisters.  This was a easy job but I had to make a homemade electrical pickup.  I stared with two flashing light canisters purchased at a train show.  I had a spare red flat car body and two trucks.  Two sections of O27 track were used also.  The two pieces of track rail were glued to the flat car body with E6000 glue after soldering a piece of wire to each.

IMG_2004


An electrical pick up was made for one of the plastic O gauge trucks.  My method used to make an electrical pick up was to use a piece of thin brass shim, with a piece of tin soldered in the center to make the brass shim last longer.  I have made over 10 of these hard to find pick ups for my train collection.

IMG_2006

IMG_2011


Picture of outside rail pickup, simply wires wound loosely around the axles

IMG_2014

IMG_2017

IMG_2021


Picture of newly build car with my Lionel 16666 Toxic Waste Canister car.  The canisters on the 16666 car are not removable.

IMG_2002

Charlie

Attachments

Hide
Images (8)
  • IMG_2004
  • IMG_2006
  • IMG_2011
  • IMG_2014
  • IMG_2017
  • IMG_2021
  • IMG_2023
  • IMG_2002
Last edited by Choo Choo Charlie

Lionelski

Thanks for the generous works and the response.

I just attended a grandsons 9 th grade football game (he is the part time kicker and mostly a soccer player) and realized 425 linear feet of train shelves is one and a third football fields long !  That is a lot of train shelves and a lot of trains.  That is how long a train all the cars and engines would be if all the shelves were full.  Before I sound greedy or like a big spender, only one of the engines and cars I have cost $100 and I have been collecting for over 40 years and never sell.  Most cars cost very little and many have been repaired or scratch built.

Charlie

Nobody will judge you.  My guess is that 425 cars & engines puts you in the "average" category among people on the forum.  And congrats for doing it on a budget.

Post 70          1-4-2021

Homemade Transfer Caboose

Transfer cabooses are smaller and cheaper than road cabooses and not as good looking as say a Porthole N5C caboose.  They are usually made from flatcars with a cab attached, to provide minimal shelter, and railings to keep workers from falling off.  I was not aware of them until recently viewed in some later Lionel catalogs.

I have been in a build and fix caboose stage lately, with more to come.


The Transfer caboose cab was made from a junker Southern Pacific caboose by cutting it up with a band saw and hand X-acto saw.  See crack in the center section.

IMG_4062

IMG_4067


The end of the SP caboose was glued to the other end to make a cab.  A support was added along the bottom of the flat car deck to my cheap flat car that was missing the wire bottom reinforcing.

IMG_4071


Hand rails were made from solid 16 gauge copper wire which is about 1/16th of inch in diameter.  Solid copper wire is strong enough for this job and easy to solder and form in homemade jig shown below.  Most grooves were cut with a band saw and pocket knife for curved grooves.


End of car railing in jig below

IMG_4077


Flat car top side railing in jig below

IMG_4085


1/8th inch plastic pieces were glued below the spots for the hand rails to add support and 1/16th inch holes were drilled to hold the rails in place without glue.  I painted the hand rails yellow so they would stand out better and for safety.

I had an old set of Rock Island Lines decals.  They dissipated in water and I had to spray the decal sheets with a couple of coats of clear spray can paint to hold them together before applying.  There were three larger spaces between side flat car supports and three letters were added there.  Three letters, R I L which stand for Rock Island Lines, a common name for The Rock Island Rail Road were used.  A ladder made from N scale track ties and added to the cab.

IMG_2323

IMG_2320


New Rock Island Lines Transfer caboose with Rock Island Homemade 6 wheel Vanderbilt Coal Tender

IMG_4100

I plan to add a small, short smoke stack on the roof of the transfer caboose.  A 12 volt mini Christmas tree light bulb and socket with pig tails was installed in the cab and plan to make a track pickup, for one truck from brass shim stock as was done for a dozen or so homemade cars.

I think the Rock Island Lines Transfer caboose has turned out well.  Lionel did not make a Transfer caboose for the postwar era but has produced and sold several in the last 20 years.

Charlie

Attachments

Hide
Images (9)
  • IMG_4067
  • IMG_4071
  • IMG_4077
  • IMG_4085
  • IMG_2319
  • IMG_2323
  • IMG_2320
  • IMG_4062
  • IMG_4100
Last edited by Choo Choo Charlie

Post 71                                1-18-2021

Homemade Bobber Caboose

Recently a homemade transfer caboose was built and posted on it.  Caboose time is still in full play here, with cold winter days keeping me in, so here is another caboose project with few more coming soon to your favorite train forum.

A cheap Lionel Rock Island 8078 Bobber caboose that works well with a Lionel General 4-4-0 locomotive freight train has been owned for awhile.  Lionel even has recently reissued this Bobber caboose in several more railroad names and is sold with more expensive sets.

I have three General 4-4-0 locomotives and coal tenders and would like to have a second Bobber caboose.  I also have several Lionel SP type caboose shells, many in poor condition, so it is time to make a second Bobber caboose.

A caboose shell, with a good cupola section and front and back roof overhangs was picked from the scrape pile.  The caboose was cut to use the short end with cupola and cut the roof overhang end from the other end and glued the two together.  A base was made from 1/8 inch Masonite and made brackets to hold train wheels axles.  Four wheels from old Marx metal wheel trucks were used and made two axles from a heavy coat hanger wire.  A Lionel coupling was added to one end of the car.  Hand rails were made from 16 ga solid cooper wire with a jig.

IMG_4089

IMG_4083


The area below the end platforms was strengthen and the hand rails were installed.  The car was painted with spray paint, silver on the ends and roof and yellow on the sides to be a Rio Grande Railroad Bobber caboose.

IMG_4092


A small smoke stack was added to the roof and old Rio Grande decals were over sprayed with clear paint to ensure they held together when wetted to apply the decals.  They were then applied to the car sides and over coated with Matte clear spray paint.

IMG_2326


IMG_2327


Picture below with the Lionel  8087 Bobber caboose

IMG_2330


Below is a more recent picture showing the end walk ways and steps painted Silver verses black before.

IMG_2462

This was fun little easy project.   I now have two Bobber cabooses to allow running two General freight trains.

Charlie

Attachments

Hide
Images (6)
  • IMG_4089
  • IMG_4083
  • IMG_4092
  • IMG_2326
  • IMG_2327
  • IMG_2330

Attachments

Images (1)
  • IMG_2462
Last edited by Choo Choo Charlie

Post 72          1-19-2021

Adding an Ammeter to Layout's Three LW Train Transformers

I have had a Amprobe Clip on ammeter for 50 plus years and it is scaled for 0-25 amps Max.  I use it check the amp draw of appliances around the house and shop.  It has an adapter that lets you plug in the cord of an item into it and read the amps without cutting wires.

I have been curious as to how much amperage my trains draw especially when running a passenger train with Lionel 2400 series cars with 6 to 8 large original light bulbs in the 3 to 4 cars.

I thought if the Amprobe ammeter would work I could use it for all three LW transformer and not have to install three ammeters on the two control panels.

The Amprobe ammeter has a small area to show the 0 to 5 amp range I would use for measuring train amps and is hard to read accurately in that small area.

Picture of the $25 Amprobe Clamp on Ammeter, full range 0-25 amps:  note the compressed area of 0 to 5  amps on the left of the scale.

IMG_1690

To amplify this area to 5 times its size, I made a simple 5 loop wire doughnut and rapped it with electrical tape.  That changes the max reading from 25 amp max to max of 5 amps for the whole range of the meter.

Five coil wire doughnut installed and meter is rotated to each of three LW transformers

IMG_1711

Picture of 5 turn coil, LW transformer and Amprobe clip on ammeter, reading scale for 5 turn coil in service are the big numbers added on with taped on numbers.

IMG_1694

With a clip on ammeter I only need one meter and can move it to each LW.  They all now have a 5 coil donuts.

IMG_1698

The Amprobe ammeter works very well for monitoring trains and still is available for other amp meter needs.  I love it when I can re-purpose something I already have.


Charlie

Attachments

Hide
Images (2)
  • IMG_1690
  • IMG_1694

Attachments

Images (2)
  • IMG_1711
  • IMG_1698
Last edited by Choo Choo Charlie
Post 73                     1-28-2021
Painting and Lighting of Two Rio Grande Cabooses

On my current caboose effort I have painted two more colorful Rio Grande cabooses.  First I painted the previously made Rio Grande bobber caboose steps and platform silver as it was black.  Then I made a Rio Grande work caboose.  Both are shown below.

IMG_2489


I used a regular Lionel work caboose without tool boxes or a search light.

IMG_2484


The Rio Grande work caboose is shown below with the Lionel Tie ejector.  A work caboose is needed to hold a load of ties to feed the Tie ejector.

IMG_2542


Another repainted caboose is a Lionel SP style one as a Rio Grande Lionel 6-9166, mine shown below.  I added a D&RGW decal where the Lionel has some other Rio Grande symbol.  I got three Rio Grande cabooses from one and a half sets of Rio Grande box car HO decals.  I made smoke stacks for all three Rio Grande cabooses from plastic sprues left over from plastic model kits.

IMG_2483


I made some wooden tool boxes to glue under the caboose and used E6000 glue.  A homemade light pickup was made and installed and windows were cut from plastic milk containers and also glued on with E6000.

IMG_2486

Charlie

Attachments

Hide
Images (5)
  • IMG_2489
  • IMG_2484
  • IMG_2542
  • IMG_2483
  • IMG_2486
Last edited by Choo Choo Charlie

Post 74                                     2-9-2021

SP and N5c Cabooses converted to Union Pacific Cabooses  & Homemade Electrical Pick Ups - Colorful and Beautiful

I recently looked over my gaggle of cabooses.  It is heavy with dark, drab cabooses, several brown Penn railroad and several mostly black ones.  I do have three colorful bay window cabooses.  I searched through some Lionel train catalogs and saw, in some years, the 1980s and 90s, they made several more colorful cabooses.  Then I noticed some of the Rio Grande and Union Pacific, with bright yellow and some red were real stand out cabooses.  It so happened I had a set of Rio Grande and Union Pacific decals for each and several caboose bodies from a box full of junk caboose shells from a long time ago train show.  I have recently posted, on other topics of this OGR forum, my construction or repainting of several Rio Grande cabooses.

I also like to make or buy cabooses to match the coal tender railroad names.  I have coal tenders or diesel engines with Rio Grande, Rock Island and Union Pacific, including two of my recently home made Vanderbilt coal tenders.


Homemade SP Style Union Pacific Caboose

It was time to make a couple of Union Pacific cabooses.  I started with a SP style caboose as I had a good shell and also the frame with two trucks with couplings as I like my cabooses to have two couplings.  I found a SP style Union Pacific caboose with yellow  being dominate in train guides and on eBay.  Picture from internet.6-27779_5875-archive-up-caboose


I added a homemade light pick up to one of the trucks, made from brass shim stock and a piece of tin can for durability.  The pickup must be no wider than 3/8 inch so it will not short on Remote Control track sections.  I use trucks without working couplings to have room for pick up.  The white wooden block is glued on with E6000 glue and serves to move the pick up back and provides a place to put a small screw to hold the brass shim pick up.  See the folded edge on the shim to keep it from moving side wise and the plastic of the truck extends out past the wood block.

IMG_4129-001


Ground wire on the other truck for the Christmas tree 12 v light bulb and a socket that was mounted in the cab.

IMG_4133

IMG_4122-001


I painted the car with some Model Master Insignia Yellow paint I had and trimmed with Testor's Red.  I used semi gloss silver instead of gray of the Lionel Car in the first picture and added red trim and the UP loco to lively the car up.  Windows were made from plastic milk cartons and glued in with E6000.  The car is shown with my silver Union Pacific Lionel 2023 diesel AA set.

You can see I made and added two tool boxes under the caboose.  A fine looking caboose and it is for now my favorite.

IMG_2557

IMG_2555

Union Pacific SP style caboose with homemade Union Pacific Vanderbilt coal tender.

IMG_2590


Homemade N5c Union Pacific Caboose

Next I wanted to make a colorful port hole window N5c Union Pacific caboose.  I found this picture of a MTH N5c Union Pacific caboose on the internet.

jhgf


Here is a Lionel 9168 Union Pacific N5c caboose shell I have had for years and is one my more colorful cabooses.  This one has a, homemade by me, extended SP caboose metal base with SP caboose end plates with steps and added light and pickups.  Lets see if I can beat it.

IMG_2626

I found a good shape Lionel N5c caboose shell without the metal base.  I had several spare SP type metal caboose bases but they are about an inch too short for the N5c shells.  I cut the metal base in half and added one more inch in length by adding a piece of 1/8 inch Masonite to joint it and to lengthen it.  I glued it together with E6000 glue and added a Christmas tree mini 12 v light and socket with pigtails.  I also made a light pick up, as above for the SP style UP caboose, and added two trucks with couplings.

I had to make plastic end floor plates and steps as the shell of a N5c caboose shell does not have them like the SP shell has.

IMG_4125


The shell was painted with the Model Master Insignia yellow paint and Testor's Red paint.  Painting was a chore with all the masking and hand painted junction of the yellow and red.

I had think ahead and cut out some of the side rail to allow a Union Pacific logo to go on the side.

IMG_4128


The Lionel N5c shell has a translucent plastic window liner installed.  Wow, that is a handsome N5c caboose and probably a tie with the Union Pacific SP style caboose above.

IMG_2597


Union Pacific N5c Caboose with Union Pacific Homemade Vanderbilt coal tender.

IMG_2599


My two new Union Pacific Cabooses showing out.  These should liven up the layout.  It is hard to keep your eyes off bright yellow cabooses.

IMG_2608


Charlie

Attachments

Hide
Images (18)
  • 6-27779_5875-archive-up-caboose
  • IMG_4129-001
  • IMG_4133
  • IMG_4122-001
  • IMG_4122-001
  • IMG_2557
  • IMG_2555
  • IMG_2590
  • jhgf
  • IMG_4123
  • IMG_4115
  • IMG_4125
  • IMG_4128
  • IMG_2597
  • IMG_2599
  • IMG_2608
  • IMG_2611
  • IMG_2626
Last edited by Choo Choo Charlie

Post 75          2-29-2021

Two Repainted Cabooses --  Penn N5c and SP Santa Fe and Review of a latest Homemade Virus Sheltered Cabooses

I had painted the top of a brown Penn N5c bright silver years ago just to make it different for the 4 or 5 of them I had.  This one has an extended SP caboose metal base with SP caboose end plates with steps and added light and pickups.  See I was doing these mods years ago.

It always was too bright of a roof.  I found a picture of a later Lionel Penn N5c with the yellow cab and dark gray or black roof and painted her up.  I liker her much better and I believe Penn RR had at least one caboose painted this way.

IMG_2611


I had several junker SP style cabooses and a couple Santa Fe locomotives so a second Santa Fe caboose was desired.  Also I had only a couple Red Cabooses so a bright red one was in order.  A light pickup was added to the new Santa Fe Red Caboose and I had some Santa Fe decals on hand.

Windows are milk jugs panes and wooded tool boxes are glued with E6000 cement, that will stick to anything.

IMG_2691

Sante Fe Caboose made 2-16-2021 2021-02-16 003

IMG_2674


The following  8 cabooses were make in the last two months of the virus shutdown.

IMG_2688


All cabooses together, boy they are really colorful and bright when I use the Flash.

IMG_2681


Charlie

Attachments

Images (5)
  • Sante Fe Caboose  made 2-16-2021 2021-02-16 003
  • IMG_2674
  • IMG_2688
  • IMG_2681
  • IMG_2691
Last edited by Choo Choo Charlie

My grandson & I both love your ATSF caboose! I see the pic w/ the Lionel CB&Q ice reefer. How about doing a CB&Q custom-paint "way car" ? (That's what Burlington called them.) Did you cover in-depth the construction of your turntable? (Maybe I missed it?) I am always amazed at your work - so ingenious & yet so thrifty! You should write a book entitled "Lionel Model Railroading for the Budget-Challenged."

Bill

Thanks for the kind comments.  I am not aware of way cars, always something new to learn.  That Burlington ice reefer came with my Lionel Icing Station accessory.  It would not take much to make a reefer by adding a hopper into the top into a milk car or box car.  The reefer is part of my operating car train that is always on the layout and has a milk car, cattle car, barrel unloading car, log dumping car to dump on to the Lionel Sawmill  and a gondola or coal car to accept canisters from the Gantry crane or coal form the mine car loader.  For now one reefer is good and I am not tied down to any railroad line.  I am glad you and your grandson enjoyed the ATSF caboose.

Yes this topic, on post 9 on page 1, has details on my $10 turntable and roundhouse and most everything on my layout including lots of my homemade cars and accessories.  There is a table of contents on page 1 also to allow anyone including me to find where each subject is.

I could have bought all the things I homemade, (eBay has most if you can out bid and pay postage for them) but I really like to make many of them and have been a model builder since childhood and found I enjoy making them more than operating or running them.  The turntable is a good example of having fun planning it and building it for next to nothing 43 years ago.  They are very  simple unless you need an automatic indexing one.

Charlie

Last edited by Choo Choo Charlie

Add Reply

Post

OGR Publishing, Inc., 1310 Eastside Centre Ct, Suite 6, Mountain Home, AR 72653
800-980-OGRR (6477)
www.ogaugerr.com

×
×
×
×
Link copied to your clipboard.
×
×