A hinged lift up requires the plane of the hinge point to be at the height of the railhead. Then you can set the rail joint at 1/16" to 1/8".


Translated, it means the hinges need a block under them on each side.


I suppose you could hide that under scenery or something like a signal box.


A recent thread discussed this with photos.


A lift out is elegant simplicity.


Originally Posted by Moonman:

A hinged lift up requires the plane of the hinge point to be at the height of the railhead. Then you can set the rail joint at 1/16" to 1/8".


Translated, it means the hinges need a block under them on each side.


I suppose you could hide that under scenery or something like a signal box.


A recent thread discussed this with photos.


A lift out is elegant simplicity.


After trying to track down the right part the last few days, I'm leaning more towards a lift out. 


Bridges are built out of  1" x 2"  and are locked into position by seating on a 2"x 4".  I've seen a few guys use brass alignment pins to ensure proper alignment.  I'm thinking of exploring that option.


Originally Posted by Jacobpaul81:
Originally Posted by Moonman:

A hinged lift up requires the plane of the hinge point to be at the height of the railhead. Then you can set the rail joint at 1/16" to 1/8".


Translated, it means the hinges need a block under them on each side.


I suppose you could hide that under scenery or something like a signal box.


A recent thread discussed this with photos.


A lift out is elegant simplicity.


After trying to track down the right part the last few days, I'm leaning more towards a lift out. 


Bridges are built out of  1" x 2"  and are locked into position by seating on a 2"x 4".  I've seen a few guys use brass alignment pins to ensure proper alignment.  I'm thinking of exploring that option.


You don't need the entire hinge way above the layout, just the pivot point.


If you use brass locating pins you can also use them to carry the electricity to the tracks eliminating the wires and plugs.

Originally Posted by Jacobpaul81:
Originally Posted by Moonman:

Contact forum member TomTee. It's tricky. At the end of this thread he mentions someone to do it or he could describe the method.


Pins and micro-switches to kill approaching track power.

Yep -  TomTee's idea of the Freeman Square Head Dowels is what I was thinking...


https://ogrforum.ogaugerr.com/t...ved-lift-out-section

You should be able to do it. That's it- a beautiful thing.

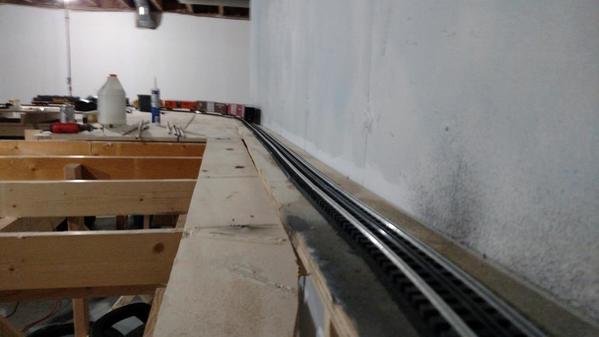
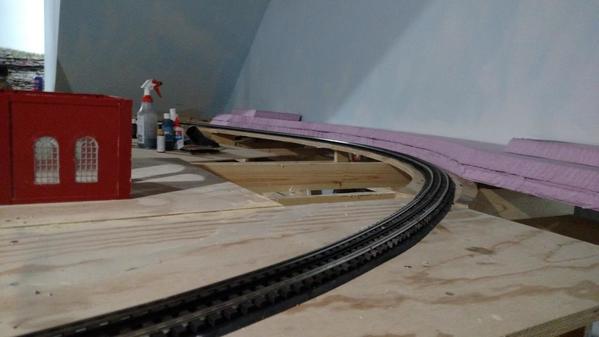
Finished painting and adding base shrubberies to one half the alcove.  Other side is in and in the paint process.   I started to rock in the area against the wall then changed my mind.  Hence the dripped black paint.  Found some appropriate sized boxes to help me scale out for some background warehouses to fill in the wall space here.  Now I just gotta learn to scratch build.  

IMG_20151216_084604808IMG_20151216_085232081IMG_20151216_085358247

Attachments

Images (3)
  • IMG_20151216_084604808
  • IMG_20151216_085232081
  • IMG_20151216_085358247

Well - 8-10 months into the build and I'm tearing a huge portion out... Again.  

I apparently was  able to make a  convincing argument to let me build around the walls in both spaces ( namely that my spouse was tired of walking all the way around the basement to get access to the kitty boxes.)

It was my feeling that the duck under was already annoying and the inability to easily move from room to room wasn't going to fly long term. I was already starting to hate it. So im happy that its early enough to start over.

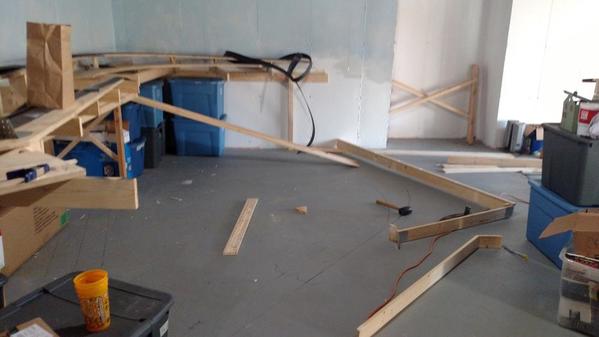
 So a tear out is in full swing on sections.  My original structure is ripped out and a new wall mounted Girder system is going in.

Heres the New Plans - going to keep the under the stairs area as an island with diesel shops and transfer table. 

IMG_20151219_172906194

IMG_20151219_172911579IMG_20151219_172916694

I know those are kinda hard to see - new layout plan is 38' x 24' (26' in one spot). Plan turns the area under the stairs into a repair facility - and puts town area all in the northwest corner. If someone would would plug it into the computer, I'd appreciate it - it would be super helpful.

Photos from today's tear out:

IMG_20151219_152229393IMG_20151219_204700085IMG_20151219_204724429IMG_20151219_194521205


Attachments

Images (7)
  • IMG_20151219_172906194
  • IMG_20151219_172911579
  • IMG_20151219_172916694
  • IMG_20151219_152229393
  • IMG_20151219_204700085
  • IMG_20151219_204724429
  • IMG_20151219_194521205
Last edited by Jacobpaul81
Moonman posted:

I'll give it try after the 25th. I am the downhill for the holiday, so lot's of family stuff going.

Too bad about the loop in the corner. I liked that element. I know you were never really satisfied with it.

You're building in pink wall land now!

Thanks Carl.  I am certainly building in pink wall land. It's all primed and I'm getting l girders in along the concrete wall.  I'm just going to buy some shelving brackets for the stud wall - should go in quick and for cheap - won't put me too far behind.

I will have to move some plumbing and there's a couple more pipes to cover up - this puts some of the city beneath the kitchen. Not crazy about three lift outs or the bridge in front of the windows, but I'll make it work.IMG_20151220_130113362

Visibility was bad with the other design - it limited what I could do because sight lines were so bad due to the stairs - to make the reverse work, I needed switches outside the north room which required ducking under - that became a deal breaker in recent weeks when I had to work around it. Decided that just was a no deal. Plus, wife hated the reverse loop eating square footage.

This new design gives me some additional travel for limited expense. I'm going with the shorter bracing in the south room - I'll be able to go below the track. This adds the island for more operation - very pleased with that - love that element on other layouts.

From a modeling perspective, this puts all my square footage in the north room - ill be able to make a larger city rather than having it split between two rooms. The other room will vary from 12-18" width so I can do simple landscaping. 

Attachments

Images (1)
  • IMG_20151220_130113362
Moonman posted:

I'll give it try after the 25th. I am the downhill for the holiday, so lot's of family stuff going.

Carl, I had some time, so I put what I could into SCARM, hopefully it will give you a head-start after the holidays. I had some trouble figuring out dimensions from the photos, so measurements might be off. I also couldn't figure out what pieces were needed to straighten things out coming out of the 11° Wyes, so the yard, etc., are not centered. I tried adding the Ross TR035 transition tracks and others to straighten things out, but they didn't work. I used the GarGraves library for the track and the Ross library for the switches. I used O89/O96 curves with the 11° Wyes. The grades are also greater the 2% and I didn't take the time to adjust things to get them below 2%. HTH a little. Merry Christmas!

JacobPaul81alt


JacobPaul81alt3D

Attachments

Images (2)
  • JacobPaul81alt
  • JacobPaul81alt3D
Files (1)

I vote for double mains and a double crossover, but I'm not paying the bills. A double main would easily let you get the grades down to 2% or less. Depending on which double you go for, you're looking at up to almost 50" of space, so they are quite the eye-catchers. The rather pricey #8 double gives you 4" track spacing while the regular gives you 4.5".

BTW, do you plan to use flextrack?

JP,

I like the Double 11° #175 for the crossover. When you total the cost of 4 switches and a crossover separately, they are more than a #175.  It should be somewhere prominent as it is a very cool looking junction. Look at the photos of Alex M.'s layout on the forum.

I don't think Elliot( Big_Boy_4005, My Dream/Nightmare thread) uses any double crosses- but he didn't have any left over from his mall layout. But you can get a look at how a long double main looks. Also, throughout the thread are tutorials on various topics. Tortoise machines for slow action switching from under the layout or manual switch controls as an example. Ballasting-soon to come, but early on he purchased about 600lbs. of crushed granite from a local stone business. He cuts his own roadbed from Homosote on a table saw.

His track laying techniques are wonderful. Draws his centerlines and just builds it.

Jacobpaul81 posted:

Dave, Carl, 


Thank you so much. Very helpful!


Opinions on the wyes - would it be better to use the two wyes on the double mains - or continue the double mains all the way around and use a double cross?  I'm thinking double cross.  More wood and track but can run two trai ns all the way around without issue.

The wyes provide a branch line. If you developed the branch accepting full cars and delivering to customers or picking up goods and bring to the main for transfer.

The doubles are nice with trains passing in opposite directions or a fast passenger sliding by a freight in the same direction looks good.

Real Estate: Using 4.5" track centers on the straights and easements into 5.5" centers on the curves, not much is needed for the double main. 10"-12". So, the rest of the deck width depends on the scenery. 20"-30". Building fronts or ends with street on road and sidewalk keep you around 20". Full buildings and such 24"-30" for a diorama.

So, vary the deck width and shape the edge. The corners will present a lot of real estate.

Somewhere in all of this, you a need a wye to turn around without the hand of JP81. A stop and back-up prototypical wye.

An add-on later could be a lower level staging yard. Up and down on the sides to pink wall land and a six track staging yard 24" wide using RCS curved switches for the throats. 6 tracks 20 feet long. See a recent post by forum member Jan. (About a $1500 dollar project) The top version in the attached photo is it. very nice!

Ok, so much for opinions, I'll end here.

Attachments

Images (1)
  • Staging Tracks
Last edited by Moonman
Moonman posted:

JacobPaul81 and Daz,

Pulled up a former file. JP81,

Would you confirm the measurements for the perimeter walls? and the North reference?

Thanks, Daz.

I am 4" short on the 38' side and 6" long on the 24' side in the drawing of the basement outline. Also, the entrance at 7 o'clock always confused me. Should that be straight?

What's the actual JP81?

Moonman posted:
Moonman posted:

JacobPaul81 and Daz,

Pulled up a former file. JP81,

Would you confirm the measurements for the perimeter walls? and the North reference?

Thanks, Daz.

I am 4" short on the 38' side and 6" long on the 24' side in the drawing of the basement outline. Also, the entrance at 7 o'clock always confused me. Should that be straight?

What's the actual JP81?

Yea, its goofy and I know my drawing is out of scale.

From north to south, space is 38'. 

From East to West, it is 24' except on the north end where there is a 13' jut out expanding to 26'.

From north wall to my stud wall behind the stairs is 15'.  From north wall to stairs is 12'.  

7 o'clock entryway is 8'. I'll be studding that in soon with a standard door door will go in 4 feet out from west wall. 

Alcoves are 8'6" (east) and 4' 6" (south)


Moonman posted:

Alright, a few more details...

Measurement from NW corner to alcove & depth of alcove

Measurement from SW corner to alcove & depth of alcove.

Then we will have it.


Both alcoves are 2 ft deep.  

South alcove is 4' 6", 10' 6" from southeast corner, 9' from Southwest corner. 

East alcove is 8' 6",  13' 6" from north, 16' from south.

One last set of measurements I forgot to include earlier - west wall:

Window is 2' 6" from Southwest corner. 

Window is 6'.  

There's a 6" space.

Then the door is  5'.

 Then 11' of wall.

It juts west 2' then 13'

I'm going to go with the double mains and the #175.

I'm thinking a wye could be added to the diesel area under the stairs. Feed the transfer table with just one track and use the other as a point of the triangle.  Only engines will be over there so less worry about curving track.

Moonman posted:
Jacobpaul81 posted:

Dave, Carl, 


Thank you so much. Very helpful!


Opinions on the wyes - would it be better to use the two wyes on the double mains - or continue the double mains all the way around and use a double cross?  I'm thinking double cross.  More wood and track but can run two trai ns all the way around without issue.

The wyes provide a branch line. If you developed the branch accepting full cars and delivering to customers or picking up goods and bring to the main for transfer.

The doubles are nice with trains passing in opposite directions or a fast passenger sliding by a freight in the same direction looks good.

Real Estate: Using 4.5" track centers on the straights and easements into 5.5" centers on the curves, not much is needed for the double main. 10"-12". So, the rest of the deck width depends on the scenery. 20"-30". Building fronts or ends with street on road and sidewalk keep you around 20". Full buildings and such 24"-30" for a diorama.

So, vary the deck width and shape the edge. The corners will present a lot of real estate.

Somewhere in all of this, you a need a wye to turn around without the hand of JP81. A stop and back-up prototypical wye.

An add-on later could be a lower level staging yard. Up and down on the sides to pink wall land and a six track staging yard 24" wide using RCS curved switches for the throats. 6 tracks 20 feet long. See a recent post by forum member Jan. (About a $1500 dollar project) The top version in the attached photo is it. very nice!

Ok, so much for opinions, I'll end here.

Carl I like the attachment with the yards you did. How about Atlas #5's =  closer spacing?

Seacoast posted:
Moonman posted:
Jacobpaul81 posted:

Dave, Carl, 


Thank you so much. Very helpful!


Opinions on the wyes - would it be better to use the two wyes on the double mains - or continue the double mains all the way around and use a double cross?  I'm thinking double cross.  More wood and track but can run two trai ns all the way around without issue.

The wyes provide a branch line. If you developed the branch accepting full cars and delivering to customers or picking up goods and bring to the main for transfer.

The doubles are nice with trains passing in opposite directions or a fast passenger sliding by a freight in the same direction looks good.

Real Estate: Using 4.5" track centers on the straights and easements into 5.5" centers on the curves, not much is needed for the double main. 10"-12". So, the rest of the deck width depends on the scenery. 20"-30". Building fronts or ends with street on road and sidewalk keep you around 20". Full buildings and such 24"-30" for a diorama.

So, vary the deck width and shape the edge. The corners will present a lot of real estate.

Somewhere in all of this, you a need a wye to turn around without the hand of JP81. A stop and back-up prototypical wye.

An add-on later could be a lower level staging yard. Up and down on the sides to pink wall land and a six track staging yard 24" wide using RCS curved switches for the throats. 6 tracks 20 feet long. See a recent post by forum member Jan. (About a $1500 dollar project) The top version in the attached photo is it. very nice!

Ok, so much for opinions, I'll end here.

Carl I like the attachment with the yards you did. How about Atlas #5's =  closer spacing?

George,

Jan did the work on the yards- I worked on the 4-way throats which resulted in 18' spurs. I just like the geometry of those. His rendition using the curved switches, first one, is elegant and has 20' spurs. Think about an F  ABBA and a consist of 21" passenger cars in scale. 20' is really needed.
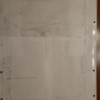
It's tough to use less than 4' for throat on each end, which the curved switches accomplish. They also accomplish cleaning out the bank for a gee wiz.

Next, we'll get something of a track plan going. Which radius for the mainlines around the room? I know you can flex whichever you like, but the O96/O106 and up is 5" centers naturally and the O89/O80 is 4.5" naturally for GG.

Will have to switch to RR-Track for easements into turns. Mixy is working on adding it to SCARM. I will probably get the easement numbers from RRT and make flex to match in SCARM. So, when you are planning your track, leave a decent length at the end of each mainline for the easement.

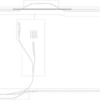
The room outline with a grid is attached. may help you drawing your ideas.

Attachments

Images (1)
  • JP81 Room Outline 12.21.15 with grid
Last edited by Moonman

Dave and Mark,

You guys are too funny. I had the basement file from months ago when JP first started. If he has the room outline to the correct dimensions, he does wonders with paper and pencil. Restores one's belief in the old way works. Go to the beginning and check it out. He only needs the software to verify a few things.

So, that's why it's mission accomplished.

Everything is set here for the holidays. I was tuning the carol boxcar on the Christmas train I just picked up. I built a twice around under the tree for it. 6-30068 North Pole Central. It's like a post war engine with an air whistle. My bride surprised me and said "Don't you think we need a train under the tree?". Only had to hear that once. She's finally coming around.

It's all good or I wouldn't have worked on it. There are 3 more in process. All in good time.

peace, brothers!

PS. Dave, see what radius works for the mainline corners without getting too wide. You have some skin in this now.

Last edited by Moonman
Moonman posted:

PS. Dave, see what radius works for the mainline corners without getting too wide. You have some skin in this now.

I used GarGraves O89 and O96 in the example I posted because JP mentioned those sizes in one of his posts. I haven't transferred any of that to the new baseline yet, so I'll work on that and then add some comparisons to the next larger sizes using layers to keep them separate.

Add Reply

Post
The Track Planning and Layout Design Forum is sponsored by

AN OGR FORUM CHARTER SPONSOR

OGR Publishing, Inc., 1310 Eastside Centre Ct, Suite 6, Mountain Home, AR 72653
800-980-OGRR (6477)
www.ogaugerr.com

×
×
×
×
Link copied to your clipboard.
×
×