Looks good to me.
Not sure how you guys with the HUGE layouts do it.... I've spent three days on wiring and track laying and I'm only dine with half my switches! I'm pooped!!! But, I am soldering every connection and crimping on wire terminals for every connection... Its a huge deal!
Due diligence as you are doing will pay dividends. I have never built a large or even medium size layout before. My plan with about 10 switches is more than I have ever done.
I won't lie - it is fun.... but I do find myself overloading and needing to not look at the layout for a day here and there. My son is frustrated - just wants to run trains! I havent even got the power feeds done - so much planning and everything.. those will be one of the last things I do actually.
I did get another switch done last night... so only three more to go. I had to service two of them as the marker lights were rubbing the housing and they wouldn't throw.. and one housing got cracked. So I fixed all that yesterday - now they are all working fine.
I also need to buy a fiber cut off wheel for cutting track - using a hacksaw is just not very good...
Whether it is your child or yourself, and no matter how many layouts you have built, it can be tedious to keep going to get trains running. Some plans lend themselves to just getting one circuit of track wired so you can run trains while working on the rest, and other plans really don't. I guess it is a lesson for all of us in perseverance versus patience. Tough for all of us, not just your son. Only 3 more switches to go sounds great! Yes, cutting track with a hacksaw or hobby hand saw is hard. I know from experience! ![]()
yep, hang in there, this is the nervous system of the layout and well worth the effort for reliability.
Take some alligator clips and power a track and run a test mule - have to run a train
Carl, your comments are spot on!
Question: I wired up my power distribution system and a single feed to my main and second loop. But - my main throttle controls both...
I didn't change the positions of the insulating pins on the switches - So - I assume, that is causing the bleed through. I assume I should remove the center pins of each switch where it connects to the switch coming from the other loop - correct?
Also - I don't have any more insulating pins - anyone have a trick to fab some up easily?
You’re correct the insulating pins should remain on the control rails of the switch. You are also correct you need to remove the center pin where between the switches on each block. You can just leave the gap on the center rail and you’ll be fine. You can try a tooth pick if the alignment is too far off. I’d say you’d be fine with just deleting the center pin.
By the way, I like how your plan has evolved
THANK YOU!!
ITS WORKING!!! Two trains, two throttles, same track or separate track, through switches - handing off from throttle to throttle smooooothly (Got the ZW's phased correctly)... WOOHOO!!!
Now to wire up the last two switches and power the rest of the track!!!
Yep - they have their own dedicated power on the B post of one of the ZW's..
I think I have pretty much everything you listed (except just center rail gaps due to lack of pins). Will be adding more power drops tonight probably.
Did you get these barrel plug connectors from tinman3rail with your switches? They are great as they not only provide fixed voltage to the switch, but also provide separate variable track power to the rails. It’s an easy way to add power drops to your layout.
Attachments
Escher posted:I think I have pretty much everything you listed (except just center rail gaps due to lack of pins).
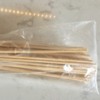
Unless you’ve found some pins already, I just use wooden skewers for insulating pins. They work fine, and six or eight skewers is a lifetime supply. Hmmm, looking at that picture, I think track cleaning is in my future. ![]()
Attachments
Butch, better late than never. Nice job on the placement of pins and drops on the plan!
Ted, The wooden skewers is a great idea! Excellent photograph!
"Did you get these barrel plug connectors from tinman3rail with your switches? They are great as they not only provide fixed voltage to the switch, but also provide separate variable track power to the rails. It’s an easy way to add power drops to your layout. "
Yep - Hence why my power distribution is so stinkin' complicated. Its basically two seperate power systems..(but I cheated a little - as you will see down below)
I wired up all my switches first - using block wiring relative to each switch - entirely on its own set of terminal blocks both at the control panel, and at a breakout strip at the transformers..
Last night I added four more 6 position terminal strips for the "track" power drops - 3 blocks and 1 common. So I can solder onto track and then attach to the appropriate block.
My cheat was that once I realized that I already powered the switches based on the throttle blocks (I hadn't undertood that the switch power and track power were the same within a block... thats why I was so confused originally)- I just added short jumper wires from the existing terminal blocks for the switches to the new power terminals for the track. Hard to explain without pictures....maybe I'll snap some this evening.
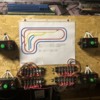
Just sitting here for the last 10 minutes trying to diagram what I have - and its complicated.. I mean - I've rebuilt vintage HiFi Amplifiers with less trouble! lol! Sorry - for the messy sketching - doing this in between running projects at work.. 
Attachments
Escher posted:I also need to buy a fiber cut off wheel for cutting track - using a hacksaw is just not very good...
Tin snips are fast as well. On tubular track cut through the rail but leave the webbing on the bottom intact. Bend back and forth to break the webbing. Open up the rail with a flat blade screw driver, stick a track pin in the rail, and use a needle nose plyer to shape the rail. Takes all of 2 minutes per piece of track. Plus now you have a use for your tin snips.
Lou, Thank you for giving me a use for my tin ships! I can't say when the last time I used them! ![]()
Why don’t you just build the thing. You should have trains running next day. Wire it all at once. One switch at a time. I couldn’t do it like that. For the the time you take talking about it it, you could have it done. Have fun!
Not even sure how to respond to that.. then again, its been a bad day so probably best I don't..
Cap it all off with - test running with the kiddos - and forgot my large engine (736) draws more power than my 224e... so I was swapping tracks back and forth between the two... and got distracted talking to the kids...
I forgot to throttle back when the 224 entered the outer loop - and I looked away. It jumped the corner at high speed and hit the concrete floor.. Broke the trailing gear carriage and sheared off a marker on the boiler.. not pleased. Now I need a donor 224 to swap parts...
.....and I'm still not finished wiring.. pbbbt!!
Breaking a marker light is always rough.
For the record, your progress is quite fast to me. I think William must have been sarcastic, or he is far removed from having a career and raising kids. Keep up the good work!
It is just a difference in plans of attack. I would have wired the main, then loops then switches also; just to get trains rolling. You could have always twisted the light or jumped posts to manually throw points until wired.
I figured you were already too far along to suggest it once you mentioned wiring switches, so I pushed the temp. loop idea. ![]()
" I figured you were already too far along to suggest it once you mentioned wiring switches, so I pushed the temp. loop idea. ![]() "
"
No worries - I don't regret doing it this way... its so clean its worth it... First time I've taken my time in a project instead of hack and slashing my way through.. Its paying dividends!
I've enjoyed reading about your progress to this point, keep up the great work! I'm sorry to hear about your 224e, but, I think you should be able to find a doner, or the individual parts to get her back to looking as she should.
Rusty
Backdrops and/or a small fence is pretty common and helps with "flying locomotives" a lot. They don't really need to be permanent either.
It doesn't take long to appreciate it's effect either. One of those times you gotta see it with and without it to realy get the impact. A picture or two and you'll know it belongs ![]()
Mine drop into a slot between the tabletop and an added frame around the the top edge.
A thick carpet is a good defense too. Even a throw rug beats nothing.
I just cut the wood off an old hollow closet door, cut it into 4 panels, and painted it blue.
Escher posted:Not even sure how to respond to that.. then again, its been a bad day so probably best I don't..
Cap it all off with - test running with the kiddos - and forgot my large engine (736) draws more power than my 224e... so I was swapping tracks back and forth between the two... and got distracted talking to the kids...
I forgot to throttle back when the 224 entered the outer loop - and I looked away. It jumped the corner at high speed and hit the concrete floor.. Broke the trailing gear carriage and sheared off a marker on the boiler.. not pleased. Now I need a donor 224 to swap parts...
.....and I'm still not finished wiring.. pbbbt!!
Don't take William 1 comments badly - he is a proponent of throwback floor train running of the 20's & 30's - a well planned layout on table just riles him up - he does come off like a troll at times
as to your last comment regarding your train event - I have a cartoon for that
the engineer cannot be distracted
Attachments
Adriatic - Yep - I was thinking about corner barriers about 30 seconds after the train went splat... That is definitley happening soon!
Carl - I was pretty worked up after a rough day at work (Automotive Industry - Weatherstrip supplier)... and then the tragedyof the 224.. As me old pappy used to say "I was being a bit thin skinned". ![]()
I get it - and I generally would agree with William - runnin trains is why we are here, right?
I think you are doing just fine. All of us can see a better way to do something once we are up to our knees into it! Take your time now and it will pay dividends! I agree with others; don't get discouraged!
Automotive supplier? You poor "need it yesterday" ******d 😕.
I'll type more quietly ![]()
I don't think anything here is going to phase the guy Mark; he goes into a tiger cage. 😔
Third loop wired... power feeds “done” but I might add one more just because... siding switches wired... but I ran out of crimp ons so I still have two switches left to wire (sidings).
Got a great deal on a Williams BL2 (I love them!) and ran that with my Son today - what great running engine! I did the series wiring mod last night and it just crawls... 


Attachments
.....aaaaaand done. Just wired the last switch and isolated the last siding track.
Only issue is I get a lot of derailments if I back up (push) cars through the switches. Forward is no problem...
The BL-2 looks great! I have two MTH BL-2s in Western Maryland scheme. I don't have experience with the old style switches to offer a suggestion.
Escher posted:.....aaaaaand done. Just wired the last switch and isolated the last siding track.
Only issue is I get a lot of derailments if I back up (push) cars through the switches. Forward is no problem...
031 curves are very sharp and pushing lightweight cars with truck mounted couplers through those curves at any sort of speed above a crawl can cause derailments. Backing through a switch can be even worse. I had the same issue as a kid with modern era 022 switches. Going slow is really the only option. On my current layout my smallest switch curve diameter is 042, which has virtually eliminated the issue.
It seems like the lighter cars are more susceptible... I may try adding weight and testing individual cars.
Weight will help. In fact the NMRA has guidlings for weighting cars. (scale folk really need it bad with those tiny scale flanges.)
Harbor Freight (and auto/tire shops sell new style tire balance weights that are great. (soft metal squares with a foam tape mount).
Escher posted:.....aaaaaand done. Just wired the last switch and isolated the last siding track.
Only issue is I get a lot of derailments if I back up (push) cars through the switches. Forward is no problem...
The siding configuration probably has more impact than the weight of the cars. The scale trains work like the real trains in this case - take notice of 99.5% of prototypical sidings. There are no turnbacks or esses (S curves)
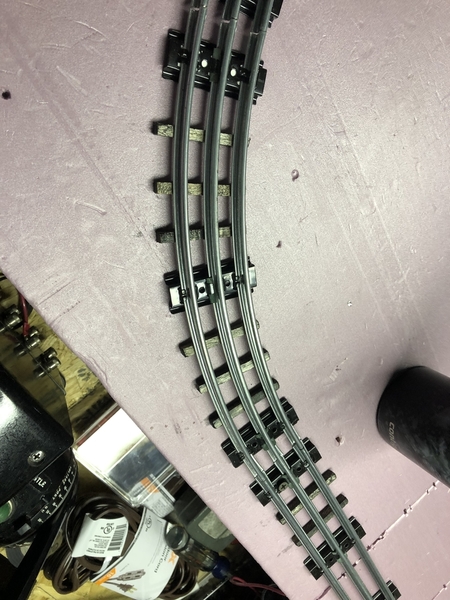
I realize its not perfect - but perfect isn't the goal! Passable works for me...
After these dry up I'll put a dab of elmers on each tomorrow and start playing with ballasting.
Escher posted:I realize its not perfect - but perfect isn't the goal! Passable works for me...
After these dry up I'll put a dab of elmers on each tomorrow and start playing with ballasting.
Sounds like plan - the ties certainly improve the look


