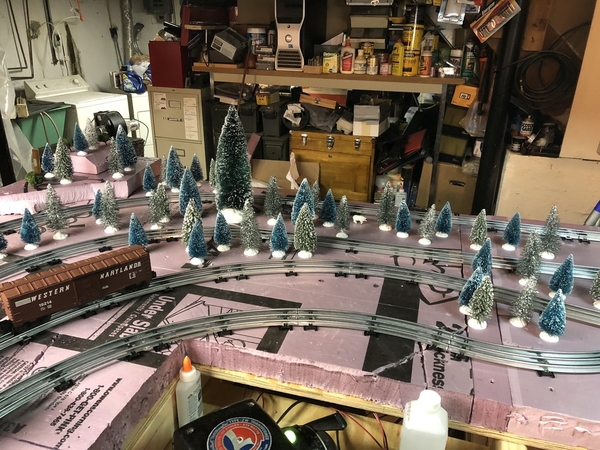
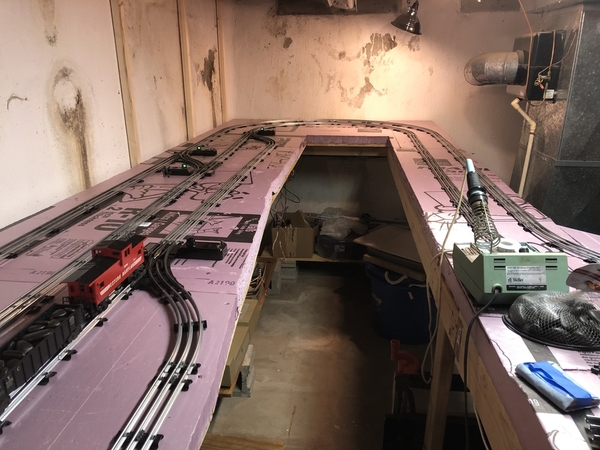
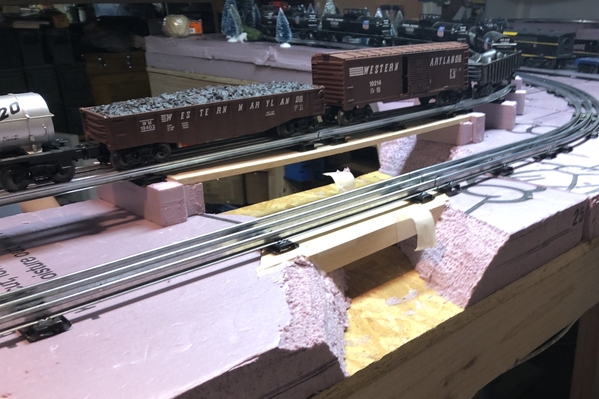
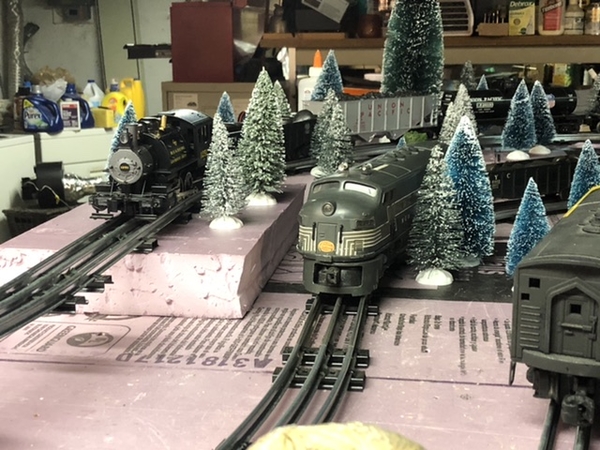
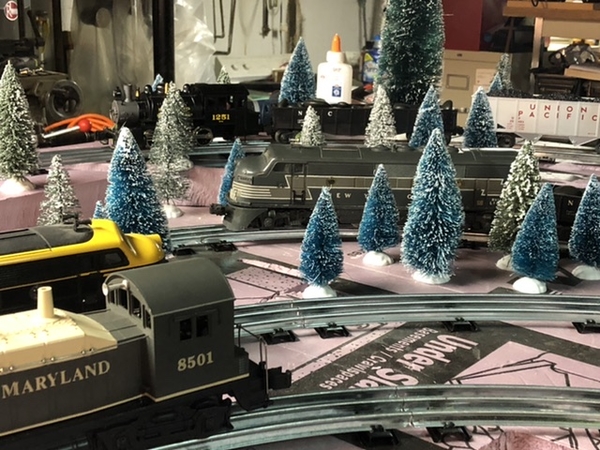
We don't have a name for our RR yet - but we are having a lot of fun!  (Kids almost as much as me!!)


Here is a vid of my on running the Second level for the first time:


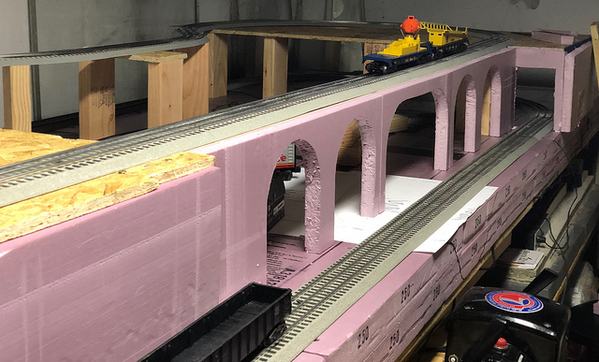
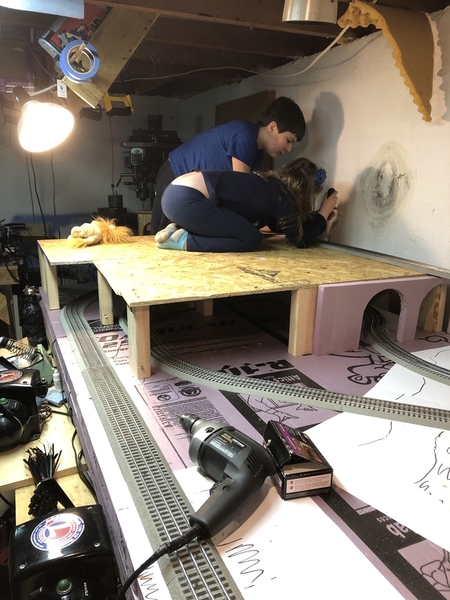
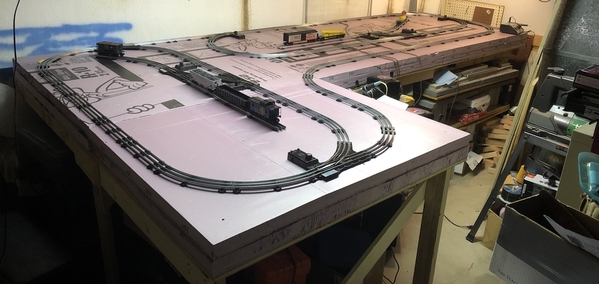
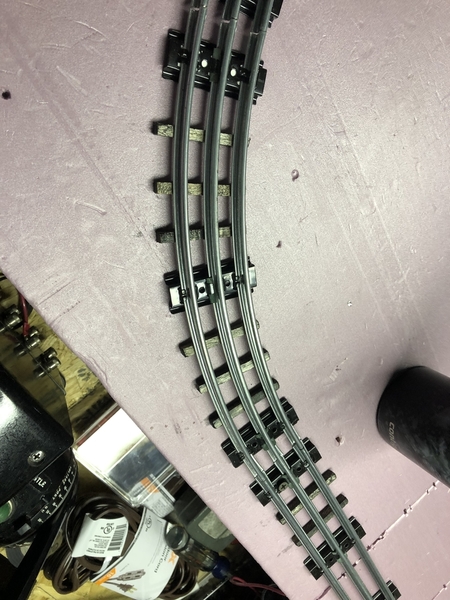
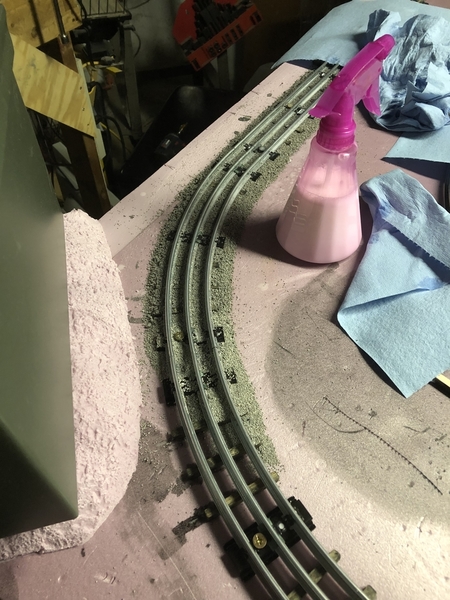
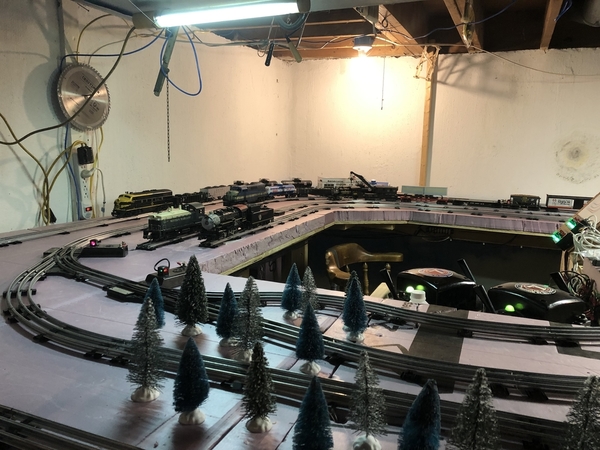
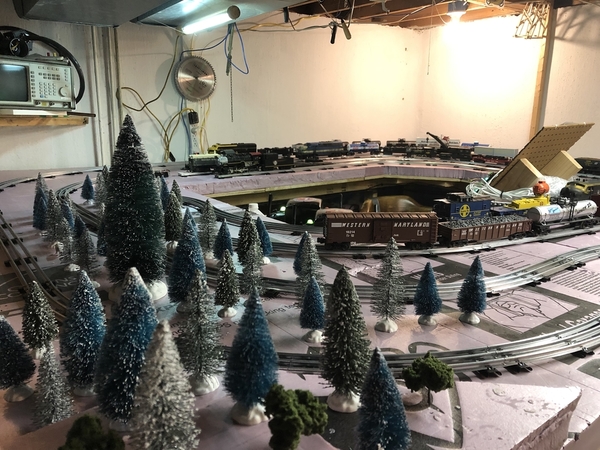
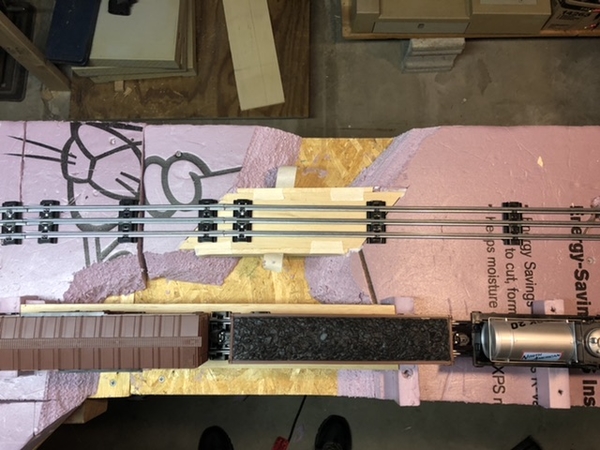
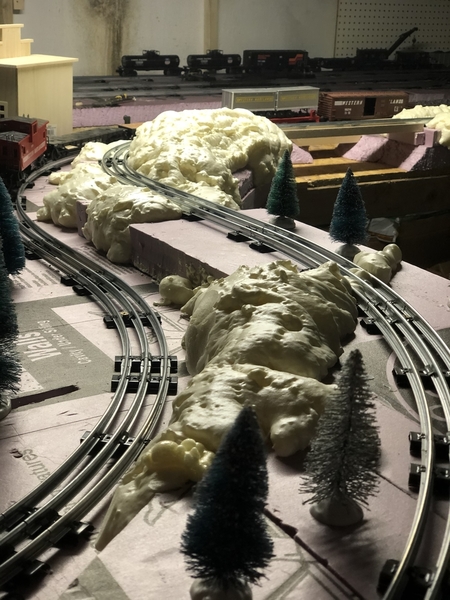
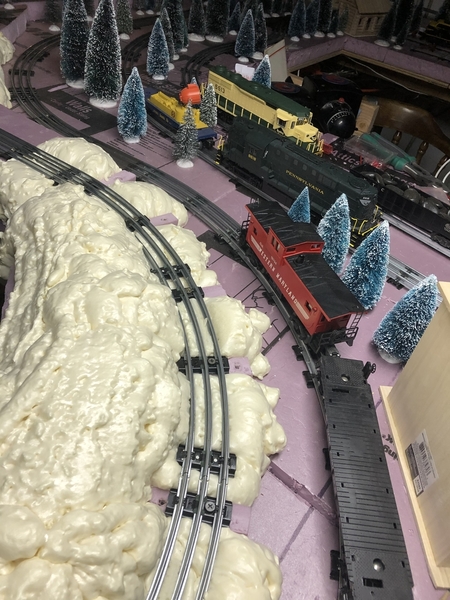
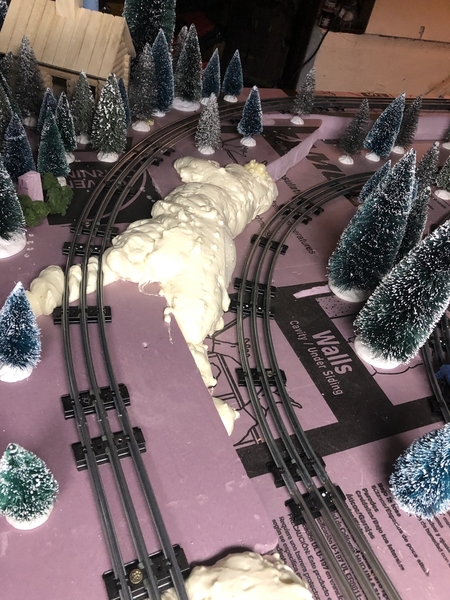
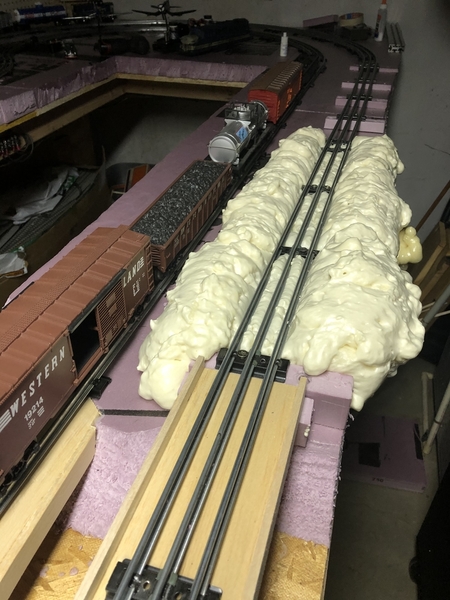
And some pics of the most current updates - Working on the bridge and tunnels in blue foam..


40264453873_90724289be_z47229532301_3f9f67935b_z47229532401_886a3c85c4_z

Attachments

Images (3)
  • 40264453873_90724289be_z
  • 47229532301_3f9f67935b_z
  • 47229532401_886a3c85c4_z
Original Post

Replies sorted oldest to newest

A week passes  - and I think I'm making a major change..

I am just not very happy with fastrack - the sound level, and the expense are a major detractor.. plus its not very forgiving and I'm having lots of slowdowns in sertain areas, even with multiple feeds and making a DIY cleaning car and running it for about an hour.

After looking at options and agonizing for several nights - I think I'm going to pull this up and go with standard tubular track and O22 switches.. I really want to run a dual mainline with reversing and sidings - and at $100 for a switch, fastrack is killing me.

I also think I'm going to compress the depth in the center a bit so I have better reach.  Possibly remove a foot or two of bench to make a large U.. 

So - I'm going to do some rail modelling tonight and get a rough idea of what I want in tubular track and I'll start ordering.  Watch this space for big changes to come!

Screwing any track, especially Fastrack, to the wood structure of a layout increases noise levels. You do have nice thick foam, but do the screws go all the way to the layout structure? Fastrack is probably the noisiest track around, to add to the issue.

May I recommend GarGraves and/or Ross track? It is a nice steel track, like the tubular, easily and durably joined, wooden ties, on the quiet side, looks much better than Fastrack or traditional tubular, less fussy than Atlas or MTH, and is available in pre-curved sections as well as flex-track (I don't bend curves any longer; pre-curved is worth the money). It does need painting (they ALL do), but spray paint before you lay it does that in a hurry.

Actually - after a bit of research here on the forums - I'm planning to use Menards O42 and O31 radius curves and straights as well as used O22 switches...  Seems to give good results at drastically lower prices.  My hobby budget is not very much (actually you could call it nil as I'll be selling other items to fund this) - so price is a HUGE factor. 


The other nice thing about the standard tubular track is that I've always had a fondness for it and have wanted to use it.  I jumped into fastrack, thinking it was not as espensive as it is and not realizing the noise level...  typical noobie learning curve stuff - now I know better.


As to using more prototypical track - I had looked at the other brands (incuding the ones mentioned) - and the price factor is still there.  I do like the gargraves a lot...


To answer the question about screwing into the layout - upper level is straight into OSB, lower level is only into the foam..  Both are very loud.

Regarding the slowdowns - not sure what to say other than - I'm glad you don't have issues!  I've swapped track and tried a few things... but in the end, I really want to just solder the connections - and I'm afraid that with fastrack, I'll end up melting the plastic.  Not an issue with the tubular stuff from what I've read.. I guess I'm just a "get a bigger hammer" guy.. lol!

I suppose the final thing I should point out - we plan to move in 2-5 years... so this is *truly* a learning layout for us.. When we move, one of the criteria will be a more open floorplan basement (hopefully a full size ranch with finished basement) - so I can run track around three walls..  When I do *that* layout - I'll likely go with the higher end track - unless I completely fall in love with the traditional tubular stuff in this learning phase.


Id try to figure out the problem.   You've got enough power there to run a whole fleet of trains with about any track!  Are all your straights 30 inch or 10 inch pieces?  Lionel says to run a feeder at every 3 to 5 pieces of track regardless of length.  You can connect batches of Fastrack with .110 female spade connectors the slide directly to the track and make jumpers.  And you can use an adapter track to add to what you have and just add tubular.    Id hate to see you not use all the track you have.  Especially if it only has to last a couple of years.   

Jim

Edit: With that being said if you are going to be upgrading it 5 years.   And still plan to replace what you have.   Why not buy the Gargraves and Ross switches now and then you will have them when you build the next layout?

Last edited by carsntrains

I personally find O22 switches a little bumpy for some locos.  The cost of quality switches is a major deterrent- there's no getting around it.  But I agree with D500- I would use Ross track, most or all of your problems will be solved. 

I've been bugging the heck out of Steve to offer his mainstream switches in O36.  That would make them a drop-in replacement for your Fasttrack.

Last edited by Ted S

Ok - for sake of argument.... let assume I'm starting from scratch... (which I likley will as the currently layout is frustrating me for a multitude of reasons).

First here are my dislikes of my current setup:

1) Reach - I can barely reach the back of the layout due to the depth - the second level - while cool, exacerbates this issue greatly.

2) I want a dual mainline - minimum 2 trains able to run at once - better would be 3 (I know - probably a pipe dream with my space issues)

3) I also would like to build a small 2-3 foot extension for a couple of sidings where I can park trains or build up trains wihtout stopping the layout.

4) As mentioned before - sound level... I love the layouts I hear online built with Tubular track - fastrack is much more high pitched and "white noise" like..

5) my upper level closed off a lot of the lower level - basically I only see the trains down there for

1/3 of the layout space.. 


Lets look at this as a blank sheet of paper..

So - I have a 4x12 foot space..

- I want 2 mainlines and the ability to have a siding/small yard that I will add on to one side of the layout (say another 1-2 feet x 4 foot extension on the side)

- Future sidings inside the loops to give the trains a place to "go".

- If possible - I'd *love* to cut a foot of depth out of the middle to improve reach - forcing sort of a dogbone shape

- From the pics above you can see I only have access on 2.5 sides (front, left and partial access on the far right (about a foot to the wall)..

- I'm not opposed to a second level, but as I found out with the current setup - I closed off so much of the lower level that you barely see the trains down there.  I'm not interested in doing a grade up to a second level at this time...  Second level - if used, would be a completely different mainline / town.

So - I'll open it up to the group - what would you recommend?  Has anyone see a layout that hits some of these points?

I found this layout along the way as I was searching - and it hits a lot of my desired points, if I change the crossover to some sidings and add a extension for a yard on one side.. (Apologies if

this is one of yours - I can't remember where I found it, it could have been this forum even..)


4x8 layout-tubluar


Attachments

Images (1)
  • 4x8 layout-tubluar

Very nice..  I started with this type of layout and started playing with how much I could fit.. 

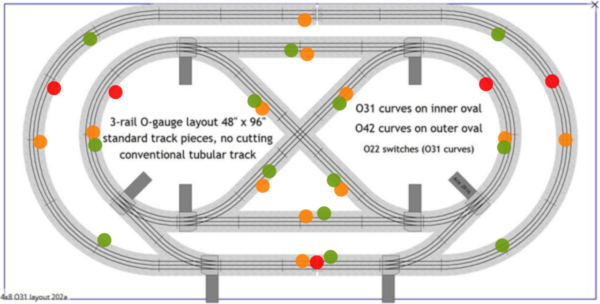
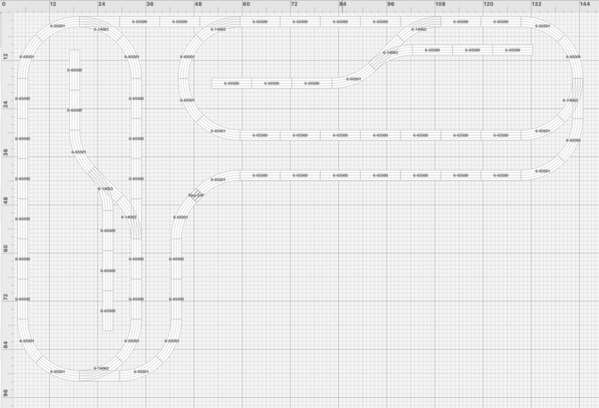
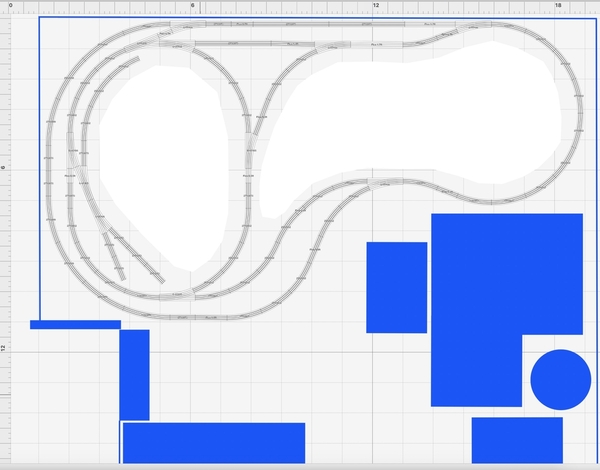
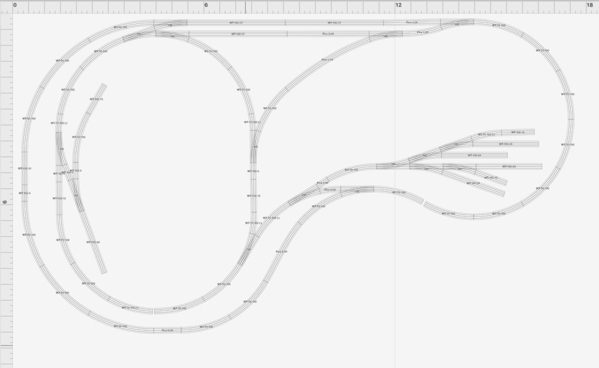
Yes I went a bit crazy.  Playing with Rail Modeller.. and came up with this if I only use O31 curves and Switches:

Screen Shot 2019-03-07 at 6.58.32 PM

This would use 10XO22 switches, 24XO31curves, and 54X10" straights...

I would probably start without the sidings (4 less switches) and add those down the road..


Attachments

Images (1)
  • Screen Shot 2019-03-07 at 6.58.32 PM

Buy 1 0-22 and see how your engine(s) like it.

Enlarging and flipping the dogbone indention to the control side would open the center into a "valley" of sorts. Careful or you might leave yourself railing stock in curves. 

If you are over 3.5' deep to the wall you should consider a hatch. It can even have track on it.

More drops and a big fat bus. The 5 red points are the least I'd do with any track  brand. Yellow and green, better or just an alternate. I like power in the curves where it's needed most. The rest is avoiding  passing power thru switches & crossings, (self powered switches or not). There are really 4 more unmarked points at the switch to switch joints too, but they are kinda hard to connect to.

sketch-1552057256653

More wood frame runner on the underside help stop a lot. So does a heavy skirt, hopefully trapping what comes from down low.

As you fill the layout it will absorb more sound presently reflecting up and out pretty easily. 

I think roadbed of some kind is the next step towards being quieter. 

Since your looking at tube track, I have an idea to use the felt leg tip / floor protection sheets from the hardware isle and cutting and stacking them so the tie would fit over and rest on them. Glued to the foam they are dense enough to stay put. 


Attachments

Images (1)
  • sketch-1552057256653

"Enlarging and flipping the dogbone indention to the control side would open the center into a "valley" of sorts. Careful or you might leave yourself railing stock in curves. 

If you are over 3.5' deep to the wall you should consider a hatch. It can even have track on it."


Thanks!  Yes - I'm considering a lift out section in front - not sure I can work in a hatch or not... going to have to play a bit to see.
 
The more I think about this - I'm very much leaning more toward a more traditional 1950's "toy" style layout with some semi-scale areas if I decide to experiment.  That being said - access may not be as big of a concern if I'm not spending hours leaning over the layout ballasting and doing scenery... 
 
Last night I was looking at some simple older layouts that just used a green base mat - and thatsnot a bad way to go for the time being while I'm figuring things out.
 
I like the idea about using the felt pads!  I've used stick on felt in various widths off a roll in the past - could just cut to the size of the metal ties and then hot-glue underneath... hmmm..
 
One thing you guys will learn about me quickly - I jump in with both feet most of the time... as such, I already ordered track and switches last night... lol!  I'll start pulling up fastrack over the weekend.  (Bracing for the screams of pain from fastrack fans!)


Just a suggestion as far as the track plan, I crudely used photoshop to try to maximize the siding length which will allow for longer trains to pass and for more accessories/scenery.

4x10

I know what you mean with the second level blocking much of the lower level.  If you do add a second level, consider adding a separate second level like this, only flipped so the long straightaway is in the back:

reverse loops - Google Search


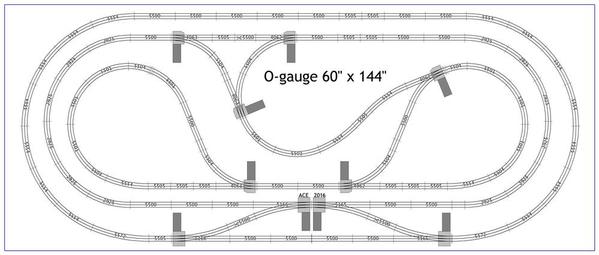
Here is another nice thread about a layout in a similar space: https://ogrforum.ogaugerr.com/...hat-can-i-do-in-5x12.  ACE created most of these plans I believe.  A lot of options for you.  

1 level, flat:

60x144 - 203a


Adding connected second level

60x144 - 233a

60x144 - 233b


Attachments

Images (2)
  • 4x10
  • reverse loops - Google Search

Just a suggestion as far as the track plan, I crudely used photoshop to try to maximize the siding length which will allow for longer trains to pass and for more accessories/scenery.

Great idea!  I'll update the plan in my software..

I also like the reversing loops in some of those plans - something I'd like to incorporate if possible..  I'll be doing a lot of experimenting.

If sound is a big thing then slow the speed down.  My 3 rail and 2 rail is integrated on the same layout.  Ii run my 3rail at a typical two rail speed and it is very comfortable to the ears.  Try running trains on the fast track at 1/2 throttle.  Also at a much slower pace your layout will seem much larger. 

Consider moving the speed control slower to produce a desirable sound level.

You might consider a dark green light weight carpet or outdoor carpet under the track. I use this on the home layout with the Atlas track laid on top, it holds its place well without the need to screw down the track. On 4 portable 4x8 foam sheets I have the green outdoor carpet glued to the foam and then both the really old Lionel O-27 track screwed down through the carpet to the foam and on some sheets I have used the MTH Realtrack. Key is to get a screw that is wide enough to bite into the metal in the screw holes through your track and make sure the whole length of the screw is threaded. While the foam does not hold it vertically it grabs the carpet and this holds the screws from coming out. The noise level of all my different tracks on the various carpet home and show layouts is very quiet, run lots of long trains and fast trains and the wheel noise is very low on all of these. I had tried the Fastrack on carpet and other sound deadening efforts and just do not like the noise level of the design of this track. I think you will be happy with your switch to the cheaper track. Looks good; your overall layout and designs, have fun. Great when the kids can be involved. 

Looks like you are moving right along! As Carl said, your son is doing a great job running the engines.  I too do not like the noise inherent to Fastrack.  But that is because I run sound equipped engines and want to hear the sounds coming from them.  I do use Fastrack for Christmas layout because it is easy to put down and change for a short season of running.  Other folks like the sound of the track whether it is Fastrack or tubular.  The thing is to find out what works best for you and what you and your kids like best.  Do whatever it takes to keep your kids interested if they are so inclined.  Neither of my daughters were interested in trains, so the trains kind of took a back seat until our daughters were grown, marrying, and left the house.

Last edited by Mark Boyce

Looking at these pics - I'm going to have to address the old concrete leaks sooner rater than later - I had forgotten how bad that looks.  Hasn't leaked in years, just I never got around to re-painting.

Switches should be in from Tinman3rail by the end of the week - so then we will start working on a final design.

I'm probably going to go the green outdoor carpet route for a while until we finalize things.. 

He does love running the trains!  "Papa - Lets race!!"  He is definitely in go faster mode..  Learning to slow down in curves, but we still have some derailments due to excitement levels being so high!

 The old paint is an advantage. Now you have an excuse paint it sky blue for an instant backdrop. But I'd do before I'd laid out ground cover.  Since you are not shopping for home&garden styling, talk to someone in your local paint dept. about bad custom color matches not bought and/retinting it slightly if needed. These cast offs can be quite cheap as once tinted with a mix of color, another exact future color match becomes much harder, maybe impossible. From that point "it is what it is" & future paint must match it, not visa versa. But that can be done easily.  (Their problem is they can't remove pigment, only add it)

  Bravo for handing them tools. I don't think enough people teach thier kids such self reliance skills anymore.

  I'm grinning hard at the boy trying to keep enough pressure on the screw to keep the driver seated.  I was small so would apply pressure of my whole weight, then move my whole body in a 3 Stooges"Curly shuffle" to actually turn it, and only 1/8-1/2 turn at a time.  Permission to use a drill & driver bit was a godsend   I got my first hand drill, saw, & hammer in second grade; and had a powerdrill and table jig saw and scroll saw by fourth.  It's hard for me to grasp how some adults never learn to handle anything like that. 

I agree wholeheartedly with Adriatic!!  Now is the time to paint the walls.  Castoffs is a great idea.  The local Lowes and Home Depot are side by side, so I often check out both before deciding on what I am going to buy.

Our girls learned how to use a host of hand tools and later some power tools by doing with me.  Now as married adults, neither is afraid of tearing into a project.

Adriatic, you would look great doing the Curley Shuffle with the screw driver.  My dad did not have any power tools at all when I was growing up.  I didn't buy a drill or circular saw until I was married and had our own house.  We used the hand twist drill, turning the crank like Mum did using the egg beater.  I could never hold the hand saw straight.  Even as a teenager, Dad would constantly tell me to straighten that saw.  However, I built my 4x8 layout using those tools and corrupted techniques.  A junky Tyco HO train set ran all through high school and 2-year college on that layout.   Also, when a tree fell down, Dad and I used the two man cross cut saw to cut it into short logs we could roll down the long hill and into the weeds.  Oh, he also taught me to use a scythe.  We still have both scythes.  Good Grim Reaper props nowdays!  

You gent's have discovered my evil plans!

I had always planned on using the railroad as a means to teach them shop skills.  Its great when they run downstairs becuase they hear me working and yell "Ohhh show me how to do that!!".

Started (very very slowly) teaching my son soldering skills... tinning wire and then how to hold the iron.  Of course I was steadying his hand the entire time.

These kiddos will be changing the oil themselves on my jeep in a couple more years.. 

Last edited by Escher

Soldering.  Oh yes I forgot that one.  I learned how to solder with Dad's iron.  It was not electric.  You had to turn on the gas stove, and lay the business end of the iron in the hot flame.  Then you had to know when it was hot enough, quickly move it to your work and make the solder joint.  Yes it was time consuming and a bit trial and error.  I'm not sure how well Mum liked soldering going on in the kitchen.  

Oh wow!  I never had to go that route - although my first cruddy radio shack iron wasn't much better - heated up so slow it was basically worthless..  I'd have been better off heating it under a flame!

The kids are lucky - I picked up a well used weller unit from a buisness liquidator about 15 years ago.  Digital temp setting and readout.  Its probably 25 years old, but it gets it done.

I was also teaching him about continuity and how to test track to see if the center rail is isolated using my multimeter..  Now, thats not to say he "retained" much of that lesson... 9 year old brains are kindof like my Husky out on a walk....  SQUIRREL!!


Proper as in - permanent... as opposed to just setting up track and running for a day or two and then tearing it down.  Something deliberately planned.

Think more along the British useage in common vernacular - "A proper breakfast as opposed to grabbing a bagel and coffee".

Now - before this thread devolves into debate as to what specifics constitute a "proper layout" - let me state that for my use - *this* layout and this use of the term means: thought out, planned and then executed to be at least semi-permanent and affixed to benchwork with some sort of cohesive scenery plan and theme.

Our theme (at the moment) is Steam/Diesel transition around the 1950's.. but we may take liberties as we go..

  My parents (not extremely mechanically inclined) felt a need to lock "dissassembly" tools up to keep me out of them while unsupervised.

No pliers, wreches, or screwdrivers (Ha, they never caught on to the Boy Scout Knife's screwdriver.. but it was limited) I only had free reign over the floor grinder, hammer, saw, drill, woodburner, carving tools, & nails. All limits stemming from my pre-school removal of all near all of our doorknobs and pushing the square shaft in until the shaft and other knob was laying on the floor in each closed room. I got at least one tighter, but didn't know about lefty loose, righty tight yet. 🤣  Then there were those first reversed threads on the bicycle pedals    

   Anyhow, I took a HUGE risk, did not mind the rules, knew the box was open and repaired Mom's record player, broken for a few years, but she refused to let me try. The reject/start handle snapped, I made a small mending plate fit and added a tiny block of oak for a handle... it took total disassembling and reassembling in under 1-1/2 hrs to not be caught in the act. I stacked her fav records and after her return, played music until she noticed they were whole album sides playing.... after a scowl/grin, the boxes remained unlocked. (summer after 5th? )  ....I was the good one. My brother the cop and sister the social worker were the real trouble makers. They brought 7 strays home to live with us.

..... stray people 

I have soldered with screwdrivers, nails/ and fat leather sewing machine needles; hat pins and even solid wire using propane torches/butane micro torches.... but I never used a team saw, and avoid table and cicular saws like they are sharks. I've seen too many short digits. I like chop saws though.

 At the same time the coolest saw I ever ran was a Milwauke metal cutting circular saw.  Imagine cutting 1/2" I-beam or bar stock with an only slightly heftier version of your normal circular saw.  It took 7-10minutes on an automatic industrial chop saw at an early job (ran 4 at once)

  All of a sudden giant gasoline driven cut off wheels messes are gone. Just "machine shop chips" to sweep up. 

 Tell the kids about weld flash & the build up of it, and drive it home not to watch torches, you may not be there when they see it at first... "eyeballs itch inside, and ache so bad you'll want to tear them out".  (Grandfather's cobalt lensed, leather temple & cheek guard saftey glasses made this a very memerable lesson. Too cool.) Ha!, I recall hiding my eyes from the tv when Herman Munster and Lily were patriot welders. As an adult it's worse. I habitually turn my head, close my eyes, or nod to drop my mask down if I have a hat on, if welding or torchwork is on TV or anywhere near me really.

 I even found myself doing it watching operating welding accessories on layout videos.

  I have an uncle that had rebuilt and installed a V-8 in a car by second grade, mostly himself (huge kid, huge man... HE is the cherry picker if heads are off). He sold it and bought another. Repeat.

  Grandfather was TEACHING welding by 17 and had me acting as an automatic drillpress monkey pre-school....and Gramps (other side, train guy, "all his fault") was either logging or in the steel mill where he would contently remain. Invited to, but never stepping into the hassle of management preferring to work with his hands and yell at lazy workers about screwing him, the company, and the union on his own accord . (union means "team", no i )

I sold woodwork for spending money. Early, it was woodburning signs, later clocks and odds & ends, a couple tables & a chair. (I made money in every school shop class I took; even drafting. I kept one table (still used) and a small fake electric guitar I would seranade the girls with in acts of hilarious public humiliation (it worked well enough ) I sold the rest. (a friend bought a table with my name on it at a yardsale about 20 years ago thinking it was stolen, as I had been robbed a few years prior.) (if you include my youth my already varied adult careers it all becomes very wide spread set of experiences) 

  I wonder when Da Vinci's parents unlocked his toolbox 🤣

Was feeling a bit better on Sunday and laid out our track and switches (Pics to follow).. learned a lot... I learned that I need a bigger space to accomplish what I want.  I'm back in bed sick today (wasn't feeling as well as I thought) , so - I got back to the drawing board... or railmodeller in this case.

This is based on the "Two Sheets to grow on" layout over at CTT website..  I think I'm going to see if I can add the required 4X4 expansion by moving things around in the basement...

8X12-L-Layout

Attachments

Images (1)
  • 8X12-L-Layout

Is the wiring schematic included with the plans?

I was looking at it thinking what an interesting challenge it would be for conventional running having 3 trains on the table, 1 on each inner loop and one to run the perimeter line. 

The two loop trains (local short lines) could run at once. Then, move one off and bring in the train on the outer.

Kill both loops and run only the outer, a high speed express.

Only wiring is what I come up with in my head...

I'm thinking something along those lines - isolating the loops and running the outside on a different block so I can park the trains inside a loop while running a mainline from town to town... Not sure - I'll play with it..


In a perfect world I would use block detection so as to keep the mainline running while stopping the looping trains.  But I'm not that advanced yet..

Looks like what I was thinking of Carl,  Updated the track plan with blocks, switches, and power shut-off for the sidings..  

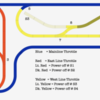
I have no idea if I'm doing this right - or if there even is a "right" way... but this is how I see it at the moment..

Since I have two ZW's - (Only using two throttles on each, the other two on each for accessories):

ZW1 - T1 = Mainline

ZW1 - T2 = East Loop

ZW2 - T1 = West Loop

Then I can use simple SPST switches to turn on or of power to the four sidings.

Blocks-1


Attachments

Images (1)
  • Blocks-1

This has been troubling me - I am assuming that the train passes from one throttle control to another - that just seems strange... but then again - I'm the neophyte. 


So - You just leave your mainline throttle set, and then speed up the loops to match before they pass into that block?  How do you avoid jumpy speed changes?


  You do your best to match voltages in conventional.  A thermosistor/inrush limiter might be worth playing with. I've never really "played" with one but it's possibly a nice way to slow a gain in speed.  But it may slow it too much initially too. I've seen complex uses and swaped them, just never played around with them.

(resistance is high at start, and tapers off as the component self heats. Lionel used them in post war stations with station stops so when the unit throws full power back at the loco, it doesn't jackrabbit start. These circuits also knocked voltage to about 5-6v to keep the e-unit active during a stop so it would not cycle)

Escher posted:

This has been troubling me - I am assuming that the train passes from one throttle control to another - that just seems strange... but then again - I'm the neophyte. 


So - You just leave your mainline throttle set, and then speed up the loops to match before they pass into that block?  How do you avoid jumpy speed changes?


Your concern is valid - two things have to be to addressed when a train passes from one transformer to another 

  1. First they absolutely must be in phase - see the attached from the 1954 Lionel Operator's manual to phase the two ZW's.
  2.  The voltage must be close to avoid bridging - adding the two transformer amperage together when there is too great of a voltage difference

             This why you see conventional operators have volt and amp gauges to monitor the outputs. There are some nice threads on this topic with some                          inexpensive analog meter sources.

The approach that I started with was trying to avoid these issues. But the track plan doesn't lend itself to that.  

Your approach is not wrong, as the AC motored conventional equipment can tolerate the minor differences when traveling from one transformer block to another. Lighted cars will lose bulbs.

Definitely phase the two transformers and mark which side is hot on the plug. The side that plugs into the narrow slot on a modern outlet when the transformers are phased. The wide slot is neutral (train Common) and the round hole earth ground.

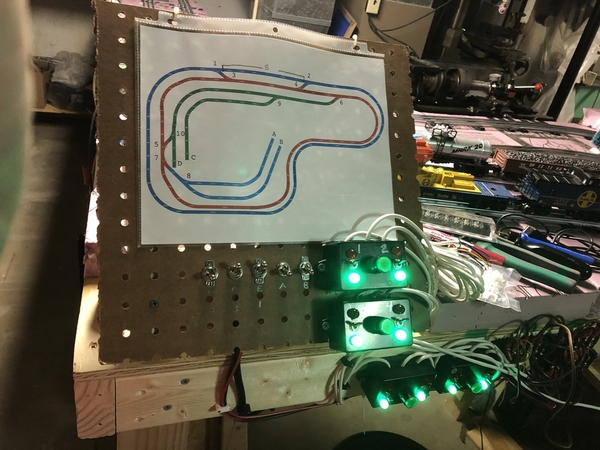
I would recommend that you build a gauge panel for the engineer to have the ability to monitor the output. I suppose they would only be needed for track power (A & D) , as you could preset B & C for fixed voltage accessory uses with a handheld meter.

Attachments

Last edited by Moonman

Carl, Those are some excellent reminders even for folks who have run trains for years or have been trained in electronics and have worked a career in the field; myself fitting into all these categories.  In the anticipation of getting trains running, it is often easy to forget any of these and then wonder why there are troubles.  Yes, the meter panel is a really good suggestion.  And phasing is a must!

Thanks Gents - Lots to think about...


Plus - now I have to go check my ZW wiring.  I have one cord that I need to replace - but I also have to check the previous cord I replaced to see if I have the prongs connected correctly.  Never gave it a thought with AC before..


I'll likely wire up a panel with ammeters and volt meters for each throttle as well.

....aaaand I still need to order a couple more switches before Tinman closes up shop for the year!

Question - If I connect up the two loops via switches - as shown below - I would need another block for just the black area, correct?  But each of the two new switches would be contained in the red or yellow blocks..  that would still allow independant control of red or yellow, and add the black connector block.. right?

I hope I'm saying that right..


Capture


Attachments

Images (1)
  • Capture
Escher posted:

Thanks Gents - Lots to think about...


Plus - now I have to go check my ZW wiring.  I have one cord that I need to replace - but I also have to check the previous cord I replaced to see if I have the prongs connected correctly.  Never gave it a thought with AC before..

it doesn't matter - just plug them in and perform the phasing procedure - turn it around if not in phase - then mark the plug with a sharpie.


I'll likely wire up a panel with ammeters and volt meters for each throttle as well.

I though the would be too cluttered - 2 for each handle + 4 per transformer - I looked for link to cheapies but goodies, but didn't find it - I'll look again...

....aaaand I still need to order a couple more switches before Tinman closes up shop for the year!


Escher posted:

Question - If I connect up the two loops via switches - as shown below - I would need another block for just the black area, correct?  But each of the two new switches would be contained in the red or yellow blocks..  that would still allow independant control of red or yellow, and add the black connector block.. right?

I hope I'm saying that right..


Capture


I wouldn't put that in - It seemed to be under control power- wise without that connection - it complicates things even more

This is why I operate command only  

The black curve doesnt need a block of its own because the turnout positions keep it out of use if you choose. Apply power from either the red or yellow block.

Bulbs in cars can blow when fed from two rollers which are far apart and bridging two blocks.  Single roller cars, not much of an issue at all. 

This would be an issue if an engine uses two rollers too. (most do have two rollers, but on one mount and single wire from there, not an issue for rolling equipment, and the short time it bridges two blocks doesn't usually effect things enough for any concern.)

Never leave stock bridging blocks though. That gives time for issues to ramp up between transformers and bite you. 

 2 diesels trucks, both with rollers, or an extra roller mounted on a tender, etc., would benefit from a.....

  The solution is a polyfuse. A tiny disc about the size of a quarter at their largest (for our uses anyhow).  It is a very fast acting fuse that will reset very fast once it is ok to do so (milliseconds).

One for each roller set. Not too expensive at all. 

Phasing is easy, and those instructions are ok.

  But to get a better grasp on why you do it, I suggest watching this link a few times (if it works) or ...  Search youtube for lionel/phasing two transformers for use together.  Mike isn't boring, over technical, etc.. I feel this is a great video for a novice or brush up on wave forms. About 20min.

https://www.bing.com/videos/se...=VIRE&PC=COSPM01

Last edited by Adriatic

That's right... too. 

I should have mentioned that. But my bulbs blow very often when run across them.

I forgot a switch was open and cooked two more bulbs last month (one car 2-6v in series)

 Cheap old bulk but still says something is up when they go two at a time, everytime. (I better make sure someone didn't vacuum and unplugged the Z.... no, I did that last time ... hey, I'm prtty sure you even pointed to that before on this matter Rob.)

I get the base theory the bulb isn't going to draw more amps because they might be available, and a wire melting and then a short are a more likely causes; but they are phased, no bad wires, and bulbs blow here.... a few melty plastic tabs etc. on mpc roller plates, but nothing detrimental to function of them either. (kinda impressive in a messed up way)

  I figure there is a very fast spike in there. But why?, I'm kinda lost outside of maybe it is the smallest differences in phase timing during the change in the circuits or something.  I.e. one cycle of being out of phase doubling voltage for just the one cycle or even half of one..?  My theory on primaries vs secondary, phase, etc. and what else is happening here is kinda base stuff compared to You Rob.  Especially phsically...tap postitions and combining of coils and thier tap positions or how phases and reading can be effected with something like 3 phase... bla bla bla...Design reasoning; that is where I have the most gaps and listen hard; definitely not my strongest suit.

   My experience with multi-transformer set up and using it is roughly 5 years younger than me though. I saw a lot of bulbs do this on Gramps layouts as well before I added constant lighting to the daily runners. It had something to do with the blocks, that I do know (he also ran 2 ZW as one unit so that's all I know....my experiences say bulbs blow too.  He really knew, I was just the smart shop monkey )  

  Point is bulbs are just the first thing that comes to mind now. But a bulb lost is not a loom; so not really the most important aspect; You're right.

Interesting....    For years I have ran many "layout" setups, some temporary while changing design, with use of two PW ZWs wired to various blocks.  All I have ever done for blocks is isolate the center rail with a fiber/plastic pin designed for that.  Or, sometimes, simply left a gap between rails.  Even as far back as the 80s on my Houston area layouts, this worked fine for years on a given layout.  Never have I blown any bulbs, or experienced any electrical issues crossing isolated pins while traversing blocks.  Maybe an occasional change in speed, but nothing detrimental.   Interesting...…. to say the least.

Jesse   TCA

texastrain posted:

Interesting....    For years I have ran many "layout" setups, some temporary while changing design, with use of two PW ZWs wired to various blocks.  All I have ever done for blocks is isolate the center rail with a fiber/plastic pin designed for that.  Or, sometimes, simply left a gap between rails.  Even as far back as the 80s on my Houston area layouts, this worked fine for years on a given layout.  Never have I blown any bulbs, or experienced any electrical issues crossing isolated pins while traversing blocks.  Maybe an occasional change in speed, but nothing detrimental.   Interesting...…. to say the least.

Jesse   TCA

Thank you Jesse for joining in - I recall your large layout - your experience is the input that Escher needs -

Have any thoughts on how the layout should be wired?  Escher has not kept the inner loops in a way that they can be isolated. Another pair of switches for each loop would do that. Any ideas would help. Maybe a link to your layout photos. 

Have you kept the transformers phased?

There may be difficulty railing fresh stock with the turnout placements along the close edge. I always consider everyones styles and experiences differ though, and I don't discount them easily. Have you considered that railing within the switches might be difficult? (assuming that's where most of the stock would be swapped out)

Mark Boyce posted:

I like Dave's White-out and Magic Marker job even better.  His placement of  just one set of crossovers is good.  I didn't think of it earlier

I did white-out because I’m on my iPad and not the laptop, so no SCARM. 🤪

BTW, I love the new iPad Pro, but have significantly mixed feelings about Apple. Having a heck of a time moving music and photos from the laptop. Can’t just copy them to an SD card and load them. 😠

I won't lie - it is fun.... but I do find myself overloading and needing to not look at the layout for a day here and there.  My son is frustrated - just wants to run trains!  I havent even got the power feeds done - so much planning and everything.. those will be one of the last things I do actually.


I did get another switch done last night... so only three more to go.  I had to service two of them as the marker lights were rubbing the housing and they wouldn't throw..  and one housing got cracked. So I fixed all that yesterday - now they are all working fine.

I also need to buy a fiber cut off wheel for cutting track - using a hacksaw is just not very good...  


Whether it is your child or yourself, and no matter how many layouts you have built, it can be tedious to keep going to get trains running.  Some plans lend themselves to just getting one circuit of track wired so you can run trains while working on the rest, and other plans really don't.  I guess it is a lesson for all of us in perseverance versus patience.  Tough for all of us, not just your son.  Only 3 more switches to go sounds great!  Yes, cutting track with a hacksaw or hobby hand saw is hard.  I know from experience!  

Question:  I wired up my power distribution system and a single feed to my main and second loop.  But - my main throttle controls both...

I didn't change the positions of the insulating pins on the switches - So - I assume, that is causing the bleed through.  I assume I should remove the center pins of each switch where it connects to the switch coming from the other loop - correct?


Also - I don't have any more insulating pins - anyone have a trick to fab some up easily?

You’re correct the insulating pins should remain on the control rails of the switch. You are also correct you need to remove the center pin where between the switches on each block.  You can just leave the gap on the center rail and you’ll be fine. You can try a tooth pick if the alignment is too far off. I’d say you’d be fine with just deleting the center pin. 

By the way, I like how your plan has evolved

Escher posted:

I think I have pretty much everything you listed (except just center rail gaps due to lack of pins). 

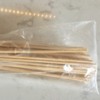
Unless you’ve found some pins already, I just use wooden skewers for insulating pins.  They work fine, and six or eight skewers is a lifetime supply.  Hmmm, looking at that picture, I think track cleaning is in my future.  

4EF74DA8-66ED-4CF2-966C-94734F3FDE1C832F279F-D6A3-449C-BC52-5B19E89AE43A

Attachments

Images (2)
  • 4EF74DA8-66ED-4CF2-966C-94734F3FDE1C
  • 832F279F-D6A3-449C-BC52-5B19E89AE43A

"Did you get these barrel plug connectors from tinman3rail with your switches? They are great as they not only provide fixed voltage to the switch, but also provide separate variable track power to the rails. It’s an easy way to add power drops to your layout. "

Yep - Hence why my power distribution is so stinkin' complicated.  Its basically two seperate power systems..(but I cheated a little - as you will see down below)

I wired up all my switches first - using block wiring relative to each switch - entirely on its own set of terminal blocks both at the control panel, and at a breakout strip at the transformers..

Last night I added four more 6 position terminal strips for the "track" power drops - 3 blocks and 1 common.  So I can solder onto track and then attach to the appropriate block. 


My cheat was that once I realized that I already powered the switches based on the throttle blocks (I hadn't undertood that the switch power and track power were the same within a block... thats why I was so confused originally)- I just added short jumper wires from the existing terminal blocks for the switches to the new power terminals for the track.  Hard to explain without pictures....maybe I'll snap some this evening.

Just sitting here for the last 10 minutes trying to diagram what I have - and its complicated.. I mean - I've rebuilt vintage HiFi Amplifiers with less trouble! lol!  Sorry - for the messy sketching - doing this in between running projects at work..  image1[1)


Attachments

Images (1)
  • image1(1)
Escher posted:

I also need to buy a fiber cut off wheel for cutting track - using a hacksaw is just not very good...  


Tin snips are fast as well. On tubular track cut through the rail but leave the webbing on the bottom intact. Bend back and forth to break the webbing. Open up the rail with a flat blade screw driver, stick a track pin in the rail, and use a needle nose plyer to shape the rail. Takes all of 2 minutes per piece of track. Plus now you have a use for your tin snips. 

Not even sure how to respond to that.. then again, its been a bad day so probably best I don't..


Cap it all off with - test running with the kiddos - and forgot my large engine (736) draws more power than my 224e... so I was swapping tracks back and forth between the two... and got distracted talking to the kids...


I forgot to throttle back when the 224 entered the outer loop - and I looked away.  It jumped the corner at high speed and hit the concrete floor.. Broke the trailing gear carriage and sheared off a marker on the boiler.. not pleased.  Now I need a donor 224 to swap parts...


.....and I'm still not finished wiring.. pbbbt!!

  It is just a difference in plans of attack. I would have wired the main, then loops then switches also; just to get trains rolling. You could have always twisted the light or jumped posts to manually throw points until wired. 

  I figured you were already too far along to suggest it once you mentioned wiring switches, so I pushed the temp. loop idea.

"  I figured you were already too far along to suggest it once you mentioned wiring switches, so I pushed the temp. loop idea. "

No worries - I don't regret doing it this way... its so clean its worth it...  First time I've taken my time in a project instead of hack and slashing my way through..  Its paying dividends!


Backdrops and/or a small fence is pretty common and helps with "flying locomotives" a lot. They don't really need to be permanent either.

  It doesn't take long to appreciate it's effect either. One of those times you gotta see it with and without it to realy get the impact.  A picture or two and you'll know it belongs  

Mine drop into a slot between the tabletop and an added frame around the the top edge. 

 A thick carpet is a good defense too. Even a throw rug beats nothing.

 I just cut the wood off an old hollow closet door, cut it into 4 panels, and painted it blue. 

Escher posted:

Not even sure how to respond to that.. then again, its been a bad day so probably best I don't..


Cap it all off with - test running with the kiddos - and forgot my large engine (736) draws more power than my 224e... so I was swapping tracks back and forth between the two... and got distracted talking to the kids...


I forgot to throttle back when the 224 entered the outer loop - and I looked away.  It jumped the corner at high speed and hit the concrete floor.. Broke the trailing gear carriage and sheared off a marker on the boiler.. not pleased.  Now I need a donor 224 to swap parts...


.....and I'm still not finished wiring.. pbbbt!!

Don't take William 1 comments badly - he is a proponent of throwback floor train running of the 20's & 30's  - a well planned layout on table just riles him up - he does come off like a troll at times


as to your last comment regarding your train event - I have a cartoon for that

joe-btfsplk

the engineer cannot be distracted

Attachments

Images (1)
  • joe-btfsplk

Adriatic - Yep - I was thinking about corner barriers about 30 seconds after the train went splat...  That is definitley happening soon!


Carl - I was pretty worked up after a rough day at work (Automotive Industry - Weatherstrip supplier)... and then the tragedyof the 224..  As me old pappy used to say "I was being a bit thin skinned". 


I get it - and I generally would agree with William - runnin trains is why we are here, right? 

Third loop wired... power feeds “done” but I might add one more just because... siding switches wired... but I ran out of crimp ons so I still have two switches left to wire (sidings).

Got a great deal on a Williams BL2 (I love them!) and ran that with my Son today - what great running engine!  I did the series wiring mod last night and it just crawls... EC9D86FB-BDCB-4FCD-8220-4B70CE82568F4182E649-76C5-426F-ACA7-A415CF3F8841B5DD0253-D278-4281-B25B-A49AFED7F1F0

Attachments

Images (3)
  • EC9D86FB-BDCB-4FCD-8220-4B70CE82568F
  • 4182E649-76C5-426F-ACA7-A415CF3F8841
  • B5DD0253-D278-4281-B25B-A49AFED7F1F0
Escher posted:

.....aaaaaand done.  Just wired the last switch and isolated the last siding track.

Only issue is I get a lot of derailments if I back up (push) cars through the switches.  Forward is no problem...  

031 curves are very sharp and pushing lightweight cars with truck mounted couplers through those curves at any sort of speed above a crawl can cause derailments. Backing through a switch can be even worse. I had the same issue as a kid with modern era 022 switches. Going slow is really the only option. On my current layout my smallest switch curve diameter is 042, which has virtually eliminated the issue. 

Escher posted:

.....aaaaaand done.  Just wired the last switch and isolated the last siding track.

Only issue is I get a lot of derailments if I back up (push) cars through the switches.  Forward is no problem...  

The siding configuration probably has more impact than the weight of the cars. The scale trains work like the real trains in this case - take notice of 99.5% of prototypical sidings. There are no turnbacks or esses (S curves)

You and your helper have done nice work! Does the helper approve of the result? If, yes , then , it is good to go.

Why don't you brush the ballast a little thinner on the inside rails? You made the extra effort to add the ties and now they lost under the ballast.

Even though outside activities prevail, it is good to take some time and still touch something on the layout.

Thanks for update!

Well... 5 months pass... and its getting toward time to get back to the layout..


Some things have changed in our lives - mainly - we now plan to stay in our house for at least 5 more years (Previously we had planned to move in 2 or less)....  


So now I'm back to thinking about the basement as a whole - and what a general mess it is.


Bottom line - I may be doubling (tripling?) the amount of space I have and going to 10X18 or even more with extensions into the other are of the basement (semi around-the room is possible).


My wife is open to the idea - so depending on my motivation level - I may be ripping *everything* out including existing shelves and tools.. 


I'm glad I did this layout as it is, because I've learned a TON in the process..  but it has also shown me a lot of areas where I made mistakes..  access for example - there are places you just can't reach if the train derails..  and the switching issues I mentioned earlier - the trains really are struggling.. making me consider going with either Atlas or GarGraves and better switches... plus increasing to a minimum of 54" or 63" diameter turns..

Ive attached an idea for a starting point... but really have no idea how I want to do this.. 

expansion

Attachments

Images (1)
  • expansion
Last edited by Escher

IMHO, I would do away with the isthmus/peninsula connection and leave it closed as a simple yard area. The way you have it now creates two inaccessible areas . By having it close ended, you open up the area inside to walk around and the track connection you show doesn't really do much.

In addition, depending on how wide the peninsula is you might be able to fit an O-27 closed loop at the bottom, even with it being closed off. See Fig 2.

Just my $0.02


Attachments

Files (1)
Richie C. posted:

IMHO, I would do away with the isthmus/peninsula connection and leave it closed as a simple yard area. The way you have it now creates two inaccessible areas . By having it close ended, you open up the area inside to walk around and the track connection you show doesn't really do much.

In addition, depending on how wide the peninsula is you might be able to fit an O-27 closed loop at the bottom, even with it being closed off. See Fig 2.

Just my $0.02


I like that idea - and had something very similar sketched!


I added the loop as a reversing loop.... but I may be able to fit that in as well elsewhere... I'm going to properly measure the other half of the basement - and maybe if I get creative I can wrap around a good portion of the furnace and throw a reversing loop over there..  Just need to have access from one side.

Progress on the basement cleaning and garage cleaning continues...  Looks like this is definitely going to happen now - I've made enough room to clear the area out..


Plyaing around in CAD here at work and came up with this... using standard GarGraves 72,63 and 54 curves.. Three mainlines with some yard areas.  I'm thinking of having a "town" or industry in each corner.. and then the main yard in the middle.

10x18-three-mainline-one

Attachments

Images (1)
  • 10x18-three-mainline-one

I'm thinking the outermost mainline will be elevated (hills / mountain) on the left side of the layout and transition back to lower level on the right - then some tunnels at the bottom left for the front two loops - this will allow access from the back .

Probably going to pull the elevated loop further away from the other two to allow for the elevation changes..  also going to play with switch positions, etc... I have to look at a bunch of back issues of OGR to find examples I want to emulate.


Goal is to have tear out done and bench work laid by December so I can start playing with track and experimenting...

Escher posted:

Playing around in CAD here at work and came up with this... using standard GarGraves 72,63 and 54 curves.. Three mainlines with some yard areas.  I'm thinking of having a "town" or industry in each corner.. and then the main yard in the middle.

DSCN0826

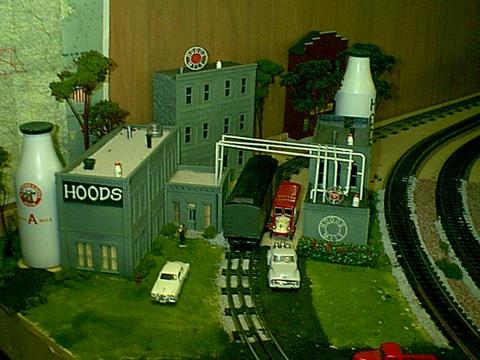
Foam board scratch built transfer buildings.

Hood's

DPM kits and modules.

Two corners of our layout.  John in Lansing, ILL

Attachments

Images (2)
  • DSCN0826
  • Hood's

Ohhh My Goodness... I cleaned and cleaned and cleaned tonight...  But now the area is opened up and I can start tearing out the existing track - and then i will be ready to go.  

Not sure if I mentioned it before - but in 2018 we had a drunk driver crash through our house - and in the ensuing madness - we dumped nearly the entire contents of the house into the basement and garage before it was condemned for repairs.  It was a mess even before that - but that made it so much worse...  So - this has been a monumental task.  I'll snap some pics once I have the existing track and make-shift benchwork out.

Escher posted:

We don't have a name for our RR yet - but we are having a lot of fun!  (Kids almost as much as me!!)


Here is a vid of my on running the Second level for the first time:


And some pics of the most current updates - Working on the bridge and tunnels in blue foam..


40264453873_90724289be_z47229532301_3f9f67935b_z47229532401_886a3c85c4_z

Hi Escher,

I went through your layout thread but not carefully. In the second and third picture of the bridge, may I ask how you created  your arches? My first thought would be you used pre-fabricated tunnel portals as templates but I wanted to still ask just in case I am incorrect.

Thanks,

Dave

Question for the group..


Since I'm starting over - I'm considering which brand of track to use.  GarGraves seems quite expensive - but it also looks to be the type to go with...  is there any other type I should be looking at?  I'm moving away from traditional tubular and selling my existing o22 switches to recoup some of the cost..

Escher posted:

Question for the group..


Since I'm starting over - I'm considering which brand of track to use.  GarGraves seems quite expensive - but it also looks to be the type to go with...  is there any other type I should be looking at?  I'm moving away from traditional tubular and selling my existing o22 switches to recoup some of the cost..

Just a clarification...  I may still use tubular track...  I’m still flip flopping a bit in that regard as the price is right..  likely I’ll run tubular to start as I’m nailing down a track plan... and then I’ll decide..

I like the GarGraves stuff but it’s quite expensive for us...  


My two cents as a tubular guy:

Gargraves definitely looks better, however, no matter what, we still have that pesky third rail. So while we are already suspending our disbelief and overlooking the middle rail, I don’t find it too much of a stretch to overlook the shape of the rail and tie size/spacing. When you added ties and ballasted the tubular, it looked pretty good too. If buying Gargraves and potentially Ross switches will slow your progress (buying in phases as funds allow), I’d stay with tubular. If money is less of a concern, buy the Gargraves and Ross all now and build it all at once. Bottom line, get it up and running while the young lad is engaged.

Made the decision this morning while surfing the local Menards stock online - I ordered some O54 and O42 curves and will be going with a dual mainline in tubular for the foreseeable future... I'll experiment with my exisitng O22 switches and see if I can space them out a bit more to avoid derailments (Switch to switch transitions were where most of my issues happened).  

But - you are correct - I can get a lot of the same "look" with the added ties, and the tubular doesn't bother me..  I was "pie in the sky" with the GarGraves - until I started really digging into the prices.. Champagne taste on a beer budget as they say.

Regardless - Sunday will be a big day - going to go all out on trying to get the bulk of the benchwork in and a couple of functioning loops... a pretty tall order - but we shall see.


I apologize for all the flip flopping back and forth.  I do that a lot - especially in thi shobby - as I'm running trackplans in every type of track (Fastrack, GarGraves, and Tubular).  But I realize have to live in reality with regard to a budget. 


 Just upping my curve radii in tubular is going to be a huge improvement and allow me to run larger trains, while still not breaking the bank.... and I can keep the total cost of the project way down.  I'm reusing a lot of the previous studs and screws... so all-in, I believe I will be under $400 for the project even with the new track..

Took the advice from earlier in the thread about getting trains running as soon as possible... I wired all the power blocks (except the small yard I added as block 4) and did a test run last night with manual switching.... everything runs smoooth.


Tonight - final tweaks and maybe increasing some clearances to the walls - then I will tack the track down and start working on switch wiring.

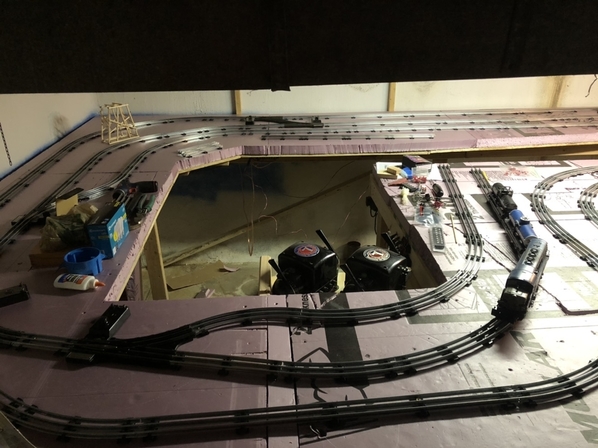
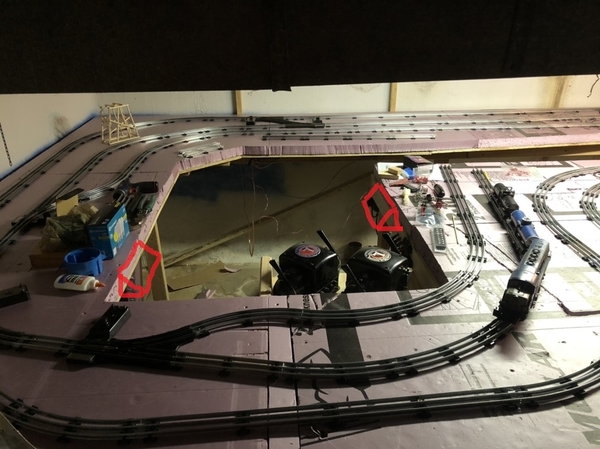
Question - Our control area is in the middle of the large cutout - center of the picture above..   I have both ZW's in there and its a bit snug, but very useable.  However - I have no idea where to put my layout diagram and switches!!??  DOH!   I can't do a board like I had previously unless I put it up high... I can squeeze the boxes in easiest if I space them out around the layout - closer to the actual switch machines..


Do you folks with larger layouts put all your switches right next to the throttles, or do you put them closer to the actual switch machine?  

Not really sure what standard practice is.... I'm not opposed to walking to the other end of the layout when I want to switch mainlines...  and that would save me a lot of pain in extending my switch wires - I'd only need to run a power and ground line.


Maybe you can separate the transformers and switches so one manages the yard, while the other manages the main lines.  For switching, I think you will want transformer and switch control right next to the yard area.  The outer mainlines, you can set the speed on the transformer and walk around to the switches or keep them near the mainline, either way it is easily altered if you want to make a change later.  Something like this:2 Position Control

Attachments

Images (1)
  • 2 Position Control
Last edited by JD2035RR

Apologies - I hadn’t posted an updated layout drawing.. here is a quick sketch...  things had to be shifted around when the true space was realized as not quite as large as I hoped.. I also dropped a loop due to space and now have two mains and a passing siding.

 A8BB41D1-FCDD-4683-8DD8-9FCCE47019BD

... the “yard” is really just two stubs where I can build up trains while the mains are running..


Edit - Update drawing - didn't show the main loops interchange switches.

Attachments

Images (1)
  • A8BB41D1-FCDD-4683-8DD8-9FCCE47019BD
Last edited by Escher

This is where I would put the power and control - on this out side edge - One can see the entire layout fromthis point of view without turning or rubber necking.

Leave the inside for access when needed or make removable scenery in there

The direction that the transformers are facing in the post above has the engineer looking away from the layout.

Anyway, just my preferences - do what you like

Good point...  In my exuberance for the new access areas inside I hadn't thought about putting things "outside"...  Not sure if that specific location will work as its right at the foot of the stairs - and in the path... but, possibly where I had the control before in the bend of the L... provided I left enough room to still use the lathe.


Thanks for the suggestion!


Escher posted:

Good point...  In my exuberance for the new access areas inside I hadn't thought about putting things "outside"...  Not sure if that specific location will work as its right at the foot of the stairs - and in the path... but, possibly where I had the control before in the bend of the L... provided I left enough room to still use the lathe.


Thanks for the suggestion!


Okay, I didn't realize there were outside constraints - I don't like the center of the outside or, in your case, the elbow of the L for the same reason. If you watch one area of the layout you are not able to watch the other. I run multiple trains simultaneously - it keeps me alert.

Wouldn't the corner move you away from the stairs? How much traffic will you have when operating? The control table can be on wheels and slide under when not in use. 

Keep it mind for the future - you have a full plate now and are making good progress!

Escher posted:

I'm thinking that I may just put the mainline switches on the side opposite where my ZW's are currently... and keep the small yard switches by the control area - as you recommend..  then I just have to turn around to switch which loop I want.

I would make two small panels with triangle block ends out a 2 x 4 and a surface of 3/16" board Mount to side of layout

Escher

The red lines indicate isolation points to kill power to the track. Each K zone is one toggle switch. 

Connect the cross-over switches together - Put SW 1, SW2, SW3 & K1 on panel facing that area

Put SW 4, SW5 and K2 & K3 on the panel to left

Make the panels as small as they can be to hold everything - use a number labeling system and place RR signs on layout to identify the switch or track section

Escher_Track_Plan

Will that work? It is only a slight rotation in the chair to make it work.

Attachments

Images (2)
  • Escher
  • Escher_Track_Plan
Escher posted:

I did pretty much what you describe... I have half the switches wired - at the location you show on the left correction - right, above.  I'm also running 4 blocks - as you can see on this updated digram below:

layout-11-18-19

Using one controller each for the crossover switch pairs saves space on the control panel and makes operation easier. 

I would still suggest that A & B get isolated and get their own kill switch. Good place to park extra locos.

I missed the second red switch going to the light blue line. 

You have to be careful with the voltage of Blue and Red when crossing over having those as two power divisions. If they are not close to the same voltage, they will bridge the two transformer channels. 

Last edited by Moonman
Escher posted:

Added another long siding tonight... considering one more at the far end off the inside loop..  Yes - I want to be able to park a lot of trains!

Final-additional-siding

Yes, that adds play value, parking one and bringing another into action keeps the interest for the run session.

Now, you made the switch control panels larger! 


Last edited by Moonman
Escher posted:

Another day - another layout change...

Turns out I didn't have the correct side switch to put a siding at the far end... so I expanded on the area with the other siding...  Makes wiring simpler as well - shorter runs.

Final-additional-siding-swap

Backing in or out through #6 & #9 or any of that route (#2 thru #9) could be an area for derailment - pushing through wiggles that could be a mess. If a car just won't cooperate use it in another train that doesn't back through there. 

A switch can be on the curve of the red line on the inside elbow - put the turn-out in the curve and the thru starts the siding

Switch_Placement

Move the siding to the right side again

You are running counter-clockwise, aren't you?

Attachments

Images (1)
  • Switch_Placement

I think I understand what you are saying - I'll have to see if I have room.  The area where the two mainlines travel from center to far right is pretty narrow..


As to running direction - no idea - I'm making this up as I go!  I've been Gomez Adams of late and running two trains in opposite directions - luckily no fiery crashes though!

Don't mean to butt in because I have no experience with these switches and the space needed for the motor, but I thought I'd offer this alternate configuration. Note the different locations for the 1-3 and 2-4 crossovers. This allows you to enter/exit the red/green tracks from either side. Also note the new location of the 9 switch. Even if you can't make the other changes, you should make this change to ease the transition to the spur.

escher 2019-11-21 daz


Attachments

Images (1)
  • escher 2019-11-21 daz

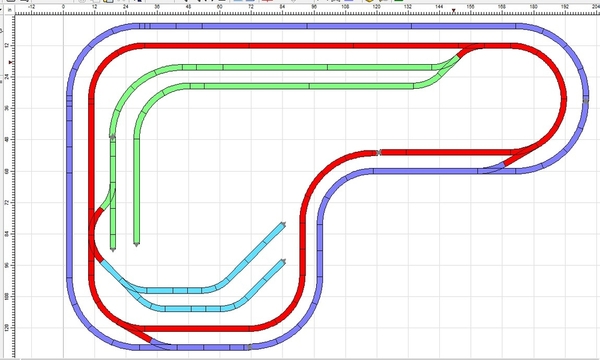
Ok - so I had it drawn a bit wrong.... When I installed the switches, I offset them a bit... here is the updated drawing.  No more wiggles - at least not nearly as bad..  Sorry for the confusion... I hadn't looked at it in a while and realized today when I went to look at it again.


Final-fixed-one

The reason for the location of the switches being all on the back side - is the distance between tracks - its set up tighter in the front - and wider in the back...  

Attachments

Images (1)
  • Final-fixed-one

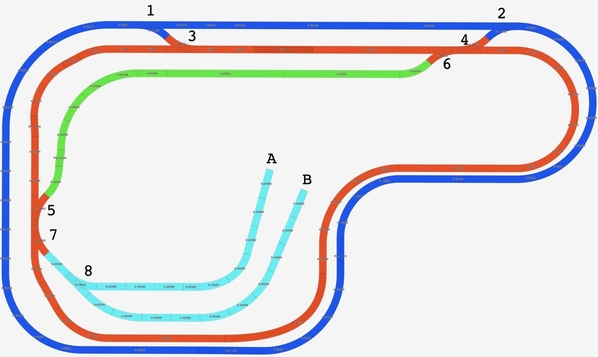
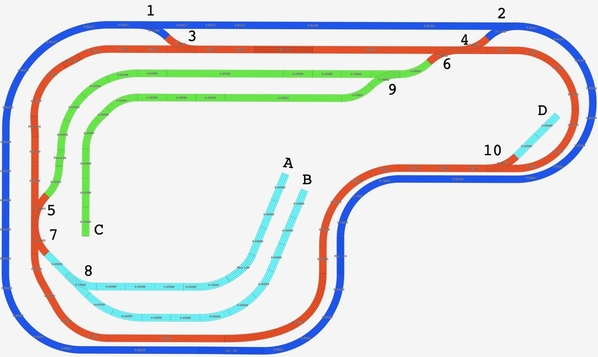
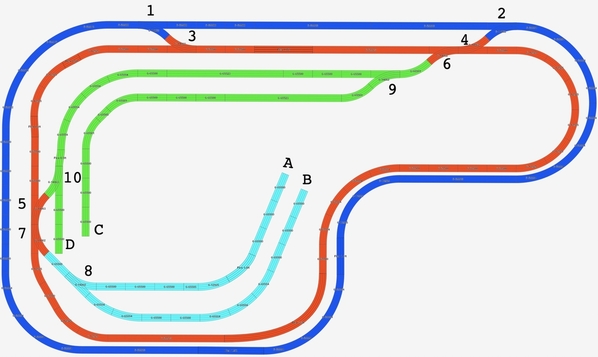
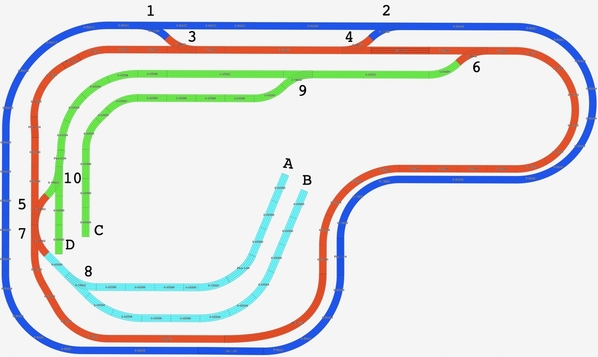
Been a busy week... First the trackplan update - showing sidings and power..  

All wired except for the last two switches (9&10) and power for sidings A and B.

And then pics of the layout with a few trains..  and we have been buying up all the trees we can find.

I think I may want to isolate part of siding C so I can hold a train at the end and bring cars into the siding with another.  

Adding power for "E" allows for a nice passing siding - I may put a depot there.

Layout-Map-11-27IMG_3004IMG_3007IMG_3011IMG_3013IMG_3015IMG_3017

Attachments

Images (7)
  • Layout-Map-11-27
  • IMG_3004
  • IMG_3007
  • IMG_3011
  • IMG_3013
  • IMG_3015
  • IMG_3017

What is a "Proper" layout?     We all have opinions and I would bet they mostly unique.

For me a proper layout has the following features:

1.   I like a layout that represents a purpose.    Therefore I like it to have a lot of industrial switching.    For that purpose I want some sort of directed switching such as switchlists, car cards, or some system to route cars.  There has to be some system to tell me where to move the cars and I prefer a system that has variability.   I use a computer system to generate switchlists based on industry routings and requests for cars.

2.    I want the modeled railroad, ie layout, to have at least one connection with the outside world.   That means it should have some tracks that represent connections to other railroads.    These could hold entire trains or just strings of cars.    They might be visible, or hidden staging tracks.

3.   I like more focus on a prototype area and/or railroad.     I currently model a Pennsylvania Railroad line that ran from a connection with the Pittsburgh Division Mainline at Greensburg to Brownsville Pennsylvania.    There was "in the day" a large yard at Youngwood Pa and the line ran through Connellsville where the B&O ruled.      In the later years, this was a single track mainline with passing sidings, and lots of industry.

4.    I prefer a single route where an operator can walk along next to his train.   Or possibly if a junction is modeled and a second route it make some sense based on items 1-3.     This implies a trackplan/layout that is probably narrower and along the walls with a peninsula or two rather than a large table type where the center is way out of reach.

5.  Based on the above features, then the trains that run should have a purpose to support the things represented on the layout.    For example, through freights would run through and stop at the yard to pickup cars bound to destinations off the layout (staging) and setout cars for industries on the layout.    Perhaps one in each direction.   Then there would be locals that originate at the yard and run to towns or areas on the layout to deliver and pickup cars.   These locals would then go back to the  yard.      Passenger trains could be locals that work express cars on the layout or through trains that just go through and do a little work at a main station such as picking up or setting out pullmans, coaches, or express cars for other trains.

Sharp tools are nice for final shaping of the expando foam- I visited a thrift type store or two and found electric carving knives for small money - they are a very nice weapon on that foam - a cutting wheel on an angle grinder really makes quick work for primary shaping.

Attack the foam with whatever weapons you have

Long time no posting... 

Long story short - I burned out in a major way.  Was deep into plaster and scenery on about 1/4 of the layout and just lost interest.  I realized I had cut so many corners with the wiring it was just a mess - and my access holes under and in the middle of the layout were not quite large enough - so I hated ducking under.   Then we hit the biggest frustration - lots od derailments and small radiuses wouldn't allow us to run the trains we want (we love big steamers)....  So it has sat for the better part of two years.  I had planned on selling the majority of my engines and regrouping while I figure out what to do next.

Fast forward to yesterday... and a dream engine came up for sale.... An older Williams Brass 611 Class J in good running condition but with poor paint - and of course - it'll only run on 072 radius or larger.

So I sat my son down and asked what he wanted to do (He's 12 now, approaching 13)... he says "Whatever it takes to run that engine and the bigger steamers".  Good boy..


So - it looks like I'll be taking all this "experience" and starting over - *again*.  Higher benchwork, and O72 radiuses. 


Our basement area is a bit odd - basically 10 foot by 18, but it narrows to 6 foot at the far end.

So I came up with this - all O72 curves and switches..  Should allow two train operation and some passings as well as a small staging yard.  Also solves the clearance issues with much larger access holes.

Any suggestions?

Layout-update-1-22

Attachments

Images (1)
  • Layout-update-1-22

I think it is good to take all you have learned and start over!  Most of us have done it at one point.  I have thought from time to time that I could have gone with 072 curves instead of 054, but it is working, so I continue on.

Have you figured what grade you need to get high enough for the overpass?  Just glancing, I think it would be doable.  The curve closest to the yard looks a bit close to the furnace, but you should be able to adjust to make more room to pass through and allow access for furnace maintenance.  I am not good at figuring out the best use of space for functionality in yards.  Maybe someone else will chime in.

@Mark Boyce posted:

I think it is good to take all you have learned and start over!  Most of us have done it at one point.  I have thought from time to time that I could have gone with 072 curves instead of 054, but it is working, so I continue on.

Have you figured what grade you need to get high enough for the overpass?  Just glancing, I think it would be doable.  The curve closest to the yard looks a bit close to the furnace, but you should be able to adjust to make more room to pass through and allow access for furnace maintenance.  I am not good at figuring out the best use of space for functionality in yards.  Maybe someone else will chime in.

Nope - no overpass - This is all flat - I think what you are seeing as overpass is two back to back switches.

That was another thing I learned in the process - I'm not really interested in grades - it really messed up running conventional trains and is why I ended up moving to legacy in the first place - trains were nearly running into each other on the grades....  I want dead simple operation...  nice roundy rounds.... Maybe a siding or passing occasionally.  I way underestimated the whole "operation" thing..   I ended up spending all my time fixing derailments in the switches.  Honestly - I probably wont add the switches for a while, and may just run a couple of loops for a while.

I wonder if you could figure out a way to build a hidden yard under the main platform.  There's no such thing as too much yard space.  I know I'd like more, even though I just added a good sized yard in addition to my smaller yard tracks.  I had space over in that corner to just expand on the main level, but if you didn't, you could go to the lower level.

Attachments

Images (1)
  • mceclip0

I wonder if you could figure out a way to build a hidden yard under the main platform.  There's no such thing as too much yard space.  I know I'd like more, even though I just added a good sized yard in addition to my smaller yard tracks.  I had space over in that corner to just expand on the main level, but if you didn't, you could go to the lower level.


I agree - I would dearly love to have a large yard space - simply for storage... Over the last 3 years I've bought all the "good deals" I could find and now have about 15 engines and 20 or so cars... and no place to store them.  My office shelves are all small display areas with loco's strewn about.

We had hoped to move by now and find a place with a full basement instead of the half basement we currently have.  But although the housing market is excellent for sellers - it also has priced us out of all the homes we would want..  Houses we were looking at 3-4 years ago for $250k are nearly $350-400k now.... so that dream (and the dream of an acre of land with a pole barn) are again on hold.  My parents also both passed away and I inherited their vacation properties in northern lower MI so the taxes and upkeep are a bit of a drain on the finances as well... Long story... but we knew all this was coming and have been preparing for it.  Life changes!  Now you see why the hobby has been on pause for a bit...

Add Reply

Post

OGR Publishing, Inc., 1310 Eastside Centre Ct, Suite 6, Mountain Home, AR 72653
800-980-OGRR (6477)
www.ogaugerr.com

×
×
×
×
Link copied to your clipboard.
×
×