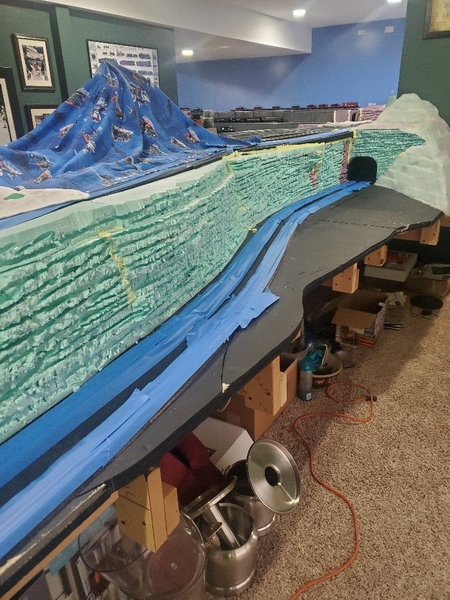
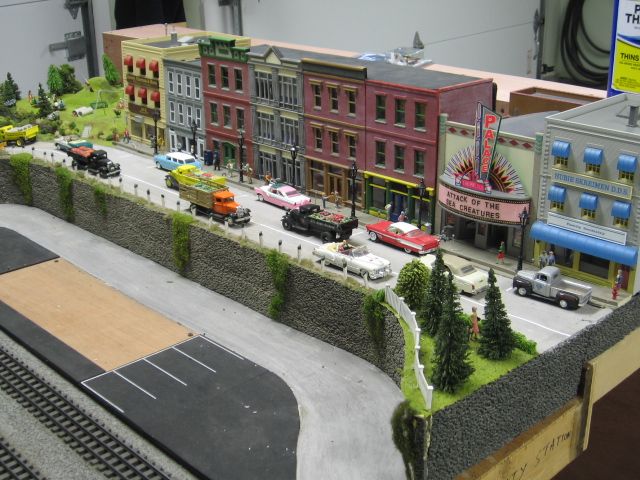
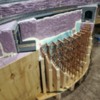
It's been a Looooong time since I posted, but I've been working on the layout, unfortunately at a snails pace.  I wanted to post some pictures of the foam mountains I am attempting to create and share some of the methods I have used so far.  They are not complete, but my goal is to have them painted by Thanksgiving (Family comes over then).

The first set of mountains I constructed were built using wooden bases, cardboard, brown rolled paper (Found at any hardware store), and hydrocal (in molds & brushed on).  After I got the structure to my liking then I used dyes to add color to the mountain.  When that phase was completed I used Scenic Cement and placed the ground cover and other scenery items on the area.  I initially used hot glue for the trees but some have taken a few hits (this will happen with three boys at home) so I need to come up with a new method for those.

Now onto the second set of mountains.  I decided to try using foam after seeing the results several people have achieved.  I went with 2" foam board, 4 x 8 sheets.  I cut the foam with a retractable knife into 4' sections, approx. 6-10" wide, shaped to the desired landscape.  I also had to place some pieces vertically due to the curves.  I then used liquid nail, low expanding foam, and screws to secure the foam into place.  Note:  I also purchased (1) 1" 4 x 8 foam sheet for fill areas.  Once I got the foam secured I used a hot wire carving/knife tool set that I got on Amazon (This works wonders).  Afterwards I used a nail puller/cats paw tool to beat up the foam.  This is as far as I've gotten.  My plans are to fill some odds & ends areas, shape them, beat up a few sections, then use quilted batting on the sections that are not rock faced.  I purchased a power sprayer last year and will use it, along with brushes, to paint the foam and batting a dark brown.

Any comments, questions or suggestions are welcome, I hope this helps anyone looking to start the scenery part of their layout.  I know that the pictures others have posted on this forum have greatly aided me and I'm hoping to repay by inspiring someone else.

DarrenIMG_3219IMG_3218IMG_3217IMG_3216IMG_3215IMG_3214IMG_3177IMG_3178IMG_3180IMG_3182IMG_3183

Attachments

Images (11)
  • IMG_3219
  • IMG_3218
  • IMG_3217
  • IMG_3216
  • IMG_3215
  • IMG_3214
  • IMG_3177
  • IMG_3178
  • IMG_3180
  • IMG_3182
  • IMG_3183
Last edited by Darren Caruso
Original Post

Replies sorted oldest to newest

Thank you for the positive comments, can't find too many of those these days, and thank you for the ideas.  I forgot to mention that my final shaping step for the foam is to use a angle grinder with different size discs, but I plan to try the wire brush.

The foam cutter I bought off of amazon is listed as:  Winon Hot knife foam cutter, retails for $22.  I also got the quilted batting there.  I found a video on Youtube.  The individual uses a glue called "Modge Podge" on the foam, then places the quilted batting on.  After the glue dries he hand paints the batting.  The end results are impressive.  I plan to use the batting on the tops of the foam formations.

I used a total of 6 sheets of foam.

The layout is "L" shaped, approximately 28' x 30', varying widths.  It is all one connected loop with the trains travelling from top to bottom then back up.

Darren

Impressive work Darren.  One of the great things about rigid foam is its light weight.  I made this corner mountain with foam modules so it can be taken apart if I need access to the track inside the tunnels.

A hot wire doesn’t make enough mess for me.  I used a keyhole saw or steak knife for the cuts and a wood rasp/60 grit sandpaper for shaping. I used mold-a-scene/sculptamold for final shaping.

2016-01-12-50312016-02-04-50722016-02-23-51472016-03-24-5189

Attachments

Images (4)
  • 2016-01-12-5031
  • 2016-02-04-5072
  • 2016-02-23-5147
  • 2016-03-24-5189

The family and I visited the Scenic Express warehouse this morning.  Impressive, very impressive!  Jim couldn't be a nicer person.  We were treated to a tour and he helped us out with the items we needed.  My wife was joking that I could have spent the entire day there, and she's right, LOL!

Can't wait to finish shaping the mountains, get them painted, and start some scenery!  I will post some pictures once I make a little bit more progress.

Darren

20201129_140923

Attachments

Images (1)
  • 20201129_140923

Looking great.  I had great luck scratching at the surface with a pumice stone in addition to the tools you have mentioned.

As to painting I would say this.

1. Start with a coat of primer appropriate for foam.

2. Apply a layer of black. Especially to the deep areas.

3.  Hit it with a couple different shades of grey.   I did a much smaller project,  but for the grey I found watering down some latex paint and using a hand powered spray bottle gave a nice effect. (Remember to spray away from your finished piece until confident no more pure water drops are coming out of the spray bottle. ) if using a rattle can, spray at a very shallow angle.   You don't want to coat like you are painting a wall. 

3. After the grey dries, mix it up with some red, rust, and yellow.   Sponge them on here and there or use a spray bottle again.   The point is to have little bits of break up color.

4.  Now is when it all comes together.   Get some white paint, (off white will do,  maybe mix in an extremely small amount of the grey.  Get a brush and dip in this color,  maybe a 1/4" into the paint,  and wipe it off the best you can. Now "dry brush" your highest surfaces.   Remember to keep as little on the brush as you can.   Lightly brush the surfaces.   This will knock the monolithic appearance of the grey down and will blend the accent colors.

That's how I did my Halloween foam layout.

Attachments

Videos (1)
20201031_180059

Melgar -Thank you, I look forward to reading the article.

jhz563 - Thank you for the detailed instructions, thank you for taking the time, most people will not do that anymore, it is appreciated!

Seacoast - Thank you for the kind words.

I have been working with an angle grinder on the foam, actually it has come out better than I expected, especially when I get complements from my father-in-law, I know I at least did an "OK" job.  I will post some pictures of my progress here.  I have one more 16hr shift this week but I hope to put some time into the layout this week.  I want to get things back up and running so the kids can enjoy the trains, especially this time of year.

Darren

Mark,

I used a "Cat's Paw" or nail puller, it's pictured in the bottom left picture, utility knife, hot knife cutter, and an angle grinder.  I shaped the foam with the knife and hot knife wire cutter, then I beat up the foam with the cats paw.  Next I pulled/raked across the foam, again with the cats paw.  This took out small and large chunks of foam.  Once I had that all cleaned up then I went to the angle grinder.

Darren

Seth,

Please let me know which picture your referring too because I do not have any rock wall materials from Scenic Express, many other items from them but not those.
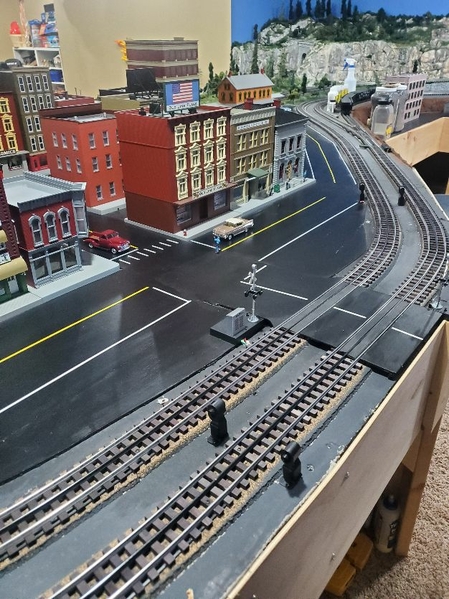
The walls, on the long straight-a-way, are molds I made, then filled with Hydrocal.  The forms are then adhered with drywall mud.

Now, the molds (light grey in color) on the large bends, below the rock faced wall, were actually designed for bridge pillars.  I just decided to cut them to my specifications and use them for another means.

Darren

Thank you for clearing that up, I had never looked into the Scenic Express walls due to having other items that I purchased 10 years ago.

I was able to get some more work done on the mountains the last few days.  It's not where I want the end results to be but I am trying to get it back to a point where I can run trains by Christmas for my little one.

20201215_14081020201215_14081020201218_17092220201215_14082820201218_16511320201218_16512420201215_140818

Attachments

Images (5)
  • 20201215_140810
  • 20201215_140828
  • 20201215_140818
  • 20201218_165124
  • 20201218_170922

Jeff, I used several different dyes; raw umber, burnt umber, black, slate grey, and stone grey. 
I mixed the dyes in plastic cups and then used foam brushes to apply.  I just "dabbed" lightly onto the rocks starting from the top and working my way down.

It was the first time I had ever used the products so I was a little apprehensive.  I started with black first then moved from dark colors to the lightest, allowing one color to dry before I started another.

Darren

I was able to get in a few hours last night after work and some more time this morning!  It is nowhere near complete but I wanted to get the layout to a point where I could run trains for my helper, just in case some magical elf happens to bring him some trains on Christmas morning.

Merry Christmas and I hope you all have a safe and joyous holiday!

Darren

20201224_12454820201224_12453420201224_12451520201224_12450720201224_12445820201224_12444720201223_11363520201223_113540

Attachments

Images (8)
  • 20201224_124548
  • 20201224_124534
  • 20201224_124515
  • 20201224_124507
  • 20201224_124458
  • 20201224_124447
  • 20201223_113635
  • 20201223_113540

Add Reply

Post

OGR Publishing, Inc., 1310 Eastside Centre Ct, Suite 6, Mountain Home, AR 72653
800-980-OGRR (6477)
www.ogaugerr.com

×
×
×
×
Link copied to your clipboard.
×
×