Please add your comments and suggestions. ![]()
Original Post


|
|
Please add your comments and suggestions. ![]()
Replies sorted oldest to newest
quote:Originally posted by Lee 145:
Let us know how those things are powered? Is it just the A unit feeding to B or what?
Looking forward to your reviews.
OK guys, the following is the gist of an email I sent to Scott (edited to correct spelling mistakes):
What about the number boards? On the sample Scott posted, the contour didn't look correct. It should be rounded and it looked somewhat squared off and chunky.
Good morning Chip, had a late night with our new member Rick.
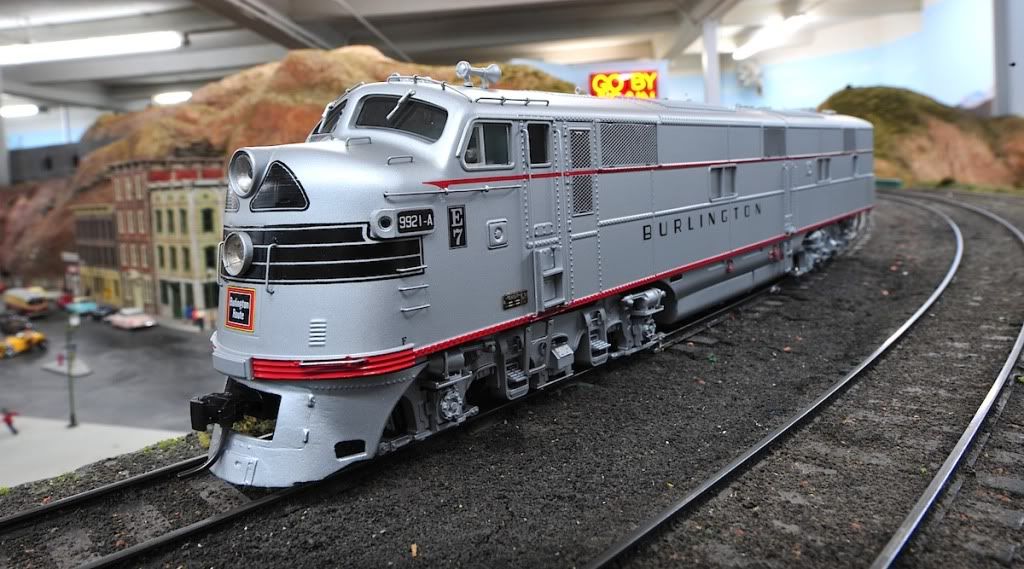
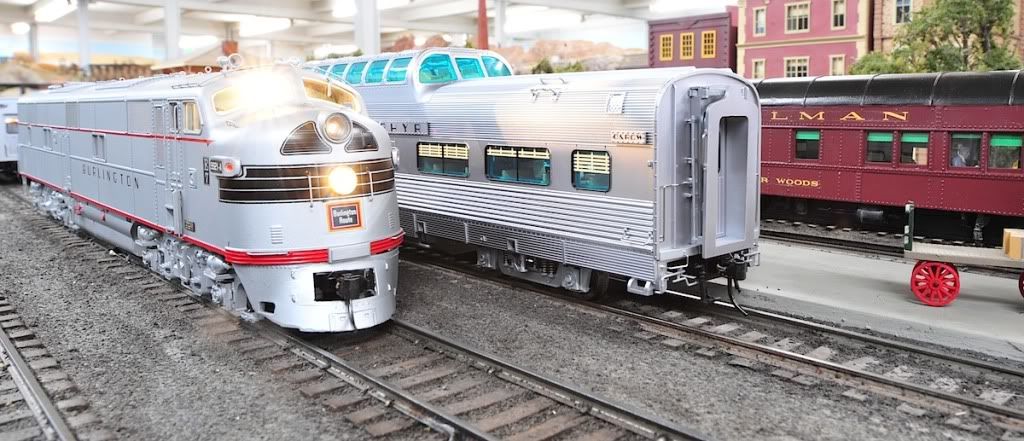
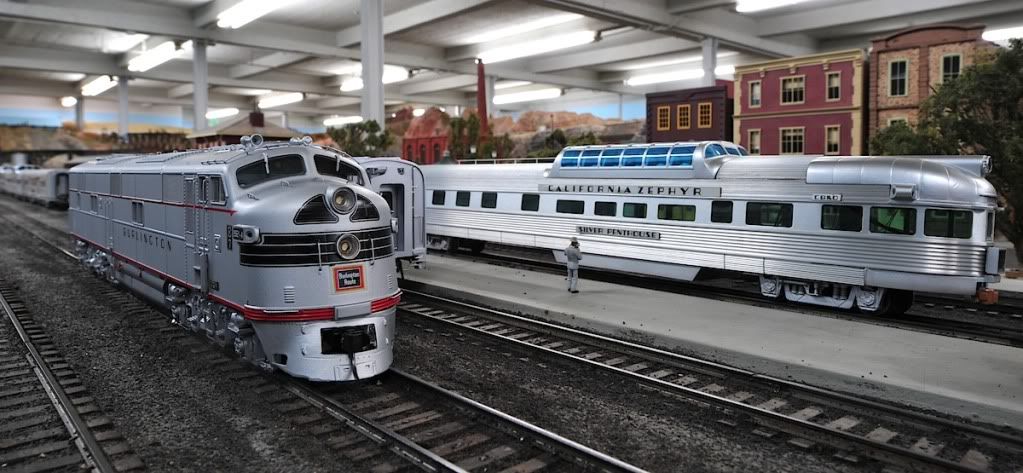
Scott, your model is wonderful, simply wonderful. I am so happy with the GGD E7!
I still think I am dreaming this. Did I really run a horizontal drive, plastic RTR 80-90% correct Burlington E7 in O scale that was not a better part of $2000!? ![]()
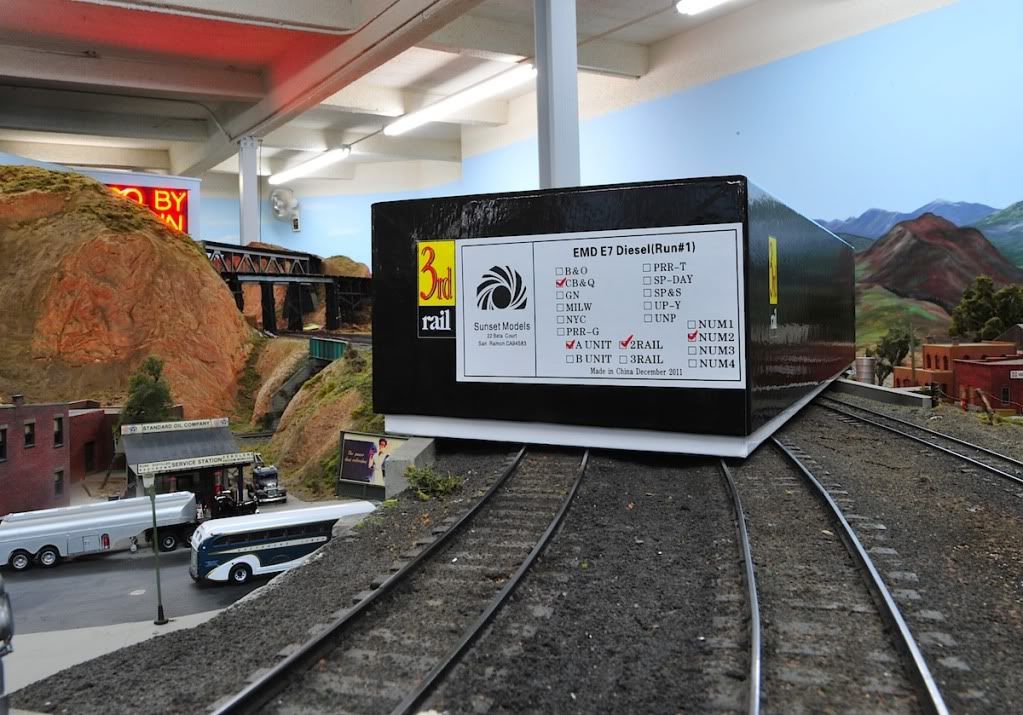
I was pleasantly surprised upon walking into the den and there sits this beautiful creation.. YES! ![]() It is REAL!
It is REAL! ![]()
OK, OK, enough of the drooling...
The new model received was not without a few issues in the quality control department. The poor pilot must be dealt with. The engineer side 2mm screw has been stripped out and was wedged between the diaphragm and the body. Oops.. ![]() No problem, easy fix for me.
No problem, easy fix for me. ![]() A RTR kind of guy would have fits.
A RTR kind of guy would have fits. ![]()
1-My biggest concern at this point is the strength of the two tiny 1/8" 2mm screws used to attach the (brass?) cast pilot to the model. This is a weak spot that concerns me. Our steep grades and an 11 car set of Atlas CZ cars would mean big trouble to two small screws already known for being libel to being stripped out. I would certainly take a look and maybe use a beefier screw; typical of your GGD passenger car bodies. A buyer certainly can't see this area and a pair of heavier maybe 1/4" long 2mm screws would do.
2-Upon operation on DC I am not that thrilled with the electronic systems used to operate the sound system. It takes some getting used to in operation but our ancient layout has so many dips and spikes in voltage that operating these sound equipped models a real pain without running out in notch 8. I would like to be able to turn off the sound system and run as a straight DC mode without the need to attain 19 volts before any movement begins. On the bright side of this the single Canon motor makes this process of running on the 19-24 volt range much easier and smoother than the ridiculous tiny twin motors of the China drive. In DCC model the piece I am sure would operate absolutely flawlessly! PERFECT I am sure.
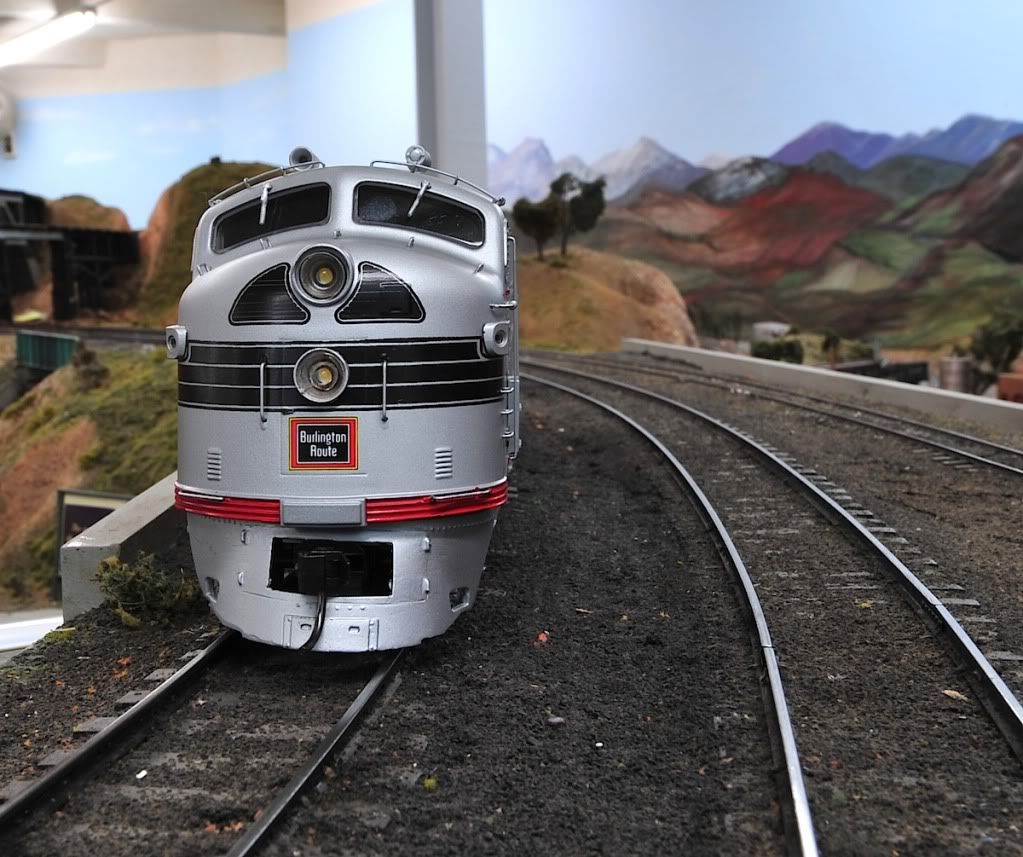
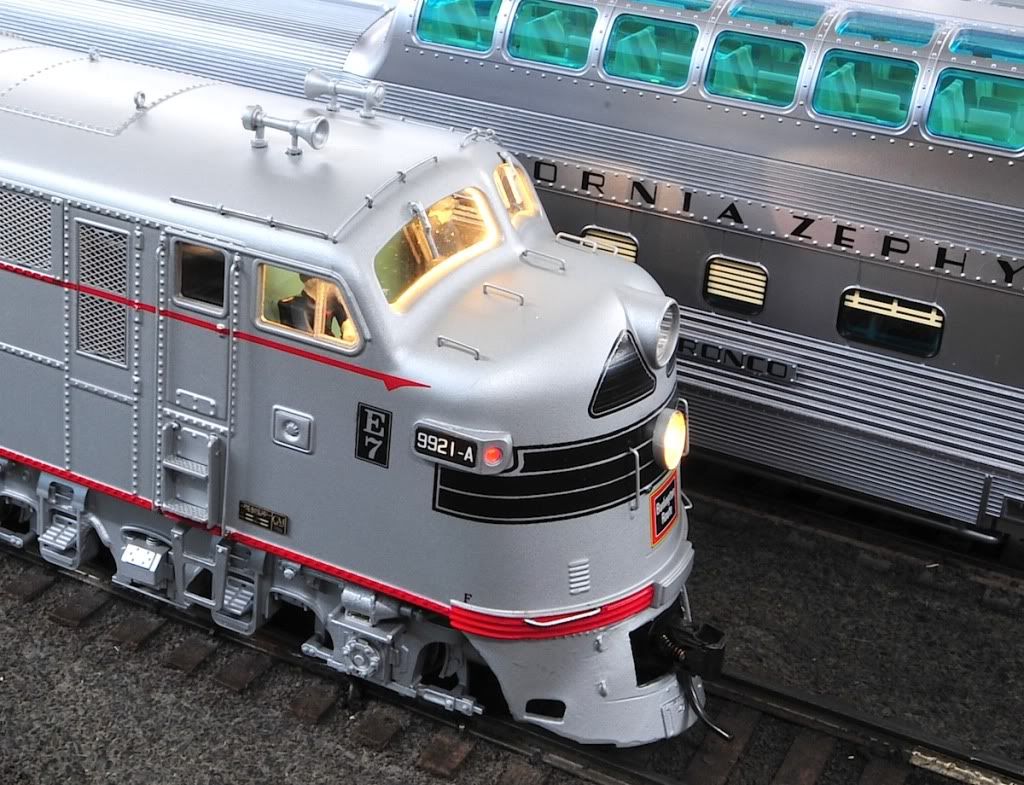
3-Headlights and Mars Lights. The builder is only guilty of not knowing the difference between the two light locations on the E unit or any EMD nose. The Mars light is really nice, looks great and has a convincing look if only it was in the right place. ![]() I am planning to disassemble the model to change this goof up and hopefully swap bulbs to correct this problem.
I am planning to disassemble the model to change this goof up and hopefully swap bulbs to correct this problem.
4- Class lights are NOT red. Green or White folks.. ![]()
5- The sculpt on the small as built era number boards are a little heavy but OK.
The remaining small issues are somewhat typical of plastic RTR models in N, HO or O. These issues are easily corrected by a modeler if he or she wishes too.
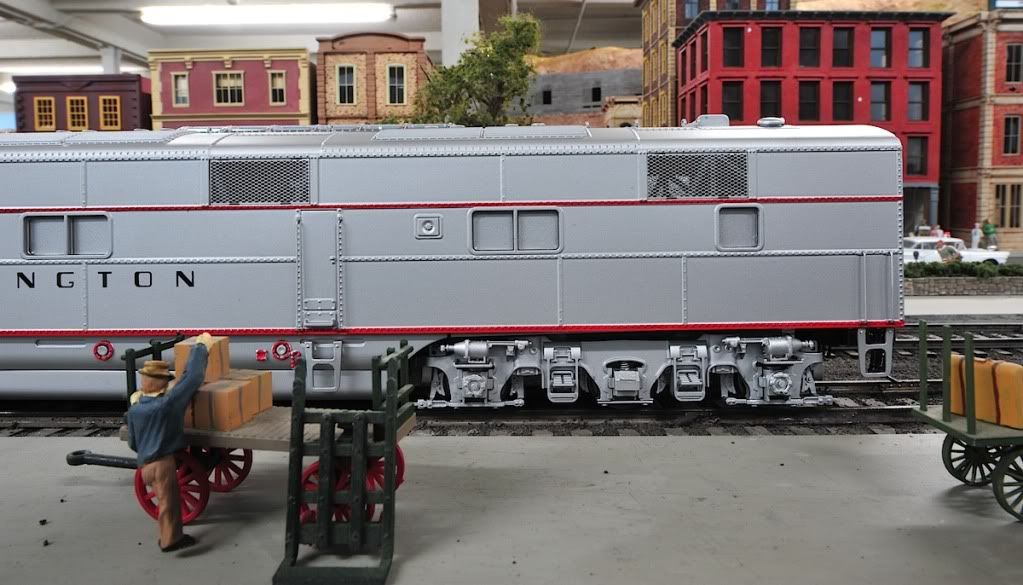
A) Maintenance grab irons are too tightly spaced and too far forward on the sides,
B) Missing maintenance step on the base of cab,
C) Functioning pilot doors would have been nice,
D) Functioning diaphragms would have been nice,
E) Cab interior lights are WAY-TOO BRIGHT,
F) Side Windows could have been painted black or a dark drab color to hide the lack of interior
G) The cab steps are truck mounted, the only hint of the Toy Train in this model. ICK!
H) Correct bearing caps for certain prototype era use. Our model has the late bearing caps in lieu of the correct early type.
I) I can correct this, I would like to see bolt detail on the maintenance grab irons. I think a total replacement is in order.
J) Silver paint on the high ribs on the Anti-Climber also the grab iron needs to be adjusted.
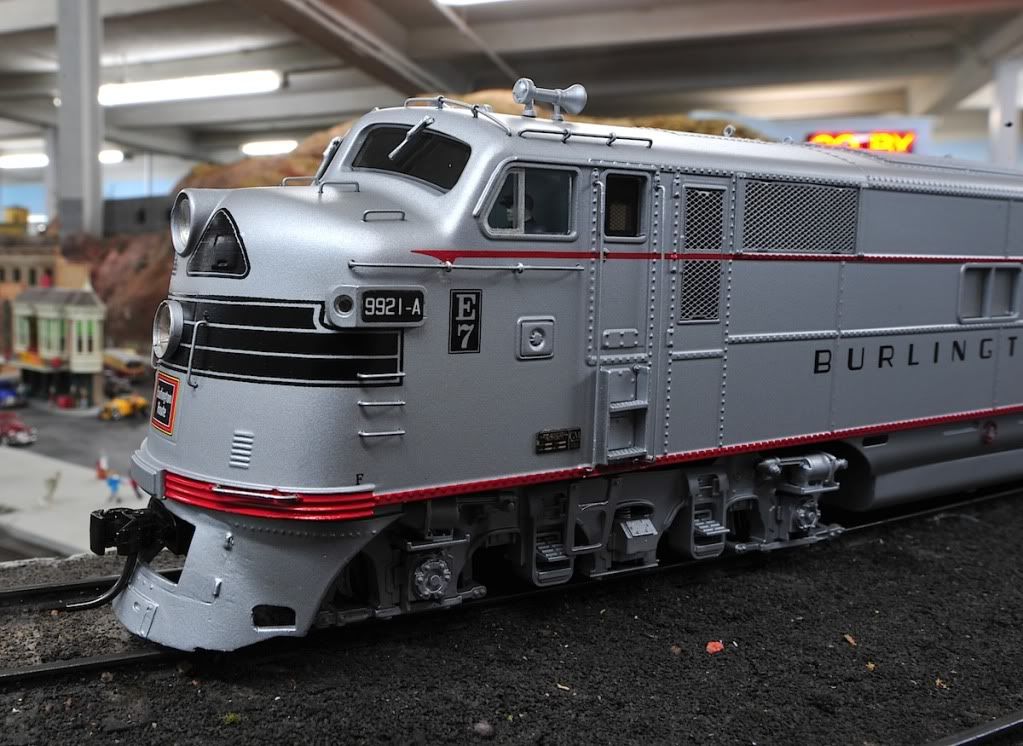
Not sure why the builder added the supports to the "eye brow" grabs?? This will be tough to correct.
The cab lights are INSANELY TOO BRIGHT
Adjusted EV steps to correct for the intense light of the cab.

I am not that excited about the windows. I would have painted the area behind the glass black.
The model is very light, I wonder if weight can be added for those wishing to pull brass cars? Finding the room to add weight will be a challenge but I am sure it can be done.
I will get into the studio for some studio shots.
Chip said it well, "If you can afford a Key Model Imports E unit that is your best choice, however the GGD for the money is spectacular...."
The model is not perfect but darn close. And close enough for me. I can correct the fake grills around the headlight, fix the pilot, and modify the grabs.
I will put together a list of corrections for the second run, hopefully the builder will make them.
What do you guys think about the model?
Lights in the cab of a running loco disturb me.
The cab should be dark.
Having cab lights lit during operation would be like having all the lights inside your car turned on while you are driving at night.
About the only time cab lights would be used is when a train or loco has stopped for a crew change.
That said, it's bascially a decent looking E-7, although those grab irons and access grabs on the nose are not right. And yes, those side windows in the carbody need to be blacked out.
Ed Bommer
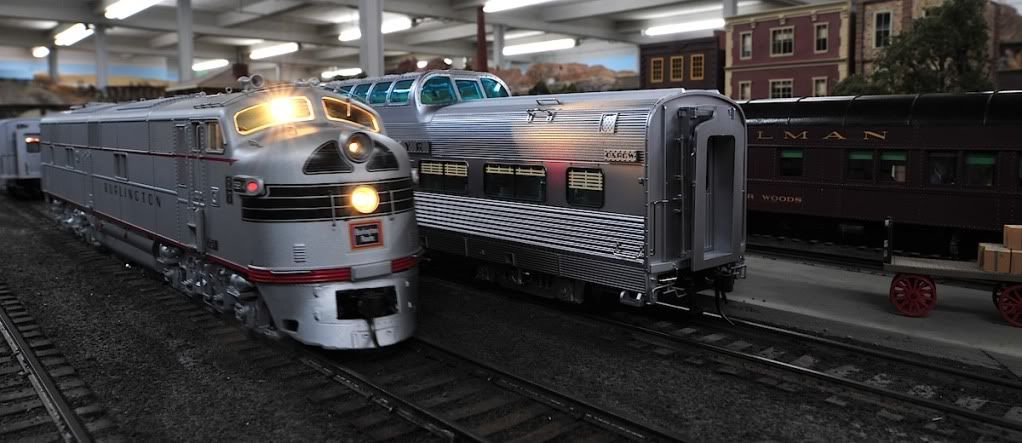
Video of the new E7 in action.
The cab lights are HOLLY WOW! LOL![]()
The Mars MUST move back into the correct position.
The DC Sound operation is cool but darn hard to keep the model from running away.. WHOOSH! I am sure it operates dead slow perfect on DCC.
THANK YOU SCOTT!
GOOD JOB BUD!
![]()
Very exciting. I'm am looking forward to the PRR ABA coming my way. The B is tied to an A unit, how will that work with 2 A's just tie it to the lead? I don't have DCC so I hope it works well with plain old DC.
Bob- can I borrow your BB Gun? ![]()
The cab light turns off after about 10 seconds of forward motion. So it is OK to a degree. I really like the trustees builder plaque, nice touch for a plastic model. ![]()
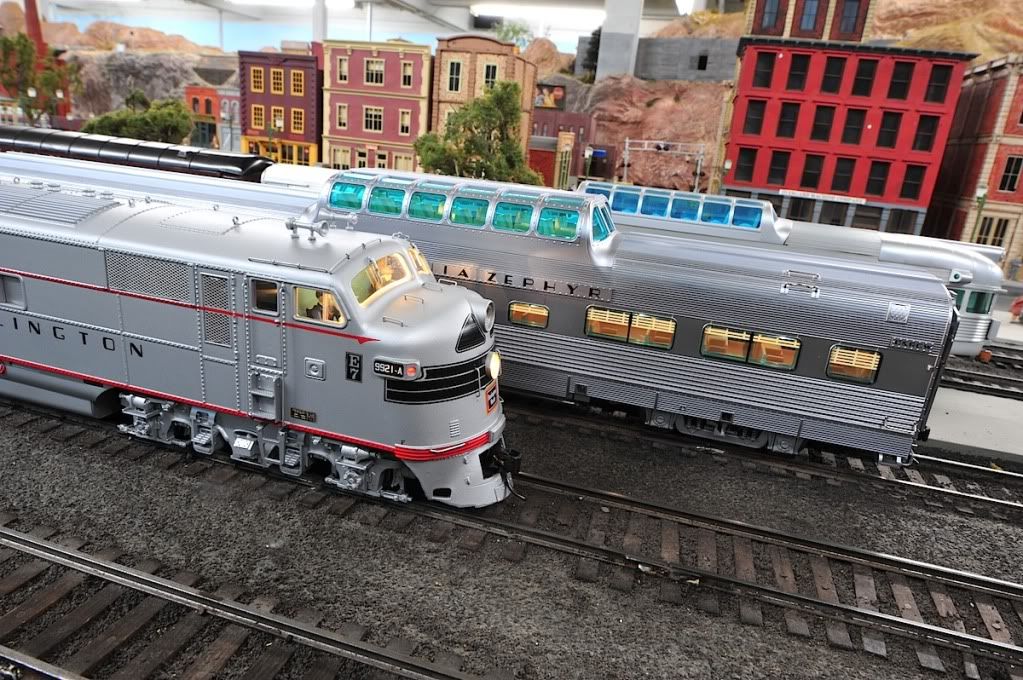
Bob I think the windshield and nose sculpt are superb.
The proportions are exactly where we all want them. Looks great.
Eric, thanks for taking the time with photos and video. As always you do a bang up job....I am looking forward to my PRR "AA" setup soon...
Dennis
FYI: If you guys right click on these images and open them in a new tab, you can view them in full resolution. The new forum shrinks "linked" images to fit the narrow width post box.
Pics are actually quite big.
Thanks Erik, A great look at a new product.
Thanks for your opinion on the number boards. Many times a photograph has the ability to exaggerate things. I see things in my photographs of my trains that I don't notice otherwise.
It would seem the hardest thing to correct would be the supports the builder added to the "eye brow" grabs?? I would think that would be easy to correct on later generation units.
I enjoyed the videos and critique.
ChipR - Thanks for sharing the letter and unit for review. I'm glad your pleased. Couldn't you order another on from the second run?
I have ordered a CB&Q which will be in the second run. If Scott doesn't fix the CB&Q issues on the next gen, how will you go about on fixing the CB&Q issues on your engine? How are you going to fix the "grills" on the sides of the nose?
Again thanks guys, exciting stuff.
rdunniii Thank you for your reply. And to the others thank you for your videos, pictures and information.
I am concerned about the wheel profile as produced. I am also thinking the Class Lights red is not correct.
Does the A unit have pickups and power on all wheels? If for example I manage to acquire two A-A (No room to turn unit) does the tether is necessary?
Finally, I would think the windows would be more of a windows on the sides.
Are the two rail Kadees as mounted by the factory no good because of the two mm screws used to mount them?
Again I appreciate the information on the engines.
My Southern Pacific A-B-A set showed up today. YAY!!! They look fantastic!! I think my only concern is the B-unit tether. Since the B-units are the same price as the A-units, they should have the same electronics. It would also make it much easier to run an A-B-B set much like the prototype did. It's also interesting to note that the side windows in the B-unit are clear, unlike the side windows in the A-units which are painted to match the carbody. ![]()
Anyway, I can't wait to get these beauties up to the club on Friday for a proper test run. The sound systems seem to operate much like the QSI sound systems in Atlas O locomotives, so the learning curve will be minimal. Thankfully, all of the pieces were still attached to my units.
Can't wait to see them pulling my 16-car Morning Daylight consist!! ![]()
Does the A unit have pickups and power on all wheels? If for example I manage to acquire two A-A (No room to turn unit) does the tether is necessary?
Are the two rail Kadees as mounted by the factory no good because of the two mm screws used to mount them?
The A-units will run fine without the tether. In fact, the tether itself is only on the B-unit. The A-unit only has a plug, which would be unused in an A-A configuration.
The Kadee couplers installed (!) are the standard 805 metal couplers in an 804 plastic box. Until I have a chance to test them at the club, I will reserve judgement of the strength of the mounting system. It seems sufficient, but we will see.
My Southern Pacific A-B-A set showed up today. YAY!!! They look fantastic!! I think my only concern is the B-unit tether. Since the B-units are the same price as the A-units, they should have the same electronics. It would also make it much easier to run an A-B-B set much like the prototype did. It's also interesting to note that the side windows in the B-unit are clear, unlike the side windows in the A-units which are painted to match the carbody. ![]()
Anyway, I can't wait to get these beauties up to the club on Friday for a proper test run. The sound systems seem to operate much like the QSI sound systems in Atlas O locomotives, so the learning curve will be minimal. Thankfully, all of the pieces were still attached to my units.
Can't wait to see them pulling my 16-car Morning Daylight consist!! ![]()
Take some pictures! Wow a DAYLIGHT!
![]()
As I noted a couple of weeks ago the windows are painted on the inside. It was done to hide the electronics. If you don't mind removing the shell it takes about 30 minutes with Scalecoat remover and a q-tip to remove the paint from the polycarbonate windows. I think it looks much better. It is dark inside the shell and you really can't see too much.
Hmmm, I think my mars light is on the top. There are 3 connectors between the lights and the Titan and 2 of which are identical except for coloring of the wires on one side. It's possible one connector goes to the upper and the other to the lower and they got some backwards during assembly, but I will have to check.
I have given Scott the front half of a Lionel new tooling F7 shell as an example of a correct angled numberboard and he thinks that will not a be an issue to correct. I described that the front of the small numberboard should be completely rounded versus flat with rounded corners but I don't have a good example Scott can take back to the builder like the angled number board so if anyone else does...
Microscale has the decals available to correct the fake grills around the headlight if you want to go to the trouble.
Tehe, I never thought about the wimpy screws holding on the pilot because I changed one for the closed pilot and run them elephant style so it didn't occur to me but I agree I don't think you be able to pull much weight very far behind the front pilot before those screws loosen or pull out altogether (probably at the worst possible time and place).
I agree about the floating front stirrups and have asked Scott about making additional fixed ones like on the rear of the unit available as parts. Given where the truck is mounted to the frame you are going to severely restrict curves probably to 96"+ radius in doing so. However, on my first unit the holes were already there to reverse the bolster to the front half of the truck allowing the fixed stirrup and limiting the radius to where the tank drive hits the fuel tank which looked to be probably 48-54" radius.
The 3-rail units are noticeably heavier so I don't think adding weight will be problem. As the axles of each truck are individually sprung it should take relatively little weight to add significant traction. But finding space may be a problem. That speaker takes up about 1/3 of the interior. Don't know if anyone has noticed but the back of cab where the light is located is in front of the cab doors because the speaker is in the way of placing it further back where it belongs.
I also agree about the radiusing between the tread and the flange of the wheels but I don't think Atlas or MTH do that either; yes, no?
3 wheels of each truck have power pickups. The insulated side of each axle does not pick up power.
Seems to me that the diaphragm does actually swivel some but it needs to be loosened up to do so.
Richard
I described that the front of the small numberboard should be completely rounded versus flat with rounded corners but I don't have a good example Scott can take back to the builder like the angled number board so if anyone else does...
I have some brass F unit (FT,FT,etc) castings from P&D that I would guess are the same as an E unit, at least the front radius would be similar and it isn't as chunky as the current E7 board. I would be glad to contribute if it could help improve the number board.
This project has demonstrated that we all can work together to make a great model!
All of us has expertise in certain areas and is willing to share this knowledge with a builder willingly enough to listen and make a great model.
Thanks Scott, Chip, Richard, Marker, all of you guys.. GOOD JOB! ![]()
I described that the front of the small numberboard should be completely rounded versus flat with rounded corners but I don't have a good example Scott can take back to the builder like the angled number board so if anyone else does...
I have some brass F unit (FT,FT,etc) castings from P&D that I would guess are the same as an E unit, at least the front radius would be similar and it isn't as chunky as the current E7 board. I would be glad to contribute if it could help improve the number board.
Marker,
Sounds good to me. Please let Scott know. If you have any pics you can email him to show him what you have, that should get the ball rolling. I don't see any pics on the P&D website.
Richard
Well after over 300 hours of time on this project to date, it is nice to see some positive responses. To see the factory get about 95% of what was asked for correct is even more satisfying.
Onto phase II paint schemes, road specific detailing and getting corrections to some of the phase I schemes that have some adjustments to be made.
The success of this release is a great sign for a lot of product of this quality at this price point in the future! It's great to see the finished product.
Folks tell me that traction is a function of sprung trucks, but I have found that not to be true. My unsprung models pull every bit as well as the sprung ones, providing all axles are powered.
This sure looks like a winner. Do you think it would be possible to round off the offending number boards with a Dremel and a steady hand?
Well after over 300 hours of time on this project to date, it is nice to see some positive responses. To see the factory get about 95% of what was asked for correct is even more satisfying.
Onto phase II paint schemes, road specific detailing and getting corrections to some of the phase I schemes that have some adjustments to be made.
The success of this release is a great sign for a lot of product of this quality at this price point in the future! It's great to see the finished product.
Good job GG1!
For the price they are P-E-R-F-E-C-T! Don't do a thing.. except maybe a tiny few things but these models are terrific right out of the box for $550. Yes SIR!
I work with the brass builders and KNOW the troubles you faced. I just completed the research phase on the E5's, 2 years of fuss over e-v-e-r-y-thing.. even the diameter of the fasteners on the stainless panels on the nose..![]() It was worth it, they will be the finest E5's ever done in miniature, ever. The Key E5's are DROP DEAD GORGEOUS!
It was worth it, they will be the finest E5's ever done in miniature, ever. The Key E5's are DROP DEAD GORGEOUS!
On your model tonight I reversed the headlight with the Mars light and disconnected the classification lights, BB'd the interior light.. ![]() LOL..
LOL..
I do plan to replace the grab irons with P&D castings and add the cab maint. step. Still trying to figure out how to make pilot doors.. ![]() I may mill the casting to the hinge detail and add them in brass with hinges. Or replace the pilot with a OMI/Ajin casting I have.
I may mill the casting to the hinge detail and add them in brass with hinges. Or replace the pilot with a OMI/Ajin casting I have.
Good JOB GG1!!! GOOD JOB!
Guys, let's here it for Scott! ![]()
FP7s after the FL9s. I think a little more lobbying needed for the FTs.
I think FTs would be a great idea, although I would prefer mine in Lackawanna paint. At least a tethered B-unit would be a little more sense in an FT. Of course, I would like some FTsb's as well (short B-units), but I'm not holding out much hope for that.
I can't post a picture, but my NYC E7 look Olive Green to me.
Bob, as for using a dremel, I think that would likely be a very difficult approach, unless you have a variable speed unit that can go v-e-r-y slow. The Dremels have a tendency to melt casting pieces, at least for what I've had experience. I would use some heavy grit sandpaper, then gradually use finer grit until it is smooth. May take longer but the Dremel is really capable of melting the plastic. Hope this helps-
my pair of PRR A units are due to arrive Friday. I think I'll take 'em down to the club Saturday to put them through their paces on our stiff grades. I plan on pulling at least 10 cars: (2) R50b, (1) REX 50', (1) X29 mail storage, (2) B60b, (4) P70, (2) 12-1 sleepers. I'm hopeful they'll be up to the task because I'll also be adding a D78R, B70, BM70ka to the consist in the future.
my pair of PRR A units are due to arrive Friday. I think I'll take 'em down to the club Saturday to put them through their paces on our stiff grades. I plan on pulling at least 10 cars: (2) R50b, (1) REX 50', (1) X29 mail storage, (2) B60b, (4) P70, (2) 12-1 sleepers. I'm hopeful they'll be up to the task because I'll also be adding a D78R, B70, BM70ka to the consist in the future.
Please post the results! I think everyone is anxious to see the pulling power of a pair of 2-rail A units.
Please let Scott know. If you have any pics you can email him to show him what you have, that should get the ball rolling. I don't see any pics on the P&D website.
I have mailed the number boards to Scott, and will see if I can take an adequate picture to post.
FP7s after the FL9s. I think a little more lobbying needed for the FTs.
I know that's been mentioned (FP7s next), but I seemed to think the FT support was pretty vocal...I'd like an O&W AND DL&W (freight scheme) FT A-B set please and thank you...
While we're on cab units, why not FA-1s? The Williams models are nice for a "lo-fi" scale version, but I'd be all over L&NE and Tennessee Central units with sound...
Brian
Access to this requires an OGR Forum Supporting Membership


