Cool that you could fit the long track in for the the larger engine.  I have two turntable leads, but the opposite whisker track didn't have enough length for anything huge, I was hoping to be able to park a couple of large engines as well.  I'm going to go a different way and create some parking for large steam on the other end of my layout off one of the inner tracks by adding a switch or two.

I like that idea as well but something about having all the motive power at “home” appeals to me. Next I’ll want a shop and and and, well, I guess the living room isn’t used much anymore and the only thing separating it is drywall!

can’t figure out how to draw the table in anyrail.

It's a bit of a PITA to draw odd shaped tables in AnyRail, I haven't figured that out yet.  I draw the surface with a bunch of tiny segments, looks fairly sloppy, but I couldn't get it to work any other way.

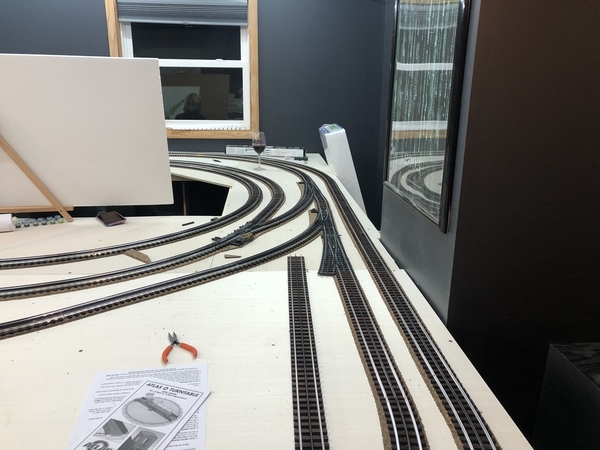
For example, here's the corner of my layout under construction with the curve I was trying to put into Anyrail.

The arrows at the bottom left show what I did with the surface tool, pretty sloppy, but I couldn't come up with a better way to create that kind of surface.  I also have curves on the upper right that I tried to represent, didn't do much better there.

Click on graphic to expand.

Test Layout

Attachments

Images (2)
  • mceclip0
  • Test Layout

It's a bit of a PITA to draw odd shaped tables in AnyRail, I haven't figured that out yet.  I draw the surface with a bunch of tiny segments, looks fairly sloppy, but I couldn't get it to work any other way.

For example, here's the corner of my layout under construction with the curve I was trying to put into Anyrail.

The arrows at the bottom left show what I did with the surface tool, pretty sloppy, but I couldn't come up with a better way to create that kind of surface.  I also have curves on the upper right that I tried to represent, didn't do much better there.

Click on graphic to expand.

Test Layout

Glad I’m not alone.

I wasn’t going to post this as I made it just for me and for fun but they seem quite popular so whatever. Here’s a half layout LPV video I made to test the camera car last week.

https://youtu.be/4kKk9lNsnWs

if there’s a better way to embed a video let me know.

@DoubleDAZ posted:

Dave, I’ve only heard that running through the turnout on the mainline is not prototypical, so a lot of modelers don’t do it, but I think that’s just being picky, especially if there’s really no other way to do something. This will add a lot of play value for taking a minor liberty.

In the real world, show me a prototypical "mainline" that doesn't have any switches?

Glad I’m not alone.
I wasn’t going to post this as I made it just for me and for fun but they seem quite popular so whatever. Here’s a half layout LPV video I made to test the camera car last week.
https://youtu.be/4kKk9lNsnWs

if there’s a better way to embed a video let me know.

If you simply take that URL and click on the  Insert media icon in the toolbar, you can insert the video link.

Here's a demo of what you get if you do that.

Last edited by gunrunnerjohn

John, sorry, but I don’t see it that way. Looking at the photo you posted earlier, I only see interchanges and crossovers, all of which are prototypical. That’s true of the trains here running between Tucson, Phoenix and Flagstaff that make the interchange in Phoenix north to Flagstaff or west to LA. In Dave’s case, he’s got the one switch on the left side of the crossover that’s part of the mainline run for the inner loop. A train running that circuit goes through the turnout part of the switch with each pass. And he can always consider that as an interchange. Non-prototypical would be a dead-end spur or group of spurs that go off the main through the straight part of the turnout. I’d be surprised if there weren’t such a configuration somewhere, but it’s certainly not the norm. It really doesn’t matter though unless someone is a purist.

In that case, who knows.   Here's the path of my mainline at the table level and the elevated section.  Lots of switches as there are a number of interchanges if you will, and  of course there's my maintenance siding on the right and my lead to the future yard in the lower left.  As to what we call all of that, I call it a model railroad.

John's Mainline at table level

Mainline Only [Table Level)

John's Mainline elevated level

Mainline Only [Elevated)

Attachments

Images (2)
  • Mainline Only (Table Level)
  • Mainline Only (Elevated)
@DoubleDAZ posted:

But none of those have a train consistently traversing through the curved part of the switch. What you have is totally prototypical. I was talking about the Blue interchange where you have the curved O96/O72L switch between the 2 ovals.

Actually, both of these are the curved path through the switch.

Attachments

Images (1)
  • mceclip0
Last edited by gunrunnerjohn

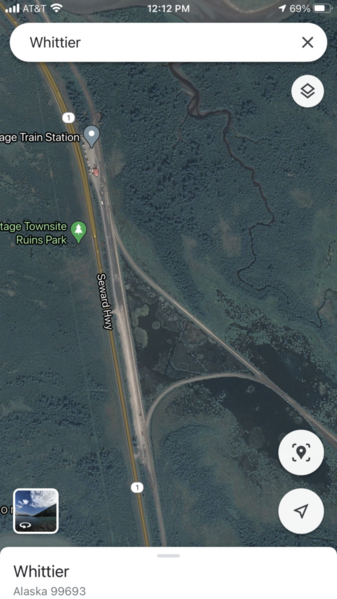
On transit we make regular moves through a switch in the reverse position. The LA Crenshaw Line will use regular moves through switches in the reverse position. Same with Miami Metrorail. When I was testing PTC for Alaska RR every move onto the Whittier Line was through a switch in the reverse position. See Google Maps screen capture of the Y to Whittier.
The limiting factor is you have to travel at a reduced speed through the reverse position. A No.10 switch for example is limited to 35MPH. In the real world an O72 switch equivalent would be limited to 5MPH. With that said I am for doing whatever you want to get your model railroad the way you want it  

0E0BEA1B-7177-4D35-A414-28F254B504C3

Attachments

Images (1)
  • 0E0BEA1B-7177-4D35-A414-28F254B504C3
@Ryan Mc posted:

On transit we make regular moves through a switch in the reverse position. The LA Crenshaw Line will use regular moves through switches in the reverse position. Same with Miami Metrorail. When I was testing PTC for Alaska RR every move onto the Whittier Line was through a switch in the reverse position. See Google Maps screen capture of the Y to Whittier.
The limiting factor is you have to travel at a reduced speed through the reverse position. A No.10 switch for example is limited to 35MPH. In the real world an O72 switch equivalent would be limited to 5MPH. With that said I am for doing whatever you want to get your model railroad the way you want it  

0E0BEA1B-7177-4D35-A414-28F254B504C3

The speed was my main concern. I don’t want to have to slow down every time I come through this section.

Looked at the matching roundhouse tonight (atlas 6904) and loved it until I saw the dimensions. That thing is massive! I think I’ll copy the base of it on cardboard and see how it sits before buying one. It would definitely eat up a ton of real estate.

Kind of comical how this thing has progressed. Started with the thinking that I had tons of room and would have plenty leftover and is now at the point of becoming crowded if I’m not careful.

B404CCC6-B36D-4812-B49E-AA1FCF88F12744EFF5CA-C8AB-4363-ABBB-24ED88498BA61246FFAD-6F0E-4541-BD68-9279CC6A487620CB9C49-C19E-413D-AAB6-8BD97FF77D79F10BC79E-A974-4864-BF0D-BAD9483F66F4Second reversing switch didn’t come out exactly as planned but I’m happy with it. Bought my first Ross switch for it and have to admit, it’s quite beautiful. Only real change was the centerline spacing at that section had to widen which is fine with me.

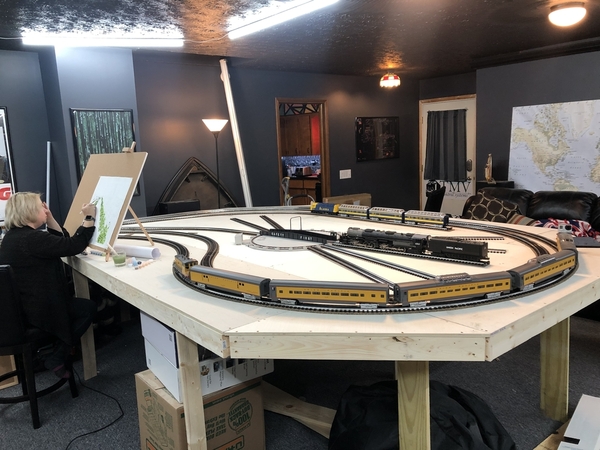
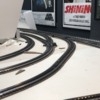
Got the turntable installed and unfortunately had the cheat a little. Couldn’t drive the big boy there so went against my rule and picked it up and moved it there. Plenty of clearance approaching and leaving. The rest of the turntable tracks are just sitting there for now until I decide final placement. Open to suggestions.

Somehow I have power on the outer loop which shouldn’t be but I’m guessing one of the switches in the crossover is wired through. Found this out while roll testing parts of it and had lights in the coach cars. Of course I couldn’t resist driving the MP over and grabbing them and doing a few loops. I’ll post a video later.

Very happy with the state it’s in. Again, many thanks to all of you for your help and support.

Attachments

Images (5)
  • B404CCC6-B36D-4812-B49E-AA1FCF88F127
  • 44EFF5CA-C8AB-4363-ABBB-24ED88498BA6
  • 1246FFAD-6F0E-4541-BD68-9279CC6A4876
  • 20CB9C49-C19E-413D-AAB6-8BD97FF77D79
  • F10BC79E-A974-4864-BF0D-BAD9483F66F4

Forgot to mention that o80 is basically unobtainable at the moment so all of the “outside” curves, as well as the turntable lead and parking track in the peninsula were hand bent. Wasn’t as bad as I thought it would be. Basically bolted 3 pieces of MTH realtrax o72 to a piece of plywood and used the inside as a jig. The outcome was less than perfect but better than expected.

I found that the Gargraves pins carried power way better than I had expected, when I initially applied power to one end of my layout, the whole thing was live except for the lift bridge, and that had to be separately connected for obvious reasons.    Nice videos, it's really gratifying when you actually see trains run for a decent stretch for the first time.

As for the turntable, I'd put as many tracks as you can around it, you'll love all the extra parking.

What switch machine are you using, the DZ-1000 or the DZ-2500?  The DZ-1000 is not a command controlled switch machine, so you need to wire it back to a control box.  The DZ-2500 is a command controlled switch machine, but it requires 12-14 VAC, higher voltages may cause issues.  Also, you have to wire the serial data back to the command base for the it to function in command mode.

I found that the Gargraves pins carried power way better than I had expected, when I initially applied power to one end of my layout, the whole thing was live except for the lift bridge, and that had to be separately connected for obvious reasons.    Nice videos, it's really gratifying when you actually see trains run for a decent stretch for the first time.

As for the turntable, I'd put as many tracks as you can around it, you'll love all the extra parking.

The same thing happened to me.  It showed me where I had forgotten to put in a gap where I wanted to be able to shut off the power to a siding.

As for the turntable, I'd put as many tracks as you can around it, you'll love all the extra parking.

how are you powering yours? I’m using a 12v wall wart and thing it turns way too fast. I have trouble “catching” the index sections. Part of that is the horrible switch they provided. I’ll be swapping it out for a DPDT momentary on switch that springs back to neutral. Have a box of wall warts so I think I’ll try different voltages to see if I can slow it down. Or maybe I’ll use an old HO power pack.

Add Reply

Post
The Track Planning and Layout Design Forum is sponsored by

AN OGR FORUM CHARTER SPONSOR

OGR Publishing, Inc., 1310 Eastside Centre Ct, Suite 6, Mountain Home, AR 72653
800-980-OGRR (6477)
www.ogaugerr.com

×
×
×
×
Link copied to your clipboard.
×
×