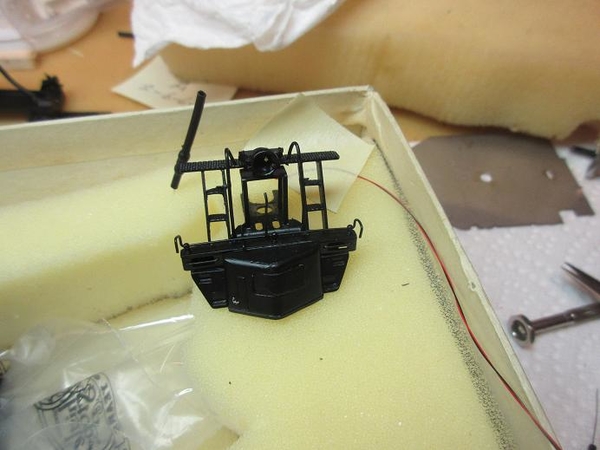
"HONGZ" stands for HO scale, N scale, G scale, and Z scale.

Post your non-O scale stuff here!

Thanks, Mike.

=====

GN outside braced caboose marker lights conversion.

An incandescent, battery, magnetic reed operated markers lights from last century.  This was always a hassle.  Forget to turn off at end of operating and the battery goes dead.  All this crap got pulled out.

GN outside braced caboose 01

Had to clean the paint off the axle for the 'wrapped wire' .

GN outside braced caboose 02

Pliers I use to make the bends in the wire including the tiny loop for the 090 brass screws.

GN outside braced caboose 03

Being a brass model, the trucks need to be insulated from the body.  I'm hoping the use of nail polish will be sufficient, over time, to keep everything electrically isolated.  Not much movement so, hopefully, will work. 


GN outside braced caboose 04GN outside braced caboose 05GN outside braced caboose 06

All seems to work well and a lot better than battery operated!

GN outside braced caboose 07GN outside braced caboose 08

Attachments

Images (8)
  • GN outside braced caboose 01
  • GN outside braced caboose 02
  • GN outside braced caboose 03
  • GN outside braced caboose 04
  • GN outside braced caboose 05
  • GN outside braced caboose 06
  • GN outside braced caboose 07
  • GN outside braced caboose 08

GN caboose less cupola.

Another conversion from battery to LED's.

The bridge rectifier, etc from the lights4models HS.  

GN caboose #636 less cupola 01GN caboose #636 less cupola 02

New delivery:

Two very nice  'cabeese' for interchange roads from Bachmann.


N&W caboose 01

The N&W caboose for the A, J and Y6B.

N&W caboose 02

'Screwed up' on purchasing this Erie caboose.  I have a triplex only I forgot it's the Virginian triplex.  Obviously, this caboose is on 'loan' to the Virginian railroad!

Erie caboose 01

Attachments

Images (5)
  • GN caboose #636 less cupola 01
  • GN caboose #636 less cupola 02
  • N&W caboose 01
  • N&W caboose 02
  • Erie caboose 01

One more GN caboose converted.

This caboose made it easy for electrical isolation as the bolsters are plastic.

GN caboose #205 01GN caboose #205 02

Overkill.

Did a road test on all the cabeese: way too much drag.  I put too many windings on each axle (guess I got 'carried away' with the 'free' wire).  One caboose rolls freely and has a lot fewer windings.  Should be easy to just cut off the excess ones. 

GN caboose #205 03

Just noticed that the Menard's building has rotating window fans.


menards building 01

Attachments

Images (4)
  • GN caboose #205 01
  • GN caboose #205 02
  • GN caboose #205 03
  • menards building 01

GN #383 caboose converted to LED's.   

Previously, wondered why this caboose was 'shorting out' on the track: one wheel set was backwards.  

The old incandescent lights don't always come out 'cleanly' so I have to cut off the outside marker light lens so I can stick a small drill bit into the hole and clean out all the old crud. 

Interesting: the old lenses are beads of plastic (which I don't remember, being old) and the new lenses are colored glass. 

GN caboose #383 01

Looks like 3 wraps of wire around the axle is sufficient for good contact.   Seems like this wrapped wire trick should work for all scales and would seem to be especially helpful with N gauge. 


ps: sorry about the bad picture: just glued the dude on the back of the caboose and he wasn't dry yet so had to take the picture at an upright angle. 

Eight done and 15 more 'to go'; at least the process is pretty quick with the markers already installed in the 'cabeese' that I did 4 decades ago.  I'm glad the brass cabeese already have the markers already installed as the paint might get damaged while drilling holes.  The plastic cabeese are easy to mark and drill.

GN caboose #383 02

Attachments

Images (2)
  • GN caboose #383 01
  • GN caboose #383 02
Last edited by samparfitt

New delivery.

The 3-4 volt strip lights came in.  I'm hoping these work well with the NCE 'light it' decoders for passenger cars.  Also, NCE's capacitors that are suppose to be made for 'keep alive' on the same decoder.  Plus my NMRA monthly mag, 2019 calendar, CCT mag and aviation mag.     

BLI new Big Boy is out video (last item featured):

Like Lionel and MTH, the whistle smokes.

https://www.youtube.com/watch?...amp;feature=youtu.be


strip lights 01

Attachments

Images (1)
  • strip lights 01
Last edited by samparfitt

An old Silver Streak wood kit caboose converted to LED's.

Was pretty light in weight but none needed to keep lights on which surprised me.

GN wood caboose #237 silver streak 01

Two that actually were working and no changes needed!

A 30' plywood by Overland.

GN caboose plywood sheathed #218 Overland 01

An old Tenshodo caboose.  One of the first brass cabeese that I ever purchased.

Was factory painted.  I remember back then, 15 bucks for a caboose, are you crazy!  Back then an Athearn caboose could be had for a buck fifty. 

Wish I could remember who made that conductor waving; probably the company is no longer in business, anyway!

Think I found it: you get engineer and fireman but I'm not paying $8.80 just to get one person.

 Labelle Industries # LBL7002

GN caboose #305 Tenshodo 01

Attachments

Images (3)
  • GN wood caboose #237 silver streak 01
  • GN caboose plywood sheathed #218 Overland 01
  • GN caboose #305 Tenshodo 01
Last edited by samparfitt

GN #181 caboose conversion to LED's.

Overland seemed to be mostly about making UP stuff but they did produce several GN cabeese.  A rather unusual model. 

GN caboose #181 overland 01GN caboose #181 overland 02

Trucks were shorting out so used some heat shrink tubing for the bolster bolt, a couple kadee insulating washers and enlarged the truck hole.  

GN caboose #181 overland 03

Only 3 windings of wire needed for good contact to the axle.

GN caboose #181 overland 04


Attachments

Images (4)
  • GN caboose #181 overland 01
  • GN caboose #181 overland 02
  • GN caboose #181 overland 03
  • GN caboose #181 overland 04
Last edited by samparfitt

A few things I failed to mention about the LED 0604's with bridge rectifiers.

Sometimes the the wires connecting to these 0604's stick out a little bit on the other side of the LED. I use my good nippers to clip the wire off.  I've had one where the wire came loose but I just used my fine tip Weller soldering iron station and re-attached it.

They are much larger than the 0402's and, thus, the LED must be turned 90 degrees by hand so they fit inside the tomar marker light housing.


LED 0602 with bridge 01

Once inside the marker housing, I tape the wire to the shell to insure the wires do not move.

LED 0602 with bridge 02

The LED's need to be lighted when installing them as, since the wires on each side of the LED are exposed, they can short out inside the brass housing.  With the low voltage, I haven't had any burn out.  Usually, just a slight movement of the LED will remedy the problem.  Some black paint inside the housing before assembly helps insulate the area.  Also, once the glue is put around the area, and dries, there shouldn't be any problems with shorts.  I keep the LED lighted while applying the glue to insure no shorts by any movement of the LED's. 

LED 0602 with bridge 03

Attachments

Images (3)
  • LED 0602 with bridge 01
  • LED 0602 with bridge 02
  • LED 0602 with bridge 03
Last edited by samparfitt

New delivery:

B&O wagon top caboose for the B&O EM-1 yellowstone. 

Not easy to find B&O cabeese.  Seems like it would be a popular road.

Got a very nicely detailed one from Spring Mills.  Most were sold out but got one of the last types they had left. 

B&O wagontop caboose spring mills 01B&O wagontop caboose spring mills 02B&O wagontop caboose spring mills 03

Even has all the brake rigging.

B&O wagontop caboose spring mills 04

Two more GN cabeese converted to LED's.

Both Atlas that came out a few years ago.

The ends with studs have to be pulled from the shell before removing the bottom.

GN steel caboose Atlas 01

Nice walkway detail.

GN steel caboose Atlas 02


GN cabeese updated to LED's.

GN cabeese 01

Interchange and three GN cabeese updated.

cabeese interchange 01

GN and interchange cabeese still to be converted to LED's.

cabeese still working on 01

Attachments

Images (9)
  • B&O wagontop caboose spring mills 01
  • B&O wagontop caboose spring mills 02
  • B&O wagontop caboose spring mills 03
  • B&O wagontop caboose spring mills 04
  • GN cabeese 01
  • cabeese interchange 01
  • cabeese still working on 01
  • GN steel caboose Atlas 01
  • GN steel caboose Atlas 02
Last edited by samparfitt

C&O wood caboose LED install  (cont)

Kids all went home after Christmas chow and gifts so might as well work on the 'railroad'!

Final assembly:

Test video of lights (marker and interior);

F0 controls the marker lights.  F1 controls the interior lights.

Turn off power and the LED's stay on a very long time.

https://www.youtube.com/watch?...amp;feature=youtu.be


As mentioned previously, I tried using some generic capacitors that were 220MF and 25 volts but they didn't work so I bought NCE's capacitors.  Don't know why!  What's sad is I have a major in mathematics and a minor in physics but that was back in the dark ages in 1968!

NCE capacitors 01

NCE's schematic and how I connected the marker and interior lights.

For the LED's, the 'square' is the plus side. 

NCE 'light it' decoder schematic 01

The NCE 'light it' decoder  is small enough to fit inside the interior of this caboose (with some slight mods).  The capacitors leads were long enough to route them directly to the decoder.  This decoder only puts out about 4 volts so I had to remove the resistors on the LED's that I used. 

C&O caboose walthers wood 62

With interior screwed in place into the caboose, the decoder is under the center seats with the two capacitors protruding out into the interior. 

C&O caboose walthers wood 63

The LED wires were routed through a hole in one of the benches.

C&O caboose walthers wood 64

The input leads for the decoder came out  one hole and routed to each truck.  Had to drill some holes into the under framing to route one wire. 

C&O caboose walthers wood 65

Three wraps of wire sufficient for good conductivity.  Had to replace the original plastic wheels with Intermountain wheel sets.  I used a bright boy to clean off the axle and wheel as there is a blackening agent on the surface. C&O caboose walthers wood 66

All's 'well in the world' again

C&O caboose walthers wood 67

Attachments

Images (8)
  • NCE capacitors 01
  • NCE 'light it' decoder schematic 01
  • C&O caboose walthers wood 62
  • C&O caboose walthers wood 63
  • C&O caboose walthers wood 64
  • C&O caboose walthers wood 65
  • C&O caboose walthers wood 66
  • C&O caboose walthers wood 67
Last edited by samparfitt

PM on a GN C-1 0-8-0 switcher.

This switcher has been working the Seattle freight yard since 1979 and it decided to start shorting on several switches (turnouts). 

Checked another engine with same string of cars. Checked all the insulated wheels on engine and tender. Check side rods touching insulated tires. Tried a different tender. Check if metal hose on kadee touching step boards or too low. Make sure gear box cover isn't too low.  Checked wires on decoder. Checked all the turnouts even though everything else works on them.  After about 3 hours, in desperation, cut a wedge out of four kadee insulation washers and put them between frame and insulated side drivers and all's 'good again'.  Go figure!  I even used a voltmeter to check the insulated drivers while pushing them against the frame and side rods. 

Hopefully, good for another 39 years! 

GN C-1 0-8-0 #828 02GN C-1 0-8-0 #828 03

Old Athearn box car rocking while on the tracks.  Filed down the plastic tube on the bolster fixed that.  At least that only took about 60 seconds to repair.

If I was modeling the 60's, I would have left the car 'as is'!


Freight car GN box 01Freight car GN box 02

Attachments

Images (4)
  • GN C-1 0-8-0 #828 02
  • GN C-1 0-8-0 #828 03
  • Freight car GN box 01
  • Freight car GN box 02
Last edited by samparfitt

Wayside structures.

All were cast metal and needed filing to remove the flashing.

Thick CA used to assemble them.

junction boxes 01

Some poly S concrete paint for the bases.

junction boxes 02

Signal relay structures.

signal relay house 01signal relay house 02

Details West called theirs instrument sheds.

instrument shed 01

Some metal 'frames' are in the kit to stabilize the structure but I found some blocks of balsa a lot easier to hold all four sides together during assembly.

instrument shed 02

Junction boxes weren't painted but the sheds were painted using 'rattle can' silver.

instrument shed 03

Attachments

Images (7)
  • junction boxes 01
  • junction boxes 02
  • signal relay house 01
  • signal relay house 02
  • instrument shed 01
  • instrument shed 02
  • instrument shed 03
Last edited by samparfitt

N&W 2-6-6-4 class A by United (PFM) decoder install.

Got 'burned out' on LED install on cabeese so back to decoder installs.

Made in 1962 and installing a TCS WOW101 steam with 'keep alive'.

N&W Class A 2-6-6-4 united 15

Engine made before sound so holes drilled in tender bottom.  Holes painted from the other side to make them look 'factory drilled'.  First successful sound made in 1972 by PFM. 


N&W Class A 2-6-6-4 united 17

Also, as with a lot of the tenders, there is a open area under the tender deck so the brass was cut away for routing of the decoder wires.   A dremel cut off disk and filing used to cut area.  A little paint along the edges to 'dress it up'.


N&W Class A 2-6-6-4 united 25


Marker (classification) lights drilled out for LED's.

Brand new #57 drill bit and oil used to drill out marker light.  Backside supported with popsicle stick.  Sides drilled, first; the front is last and has very little brass to drill through.  Oil added about 3 times to insure no heating or binding.  Also insures the markers are not broken off the boiler front.  Care needed on drilling.  I find the PFM (United, Tenshodo, etc) engines are mostly very sturdy in brass thickness and soldering and, usually, can take the drilling.  Other importers can have some pretty thin mounts and, sometimes, it's best to remove them, drill and then re-solder them back onto the boiler.  I have held them with wire cutters while drilling.  The ends of the wire cutters have jaws.

N&W Class A 2-6-6-4 united 18

#57 drill bits bulk buying from HD online.
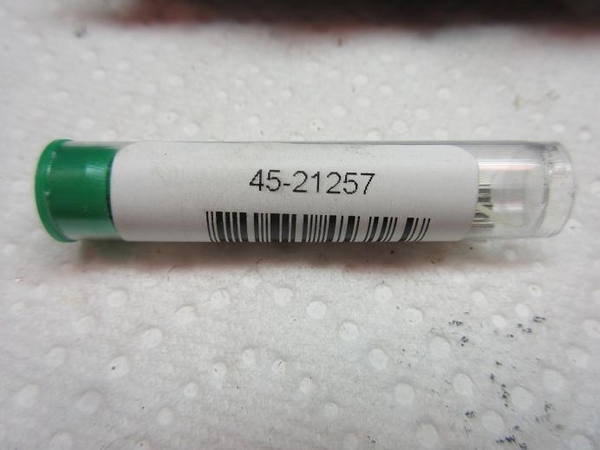
N&W Class A 2-6-6-4 united 19

Four holes drilled in boiler for running lights.  Installed and glued in place.

N&W Class A 2-6-6-4 united 20

Since I, previously, put a back head in the cab, an LED was installed. 

N&W Class A 2-6-6-4 united 21

Tender light drilled out and LED glued in.

N&W Class A 2-6-6-4 united 22

Ditto on the head light.

N&W Class A 2-6-6-4 united 23

Holes drilled through front of boiler front to route LED's to marker lights. 
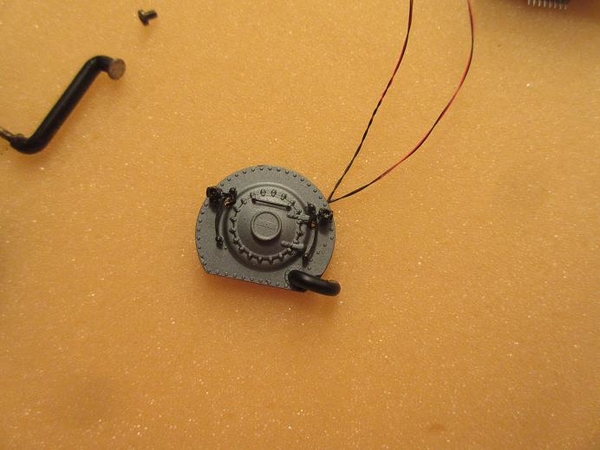
N&W Class A 2-6-6-4 united 24

Attachments

Images (10)
  • N&W Class A 2-6-6-4 united 15
  • N&W Class A 2-6-6-4 united 17
  • N&W Class A 2-6-6-4 united 18
  • N&W Class A 2-6-6-4 united 19
  • N&W Class A 2-6-6-4 united 20
  • N&W Class A 2-6-6-4 united 21
  • N&W Class A 2-6-6-4 united 22
  • N&W Class A 2-6-6-4 united 23
  • N&W Class A 2-6-6-4 united 24
  • N&W Class A 2-6-6-4 united 25
Last edited by samparfitt

N&W class A 2-6-6-4 decoder install (cont)

The usual.

Made 8 pin connector between tender and engine and 4 pin connector from boiler to engine and a PFM speaker was used.

Marker lights, four running board lights, cab light, glow box and tender light all working.  Still need to wire up the head light on the front engine. 

N&W Class A 2-6-6-4 united 26N&W Class A 2-6-6-4 united 27

Left original open frame motor in engine.


N&W Class A 2-6-6-4 united 28

Cut the ground wire from the one brush to the motor plus put tape over the solder joints to prevent shorts to engine boiler.  

N&W Class A 2-6-6-4 united 29

Attachments

Images (4)
  • N&W Class A 2-6-6-4 united 26
  • N&W Class A 2-6-6-4 united 27
  • N&W Class A 2-6-6-4 united 28
  • N&W Class A 2-6-6-4 united 29
Last edited by samparfitt

N&W class A 2-6-6-4 decoder install (cont)

Final assembly.

There was enough room between the back of the open frame motor and the cab back head for the routed wires to all the LED's.

The head light, being on the front engine instead of the boiler, had the wires routed along the two engine frames.  A 2 pin connector was used for the headlight for ease of PM.  Also, a 4 pin connector made to easily separate the boiler from the engine frames.  An 8 pin connector between engine and tender in order to control all lights with different function keys.  

N&W Class A 2-6-6-4 united 30N&W Class A 2-6-6-4 united 31N&W Class A 2-6-6-4 united 32N&W Class A 2-6-6-4 united 33

This model was already painted when I purchased it but a little extra detailing done.  Poppet valves and whistle painted brass and valve handles painted red. 

N&W Class A 2-6-6-4 united 34

Being made in 1962, back heads were not normal for engines so one was added.

Runs fine in the yard, next will be 'road test' on the mainline.

Additional lead weight was added so it should pull well (versus 'good'!).


N&W Class A 2-6-6-4 united 35

Have two other N&W engines that I consider iconic during the steam era that needs painting and decoder install: Class J and Y6B.  Have decals for the J engine striping but not sure if I'll mask versus decal for that.


N&W J 4-8-4 sunset 13

Y-6B has removable cab roof.

N&W J 4-8-4 sunset 14

Have one NWSL auxiliary tender and one BLI tender.

The NWSL probably made in the late 60's and the BLI, two years ago.


auxiliary tanks 01

They were within a dollar of each other in price but the BLI is already painted, has lights and better detail. 

auxiliary tanks 02

Attachments

Images (10)
  • N&W Class A 2-6-6-4 united 30
  • N&W Class A 2-6-6-4 united 31
  • N&W Class A 2-6-6-4 united 32
  • N&W Class A 2-6-6-4 united 33
  • N&W Class A 2-6-6-4 united 34
  • N&W Class A 2-6-6-4 united 35
  • N&W J 4-8-4 sunset 13
  • N&W J 4-8-4 sunset 14
  • auxiliary tanks 01
  • auxiliary tanks 02
Last edited by samparfitt

A little tree making:                 

Some 'fiber fur' added.  I added very little so the branches would show.  

aspen trees 04

Hair spray and ground foam added.  The tree is heavily saturated with the spray so the foam 'sticks'.

Since it's fall colors, I tried to leave some bare along the tops of the trees.

aspen trees 05

Material used for 'bulking up' the tree. 

aspen trees 06

Some cheap hairspray.  The cheaper, the better.  

aspen trees 07

Aspen yellow was used for the full coverage of the tree with some autumn gold added on the under sides and crevices. 

aspen trees 08

Not a big forest but adds some color to the area.   

aspen trees 09


Attachments

Images (6)
  • aspen trees 04
  • aspen trees 05
  • aspen trees 06
  • aspen trees 07
  • aspen trees 08
  • aspen trees 09
Last edited by samparfitt

Engineers painted.

About 2-3 decades ago, I picked up some unpainted cast metal engineers (wish I would have bought more than 7).

I followed a procedure from a video on the NMRA web site.

engineers 01

First coat of paint is black.

engineers 02

Nothing fancy: some beige for face, blue for overalls, brown gloves and shoes, red bandanna and black hair.

Some matte medium from Krylon to seal the paint and 'dull' them up.

engineers 03

Dollar paints at Michaels and an airplane heat gun to 'speed the process'.

engineers 04

Attachments

Images (4)
  • engineers 01
  • engineers 02
  • engineers 03
  • engineers 04
Last edited by samparfitt

Monthly NMRA MCR Div 7 meeting.

Cincinnati area got about 6" of snow last night but the 'snow crews' did an excellent job of clearing the roads.  The 'general' crowd stayed home so there were very few vehicles on the road plus the church parking lot (where we had our meeting) was all cleared.  I went out to our Div 7 web site and they announced the meeting was 'still on'.

Sam did a clinic on making deciduous trees and we visited Tom's HOn3 layout.

John is going to upload Sam's presentation onto out Div 7's web site.

Sam Swanson's tree planting presentation

Tom's HOn3 layout.  Very large HOn3 layout with lots of 'walk in' isles to get close to all scenes. 

Tom's HOn3 layout 01Tom's HOn3 layout 02Tom's HOn3 layout 03Tom's HOn3 layout 04Tom's HOn3 layout 05Tom's HOn3 layout 06Tom's HOn3 layout 07Tom's HOn3 layout 08Tom's HOn3 layout 09Tom's HOn3 layout 10Tom's HOn3 layout 11Tom's HOn3 layout 12Tom's HOn3 layout 13Tom's HOn3 layout 14Tom's HOn3 layout 15Tom's HOn3 layout 16Tom's HOn3 layout 17Tom's HOn3 layout 18Tom's HOn3 layout 19

Tom used to model UP.

Tom's HOn3 layout 20

Winter wonderland!

snow Jan 13 02snow Jan 13 03snow Jan 13 04


Well, not everyone's street got cleared.  This was the only exception in my neighborhood. 

snow 01

Attachments

Images (25)
  • Sam Swanson's tree planting presentation
  • Tom's HOn3 layout 01
  • Tom's HOn3 layout 02
  • Tom's HOn3 layout 03
  • Tom's HOn3 layout 04
  • Tom's HOn3 layout 05
  • Tom's HOn3 layout 06
  • Tom's HOn3 layout 07
  • Tom's HOn3 layout 08
  • Tom's HOn3 layout 09
  • Tom's HOn3 layout 10
  • Tom's HOn3 layout 11
  • Tom's HOn3 layout 12
  • Tom's HOn3 layout 13
  • Tom's HOn3 layout 14
  • Tom's HOn3 layout 15
  • Tom's HOn3 layout 16
  • Tom's HOn3 layout 17
  • Tom's HOn3 layout 18
  • Tom's HOn3 layout 19
  • Tom's HOn3 layout 20
  • snow 01
  • snow Jan 13 02
  • snow Jan 13 03
  • snow Jan 13 04
Last edited by samparfitt
samparfitt posted:

Monthly NMRA MCR Div 7 meeting.

Cincinnati area got about 6" of snow last night but the 'snow crews' did an excellent job of clearing the roads.  The 'general' crowd stayed home so there were very few vehicles on the road plus the church parking lot (where we had our meeting) was all cleared.  I went out to our Div 7 web site and they announced the meeting was 'still on'.

Sam did a clinic on making deciduous trees and we visited Tom's HOn3 layout.

John is going to upload Sam's presentation onto out Div 7's web site.

Sam Swanson's tree planting presentation

Tom's HOn3 layout.  Very large HOn3 layout with lots of 'walk in' isles to get close to all scenes. 

Tom's HOn3 layout 01


Looks like a great day! Nice layout, gonna look for the clinic.

Population explosion:

Populated the passenger station that I picked up last fall at a flea market.

Used canopy glue: dries clear and fairly fast and easy to remove.  Used some small pieces of foam rubber to hold up the 'people' while the glue set. 

This is in the interchange/staging yard so details are minimal but it 'dresses up' the staging yard a little 'bit'.

GNRR714GNRR715GNRR716GNRR717

Extra critter in the logging railroad.

GNRR718

A new pen needs new critters.

GNRR723


I model 1938 so these vehicles are a little too new (40's) but they remind me of when I was young.    That Sear's truck may soon be a 'thing of the past'!  I also picked up these trucks last year so I, finally, put them on the layout. 

GNRR719GNRR720GNRR721

Lots of people and critters to keep me busy populating the layout!

GNRR722

Attachments

Images (10)
  • GNRR714
  • GNRR715
  • GNRR716
  • GNRR717
  • GNRR718
  • GNRR719
  • GNRR720
  • GNRR721
  • GNRR722
  • GNRR723
Last edited by samparfitt

Add Reply

Post

OGR Publishing, Inc., 1310 Eastside Centre Ct, Suite 6, Mountain Home, AR 72653
800-980-OGRR (6477)
www.ogaugerr.com

×
×
×
×
Link copied to your clipboard.
×
×