Asymair95 posted:

Got the o31 section of track done and hooked up and there is a short...aaaargh!

Is there a way to find the offending piece of track with a multimeter without dismantling everything? I’m going to check my custom length pieces first as I did move some ties around and may have disturbed the insulated rail.

This recently happened to me, I assumed it was a switch acting up, but it ended up being a nice looking piece of straight track.

I think your best bet it to separate the 031 line in half and test which side causing the short, then separate that side in half to see which of those sides is causing it, etc etc etc until you narrow down which piece of track is the offender. 

The process of elimination above is a good one. 

  To add to it slightly, for tube track at least, look for the heat build up. It will be hottest at the short most of the time.

  Move fast; I didn't say warm. It could cause a blister if you move too slow.  A fast pass along the top of the  center rail with a finger is my "fast check". Then finger and thumb, lower and slower.

The 1073 should have a breaker if Im not mistaken. Let it trip once and quickly go hunting.

 Id likely disconnect at least half first... and mind you this is not a technically proper way to test and heat may not be present.  But it is pretty easy to find if the heat does build, and it usually does.  No heat? Then it's back to process of elimination.

Found the short. It wasn’t in a switch or one of the pieces I cut to length. It was in a new straight piece I had bought from Tin Man last year. There was no obvious metal to metal contact that I could see, so I don’t know what happened. Ran my first train tonight after fixing the track! The trestle grade is fine, nice and smooth. Needs a few more power line drops to smooth things out. 

I got all the trestle pier clips put on tonight and started piecing the o27 track together.

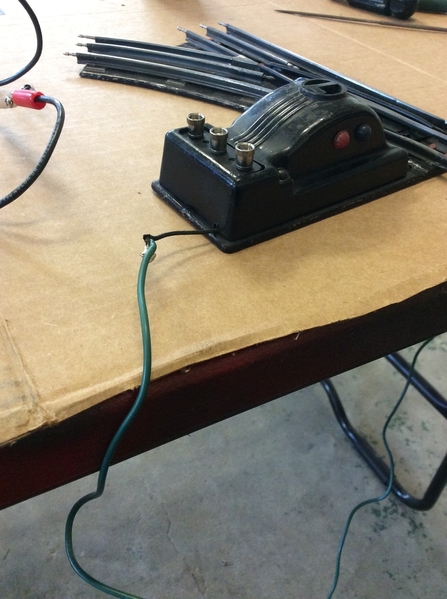
Next order of business is modifying the 1121 switches for aux power...all 11 of them. I’m not going to do the auto derailed mod, so don’t need the capacitor mod. Wish me luck.

Last edited by Asymair95

Good work! 

Do you have someone to help modify the switches? I did about 15 with another guy. It was really helpful making a production out of it. He made the power by-pass wire while I disassembled the switches and then made the wiring change. Two soldering irons to tin the wire and install.

be careful with insulator paper inside. It will be fragile. Have some electrical tape on hand.

It should be easy, but some solenoids were made so that they won't leave you much wire after you clip the track power wire. 

I also lubed the switches with CRC 2-20 at the pivot points and also the solenoid rod. I also put some silicone grease on the direction indicator gears. 

I found that carefully snugging the direction indicator parts to not too tight kept the switch free. They were very snappy when operated after the process.

This also stopped the arcing that these do when on track power. 

Take your time. It's well worth it. These switches will work great.

I’ll be modifying these alone, I have to do all my train work at night after the kids are in bed so it doesn’t interfere with family time. If the little ones were older I would have them help me, but I don’t think a four year old would have the attention span. 

I followed most of your description. I have had some of these switches open already last year for cleaning and lubrication. Most work great now, but I still have a few that need higher voltages to snap completely over. 

My 1121 switches don’t have any gears, only a shutter type piece that blocks the direction light from showing through the lense, and a push rod that throws the switch from the solenoid. I have lubed these with automatic transmission fluid per instructions I read in a different thread on here. Seems to work very well.

My question is what gauge wire should I use to extend the power wire from the switch? Can I get away with 18ga?

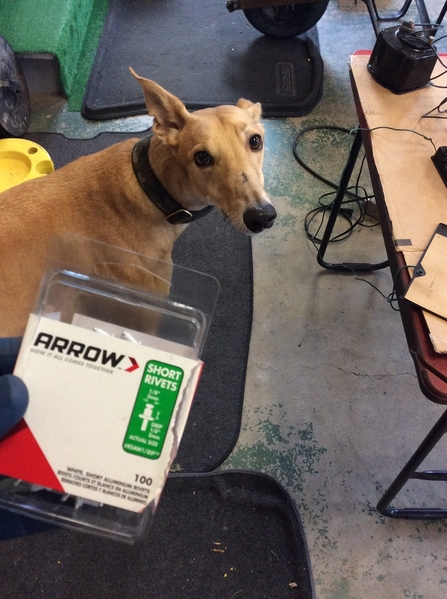
Tonight I get to drill out the pop rivets...again. I knew I should have used screws to put them back together last time

Asymair95 posted:

I’ll be modifying these alone, I have to do all my train work at night after the kids are in bed so it doesn’t interfere with family time. If the little ones were older I would have them help me, but I don’t think a four year old would have the attention span. 

I followed most of your description. I have had some of these switches open already last year for cleaning and lubrication. Most work great now, but I still have a few that need higher voltages to snap completely over. 

Mostly the shutters - loosen the screws a little bit and make sure the paper for the color isn't rubbing

My 1121 switches don’t have any gears, only a shutter type piece that blocks the direction light from showing through the lense, and a push rod that throws the switch from the solenoid. I have lubed these with automatic transmission fluid per instructions I read in a different thread on here. Seems to work very well.

yes, that is it - sorry - I lubed everything and found that the through position was easiest to reassemble to - it is mainly the friction of the top on the indicator that slows them down - too tight, misaligned and rub, colored paper coming off

My question is what gauge wire should I use to extend the power wire from the switch? Can I get away with 18ga?

yes, I used 16ga it was a little large to fit and looked too big on the outside - but it was all I brought for the project and we were getting it done that day

Tonight I get to drill out the pop rivets...again. I knew I should have used screws to put them back together last time

I hear ya on that one

here's what the big 16 aux power wires looked like (see attached)

Attachments

Images (1)
  • Thomas_on_Converted_1121_22_Switches

 To run constant power for a turnout coil only? 18g pigtail 2’ length should be fine. Use 16g or heavier for bussing power to those pigtails over a distance.

I don' know if it can apply to yours, but the older turnouts only need a dremel wheel slice (maybe two?) of the trace. It can be done from underside, right thru the steel. The liner will still do its job , just leaving pulling the cover for wire work.  You may want to pull one apart and look at how you might pull it off. Take measurements of where the slices need to be and know that though you can't see it, you know what is being cut.  (Ive done it, but those switches are laid on a ceiling shelf, my other two in the "center of town". I cut a window in the steel the first time, taped edges, etc. but after trying the simple slice and inspection, I'll always just slice.)

With the bulb? Well now you gotta look at that bulbs amp/watt too.

If it is carrying track power around to rails, that is too small.

I hate setting rivets. I'm actually good at it, but if I see good opportunity for a washer/nut /bolt or screw, even "micro", I'm there.  I also have an inherited "lifetime supply" of rivets that keeps me setting them if I need to hunt too hard for a certain threaded fastener. (the dreded unsorted screw box )

I tie knots in my wire before it exits a cover so it pulls at the cover vs connection point.

My plan is to run a 14ga bus wire (That is the smallest Lowe’s had when I was there in a large roll) and then run drops to it from the switches.

Will be doing this for accessories, lighting, track power, and the o27 switches.

Last night I got all the rivets drilled out. Wasn’t as bad as I thought it was going to be. Will try and get these soldered up today.

Baby steps.

Keep up the progress. I know the feeling of fitting in layout building during time that doesn’t disrupt family time. Sometimes I take small projects with me to work on over my lunch break at work. 

Which transformer(s) will you be using to power the layout? I’m curious how many watts those switches will use. 

I will be using two ZW 275. I have a few 50 or 60 watt small ones also. Was thinking of using the four main handles on the ZW to run different train lines, and the four smaller knobs on the ZW to run accessories, switches, and lighting.

8BFCD2DE-8DB4-4CA6-A0A6-8DAAEC14C590

Got six switches done tonight, five more to go. It’s fun opening up switches that have never been opened before. It’s like a time capsule...I found Christmas tree needles, tinsel, and glitter inside a few. I can imagine a kid 70 years ago on Christmas Day watching his brand new Lionel set going round and round


Attachments

Images (1)
  • 8BFCD2DE-8DB4-4CA6-A0A6-8DAAEC14C590
JD2035RR posted:

Keep up the progress. I know the feeling of fitting in layout building during time that doesn’t disrupt family time. Sometimes I take small projects with me to work on over my lunch break at work. 

Which transformer(s) will you be using to power the layout? I’m curious how many watts those switches will use. 

I used 14 volts ACC power and they were snappy after tuning and modding for ACC power. I used mini center off toggles that were sprung for the switch controller. I didn't measure the brief amperage draw.

That layout was for Larry3Rail in Calgary.


Attachments

Images (1)
  • Control_Box
Last edited by Moonman

I'm just seeing this thread now.  My suggestion would be to get things running with what you already have and play around with the track plan a bit until you decide on what you want.  You will find the shortfalls very quickly once the wheels start turning.  Personally I think you may want to open up some real estate for buildings and such.

If you want to keep the kids interested then they should have a section as well.  Kids love plastic cows and gons to put them in.  A milk car is always popular.  The layout can grow as they do.  Lionel sells some nice preformed tunnels, too.  

Ive used the hvac wire for runs over 15' but its usually in round bundles. 

I agree with Montclair, a clearance test & well loaded test asap. 

  A General has about the worst down low overhang at the cow catcher, my E-33 hand railing is next worse at mid height. The last is the cab roof on Hudson and Berk. (If memory serves me right, an FMTM is about the worst for inside & outside overhang clearances both, but it's forgetting steam cab roofs that always bit me most.)

Good news! All 11 switches are now wired for accessory power. I was even able to free up a couple of sticky switches that had been giving me trouble. One was a bent base plate exerting pressure on the swiveling plastic rail. The other was a bent center rail scrubbing the swiveling plastic rail. 

I am again in the process of laying track. Should be a few more nights till I’m done. 

Was wondering how many power taps/drops everyone uses? I have seen guys say every ten pieces of track a few times. Is this a good rule of thumb?

Some bad news too. Bought a ZW on fleabay and got burned. Needs rollers, power strip bolts, and maybe a whistle diode.


Asymair95 posted:

Good news! All 11 switches are now wired for accessory power. I was even able to free up a couple of sticky switches that had been giving me trouble. One was a bent base plate exerting pressure on the swiveling plastic rail. The other was a bent center rail scrubbing the swiveling plastic rail. 

Nice work! Check 'em out and tune 'em up while making the wire change. They'll all be snappy now.

I am again in the process of laying track. Should be a few more nights till I’m done. 

Was wondering how many power taps/drops everyone uses? I have seen guys say every ten pieces of track a few times. Is this a good rule of thumb?

The piece count relates more to the MTH DCS command system. I would use 6 on each L shaped loop and 3 on the center oval. Then, test run the largest amp draw equipment that you have, like a dual motored PulMor and lighted cars.

Some bad news too. Bought a ZW on fleabay and got burned. Needs rollers, power strip bolts, and maybe a whistle diode.

I had a link to a step by step, but, couldn't find it. Start a new topic on how to rebuild it. You'll get some help. Can search the forum using the search tool.


I couldn't see much of anything except the windings look nice.

If it was misrepresented, post that claim. The windings here look ok. The arms too. I couldn't figure the bus bar reference.

  Buy 2 extra wheels and 4 extra pins. The wheels are brittle and the rivets/axle bend easily when you set them. They are delicate & if overset, the axle bows. If the axle bows, the roller wont roll as smooth, it might hang up some, or it might not turn at all. (I think if you search 16a post diode you'll find a reference on that.)

A drop every 4 to 6 sections for me.

Thank you guys. I installed a small bolt in place of the offending dead post, and it seems to have fixed that one. Need to do one more and they should all be back up and running.

I will be careful when doing the rollers. 

Adriatic, I saw in another post you suffer from migraines. I also get these awful things. I was wondering if you have found anything that gives you relief? 

I have a few questions about trestles. I have a large elevated section here.

9185E142-1311-4D1D-BA94-716D573D6DBB

I understand how to use the trestle clips to join the track at the joints. But, how do you secure the bridges to the trestle? The metal bridge is 2.5 track sections long and doesn’t fall on a joint. The smaller girder bridges are one track section long and do fall on track joints. Do I just drill through the bridge base and screw it? Hot glue? Liquid nails?

61908AA4-EAF3-4F3A-8A31-7347E7A1AAA8

I have two different types of track clips. A plastic one on the right, and metal one on the left. Can these be used with o31, and o27 ? Is one better than the other? Which one should I use for the bridges? I also tried to slide the plastic clip between the track ties like the directions said and it was spreading the joints apart. I thought maybe my ties were too close to the ends of the track, but it was all pieces, not just those few. I’m thinking I’ll just nip those pieces off and screw down through the holes of the support bits.

6A9127B7-3A12-4D87-B165-BD3CC77F4EE1

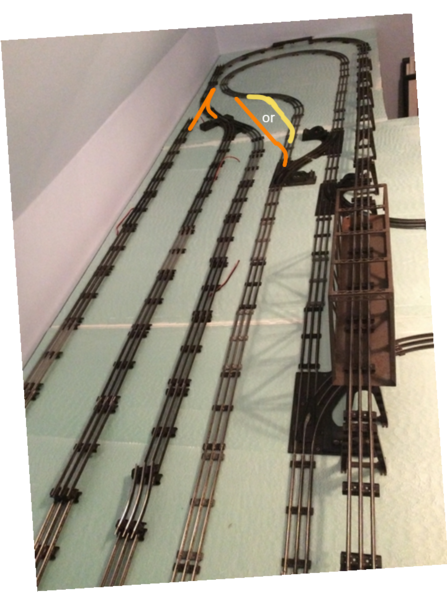
I’ve settled on this design for the middle section. I like the cross over in the middle as it breaks things up a bit.

C612A2D2-347C-482C-8283-107E1BD30A5C

Got rid of the S turns and now have more of a teardrop shape on the turn arounds.

Attachments

Images (4)
  • 9185E142-1311-4D1D-BA94-716D573D6DBB
  • 61908AA4-EAF3-4F3A-8A31-7347E7A1AAA8
  • 6A9127B7-3A12-4D87-B165-BD3CC77F4EE1
  • C612A2D2-347C-482C-8283-107E1BD30A5C

The track configuration for the bridge is 5500(10") - 5505(5.5") - 5500(10") = 25.5" which would put the one side of a trestle clip under the metal edge of the end and line up with the center hole. The last tie would line up with that hole also.

I thought a stone pier was used on each end of the bridge and the trestles for the track.

A track tie sits on either side of the trestle with the joint over the center of the trestle.

There are clips for O and O27 and later Super O. I don't know the difference.  

Last edited by Moonman

Thank you for the instructions. I had seen them and followed them, but it spreads my track joints for some reason. I will trim those pieces off, and just screw into the two horizontal parts.

Will measure my bridges too. I know the black ones fall on a joint, but my metal girder ones do not. But like you said, if I’m using two bridges it would stand to reason they would fall on a joint if they are each 2.5 track sections long.

I have some heavy engines (GG1, F3 Southern) do I need to add extra bents like the instructions say?

I saw a track design in those directions I like. I may try and redisign my center layaout area. 

Whichever clips I use I need to stick with one kind because there is a height difference between them.

   Well, you've already gotten to most suggestions I had wanted to make....and it looks like I finally got an attachment tool too, lol. (those photos are a week or two old now)

  Oh, youve stumbled on one of my "whiney" posts.  I had a young guy I was helping out causing me immense daily life pressures before I finally gave up on them and booted them to lifes curb. Food seemed to play a part as well; mom is alergic to "everything" it seems.  I switched super markets for meat and began feeling better, and sleeping better as well.

  My migraines were more "light show" than pain, and only lasted about a year or so around the height of my insomnia( which is still a pita, but I'm not going 4-6 days without sleep anymore either).   Just once or twicetwi the last 2 years have I went four days without ANY sleep.  There is a new migrane pill, I don't recall the name of at the moment but it's helping an aunt temendosly; I'll try to get the name.    

  Can you use one clip to cover the level el, the others to cover the grade? 

  Or if the height difference is small, and you have opportunity, use an "D" with short clip, then "D" with tall clip, then "E" with short clip, then "E" with tall clip to spread the grade (lessen it). (note I think the height between letters changes slightly to provide for transition to grade...never measured that close though)

Adding a teardrop shape at the loop preceding the grade (and the other loop to make room for it) would help with consistency of throttle and any S turn issues too

.sketch-1543815595494sketch-1543815909017


Attachments

Images (2)
  • sketch-1543815595494
  • sketch-1543815909017

OK thank you. 

By enlarging the teardrop on the grade it will decrease the friction in that area? I have smoothed it out a lot compared to that old pic. I will upload a new one to see what you think.

That is a good idea with the track clips, I will do that.

Would just adding another bent in the middle track tie do the job? Would hate to see my Grandfathers GG1 take a nose dive off the trestle.

I started getting migraines in 2004. About the only thing that helps me is my migraine meds. I take 10mg of Maxalt at the onset, sometimes it goes away...sometimes not. The bad ones land me in the ER.

  My aunt doesn't leave the dark bedroom for weeks at times. Mine are a joke compared to some folks, but still not fun. "Least of my concerns" now, lol.

   Adding more trestles will make it more stable sure. In the curves for sure  Just shim one about 1/8". (normal rise is 1/4" AVERAGE per track... I think they vary a bit for a good transition to grade.)  Once attached to track and table (last) it all gets far more sturdy though. 

  Folks seem to claim better traction for grades in curves.  I'm not sure that applies to 0-27/0-31.  I did better on straights; far better. Your curve and S have me nervous for you...test. Test again.  And pull the pants, lay down towels and test the GG-1 (they can be grade tempermental. Look for your loosest coupleling cars to follow it so it's less likely to bind at the grade. (they have "small" knuckles. Cars coupler sizes vary slightly; you want the smaller, metal one first if one's around.... likely is )

Asymair95 posted:

OK thank you. 

By enlarging the teardrop on the grade it will decrease the friction in that area? I have smoothed it out a lot compared to that old pic. I will upload a new one to see what you think.

That is a good idea with the track clips, I will do that.

Would just adding another bent in the middle track tie do the job? Would hate to see my Grandfathers GG1 take a nose dive off the trestle.

I started getting migraines in 2004. About the only thing that helps me is my migraine meds. I take 10mg of Maxalt at the onset, sometimes it goes away...sometimes not. The bad ones land me in the ER.

Try taking some raw, unfiltered, unpasteurized local honey to help with your migraines. Honey is rich in minerals, especially potassium and magnesium. These minerals actually relax arteries within the body, causing more blood flow to the brain. Thereby, the skin around the skull relaxes. The best honey to use is Tupelo altho it is difficult to find at times, but is the lowest honey on the glycemic index making it good for diabetics.

Last edited by balidas

Balidas, I have a migraine today, will try your honey remedy.

Adriatic, I took some new shots of the layout last night.

50EA1FEC-0920-48E5-9C9A-39257F4B7FF7

You can see how I cut the corner a bit here to smooth things out. Elevated section is o31, section in the foreground is o27.

9D8CFEEA-E423-4DA5-8AB0-1E34872DD2C1

The elevated teardrop and smoothed out corner.

D2D86CA5-312F-4811-97E5-C1F188C6EBBE7082DB1E-AFB0-4DFC-9B16-BF69FC4C0934

 This is the side area behind the trestle. You can see the F3 2356 in the corner for scale. I’m using a lighted caboose to check continuity as I build the track now. Such a great idea from our forum members.

6277DC3A-4164-496E-AEAB-56D9270BD555

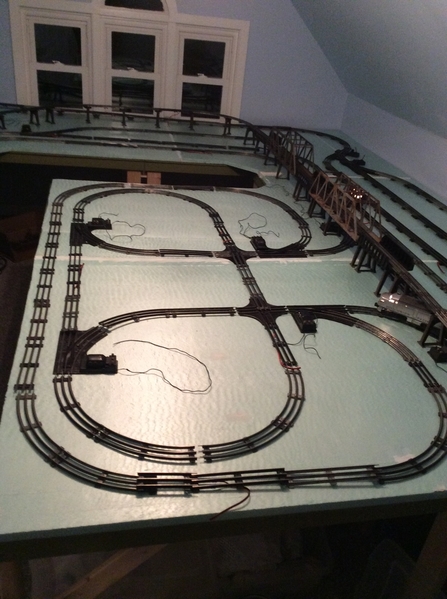
New design for the center area, thanks to the instruction manual attached a few posts up. I really like the cloverleaf. 

CF3C4EA3-E9FF-436D-81F8-41EC69260312

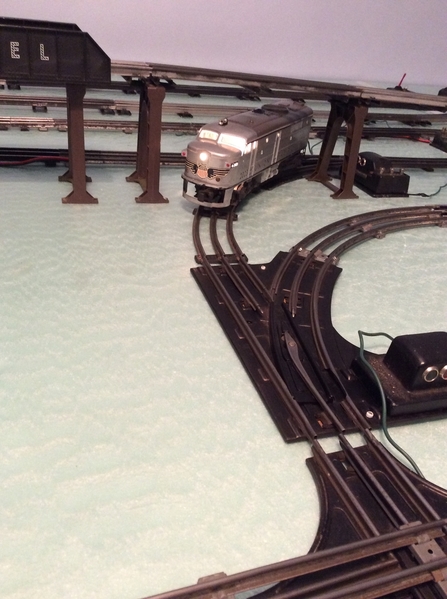
Checking clearance with one of the Alco B units.


I know it’s a lot of track and not much room for accessories, but I primarily like to just watch the trains run. 

Attachments

Images (6)
  • 50EA1FEC-0920-48E5-9C9A-39257F4B7FF7
  • 9D8CFEEA-E423-4DA5-8AB0-1E34872DD2C1
  • D2D86CA5-312F-4811-97E5-C1F188C6EBBE
  • 7082DB1E-AFB0-4DFC-9B16-BF69FC4C0934
  • 6277DC3A-4164-496E-AEAB-56D9270BD555
  • CF3C4EA3-E9FF-436D-81F8-41EC69260312

Add Reply

Post
The Track Planning and Layout Design Forum is sponsored by

AN OGR FORUM CHARTER SPONSOR

OGR Publishing, Inc., 1310 Eastside Centre Ct, Suite 6, Mountain Home, AR 72653
800-980-OGRR (6477)
www.ogaugerr.com

×
×
×
×
Link copied to your clipboard.
×
×