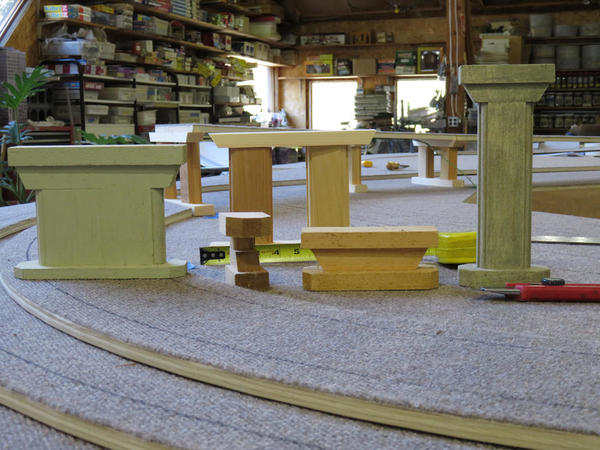
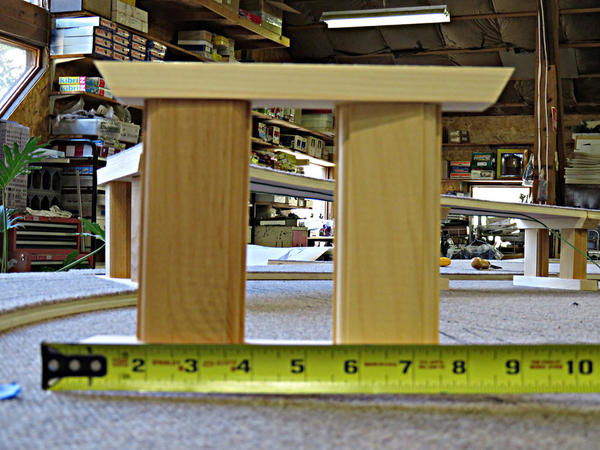
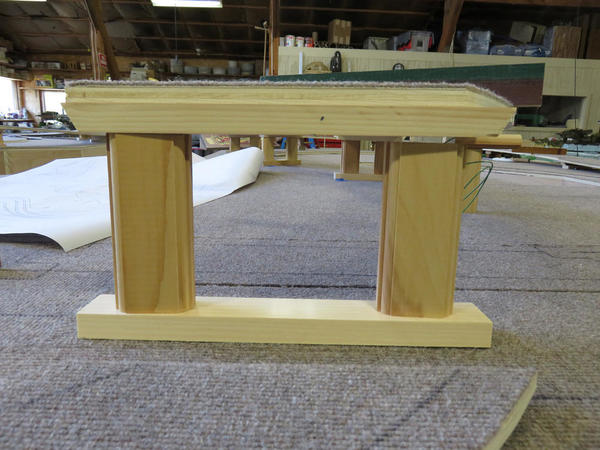
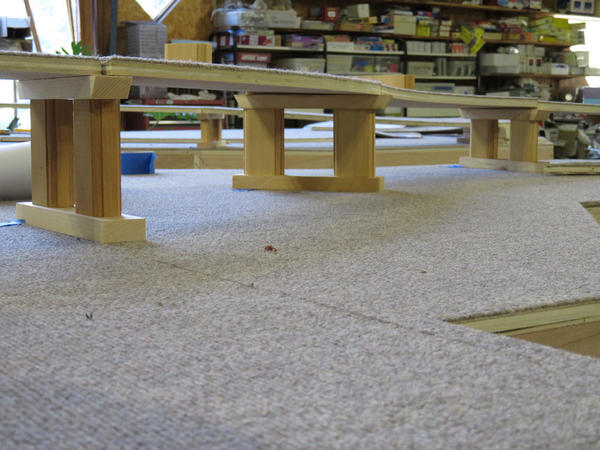
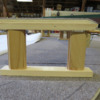
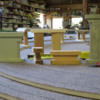
It's time to begin adding the second track level. Roy starts to space out the risers to roughly set the % of rise. (John is working in background on wiring for another layout which I'll try to document in another thread.) As you can see from the track plan lying on the platform, the track goes beyond the Basic Layout itself. We're already building a set of platforms (below) for the addition which will hold the switching yard and turntable ( attached by a trackboard umbilical cord).
Clarke,
Great job. Could you take closer Picture of support structure lag's
They look very nice.
Good Luck, John
This is a great thread. I like seeing this all come together. Nice job
Mike
Thank you for sharing the construction process.
Hi Guys,
This post is especially for John DeAlto, but also especially about how we do things here. When you build as many layouts, and in all styles, I tend to carry around in my mind a series of "qualifications" such as "Hi-Rail", "Scale", "Traditional" and "Fantasy". I could use these uprights (which came right out of our parts box), in the Hi-Rail, Traditional and Fantasy groups, but not in the others. There are other, more realistic, solutions that can serve exactly the same purpose, as on our NYC/Long Island layout (see our separate OGR Forum thread for that). That's just my thinking. As you can see there are several different approaches here, including the "little guy" who functions as the edge detail on a platform face to complete the sense all the risers on the layout have set. You'll see this happen on this project, later on when we get to the upper center level. Note that the Grade Angle has been cut into the top member of all the supports.
Clarke
clarke@dunhamstudios.com
Attachments
Love that construction technique. Makes the layout benchwork look like a piece of custom furniture. ![]()
Hi Matt,
That's exactly our intention. More so in this case because our client is going to have to look at this layout like this for perhaps a long time before he adds scenery. If he does. If he doesn't, he's got a piece of furniture. It takes so little more work to make it look nice!
Clarke
clarke@dunhamstudios.com
Seacoast posted:What are the dimensions of this layout and what size curves are you using?
Hi George,
The main layout is just less than 18 x 18 feet and the Turntable/Yard area is approximately 4 x 18 feet with a slight bump out on the yard's return loop. The ruling radii are O72 & O-63 to the Upper O-54 level. All levels are interconnected so that you can run to any loop/level from the Yard/Turntable area and return.
Clarke
Dunham Studios posted:I'll let Clarke answer you George. Meanwhile I'll go ahead and post some more pix. The left side of the Basic Layout as the 2nd level goes on, the right side. And some risers with dimensions. Anyone want to guess the % of rise?
I'm guessing 1.5 - 2% grade.
Thank you,john
My estimate for the grade given O54 curves 3.5% grade
assume you use cnc machinery, is it mandatory at your level
wonderful thread
j
Why are you using carpet for the table top is this a traditional toy train layout or other?
I'll continue with my Basic Layout progress report. First, Mike Burke is under the main section of the layout installing wiring which will lead to both track (yes, yes, I know it's not there yet!) and controls (for obvious reasons!), then some shots of the (still unfinished) auxiliary sections of the layout. Stay tuned.
Attachments
First class carpentry all around and well thought out design. My scratch built 15' x 28' layout took 12 years to build and if and when it comes time to move it, you will get the call, that is if you do this work. Keep the pics coming. Outstanding work!
JPC, as the title of the thread states this is a "basic" layout. Good custom builders work to a number of price points. This layout appears to me to not using 3D CAD or CNC machining from a 3D CAD file. The carpentry work here is well done and appears to be a good and cost effective approach for this layout.
I am having a layout built that would be considered "way beyond basic." It is completely modeled in 3D CAD and all the structure was CNC cut. The appearance and assembly is completely different from what is pictured here.
Quite untrue, Tom. There is no "better price point" than computer aided design and CNC routing. If you had followed this thread from the start, you would have seen that this is all 3D designed and all CNC cut. In fact, because of the CNC side of it all, we've been able to adhere the rugging to the plywood before cutting on the CNC router. Further, we were able to precisely draw the track and turnout locations on the rugging after mounting it on the plywood using the CNC to draw the lines with a Magic Marker directly on the rug. "Basic" or no basic, you can't make money by cutting out the technical side of it.
All, of us in the business have different professional backgrounds and different technical approaches. Mine comes from fifty years in Stage Design. As result, I would rather die than have an Architectural CAD approach to my designs or construction. It is limiting and un-artistic, and I regret the direction it has taken American Architecture. As this is architecture "writ small", the same applies here. Check Page One of this Thread. That's where all the 3D and CNC stuff is.
The difference in construction appearance you've noticed is that we use construction techniques from the Broadway Theater. Everything in a Broadway Set has to break down into "truckable" sections. This is a lesson well learned, but not applied by all in the hobby. As a result, we've been able to install large and complex historically accurate layouts through tiny third story windows in 17th Century Farmhouses and Historically Certified California homes as well as the huge 32-train multi-gauge Station At Citicorp Center layout, which had to pack, section by section & piece by piece, into two 53 foot tractor-trailers and then assemble over a weekend into a thirty-foot-high Victorian Station Building with all those trains and all those layout sections inside. Year-after-year for more than twenty years.
Clarke, I have followed the thread from the start. I am really pleased you are taking the time to post these pictures to encourage others to contact you about a layout. There are many who would like to have a layout that either do not have the time or skills to make what they want. I think you offer a viable solution for many of them. Our hobby will benefit.
Regarding the CAD, I saw the screen shots and the plotter, I guess I did not recognize the program. I thought it was 2D with 3D rendering capability. I still do not see the CNC equipment. Apparently you are saying the plywood layers and other shapes were CNC cut. Keep the posts coming.
For Tom's question raised about the CNC Router, it's my fault. I didn't think the picture I had was 'sexy' enough, but take a look. Here's Fletcher, our computer guru at the router on this project. I may be able to scrounge a couple more photos as I go into other projects. At the moment we're working on 4 projects at once so I occasionally miss a day of photo ops and let things slip by. Sorry. (I do promise to start at least 1 more thread on a more complex layout...or 2.
Attachments
We haven't exactly been hiding the CNC Router, but Barb didn't consider it to be "worthy" of a featured photo. We'll take care of that ASAP. It shows up a lot on our Website (www.dunhamstudios.com) on a lot of our HO Scale Layouts. In terms of the design programs, there are several that, working together, provide a much more integrated and powerful design solution than an ordinary CAD program. Notice that the track location has been routed into the platform tops in this particular layout. We feel that it gives a more "Scale Appearance" that way. Also, we will often lay indoor-outdoor carpet between the track and the plywood as a sound-deadening factor.
But now that you mention it, you should know that it joins a Computer-Driven team of The CNC Router, plus the large Laser-Cutter and three generations of 3D Printers.
Attachments
Clarke, great new pictures! They really put a more complete perspective on this build and the activities in your shop. They are not boring at all.
Very handsome looking! It will look very good until the owner gets to building scenery! Thanks for posting!
John Doty is laying track on the auxiliary section of the Basic Layout. This section houses the Engine Storage. and is attached to the Basic Layout by a track bridge. Notice that the indicator lines are marked for placement of the center rail.Although this part of the layout has its rugging and T-111 base, it still has to be painted.
Attachments
Tilting the platform on edge makes it easier to work on. John is marking the underneath where he'll drill to insert the wires to the track. On Friday, John installed the 30" turntable into the next auxiliary section of the Basic Layout. Meanwhile, Delia's assembling the second level for the Basic Layout itself while Roy is finishing touching up the painted edges of the trackboards.
Attachments
Just a note to Mark in response to your comment above. Maybe he'll be so blown-away by the art-deco look of the 'naked' layout that he'll simply forgo doing the scenic thing!
Dunham Studios posted:Just a note to Mark in response to your comment above. Maybe he'll be so blown-away by the art-deco look of the 'naked' layout that he'll simply forgo doing the scenic thing!
This could very well be true!! And if so, that will be good for him and a compliment to your work!!
Holy Cow! That is fantastic! Thanks for posting this. I'll go ahead and say, if that were my layout I would use it as is, that looks awesome!!!
Please excuse the lapse. My camera wasn't working correctly. Here's Mike Burke working on track in center section of Basic Layout. The left side "teardrop" (the second level) has not been installed in the photo below. On the right side in the photo with John Doty you can see both levels.Now it's pretty much a question of finishing the track laying, wiring 'er up and watching 'em go! (It should be that simple!) Oh yes and getting the fascia on and painted.
Attachments
If it's not too invasive to ask, what sort of price range are we talking about for the finished product of this complexity and size? What sort of additional costs does delivery add? Beautiful work and thanks for sharing your art with us.
Very nice indeed! Thank you for posting!
Sorry for the delay. Clarke has been working at his 'other life' as a Broadway/Opera Designer readying his set model for a meeting on "Candide" (which Hal Prince is directing at the Rose theater in New York in January before it heads for Paris and other cities worldwide that are celebrating Leonard Bernstein's 100th birthday). The electrical/electronic part of the staff has been working on the complex track wiring of the Basic Layout but I've neglected to follow along with pix missing shots of the layout upended vertically with the guys wiring it. Now back in its horizontal mode here's where we are.
Attachments
The turntable for the Basic Layout's auxiliary section finally arrived (after a wait of several months) and John got right to setting it up. (Note how he worked with the section in vertical mode so as not to have to keep crawling around underneath.) The turntable has been bolted in place and is ready for Roy to 'rug' its platform after which John will give it a whirl (so to speak).
Attachments
Dunham Studios posted:The turntable for the Basic Layout's auxiliary section finally arrived (after a wait of several months) and John got right to setting it up. (Note how he worked with the section in vertical mode so as not to have to keep crawling around underneath.) The turntable has been bolted in place and is ready for Roy to 'rug' its platform after which John will give it a whirl (so to speak).
Nice work. We have a Ross turntable and it works great. I wanted to pass on a suggestion, though, that you install a "slip ring" underneath it for the wires. It allows electricity to pass to the track (and bridge if you want) on top, but prevents the wires from eventually twisting over time. We put one under ours years ago and it still works great. You only need a small piece of wood across the bottom beams to mount it in. I'll post a photo when I go to the club this weekend.
Great job! Why the carpet ? Do you do scenery right over the carpet?
Hi George, In this case, there is no scenery at all. So, partly for the look and much for the sound-deadening qualities we use carpet, this time a high quality, low pile indoor-outdoor type. If there were to be scenery we might well use an even flatter/no pile industrial type carpet that quiets everything and also takes scenery well. Whatever combination works for the job-at-hand, but with Hi-Rail and Conventional O Gauge Trains, layout "quietness" is a major consideration for us.


