What do you find most useful to carve pink foam, I want to carve rock walls with boulders and crevices thanks
Original Post


|
|
What do you find most useful to carve pink foam, I want to carve rock walls with boulders and crevices thanks
Replies sorted oldest to newest
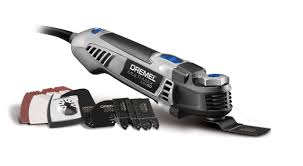
A lot of guys use a hot wire cutter. I use a Dremel Multimax with various blades. Run a shop vac near the cutter to contain the crumbs. Great tool to have around the house too.


Thanks, your work looks great
i have a difficult time carving pink foam insulation board and getting clean cuts. However, I do have good luck with blue insulation board getting clean cuts. I now only use pink when I don't need a clean cut or the cut side won't be visible.
walt
For a straight line, I generally use a table saw with an old blade. You have to maintain a firm stead grip yet be ready to run away if the saw grabs the foam, melts a bit of it to the blade and sends it flying.
For terrain, I generally use a keyhole saw and or pen knife. A steak knife can also be used. Shaping can be done with a wood rasp and or coarse sandpaper. The wood rasp can also be used to smack against the foam to make “tool marks” in masonry. A triangular file can be used to make mortar/joint lines in masonry.
And RSJB18 mentioned the most important tool: a shop vac.


I use the tools made by Hot Wire Foam Factory. https://hotwirefoamfactory.com/
The hot wire melts its way through the foam and leaves no particles to clean up afterwards. Below are photos of a tunnel that I constructed for a client in California several years ago while I was still in the model railroad scenery business. The substructure of the tunnel is made totally from pink insulation foam of various thicknesses. All of the foam was cut with the Hot Wire knife tool. The slabs of foam board are held together with a specialized glue call "Foam Fusion" sold by Hot Wire Foam Factory.

I engraved the stones in the tunnel portals using the scribing tool.

Below is a photo from one of our York show booths showing a partially finished tunnel with exposed foam.

Below, are two photos on the bench in our shop of a north woods diorama, that I made for a client. All of the terrain is carved from pink insulation foam.


This a great way to cut foam with no residual mess. However, ALWAYS cut in a well ventilated area or outside on a sunny day. The vapors from the melting foam are highly toxic.


I did my foam mountain with 3 tools. The messier you are the better IMHO.
Use a bunch of scrap pieces vice a single clean piece.


Ron:
That is superb scenery and GREAT carving.
Hot wire is the best for Pink... green and blue are a similar foam but have a different cell structure. The best carving foam is polyisocyanurate foam, but it is not in the big box store like pink, green, and blue extruded polystyrenes.
I shape pink foam 3 ways:
1) If I need a clean cut, I slit it with a razor blade or utility knife, going as deeply as possible, and then snap it apart. You can then sand the remaining rough edge to make it perfectly smooth.
2) If I need a rough texture, I carve it with a Dremel tool, using various bits for different effects.
3) If I need detailed textures, such as cut stone or concrete expansion joints, I simply emboss it, using an old set of manicure tools.


For cutting 2" thick foam board; I use a Olfa knife with break away blade points. I bought mine in Home Depot, you can find them with the wallpapering tools. They sell the replacement blade packs with standard, and a thicker heavy duty blade, get a pack of the sturdier heavy duty blades. You can extend the blade out about 3 inches or so, with a fresh blade, and make a clean cut in foam board. Mine is the nicer knife with the black and yellow handle, and the blunt blade on opposite end for prying open can lids. I carry mine with me all the time. They are inexpensive.
I don't have one, but I believe someone makes what is essentially a soldering iron with a replaceable Exacto blade at the end for making quick work of small, detailed cuts.
Avanti posted:I shape pink foam 3 ways:
1) If I need a clean cut, I slit it with a razor blade or utility knife, going as deeply as possible. You can then sand the remaining rough edge to make it perfectly smooth.
2) If I need a rough texture, I carve it with a Dremel tool, using various bits for different effects.
3) If I need detailed textures, such as cut stone or concrete expansion joints, I simply emboss it, using an old set of manicure tools.
Pete:
That is very nice work.
I use the hot wire tools, I don't like paint,plaster, glue, or any other liquid mess. And I don't like taking all day to do something. This scene what you see is about 1/2 of it, took 30 days from tear out, to finish. Carved and painted in the garage then moved to location in three large sections. the whole thing is about 6 x 12 feet. that curve is 120" Dia. And a 2% grade.


I use a slightly different method. I first slice on my table saw, 1" thick sheets of blue or pink foam into 2 1/2" wide boards. I then hot glue them into the basic form of the scenery area I am building. I then take a serrated knife, one of three sizes - small, medium and large - and start carving, and carving and carving until I have the basic shape I am looking for. Cracks and joints are then filled with Sculptamold and left to dry. Then the entire area is coated with a thick ceiling paint. It is now ready for a basic color, installation of rock molds and scenery.


Wow PeterA. That's a lot of foam. I'm guessing the "R" value in your room increased too. ![]()
fyi, if you are stacking pieces up use Glidden Gripper to keep them together. Lots of other things say they work, most don't.
I used a hot knife from Harbor Freight worked well on +5 inches pink board
I liked the look I got but eventually needed a fan and respirator
fumes can be nasty I couldn’t get the right textures with rasps or other tools glad that part is over
Steve:
As I said in my post about Hot Wire Foam Factory tools in an earlier post, ALWAYS cut in a well ventilated area or outside on a sunny day. The vapors from the melting foam are highly toxic.
Randy Harrison posted:The vapors from the melting foam are highly toxic.
I am all for good ventilation, and the fumes are irritating. But it isn't really true that they are highly toxic. Pink foam is Extruded Polystyrene. Polystyrene is a food-safe substance. When it is heated or burned at non-extreme temperatures, the resulting vapor is mostly CO2 and water vapor. It is actually pretty benign:
Fork, butter knife, steak knives, hack saw blade, exacto, exacto saw, flame from lighters, micro torch for shaping.
Large cuts I usually use the hacksaw or score with a box knife and snap it.
Sanding ; 220 ish
I've used the locktite foam glue; pricy.
For less permanent stuff, I just used white glue. But nothing has fallen apart in 7-8 years.
If you chase the mess too much you'll just clean all day ;(
Vacuum and kill the lights ![]()
Access to this requires an OGR Forum Supporting Membership


