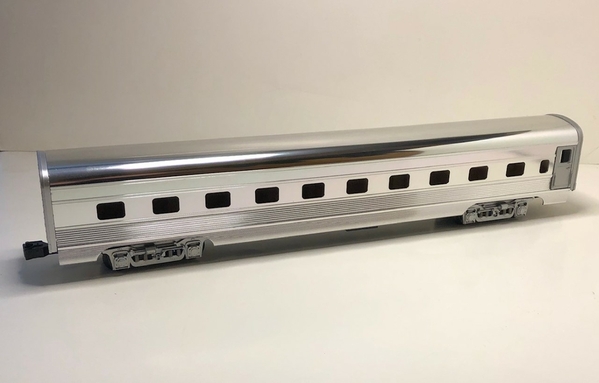
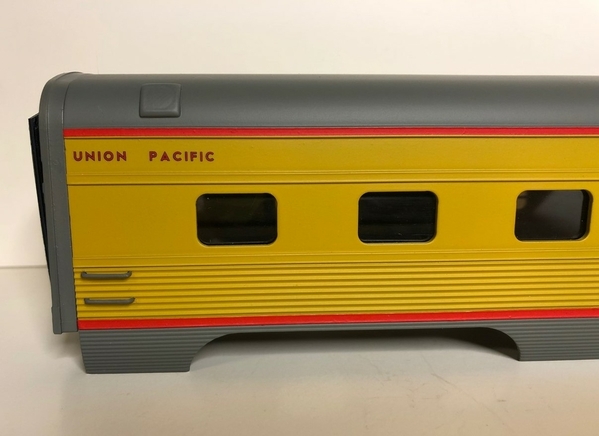
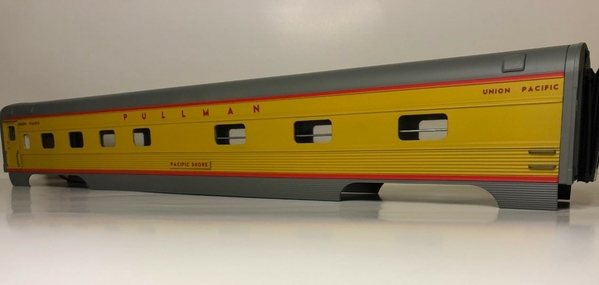
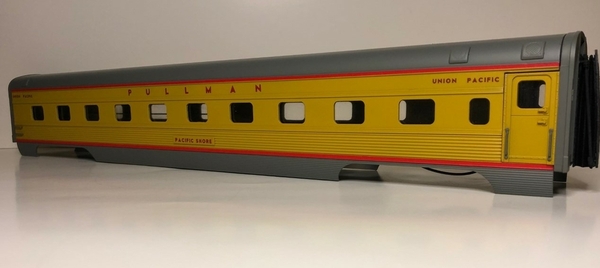
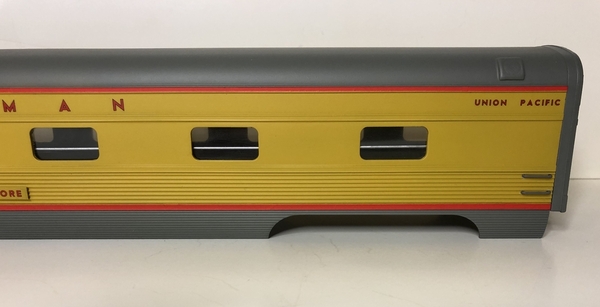
I liked how my previous 18” Phoenix Railway aluminum passenger car turned out and decided to try a Budd style shell with fluted sides.  This time I was going to try to recreate a 1950's era “Pacific” series sleeping car using a Phoenix shell.  The names of these cars were not for specific places but were meant to give a pleasant feeling about the destination or terrain that was being traveled.  For this build I picked the name Pacific Shore.  Here’s a photo of the real Pacific Shore. http://www.rrpicturearchives.n...ture.aspx?id=4469054 .

In my opinion, these Phoenix Railways shells are a good alternative for different styles of 18” aluminum unpainted semi-scale passengers cars.  After picking up a 1990’s era Phoenix shell with fluted sides from eBay I wrote down this building guide with step by step experiences for fellow O-gauge forum members.

thumbnail_IMG_7629

Modifying and painting this Phoenix Railways aluminum shell

Passenger traffic was heavy after the war and Union Pacific ordered lots of new sleeping cars from Pullman Standard and American Car Foundry.  But UP’s largest single series type sleeping car order after the war was for 50 sleeping cars in the 10 roomettes – 6 bedrooms arrangement from Budd.  These new 10-6 Pacific series sleeping cars started being delivered on December 19th 1949 and Budd finished the order on June 29th 1950.  The first 25 cars were painted Amour Yellow and Harbor Mist Gray to match the “City” fleets.  The last 25 cars were painted in the Grayhound two-tone paint scheme to be used on conventional passenger trains.  Then, in 1952 Union Pacific standardized colors and repainted all their passenger cars Amour Yellow, Harbor Mist Gray with red lettering and red stripes.  Also, around 1955 all gray trucks used underneath Union Pacific’s streamline passenger cars were painted silver.  The Union Pacific still runs the Pacific Domain (now called Willie James) in their heritage fleet.  https://www.up.com/cs/groups/p...james_historical.pdf


To find detailed photos and information on these Pacific series sleeping cars I hunted down “The Streamliner” magazines Vol. 4, No. 4 and Vol. 5, No. 2 published by the Union Pacific Historical Society.  In these issues Robert Darwin goes over construction details of these 50 Pacific series cars.  At that time, all the other Union Pacific sleeping cars had smooth sides and only these Pacific series cars built by Budd had been fitted with fluted side panels.  Once I had the detailed photos and information from the UPHS magazines I started working on my Phoenix Railways shell.  In the photo below I'm test fitting the Phoenix shell on top of a K-Line frame with trucks and Lionel post war end caps.

thumbnail_IMG_7863


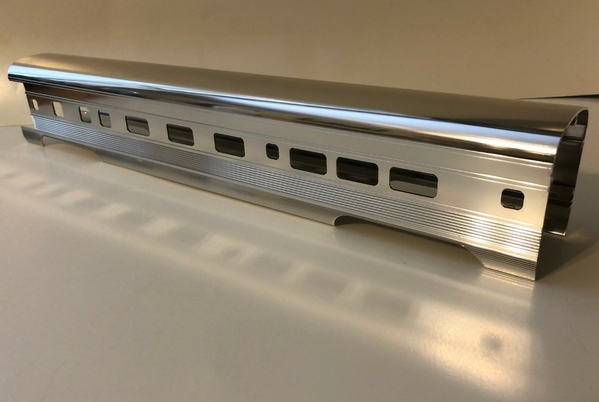
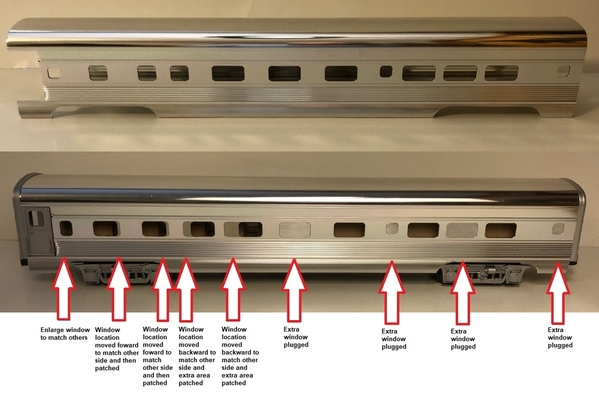
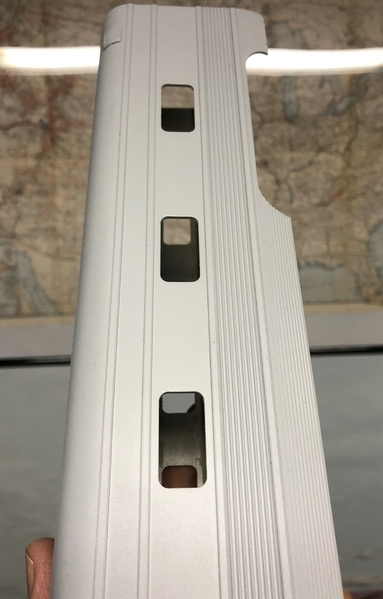
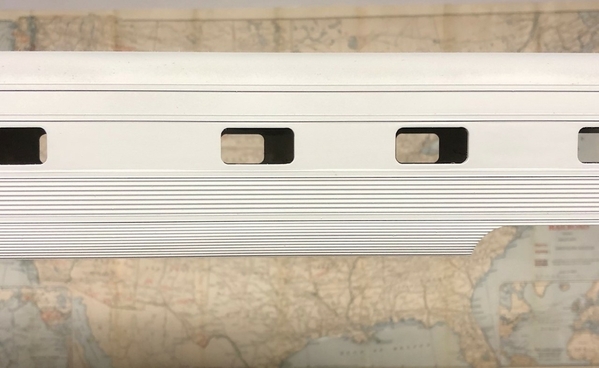
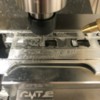
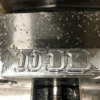
After the test fit I realized this shell needed its windows moved to better match a real Pacific series sleeping car.  Phoenix Railways makes a great aluminum shell but the windows on the right hand side were nowhere near matching the original 1949 Budd plans.  In my previous builds I would cut-in new windows by hand using a Dremel.  And then fill-in unwanted openings using styrene.  This time I contacted a professional with a CNC machine and had the new windows put into the shell at the correct locations.  He measured the openings with a micrometer, identified the window corners as 7/64th radius and then created a CAD drawing on his PC.  Next, he secured the aluminum Phoenix Railway shell in the CNC machine, calculate the RPM needed based on the type of aluminum being cut and the size of the end mill (router cutting bit) being used.  After inputting all the data the automated CNC machine came to life and went to work cutting in new windows and moving over existing openings.


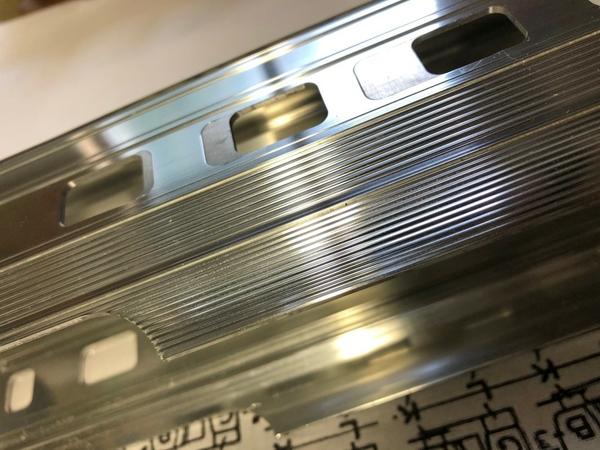
Next, the CNC machine was programmed to make small patches out of aluminum flat stock.  These patches were needed so the right side window openings would be in the same correct locations as the roomette windows on the left side of the shell.


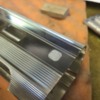
The quality of the new CNC aluminum patches was incredible.  The accuracy was within 1000th of an inch.  Far better than I could have done by hand.  The Pacific Shore was turning out great and in the photo below you can see how the roomette windows were moved to the correct locations.  Send me an email if you want the contact information for this CNC shop.

thumbnail_IMG_7877


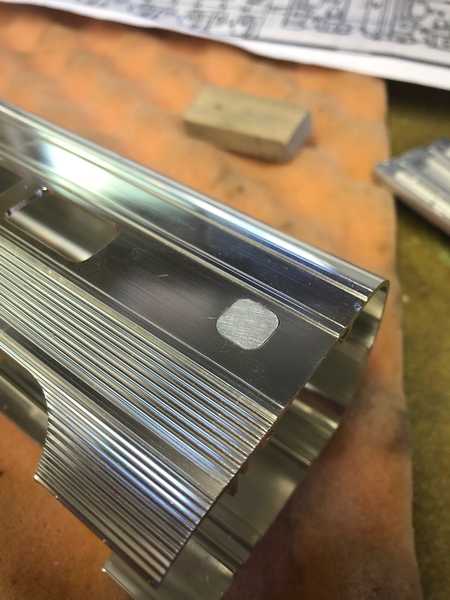
Next, the CNC shop had the machine make aluminum blanks to fill in the extra openings where there shouldn't have been windows on the right side of the Phoenix shell.   When installing your new aluminum blanks into the shell it’s critical you do not glue the new plug too high up in the opening.  If you do, you will not be able to easily sand them back down again.  If needed clamp a small block of wood to the outside of the shell when pushing in your new aluminum blank from the inside.  Use CA clue on the inside of the shell to secure new blanks in place.

window plug

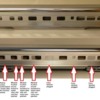
Here is a look at 8 CNC’d window patches and blanks used on the right side of the shell.  This new window arrangement is much closer to a real Pacific series sleeping car.  Since I'm working with an 18” semi scale shell it did not have enough space to include all 10 roomettes in the front section of the car.  This semi scale Phoenix Railway shell could only hold 4 roomettes on each side for a total of 8.  Also, the small bathroom window next to the vestibule was enlarged by the CNC machine to be the correct height.  Now the small bathroom window correctly matches the height of the other windows and the original Budd plans.

before after right side


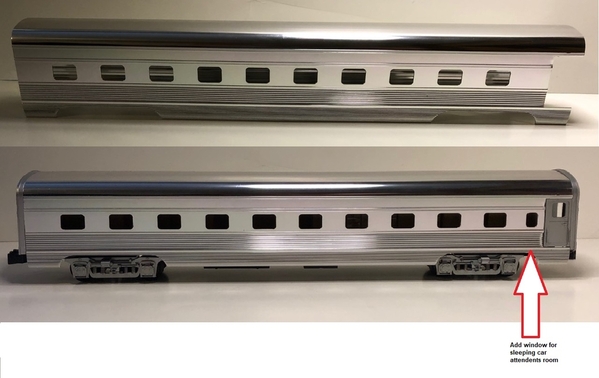
The only modification needed on the left side of the shell was adding a small window for the sleeping car attendant’s room.

before and after left side

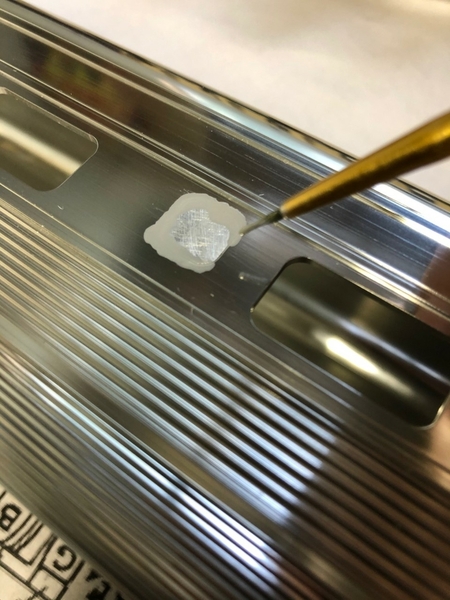
Next gently wipe down the shell with 91% alcohol to remove any fingerprints/oil residue and prepare the surface for primer.  Then, lightly go around your new aluminum patches and blanks with gray Tamiya primer on a small paint brush.

thumbnail_IMG_7875

The gray primer easily fills and covers the seam between the blank and shell.

thumbnail_IMG_7878

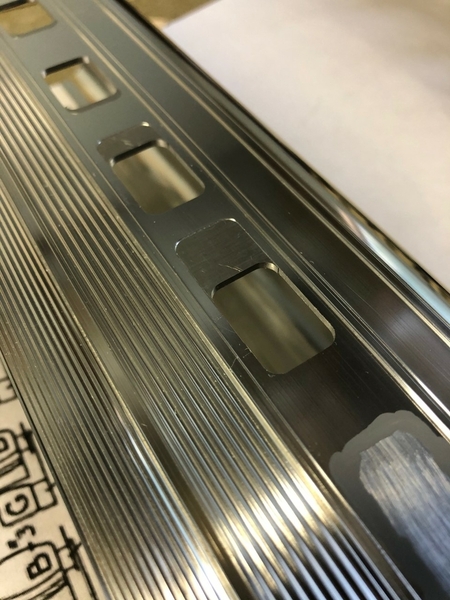
Once the primer has fully dried around the seams carefully sand the area smooth.  Then, spray the whole shell with gray primer. In the photo below there used to be 7 windows... now there is only 3.

thumbnail_IMG_8003

After applying primer look for any imperfections.  If you find any, repeat the steps above until the area is perfectly smooth. The new CNC window patches and blanks blended in fantastic and I couldn’t tell where they were installed after the shell was sprayed with primer.  

thumbnail_IMG_7999

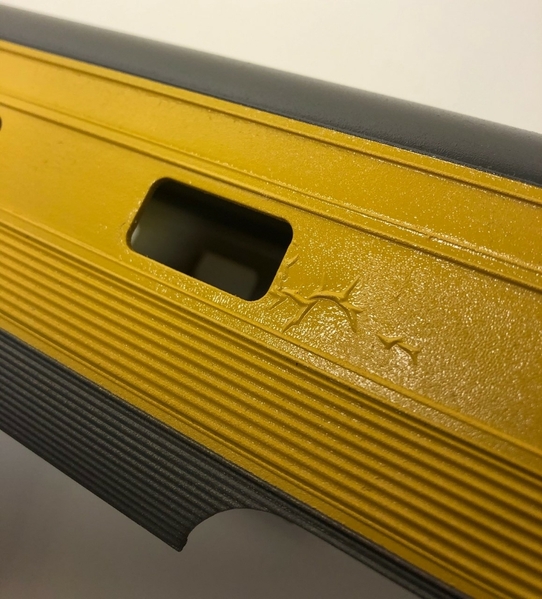
Next apply the correct Union Pacific colors for the year you are modeling.  To make this sleeping car match the color online photos I used Scale-Coat II UP Amour Yellow #2085 and Scale Coat UP Harbor Mist Gray #2032.  The first step was applying the Amour Yellow with an air brush.  Wait 24-hours for the yellow paint to fully dry.   Then tape-off the yellow areas and applied the Harbor Mist gray to the roof and skirts.  Wait 24-hours for the roof and skirts to dry.  Next, spray with Krylon gloss.   


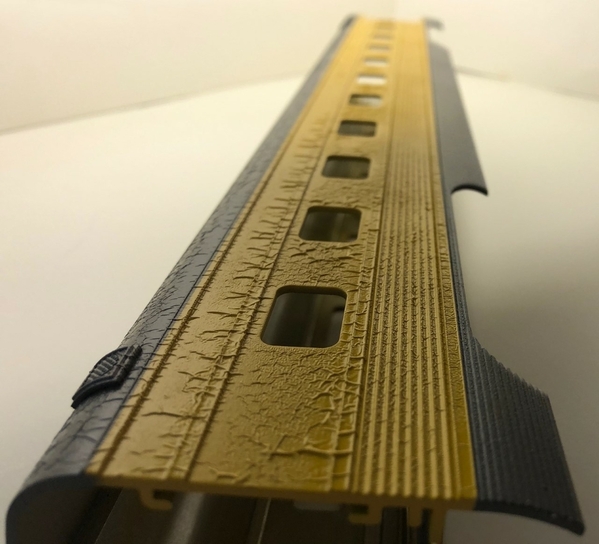
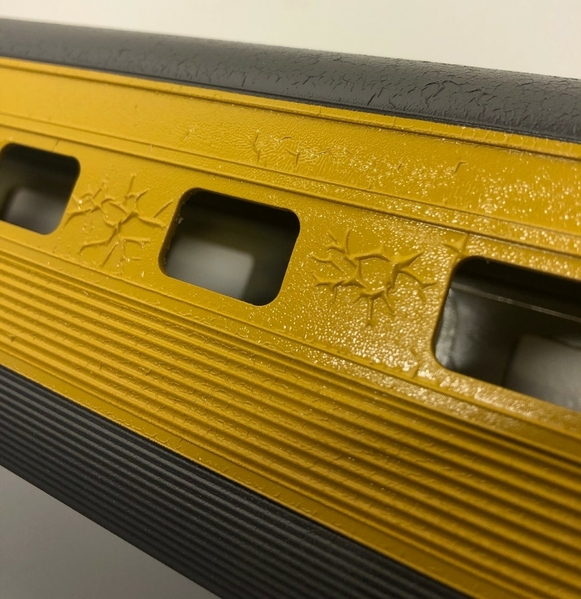
Fail.... apparently Krylon gloss is not compatible with Scale Coat II paint.

thumbnail_IMG_7893

thumbnail_IMG_7902

"Like" this post to show your support for the build and I will sand it down and try again.

Attachments

Images (14)
  • thumbnail_IMG_7629
  • thumbnail_IMG_7863
  • CNC_7683
  • CNC_7800
  • thumbnail_IMG_7877
  • window plug
  • before after right side
  • before and after left side
  • thumbnail_IMG_7875
  • thumbnail_IMG_7878
  • thumbnail_IMG_8003
  • thumbnail_IMG_7999
  • thumbnail_IMG_7893
  • thumbnail_IMG_7902
Last edited by T.Albers
Original Post

Replies sorted oldest to newest

Another terrific project, "how-to" thread with plenty of detail, @T.Albers.

Question:  why did you feel it necessary to put a gloss coat on the SCII paint?  The mfr. says SCII paints are decal ready--no need for a separate gloss coat.  I ask because I am going to air brush four NP North Coast Limited dome cars soon using SCII paint and hadn't planned to apply a gloss coat prior to decal application per SCII's directions.

Question:  You didn't use SCII's gloss because...?

By the way, I feel your pain.  I thought I was about finished with two of the four NP NCL dome cars until I was trying to apply the white separation stripe and realized I'd be better served to paint the stripe.  At that point, I also realized I wasn't satisfied with the dark green paint application.  So those two cars were stripped; more accurately, are in the process of being stripped and prepped for a "do-over."

@Pingman posted:

Another terrific project, "how-to" thread with plenty of detail, @T.Albers.

Question:  why did you feel it necessary to put a gloss coat on the SCII paint?  The mfr. says SCII paints are decal ready--no need for a separate gloss coat.  I ask because I am going to air brush four NP North Coast Limited dome cars soon using SCII paint and hadn't planned to apply a gloss coat prior to decal application per SCII's directions.

Question:  You didn't use SCII's gloss because...?

By the way, I feel your pain.  I thought I was about finished with two of the four NP NCL dome cars until I was trying to apply the white separation stripe and realized I'd be better served to paint the stripe.  At that point, I also realized I wasn't satisfied with the dark green paint application.  So those two cars were stripped; more accurately, are in the process of being stripped and prepped for a "do-over."
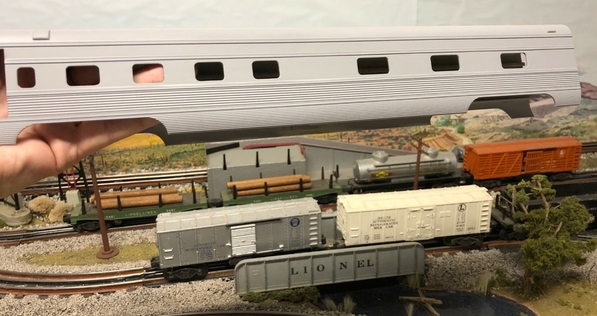
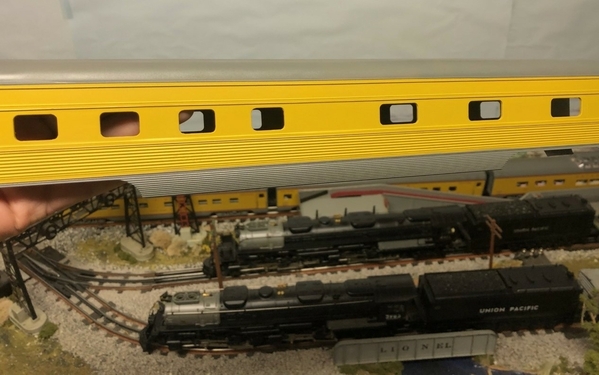
Hi @Pingman, thanks for the support

Question 1.  Why did you feel it necessary to put a gloss coat on the SCII paint?   Answer:  The instructions on the MicroScale decal pack said, "The model must have a smooth glossy painted surface."   I thought the decals needed this Krylon high gloss finish to help them blend in better.  
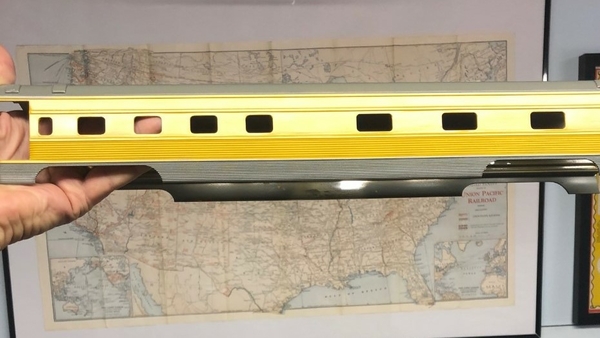
 

Question 2.  You didn't use SCII's gloss because....?   Answer: The Krylon gloss worked great on my last two shells exterior builds (using other base coats) and I still had lots left over in the can.  I was going on autopilot and didn't consider any other types of gloss paint for this build.  You are correct, I should have used Scale Coat II gloss.  This is my first experience using Scale Coat II paint.   I almost did not post this problem today.    But its important for other O-Gauge forum members to see what happened so they don't have the same incompatibility issue.

thumbnail_IMG_7900

Attachments

Images (1)
  • thumbnail_IMG_7900

@T.Albers, I'm sure I've never seen on the forum a more brutal turn in what up to this point had been a very innovative and, for you, satisfying project--after all, what could go wrong with only decal application and a clear coat to conclude the many hours of research and modeling invested in the project.

I'd expect you to remove the ruined paint and refinish what is a superb shell for modeling the UP prototype you've selected.  

I look forward to seeing this thread with "Updated (insert date)" in the title soon.

Well, before I got to the punch line (of the Krylon fiasco, of which more later), I was thinking in Star Trek terms, as in, "to boldly go where no man has gone before." I have found with my own passenger car detailing efforts that it is impossible to replicate machine-made accuracy, even by using machine-made parts. I have never even contemplated changing a body shell configuration using a pro-level CNC facility. But, as I have said before, I am not devoted to to prototypical window placements; I make do with what I have and design the interiors to fit. Your efforts are several orders of magnitude above what I, or as far as I am aware anyone else, has done. 

Also, when I saw the bare metal shell you had, I wondered whether I could ever bring myself to paint it as opposed to leaving it in a polished state. But then I do not have anything in 18" cars that I could pair something like that. 

The precision machining in this case is a total relevation to me, as is the availability of the shell you worked on. I might re-think what I have on the drawing board in consequence. 

Paint: I haven't had this kind of disaster in a while, but I am generally not painting whole extrusions as opposed to individual parts. I do know that Krylon formula have changed over recent times and as a result the risk of laying down incompatible paint coats is not small. I generally stick with the same brand (mostly Tru Color and Alclad) for all phases of a particular paint application.

In your position I'd strip the shell and even do the filling of the new sections over again to remedy what's happened.

However, chemical stripping may add something to the chemical mix that will cause trouble down the line. I have looked at sandblasting as an alternative for removing paint from metal finishes. Think about what custom car painters do and you will get my drift.

None of that detracts from your effort. I am, as always with your projects, totally impressed!

Thanks @Hancock52 . The shells polished aluminum finish is (was) very nice.  It would have look great on a layout with chrome Lionel end caps and other matching cars.


I’m surprised how little these Phoenix shells cost.  The shell for the first 4-4-2 sleeper was $14 and this Pacific shell was only $24.  Add the $40 cost for a donor frame with trucks from K-Line and I have a brand new project.  It’s a lot less money than buying a finished K-Line Union Pacific sleeping car.

But my jaw hit the ground when the paint went bad.  The Krylon gloss was great for about 10 seconds and then the yellow paint started to curl and wrinkle.  I will take everyone’s advice and give it another try.  


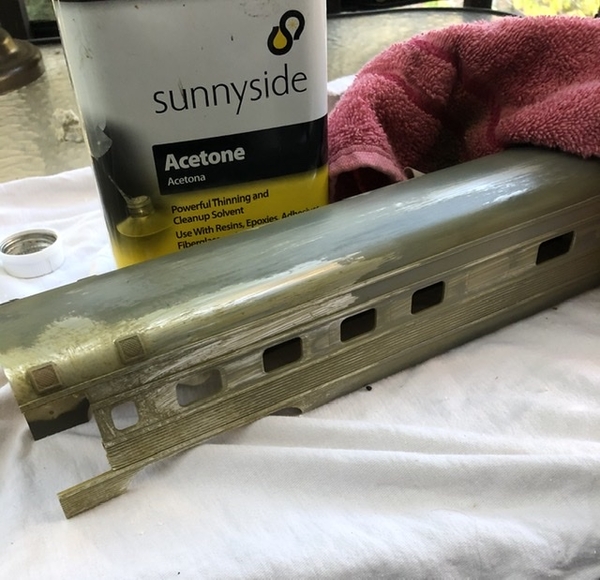
It’s getting wiped down with Acetone right now. 😖
95A3172E-52B6-472F-A734-3CE8EA256F9E

Attachments

Images (1)
  • 95A3172E-52B6-472F-A734-3CE8EA256F9E
Last edited by T.Albers
@Norton posted:

T, great work as always. Are there not any Budd cars you could have used instead of these closer to Pullman Standard? Any chance your friend could have machined in the fluting on the roof?

Pete

Thanks Pete! 

Q. Are there not any Budd cars you could have used instead of these closer to Pullman Standard? A. I searched for streamline Budd passenger cars and could not find anything closer.  These potential candidates got knocked off my list because they are 21" long: All Nations/All Nations Lines, B-C models (aka Boxcar Ken), Indianapolis Car company (ICC), Union Station for new sides, Kasiner, CRC, Speer, PSC, Walthers, Weaver, Clark-Benson, American Standard Car Company/American Lightweight Car Company, Precision Scale, Russ Briggs Designs, Midland Reproductions, OK Streamliners, Golden Gate Depot, Allegheny Scale, Pomona Valley Model Supply, O-Scale King’s, Rail Chief, La Belle Kit, Sunnyside, American Lightweight Car Company and MAC Shops.

There's only a few 18" streamline passenger car manufactures I could pick from.  Lionel, K-Line, Williams, MTH, GGD for 042 and Phoenix Railways.  MTH actually made an 18" Amtrak car called "Pacific Forum" with fluted sides and corrugated roof part# MT-6508.  But the fluting and windows were not correct either.  Also, I felt the Lionel, GGD for 042 and K-Line cars with fluted sides and corrugated roofs were too expensive to cut apart for this experiment with a CNC machine.   That left the me with picking the Phoenix Railways shell.  It didn't cost much and there are plenty more shells available.   

Q.  Any chance your friend could have machined in the fluting on the roof?    A. That's a great idea.  I hadn't thought of that possibility.  I have seen were railroads would paint strips on the roof so the passenger cars looked like they had corrugated roofs but at this point in the project I think I'm just going to try and finish the build.  I don't want to give up on the Pacific Shore sleeping car even though it's been a rollercoaster.  I'm re-priming the shell this evening and have ordered more Amour Yellow and Harbor Mist Gray paint.  I'm going back to using Tru-Color paint.  It worked well on my last build and did not give me any problems.


If anybody knows of other 18" Budd sleeping car manufacturers with fluted sides and a corrugated roof let me know.  I would have tried Williams but I never know if one of my builds is going to go sideways.  So far only the paint job went bad.  If that automated CNC machine had issues during the cut or was not perfectly calibrated for this shell I would have had a much bigger problem on my hands.

Last edited by T.Albers

@Norton, After your suggestion  "Any Budd cars you could have used instead?" I went on the hunt for a better Budd style shell.  I found an 18" Lionel shell, Budd style, fluted sides, corrugated roof and smooth sides above and below the windows.  These windows are in the wrong locations for a sleeping car but I'm getting use to that issue.  (edited to remove eBay link)


You have mentioned before that 21" Lionel aluminum cars don't have the same height and width as older K-Line passenger cars.   But would this 18" Lionel aluminum passenger car match the older K-Line cars height and width?   Would Lionel post war end caps fit this shell?   (edited to remove eBay link)

Last edited by T.Albers

imageThe Lionel 18" cars are the same size as the Lionel 21" cars. You can use the ends from the 21" cars on this car. In fact I bought a few with the classic style diaphram end to replace the current "tube" type diaphrams on their Excursion car series. 

I guess thats good news and bad news. Here again is a Lionel 21" on the right coupled to a K-Line car left.

Pete


Attachments

Images (1)
  • image
Last edited by Norton

Update 10/4:

Well, it has taken two weeks to fix my painting mistake and that bad decision in not researching Krylon compatibility with Scale Coat II made a very memorable photo.  With Acetone on a rag I scrubbed the wrinkled Scale Coat II paint off the aluminum shell.  Then, thoroughly cleaned the chrome shell with 91% alcohol.  The next step was re-applying a fresh coat of Tamiya primer to the clean shell (again).

thumbnail_IMG_8016


That bad choice may have made a memorable photo but I learn from my mistakes.  This time around I’m going back to painting with Tru-Color Amour Yellow #TCP-026 and Tru-Color Harbor Mist Gray #TCP-025.

thumbnail_IMG_8025


After waiting 24-hours for each color to dry, I crossed my fingers and sprayed with Krylon gloss.  Success! I now have a high gloss finish on this shell to make the Microscale decals blend in better.

thumbnail_IMG_8037


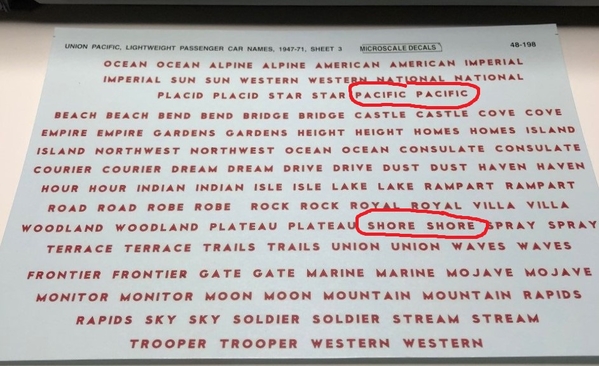
The next step is to apply the correct decals for the year I’m modeling.  I picked how the Pacific Shore would have looked in Union Pacific service between the years 1952 and 1969.  Microscale decal sheet #48-114 was used for the red stripes.  Microscale sheet #48-195 was used for the large Pullman name in the center of the shell and the smaller Union Pacific decals on each ends.  As seen below Microscale sheet #48-198 includes the name Pacific Shore.

Microscale 48-198 Pacific Shore


Micro Set was used under the decals and Micro Sol over the top of the decals. It took several repeat coats of Micro Sol to get the red stripes to mold down into the shells side channels.   After the decals were dry the final step was spraying the whole shell with Krylon Flat (2 coats) so this paint job would match the exact same finish that's on my other factory painted K-Line passenger cars.

thumbnail_IMG_8073


Other small items were added to the Phoenix aluminum shell like clear windows, roof vents, inside hand rails, LED lighting kit, outside grab bars and a horizontal plate for the name Pacific Shore.  Lionel end cap part numbers 2532-010 and 2532-012 were painted with Tru-Color to match the shell.  The Keil-Line Products diaphragm kit part number 4825 was purchased at a local train store and installed.

thumbnail_IMG_8062

The real Pacific Shore (UP car number 1439) stayed in Amour Yellow and Harbor Mist Gray streamliner colors until Amtrak took over in 1971.

thumbnail_IMG_8068

Its paint was removed down to the stainless steel finish underneath and its number was changed to 2632 by Amtrak in December of 1971.  In 1978 when it was converted to Head End Power (HEP) its Amtrak number was changed to 2932.  Pacific Shore went for sale in 2001 after being in passenger service for 51 years.  The Pacific Shore’s current owner is SAM Shortline Excursion Train based out Georgia. 


In my next update I’ll post a How-To guide on making the interior for this sleeping car and photos of the finished product.


Attachments

Images (7)
  • thumbnail_IMG_8016
  • thumbnail_IMG_8025
  • thumbnail_IMG_8037
  • Microscale 48-198  Pacific Shore
  • thumbnail_IMG_8073
  • thumbnail_IMG_8062
  • thumbnail_IMG_8068
Last edited by T.Albers
@Pingman posted:

Wonderful recovery.  What vendor/part nos. did you use for the grab bars and vents?

Also, what did you use for windows and how did you make them (individually or a strip)?

The CNC milling/filling worked beautifully.

Thanks Pingman 👍

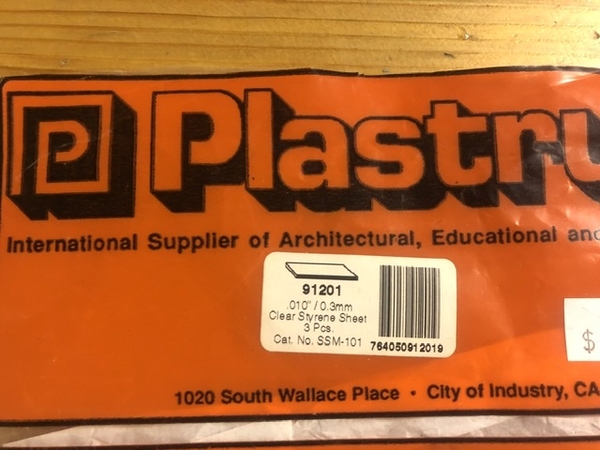
Here’s a photo of the 0.3mm clear Styrene sheet I used to make the windows.  I cut this sheet into a strip and placed it in the long channel inside the shell that would have held the factory silhouette people.  Once the clear strips were installed On each side I used Canopy glue to secure them in place.

96D6A3D8-14DB-4A4B-9490-28276D673426

I will look up the part numbers for the 6x roof vents and post them next.

Attachments

Images (1)
  • 96D6A3D8-14DB-4A4B-9490-28276D673426
Last edited by T.Albers
@Hancock52 posted:

Phew. That’s an absolutely great result considering the paint issues you had to start with. Well done!

Thank you Hancock52 👍 

Here’s a close up on the area where three CNC patches that got installed in the hallway section.  The patches blend in perfectly with the shell and nobody will be able to tell it originally had 6 windows here.

CE51C4F0-BEC5-4A45-8623-E414FAA01346

Attachments

Images (1)
  • CE51C4F0-BEC5-4A45-8623-E414FAA01346
@Pingman posted:

Wonderful recovery.  What vendor/part nos. did you use for the grab bars and vents?

Also, what did you use for windows and how did you make them (individually or a strip)?

The CNC milling/filling worked beautifully.

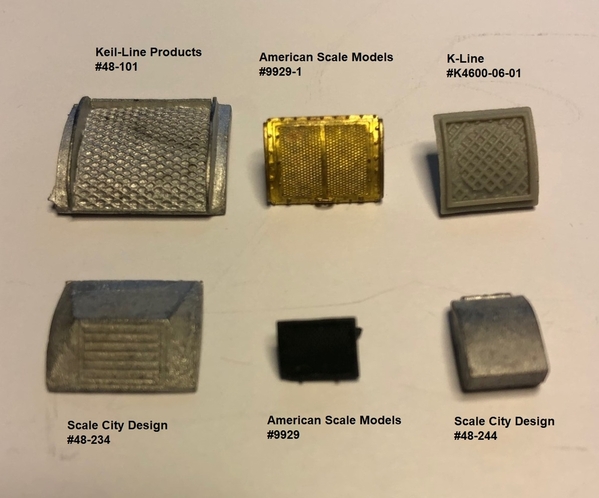
Good Morning @Pingman,  Here are the part numbers for the roof vents I have used in my builds. 

The plastic Budd style roof vent from K-Line part K4600-06-01 is no longer available from Brasseur Trains.  But you can try Budd style roof vent from ScaleCityDesign part 48-326.   They made that style vent in white metal.  I think the dimension posted for the vent on their website are incorrect. https://scalecitydesigns.com/s...&section=product

Different style roof vents


I will get you the information and dimensions on the grab rails and post them next.

Attachments

Images (1)
  • Different style roof vents
@T.Albers posted:

Thank you Hancock52 👍 

Here’s a close up on the area where three CNC patches that got installed in the hallway section.  The patches blend in perfectly with the shell and nobody will be able to tell it originally had 6 windows here.

CE51C4F0-BEC5-4A45-8623-E414FAA01346

It hadn't occurred to me until seeing this photo; but, a car without a hallway might require that the interior of the car be re-finished to hide the patched area(s) from an opposite side view.

Beautiful bodywork.

And thanks for the info on the vents.

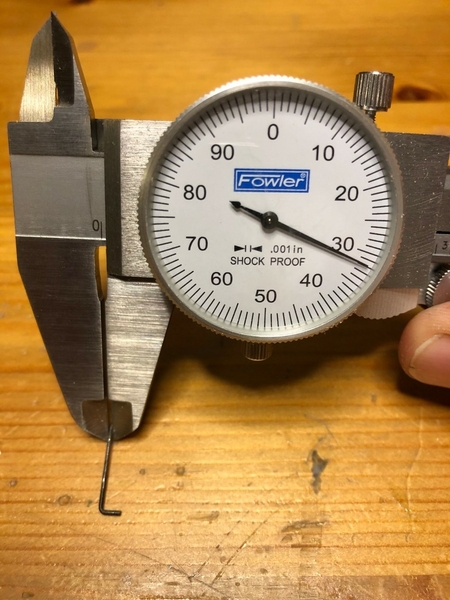
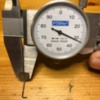
Hi @Pingman, here's the answer about the grab bars on the side of the shell.  I started off by measuring a factory steel grab bar off another K-Line passenger car and it was 0.0325"  

Grab bar 0.0325 K-Line


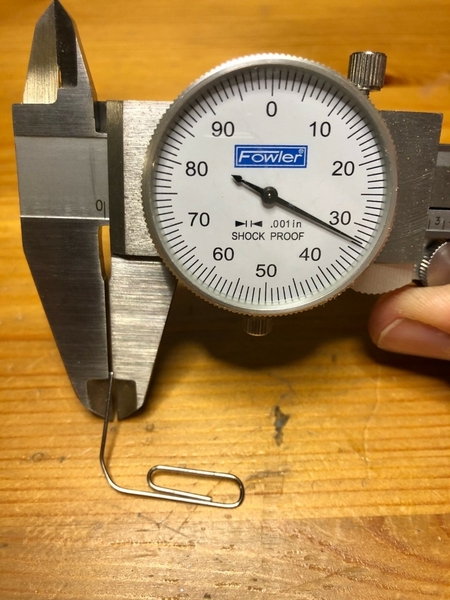
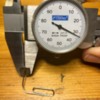
Since I did not have any extra 0.0325 brass rods sitting around my house. I found a creative substitute in the same size needed made from steel.  That small paper clip even has a polished finish.

Grab bar 0.0325 paper clip


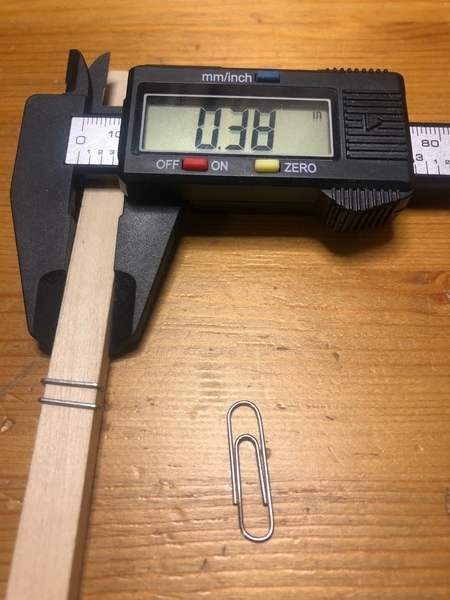
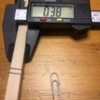
The factory grab bar inside opening measurement from K-Line was 3/8".  So I made my own 3/8" bends over basswood.  That steel paper clip really put up a fight on this part and it would have been much easier bending brass rods. 

grab bar bent over .38 basswood


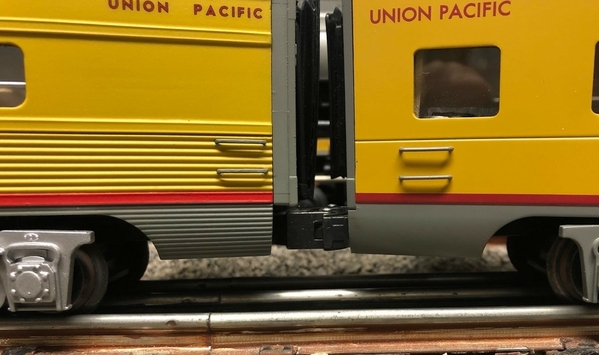
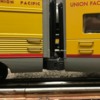
After that, I drilled holes and mounted them to the sides of the car.  Even thought a real Union Pacific car should have stainless steel grab bars I painted them Harbor Mist Gray to match the other K-Line passenger cars in my fleet.

Grab bars left and right


Hope this helps!


Attachments

Images (4)
  • Grab bar 0.0325 K-Line
  • Grab bar 0.0325 paper clip
  • grab bar bent over .38 basswood
  • Grab bars left and right
Last edited by T.Albers
@T.Albers posted:


 I almost did not post this problem today.    But its important for other O-Gauge forum members to see what happened so they don't have the same incompatibility issue.

Thank-you for the integrity and willingness to share this.  It looks like it was able to be corrected and the car turned out great.  Every day is an experiment!

Add Reply

Post

OGR Publishing, Inc., 1310 Eastside Centre Ct, Suite 6, Mountain Home, AR 72653
800-980-OGRR (6477)
www.ogaugerr.com

×
×
×
×
Link copied to your clipboard.
×
×