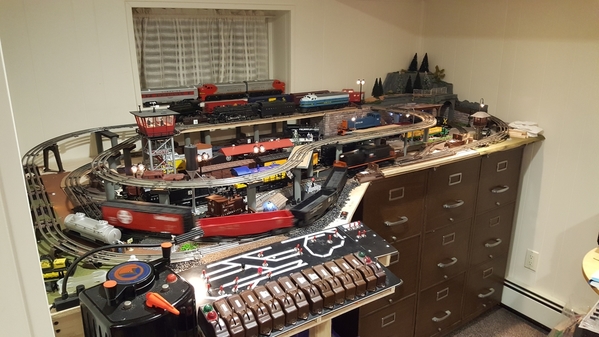
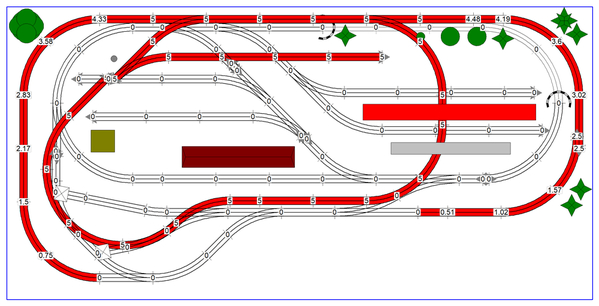
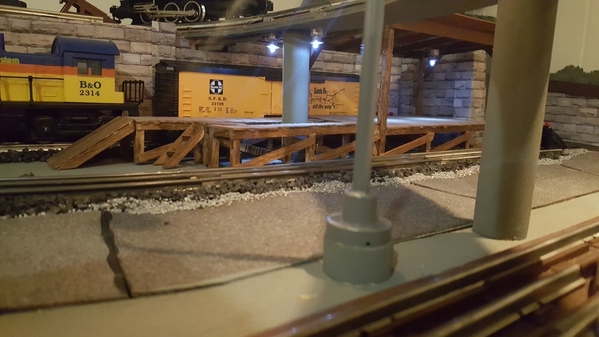
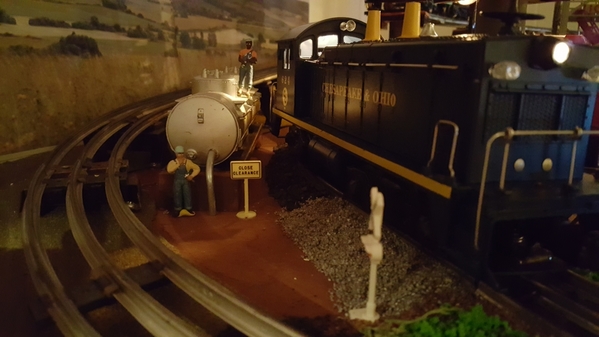
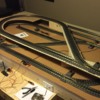
**Update** Because I have selected a layout for my first build, I figured I would change the focus of this thread to show my build progress. Since I'm finding this forum so helpful, I want to continue this thread so I have a place to ask questions and possibly give other new hobbyists like myself tips and ideas for their first build. If this is not the correct place for this topic, please let me know and I will start a new thread elsewhere. -Brad

Hi All. My first post.

I'm brand new to the hobby and this is my attempt at a 4x8 layout. I only have a small room to work with so 4x8 is my limit for now. I may have tried to cram too much onto one sheet of plywood but I wanted to get your opinions.

I plan to have a couple small "mountains" and tunnels for the lower track at each end of the elevated track. I'd also like to have a couple bridges on the two straight sections. I will probably not have any industry accessories but I will have a few small buildings. I'm aiming for late 19th century to early 20th century rustic. I don't know a lot about this time period but I'm learning.

I purchased an MTH RTR starter set last month. I added a couple of switches to get a feel for how this works. I will be using MTH RealTrax for this layout and I have purchased an MTH Z-1000 Power Supply.

I'd love to hear your ideas, comments and concerns about my plan.

Thanks, Brad

Oakfan-Layout-4x8-A

Attachments

Images (1)
  • Oakfan-Layout-4x8-A
Last edited by Oakfan
Original Post

Replies sorted oldest to newest

Make sure to use some kind of sound proofing material on top of the plywood. Do not mount the Realtrax directly to the plywood, the sound will be horrible. My 9x6 layout has Realtrax on top of 2" blue foam insulation and is still pretty loud. I like the ease of Realtrax but if I were to do it again I would go with foam roadbed and Gargraves. 

Hey TM Terry,

Thanks for the input. I tend to agree with you that it loos too busy. It has the features I'm looking for but I might be trying to do too much with the space I have. I might do parts of it first and see how I can expand it.

My plan for supporting the upper loop was to build hills on both the right and left side that the track would lay on. Like the mountain was carved out to lay the track. That would give me some short tunnels below. These hills will probably be steep. I was going to make the structure out of wood and use foam to carve the mountains. I was hoping I could support the center sections with trestle supports.  

SouthernMike,

Thanks for the reply and input.

I have been reading about the noise issue with Realtrax. It does have me concerned so here is my plan. I have a 4x8 table with 3/4" plywood as the top. I have a bunch of 1/4" rug padding that I was going to use to cover the plywood. Then I was going to use a sheet of Homasote on that. I was going to use the rug padding for the track on the elevations too. Fingers crossed.

Oakfan posted:

Johnstrains,

Yes, I'm committed to Realtrax for this layout. Much of the track is purchased between the RTR started set and the bit I purchased after. I'm thinking/hoping it won't be too bad. If I do it right, I could always upgrade to the pro stuff later, correct?

Education can be VERY expensive!

Absolutely, and if you check some of those old Real Trax threads you’ll find different methods used to mitigate some of the issues like bad connections.

I have a Lionel PW-style toy train layout and actually use good old tin track.

IMG_20190106_195232830

Attachments

Images (1)
  • IMG_20190106_195232830
Last edited by johnstrains

Hi Brad and welcome to the forum.  There's plenty of great guys here who are always willing to help.  I like your plan and can see how it would fit with your time period.  That's a great era to model and you don't have to worry about scale size trains.  I really like that you've incorporated two return loops which is left out all too often.  With a smaller layout it eliminates the monotony of the train always traveling in the same direction.  Perhaps one of our members who uses SCRAM track software can take your plan and show it in 3D.  BTW what RTR set did you purchase.  Anyway your plan incorporates a lot of good construction  features that will be fun to build.  Looking forward to seeing this as you progress.

Hi Wild Mary. Thanks for the warm welcome and comments on my layout. I used the RR-Track Lite software that came with my starter set to create that plan.

I purchased the MTH 30-4245-1 RailKing 2-8-0 Steam Freight R-T-R Train Set w/Proto-Sound 3.0. I also got some extra track and a few switches. I set it all up on the top of a sheet of plywood so that I could wire everything and figure out how it works. So far so good. So I took the next step and built my 4x8 table. The remainder of the track purchase is next and then the fun begins.

FYI, right now I'm using the DCS Explorer that can with my set. I do plan to upgrade to the full DCS system in the future. However, while I have been planning, I can't find the hardware anywhere. They advertise the heck out of it but you can't buy it. I hope there isn't an issue with the MTH DCS system.


While I understand the comments about the plan being "track heavy", I think that's a tradeoff that needs to be made.  Unless the goal is to create realistic scenery, a small layout needs to be busy in order to make it fun to run.  I like the plan, and also enjoyed seeing the other small masterpieces.

One suggestion - you WILL make mistakes and find things you would like to do differently, so don't paint or glue the track, and don't add ballast.  Save that for the next time.

Every time someone post a pic of a small layout, I'm amazed at the amount of running, not just one but many times several engines on the trackage. Also the detail to scenery is outstanding.

Personally, I enjoy seeing what can be accomplished in a given restriction more then a large club type layout. Kudos to those that posted pics here, now lets see more.

The scenery that people can create is absolutely amazing. I'd like to take a stab at some elements but I'm far from an artist or hobby enthusiast. I'll see how it turns out.

One thing I really want to do is create some scratch build structures. For sure I'll try my hand at wood bridges and wood/timber portals. I think they will fit much better with my time period than the plastic stuff. It should be fun.

Oakfan posted:

The scenery that people can create is absolutely amazing. I'd like to take a stab at some elements but I'm far from an artist or hobby enthusiast. I'll see how it turns out.

One thing I really want to do is create some scratch build structures. For sure I'll try my hand at wood bridges and wood/timber portals. I think they will fit much better with my time period than the plastic stuff. It should be fun.

Be surprised what you can do with the supplies available to do some amazing scenery. This is my favorite on my layout. Built from what our farm looked like in the 50s. Believe me, it took several tries.

Aviary Photo_131947177086631045

Attachments

Images (1)
  • Aviary Photo_131947177086631045

For many years, I, too, was limited to a 4x8 layout. I'll give you my thoughts but your mileage may vary.

As you've shown, you can fit a lot of track onto a 4x8 board, and you can have a lot of fun with a small layout. The trick is to get a lot of action without getting too elaborate. It's a fine line, and varies with each person's tastes. I've done sparse layouts and jammed layouts, and I tend to have liked the sparser ones a little more. My advice would be to carve nothing in stone. Try your track plan; it looks very interesting. However, go by your experience, and be ready to cut back a bit if necessary.

Last edited by Joe Connor

I vote for "it's too busy." You actually have 3 return loops there, not two. If you eliminate one, specifically the one on the lower left, you can still have a spur and leave plenty of opportunity for creating some of that rustic scenery you're looking for. Filling up every square inch of space with track connotes more of an urban feel to a layout IMO.

Are you sure you don't have room for an extra foot in length and width? 5x9 (ping-pong table size) provides opportunity for a little more flexibility in increasing the fun factor.

Last edited by Former Member

I think I see what you are saying. I have 2 ovals and 2 reverse loops but the left side of the inner oval is not needed. I would then have 1 oval but more room and less crammed into that area.

I really wish I had more room. I definitely can’t go bigger than 8 feet. I only have about 24” to walk around. I could do the same on the side and have 24” to walk by but that only buys me about a foot, so 5x8. I think my wife won’t go for that. I’ll have to be happy with the 4x8.

Bill,

I'm glad to see a vote for RealTrax. May I ask why you prefer it over Fastrack?

During my research before I got my first train set, i found that I really like the look of RealTrax much better. Also, it seems to be cheaper. I have never owned a train set before so, even though I had obviously heard of Lionel, I don't have any experience with them. I just really like all the products I see from MTH so I went with them. I also like what I'm reading about MTH DCS. I just can't find where to buy the hardware. 

Oakfan posted:

SouthernMike,

Thanks for the reply and input.

I have been reading about the noise issue with Realtrax. It does have me concerned so here is my plan. I have a 4x8 table with 3/4" plywood as the top. I have a bunch of 1/4" rug padding that I was going to use to cover the plywood. Then I was going to use a sheet of Homasote on that. I was going to use the rug padding for the track on the elevations too. Fingers crossed.

You should be fine with this configuration. Change the layering a little. Place the homosote on the ply and cut the rug padding to fit only under the track. Secure the track with #4 x 3/4" sheet metal flat head Philips screws. Snug, but not tightly.

I think looks like you can have some fun and not get bored. There is room for a few buildings or an operating accessory.

I took the liberty of checking the fitment and have only 1 joint that is slightly mis-aligned. I though extending the centermost yard spur straight would let a set of cars to be parked there and I put in an operating track for an uncoupler. I have to get the author of SCARM to add that track and the switching motor detail for RealTrax.

Here's the track plan and some 3D's. 

I would leave the elevated reversing loop open like a subway elevated line. Closing it in would hide a lot of the lower level. Also, here is the RealTrax lengths combinations chart.

Have fun!


Attachments

Images (4)
  • Oakfan_3D_1
  • Oakfan_3D_2
  • Oakfan_Track_Plan
  • MTH RealTrax Combination Table
xrayvizhen posted:

I vote for "it's too busy." You actually have 3 return loops there, not two. If you eliminate one, specifically the one on the lower left, you can still have a spur and leave plenty of opportunity for creating some of that rustic scenery you're looking for. Filling up every square inch of space with track connotes more of an urban feel to a layout IMO.

Are you sure you don't have room for an extra foot in length and width? 5x9 (ping-pong table size) provides opportunity for a little more flexibility in increasing the fun factor.

hey Xray, good to see you post.

I like both loops on the lower level for operational play value to orient the train for siding in opposite directions. To each his own...

Something to think about.  Down the road you will be getting some additional locos & cars. Think now where you could have a temporary yard finger sticking out to accommodate two or three tracks say 4 to 6 feet long, with a foldup leg.  Something to attach while running then disconnect and put away.

If you can wrap your head around this idea then insert a switch where this future finger will go so you will not need to pull track apart to add later on.

A plus with the MTH Real Trax, they have copper pads at each end to which I solder extra power feeds.

Moonman,

WOW! Thank you so much for taking the time to redraw and review my layout in such detail. I think I'm sold. I like the change you made to the center spur. It makes it longer and more usable. You nailed my idea about the mountain on the right side. I will have to play with my idea of a mountain on the left side. It may be better to leave it out as you suggested.

I also like you idea about sound dampening. My only concern are for my hands. cutting that carpet pad is a pain in the you-know-what. ;-) But I think that will be better. I'll play around with it.

Thanks again for your efforts.

My layout space limited my size to 48" by 76". I went with FasTrack with O36 curves and O48 switches. Like your proposed layout mine is extremely busy, though it is "industry busy". It has a single loop. The time frame is 1954, with exclusively L&N and NC&StL motive power, and many of those road's freight. There are six sidings and an isolated track of cabooses between two sidings. Once I saw what Woodland Scenics had to offer, my idustries went in that direction.

DSCN0237

My first Woodland Scenic industry was the Morrison Door factory with two NC&StL box cars waiting trackside.

DSCN0236

Next I made space for Woodland Scenics' H&H Feed Mill. Behind and to the right is Lionel's Coaling Station, which was initially intended as the focal industry, but might eventually be replaced if something I like better comes along. The building in front of L&N #1757 is temporary and will soon be replaced, maybe with a water tower.

DSCN0235

Finally, Joe Fauty custom designed and built a fuel tank farm, which is now the focal point of my layout.

It has been a slow progression that has developed over the last 7 years. The single loop was the start and it still exists as originally built. My layout is called Loop & Nowhere (L&N).

Attachments

Images (3)
  • DSCN0237
  • DSCN0236
  • DSCN0235

That's an awesome little layout. The Woodland Scenics stuff is great. I found a couple structures that might fit well with my layout concept. What I would really like to find is a rustic old lumber mill/saw mill or something to do with logging that's not too big and won't break the bank. That will probably be the only type industry structure in my layout. Maybe some cabins on the hill and a general store etc. on the lower level. That's about all I think I will be able to fit.

I very much like your track plan.  027  is just fine as your track, especially considering your layout is 4 x 8. I had a 4 x 8 layout for about 10 years and it had nowhere near the excitement of running trains that your layout will provide!  I do like the3 bi-level design of this (your) layout....AWESOME!

      Mind you, there are T O N S of RR cars/engines, and what not suited for 027.  Also think of all that Menards has been putting out these last 8 (?) years. 

Go, man, GO!

TM Terry posted:

My layout space limited my size to 48" by 76". I went with FasTrack with O36 curves and O48 switches. Like your proposed layout mine is extremely busy, though it is "industry busy". It has a single loop. The time frame is 1954, with exclusively L&N and NC&StL motive power, and many of those road's freight. There are six sidings and an isolated track of cabooses between two sidings. Once I saw what Woodland Scenics had to offer, my idustries went in that direction.

DSCN0237

My first Woodland Scenic industry was the Morrison Door factory with two NC&StL box cars waiting trackside.

DSCN0236

Next I made space for Woodland Scenics' H&H Feed Mill. Behind and to the right is Lionel's Coaling Station, which was initially intended as the focal industry, but might eventually be replaced if something I like better comes along. The building in front of L&N #1757 is temporary and will soon be replaced, maybe with a water tower.

DSCN0235

Finally, Joe Fauty custom designed and built a fuel tank farm, which is now the focal point of my layout.

It has been a slow progression that has developed over the last 7 years. The single loop was the start and it still exists as originally built. My layout is called Loop & Nowhere (L&N).

Excellent, and see much potential for operating and switching. Good job

josef posted:

Be interesting for many starters to see among our group with pictures smaller layouts. Lets say starting with 6X12 or smaller layouts and give insight into newer members and some with floor layouts what can be done with smaller layouts.

I did a search for general “Show Your Small Layout” threads. There were some a few years ago. I think they should be revived or create a new one as suggested by JOSEF. All of the pictures and track plans really helped me on getting started. 

Oakfan posted:

Well, my local Hardware/Lumber store no longer carries Homasote board. However, I can get the pink insulation board for my new layout. Is this a good alternative? I see many photos and videos of others using this insulation board so assume it's a good choice.

It's fine or try the Lowes greenish/blue stuff which comes in 3/4" and 1" thick variations. I used inexpensive construction adhesive to attach it to the plywood and weight it down with books, etc. to get a good seal. You can paint it earth brown and sprinkle green and yellow fine turf over the wet paint to give you a good foundation.

Attachments

Images (3)
  • Foam 2
  • YARD 4
  • YARD 9
TM Terry posted:

I just used grey indoor/outdoor close-cut carpet which seemed to work very well, but you need to know my railroad operates under scale curvature speed limits (O36 curves), aka slow.

Are you able to do scenery on the carpet? I plan to use some of the Woodland Scenics products for ground covering and such.

Richie C. posted:
Oakfan posted:

Well, my local Hardware/Lumber store no longer carries Homasote board. However, I can get the pink insulation board for my new layout. Is this a good alternative? I see many photos and videos of others using this insulation board so assume it's a good choice.

It's fine or try the Lowes greenish/blue stuff which comes in 3/4" and 1" thick variations. I used inexpensive construction adhesive to attach it to the plywood and weight it down with books, etc. to get a good seal. You can paint it earth brown and sprinkle green and yellow fine turf over the wet paint to give you a good foundation.

Thanks Richie. That looks like what I was going to try as well. Paint the board and then do some ground covering. I might do my mountains first.

This is all new to me so I love seeing everyone's layouts and scenery concepts. It really helps me make a plan. I hope to see more ideas as I roam the forums.

Oakfan posted:
TM Terry posted:

I just used grey indoor/outdoor close-cut carpet which seemed to work very well, but you need to know my railroad operates under scale curvature speed limits (O36 curves), aka slow.

Are you able to do scenery on the carpet? I plan to use some of the Woodland Scenics products for ground covering and such.

When I decided to go with carpet, I felt that I had no plans for highly detailed scenery. The density of the real estate on my layout makes trees of no consequence, but bushes and shrubs can be easily attached. I know the carpet texture misses a realistic look. For now I am fine dealing with its shortcomings.

As I add people I will need some modification to the carpet surface if I wish them to stand properly. They can still stand on various platforms of the buildings on my layout. I have yet to add streets, which are still a little down the road (no pun intended). I have a little more space looking for just the perfect building/structure. Then the streets/roads/parking areas will be added.

Oakfan posted:

Well, my local Hardware/Lumber store no longer carries Homasote board. However, I can get the pink insulation board for my new layout. Is this a good alternative? I see many photos and videos of others using this insulation board so assume it's a good choice.

Move to the midwest so you can get homasote at your local Menards.  You'll be buying buildings from them anyway, and I've heard that they no longer ship to CA (please don't hijack the thread with comments about that - it's been done to death).  And as a benefit, you can get a basement.

And a serious suggestion - get your feet wet with scenery by making vignettes on foam board.  Depending on what you make, either use the thin stuff as a base or build terrain by stacking and sculpting the 2" thick pieces.   When you modify or rebuild, you can simply pick them up and plant them where you want.  Or if you don't like the results, you can easily remove them and make something else.

Oakfan,

If you use the 3/4" plywood and put the padding under the track you'll have a quiet layout. Scenery on the ply - paint and glue and scenic material works great - always has.

Using foam as a deck or on top of the deck doesn't really have any advantage. Sure, it is light weight and doesn't require power tools. It brings a different set of attachment limitations and such.

it is good for carving rivers and sanding for terrain shaping. 

yes, some are making it work as decking. The old rule applies - it is your layout - do want you want to do.

I, too, confirmed that Home Depot no longer stocks or ships Soundboard440 (homosote) to CA. here is their product info.

Model # 206136

Internet #202090212

Store SKU #123024

Store SO SKU #532811


No big loss in my opinion. 

Hey Oakfan.........you're getting some sage and inexpensive cost advice here.  Great idea about using either carpet padding or cheap remnants!   Once you ballast your roadbed, and/or perhaps just paint it, the track noise will really be deadened. Of course, I'm talking about cutting up cheap carpet remnants the width and length of any roadbed you need.

Update and a question. 

First, I’m almost finished with my table. I have a little more wiring and then I’ll paint it. It’s coming along nicely, I think. 

My question is do you think I’m going to have issues with my incline? I have about 8 feet of track length to get up to my upper level. I’ve seen it done but everything I’m reading says I need way longer incline. It can’t be done on a 4x8.

30A7B8E0-CAE4-4AE2-A075-04D938F2D7E69A587A65-62EC-4606-B32F-828FBA7317BA293ADFD7-5640-4ADA-B1BF-38D23B636FA3

Attachments

Images (3)
  • 30A7B8E0-CAE4-4AE2-A075-04D938F2D7E6: Table
  • 9A587A65-62EC-4606-B32F-828FBA7317BA: Wire Cabinet
  • 293ADFD7-5640-4ADA-B1BF-38D23B636FA3: Switch Shelf

Hi Oakfan,

The table looks good.

If you look at the track plan that attached earlier, you will see elevation heights at the track joints. There are 12. I assumed that using the MTH 40-1134 for FasTrack or the 40-1033 trestle set for RealTrax, would provide 12 elevation points. The overpass, the last 2 curves before the elevated reverse loop, make up the last 2. When they are an overpass, only 10 points can be used. The switch on the far left at 9 o'clock pins down or prevents using that set of curves.

The point is , yes, the slope is a little steeper. It won't be problem climbing. You may have to throttle back coming down. Just be careful the first time you run train down.

The complimentary set of MTH stone trestles is 40-1034 for the elevated loop. You can cut sub-roadbed out of wood and make your own blocks at 6.5" height if you wish.

Thanks again Moonman. I understand what you're saying and I feel a bit better about the incline now. My plan is to build my own using plywood and 1X blocks. My hope is that my layout will have mostly scratch built elements, structures and buildings.  Since it's so small, I think that will be manageable over time.

Brad

**Update** Because I have selected a layout for my first build, I figured I would shift the focus of this thread to show my build progress. Since I'm finding this forum so helpful, I want to continue this thread so I have a place to ask questions and possibly give other new hobbyists like myself tips and ideas for their first build.

If this is not the correct place for this topic, please let me know and I will start a new thread elsewhere.

-Brad

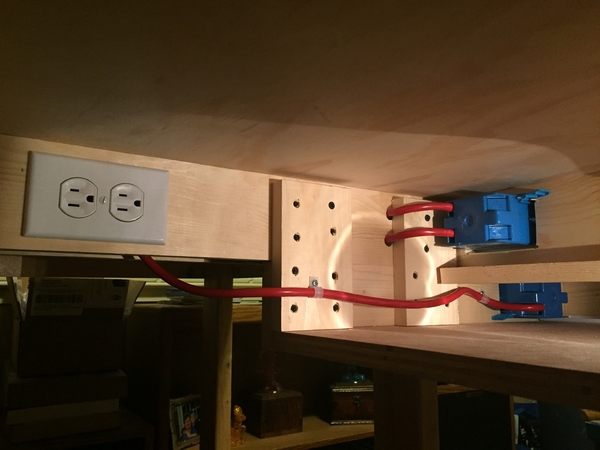
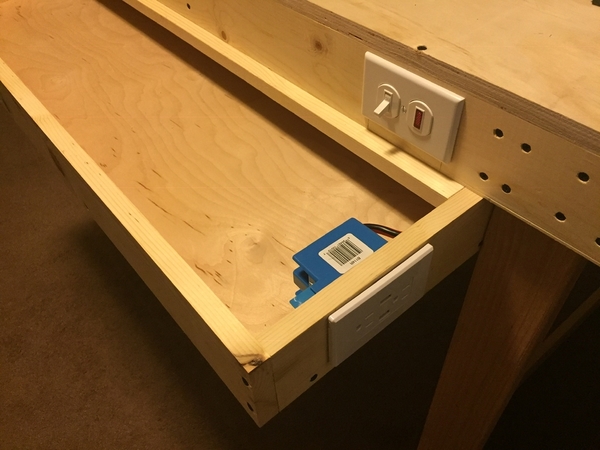
I finished the power to the table. For the main power I just bought a heavy duty extension cord and cut off the end. I wired it to a lighted switch to turn on/off power to the whole table. I have an outlet under the shelf for transformers. I’ll plug a surge protector in to that. I also added an outlet with USB connections on the side of the shelf so I could always keep my devices charged while running trains. Everything is working great.

8A75AC66-CBEB-45DF-9A96-8B2DD501067BBDA80978-2E32-49E1-BE50-0D24ABA891909199A036-C0D8-4E6D-938E-4C3F7C08D16E

Attachments

Images (3)
  • 8A75AC66-CBEB-45DF-9A96-8B2DD501067B
  • BDA80978-2E32-49E1-BE50-0D24ABA89190
  • 9199A036-C0D8-4E6D-938E-4C3F7C08D16E

Home Depot doesn’t sell sound board here in my town. And as stated earlier, no Homasote in CA. So I went to a local lumber store and found this 1/2” sound board (I don’t know the name brand). I also got a 1” sheet of foam to go under it. I wanted that just in case I want to add some features below grade. 

Overall, I’m happy with the sound board. It was only $11 and it’s about a perfect dirt color to go under my scenery. I’m not painting it. I still need to glue the 2 boards together. I’m not glueing them to the plywood. Maybe just a few drywall screws. 

So what do you think?

CED61755-20CC-4DF4-8A06-142B331FA88C5719AEF3-2954-4D0E-82FC-86032831D998

Attachments

Images (2)
  • CED61755-20CC-4DF4-8A06-142B331FA88C
  • 5719AEF3-2954-4D0E-82FC-86032831D998
Moonman posted:

It looks like a high density material that will help with sound abatement. The foam board, meh, I am just not a fan of it as a layout layer. Others like it. I guess you'll find if it does want you need it to do. 

The color will work for an earth base color. 

Obviously, I’ve never worked with this stuff on a train layout. But now I can confirm that the pink board still “echos” when I tap on it much like the plywood. The sound board seems to help a little but it’s no miracle material. I wanted the pink board mainly to carve features below grade on future scenery.

I still have a couple other noise dampening things I’m going to do. I’ll try the carpet pad in the void of the Realtrax and fasten the track with zip ties instead of screws. Fingers crossed. 

Moonman posted:

Is the lid of the control panel still loose? Hide the spaghetti.

Make a V with the track having the railheads touch and fold down to connect - it gets flatter as you get closer to closing a loop. Place a lock-on at opposite sides somewhere.

Have fun!

Yes, the top board on the control panel is still loose. I have some T-Nuts and brass screws to fasten it once I have all/most of the wiring done. All of the wires will be routed in the shelf below. My hope is that it will be very clean and no wires will show. 

I have the lower level laid out. 

0F8F45EC-C85B-49CA-8EDA-C5F91C5A84D2

Attachments

Images (1)
  • 0F8F45EC-C85B-49CA-8EDA-C5F91C5A84D2
TM Terry posted:

When is the first test run for all laid track?

I think I’ll wait until I wire all the switches on the lower level. Since I’m new to this, I’m not sure how long that will take.

I’m not fastening the track down yet. Once I get all the lower level working and trains running, I’ll start building the incline on the very back straight section and get upper level reverse loop done. Then I can get that wired up. When everything is working how it should, I’ll start to zip tie the track to the table.

If anyone sees a mistake or has some tips, please don’t hold back. ;-)

Brad

I would check for continuity before wiring any switches. There is a remote possibility that one of the switches having a continuity flaw and need to be removed to repair or replace. And there are derailment concerns for various locomotives and cars. 

Of course the switch mechanism or remote could be defective. So it’s just a choice.

I like to see trains run ASAP. But that’s just me; plus probably most everyone else on this forum.

Last edited by TM Terry

Looks good! You can pull the switch controller wires under the track for testing. That will let you check length to determine if you need to make and longer sets.

You can track power for the switches for testing also.

The switches will operate by just touching a jumper wire between the terminal. 

Hook up a transformer and power up the layout! 

What do you intend to use for the elevated sub-roadbed? Soundboard?

TM Terry posted:

I would check for continuity before wiring any switches. There is a remote possibility that one of the switches having a continuity flaw and need to be removed to repair or replace. And there are derailment concerns for various locomotives and cars. 

Of course the switch mechanism or remote could be defective. So it’s just a choice.

I like to see trains run ASAP. But that’s just me; plus probably most everyone else on this forum.

Are you saying that I should check the switches because they are known to have issues? I'd be interested to read about the problems found with any MTH Realtrax products so I can avoid major problems.

I should have the trains running in the next couple of days. My free time to work on the project is limited right now.

Thanks for the input. It's much appreciated.

Moonman posted:

Looks good! You can pull the switch controller wires under the track for testing. That will let you check length to determine if you need to make and longer sets.

You can track power for the switches for testing also.

The switches will operate by just touching a jumper wire between the terminal. 

Hook up a transformer and power up the layout! 

What do you intend to use for the elevated sub-roadbed? Soundboard?

I had issues using track power for the switches during my initial test setup that had 2 switches. Once I put them on auxiliary power, they worked great. It may have been that I was only using the small power supply that came with the RTR at first. I used the Z-1000 for the test where I separated the track and auxiliary power.

I will do as you suggested and just run the wires under the track for the test. I'm sure I will have to add length to the remote switches wiring. They are too short.

I'm going to run the elevated section of Realtrax on plywood. I will not be using the foam or the sound board for the elevated portion. I will put down some dense foam weather stripping tape on the plywood and set the track on that.

Oakfan posted:
Moonman posted:

Looks good! You can pull the switch controller wires under the track for testing. That will let you check length to determine if you need to make and longer sets.

You can track power for the switches for testing also.

The switches will operate by just touching a jumper wire between the terminal. 

Hook up a transformer and power up the layout! 

What do you intend to use for the elevated sub-roadbed? Soundboard?

I had issues using track power for the switches during my initial test setup that had 2 switches. Once I put them on auxiliary power, they worked great. It may have been that I was only using the small power supply that came with the RTR at first. I used the Z-1000 for the test where I separated the track and auxiliary power.

I will do as you suggested and just run the wires under the track for the test. I'm sure I will have to add length to the remote switches wiring. They are too short.

I'm going to run the elevated section of Realtrax on plywood. I will not be using the foam or the sound board for the elevated portion. I will put down some dense foam weather stripping tape on the plywood and set the track on that.

Using the AUX power from the Z-1000 brick is certainly a good way to go. There's no problems with the RealTrax switches. They have a coil motor. It will draw a couple of amps momentarily. Fire two at once and it could slow a train for a split second.

I mentioned the lock-ons on opposite side to provide both outside rails with common. If you put two switches together turn-out to turn-out, the common can get lost because of the trigger rails for the non-derail. There is a 10" ground track that does this also. #40-1068-2

Those are the only 2 nuances that I can think of with those switches.

Thermostat wire is the easiest to find locally for switch and accessory wire. 

For the elevated grade - subtract the thickness of the plywood from the numbers on the track plan and cut the supports to that length. The slope is about 6.5%. If you have a miter saw, you can bevel the top of the supports to 3.75 degrees (the grade). Then, the sub-roadbed will sit flat.

Oh! Now I understand about the lock-on on both outside rails. I missed that earlier. I have 4 lock-ons that I can use right now. Currently I only have 2 connected and I think they are on the same outside rail. I can fix this. Do you recommend that I put the other 2 lock-ons somewhere on the track? If so, where would be a good location?

I do have a miter saw. You laid out my plan just how I was going to tackle that. I'm still debating how I will fasten the columns to the table. I have a couple ideas but I'll have to see which works best.

Thanks

Oakfan posted:

Oh! Now I understand about the lock-on on both outside rails. I missed that earlier. I have 4 lock-ons that I can use right now. Currently I only have 2 connected and I think they are on the same outside rail. I can fix this. Do you recommend that I put the other 2 lock-ons somewhere on the track? If so, where would be a good location?

I do have a miter saw. You laid out my plan just how I was going to tackle that. I'm still debating how I will fasten the columns to the table. I have a couple ideas but I'll have to see which works best.

Thanks

The test run will help decide if you need more than two. Maybe 12 and 6 o'clock on the lower level and one just past the switch where the elevated loop starts. Then, observe a loco operation.

I don't think that they would need to be screwed to the table. When the elevated structure is assembled having the sub-roadbed screwed to the piers, the structure should be solid enough to just sit on the table. If the inertia of a train through a corner makes it slide a little, then, just putting a nail next to the pier should keep it from sliding.

Last edited by Moonman

Realtrax remote track switches have a track ground terminal and a track power terminal available on the terminal block. When using Raeltrax I always used them. Also yes, when putting Realtrax switches back-to-back ground continuity is lost because of the way non-derailing is implemented. Don't forget to check that the gap is maintained between the short non-derail trigger rails and the adjacent track pieces.

Lew 

I do better with pictures and diagrams.Please let me know if I have made a mistake.

1) I need to make sure I have a good gap between all of the center rails (Hot) of the switches and their adjacent track sections. 

2) I should put my Lock-Ons so that they are alternately connected to both outside rails making them both common.

3) I will be using the 14v auxiliary power from my Z-1000 to power all my switches and operating track sections.

Switch

Attachments

Images (1)
  • Switch
Oakfan posted:

I do better with pictures and diagrams.Please let me know if I have made a mistake.

1) I need to make sure I have a good gap between all of the center rails (Hot) of the switches and their adjacent track sections. 

2) I should put my Lock-Ons so that they are alternately connected to both outside rails making them both common.

3) I will be using the 14v auxiliary power from my Z-1000 to power all my switches and operating track sections.

  • 1   No gaps needed - the switch is built to handle operation properly
  •  2  Well, yes, one on the inside of a loop and one on the outside 
  •  3  yes  

MTH_RealTrax_Switch

Attachments

Images (1)
  • MTH_RealTrax_Switch

I read this from the switch manual about 5 times trying understand what it’s saying. It seems like the switches take care of themselves as long as they are wired correctly. 

“The RealTrax O-31 Switch performs all of the functions of other switches, but better. It has a double-microswitch driven non-derailing feature. Inside the Switch Block (lantern housing) are four powerful but efficient and quiet solenoid coils that drive the switch points back and forth at a voltage and current draw as yet unexperienced in model railroading. The RealTrax Switch operates on only 10Volts and 1.25Amps. It has a spring assisted mechanism that ensures that the points always will be in the correct position. If you change directions with a RealTrax Switch, you will not have to worry about derailments or electrical short circuits.”

Oakfan posted:

Thank you both for helping me with this. As you can see, I’m a total noobie. 

Can I ask you to explain what the “control rails” are meant to do? Does it have something to do with correcting the switch if it’s out of position as the train hits that rail? 

Yes. That's it exactly. 

You can forget to align it properly on a layout as the train is cruising around. Then, you notice the switch lantern has the wrong color facing you. As you stretch for the switch controller handle the train enters the switch and you hear the sound of the switch changing and the train passes through. Relief, panic subsides.

You'll experience it.

Oakfan posted:

I read this from the switch manual about 5 times trying understand what it’s saying. It seems like the switches take care of themselves as long as they are wired correctly. 

“The RealTrax O-31 Switch performs all of the functions of other switches, but better. It has a double-microswitch driven non-derailing feature. Inside the Switch Block (lantern housing) are four powerful but efficient and quiet solenoid coils that drive the switch points back and forth at a voltage and current draw as yet unexperienced in model railroading. The RealTrax Switch operates on only 10Volts and 1.25Amps. It has a spring assisted mechanism that ensures that the points always will be in the correct position. If you change directions with a RealTrax Switch, you will not have to worry about derailments or electrical short circuits.”

That sounded so cool when RealTrax was introduced. Now, it is a power hog. 

yes, that's the non-derail feature. 

It has nothing to do with wiring it correctly. it's built into the switch. 

Moonman posted:
Oakfan posted:

Thank you both for helping me with this. As you can see, I’m a total noobie. 

Can I ask you to explain what the “control rails” are meant to do? Does it have something to do with correcting the switch if it’s out of position as the train hits that rail? 

Yes. That's it exactly. 

You can forget to align it properly on a layout as the train is cruising around. Then, you notice the switch lantern has the wrong color facing you. As you stretch for the switch controller handle the train enters the switch and you hear the sound of the switch changing and the train passes through. Relief, panic subsides.

You'll experience it.

Yep. Once again, you are correct. I did experience it. I powered up the track last night and ran the engine only around the ovals. I got cute and manually rotated the switch to change directions on the reverse loop. I didn't get to the switch in time as it rounded the corner and when it hit the switch -"click"- the switch corrected itself and the train kept going. Nice!

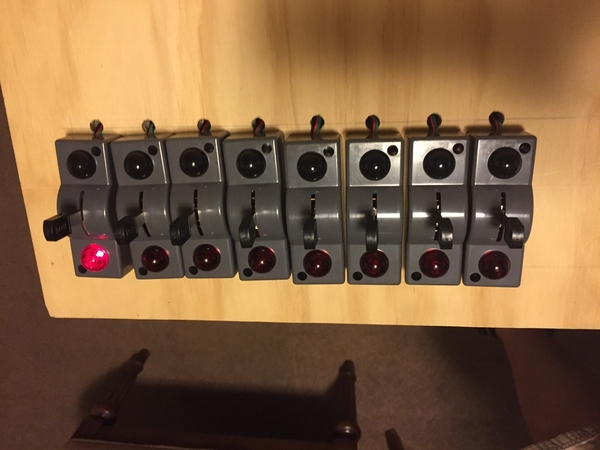
I took a drill bit only slightly larger than the screw hole already there and enlarged it somewhat, then used plain old dry wall screws. See pictures. The thing about mounting the throws in such fashion is that about half of them are somewhat removed from the switches themselves, necessitating adding some extension wiring using shrink tubing. Took a while but was worth it! 

DSC_0019DSC_0020DSC_0021

Attachments

Images (3)
  • Note the distance between throws
  • A close-up shot
  • The entire panel of throws (I have 12)

I took a drill bit only slightly larger than the screw hole already there and enlarged it somewhat, then used plain old dry wall screws. See pictures. The thing about mounting the throws in such fashion is that about half of them are somewhat removed from the switches themselves, necessitating adding some extension wiring using shrink tubing. Took a while but was worth it! 

Thanks for the tip. I didn’t even think about opening the holes. And as you can see in my previous picture, I’m running all the wires from the remote switches to the terminal blocks. Just behind the control panel. I will then run 18-5 thermostat wire from the block to each switch. 3 of the wires are for the switch operation and 2 are for running to my 14v auxiliary power. 

Thank you very much for the compliment on my layout. Everything is good so far (knock on wood).

Thanks for the tip. I didn’t even think about opening the holes. And as you can see in my previous picture, I’m running all the wires from the remote switches to the terminal blocks. Just behind the control panel. I will then run 18-5 thermostat wire from the block to each switch. 3 of the wires are for the switch operation and 2 are for running to my 14v auxiliary power. 

I had not thought of doing that! Good on you. And the thermostat wire is a good choice. I used CAT-5 Ethernet cable to keep the colors straight. 

Oakfan posted:

@LaramieJoe I really like your layout’s table skirt. Are they custom made or did you use curtains or something like that?

Thank, Brad
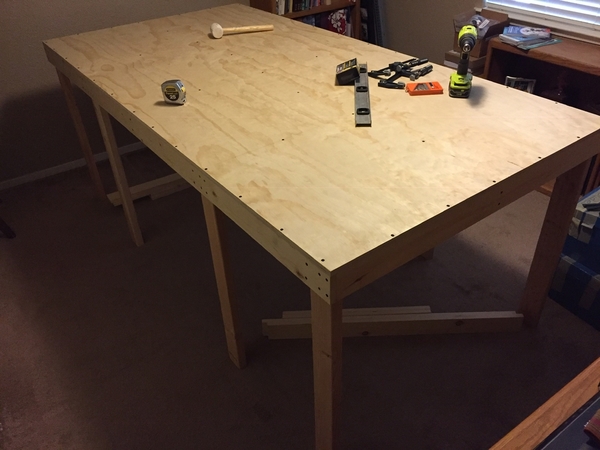
I bought plain colored curtain panels (48" wide by 52" tall) from The Walmart and had them hemmed to 45 inches. I then stapled them every 5 inches horizontally. I created the pleats myself by gathering a little bit of curtain, then stapling. 

LaramieJoe posted:
Oakfan posted:

@LaramieJoe I really like your layout’s table skirt. Are they custom made or did you use curtains or something like that?

Thank, Brad

I bought plain colored curtain panels (48" wide by 52" tall) from The Walmart and had them hemmed to 45 inches. I then stapled them every 5 inches horizontally. I created the pleats myself by gathering a little bit of curtain, then stapling. 
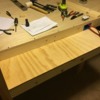
That’s a good plan. I want to do curtains around my table when I’m done too. That will make my wife happy. ;-)

I use #4 sheet metal flathead Phillips in black oxide for tracks for RealTrax and FasTrack. You can get them from McMaster-Carr, MicroFasteners (out of stock now), sometimes Fastenal 

I don't fasten switches. I fasten the ends of the three adjoining tracks.

I like the method that you are using to extend the switch control wires. Good for trouble shooting and keeping the equipment in factory condition. It takes a little more time now, but, it is a lot easier when changes or maintenance is required.

After messing with the elevated track and trying to figure out how to support it, I have decided to slightly change the layout. I really want mountains on the left and right. I like tunnels, bridges and trestles. I think I have figured out a way to have all of this on my small layout. 

I haven’t drawn it yet but there will be a trestle on the front straight section. 

The 2x4 siding if a future upgrade. I will put in the switch on the far right but just add a bumper for now.

3A0B489E-773D-4B55-9304-579D76C133A114B9928E-F724-4C11-980B-F1F8E6F3AE5CCF14B201-0701-4BE5-AC1B-D69F1778F118

Attachments

Images (3)
  • 3A0B489E-773D-4B55-9304-579D76C133A1
  • 14B9928E-F724-4C11-980B-F1F8E6F3AE5C
  • CF14B201-0701-4BE5-AC1B-D69F1778F118
Moonman posted:

Nice drawings. Do you have CAD at work or what app did you use?

My personal taste is not to hide the train that much.

I think you will miss the play value of the sidings. You will tire of the running only. But, then you will have something to do - build another or change this one.

I have Autodesk Inventor. At first, I started playing around with the table design to get material cut sheets. Then I decided to draw the track.

Although I like the sidings in the middle, they get in the way of the mountains and supports. I spent a day trying to get it right but I didn’t like how it was turning out. 

229A5A7B-1300-450C-ACEC-D5C2273696C1

Do you think the future 2’x4’ siding table will satisfy the play value? It provides 3 longer sidings than the middle. I was thinking of maybe only having 2 there and add a sawmill or something.

I’m learning it’s a compromise when I have a small space. Yes, a good portion of the track is covered. I’m trying to figure a way to minimize that and still have a mountain logging, mining feel. I’m learning it’s not easy. But I’m having fun so far.

Attachments

Images (1)
  • 229A5A7B-1300-450C-ACEC-D5C2273696C1
Oakfan posted:
Moonman posted:

Nice drawings. Do you have CAD at work or what app did you use?

My personal taste is not to hide the train that much.

I think you will miss the play value of the sidings. You will tire of the running only. But, then you will have something to do - build another or change this one.

I have Autodesk Inventor. At first, I started playing around with the table design to get material cut sheets. Then I decided to draw the track.

Although I like the sidings in the middle, they get in the way of the mountains and supports. I spent a day trying to get it right but I didn’t like how it was turning out. 

229A5A7B-1300-450C-ACEC-D5C2273696C1

Do you think the future 2’x4’ siding table will satisfy the play value? It provides 3 longer sidings than the middle. I was thinking of maybe only having 2 there and add a sawmill or something.

I’m learning it’s a compromise when I have a small space. Yes, a good portion of the track is covered. I’m trying to figure a way to minimize that and still have a mountain logging, mining feel. I’m learning it’s not easy. But I’m having fun so far.

In the photo above, the sub-roadbed should be shaped at the curved end also. I know that you were only mocking it up. A good support is a 1" x 1" block

3 1/2" wide on top of a 1" wooden dowel for a support. You really don't need that many when using the shaped sub-roadbed. You won't be running any 30lb scale sized steamers up there. 

making a short tunnel in the corner where the grade starts with a mountain shape on top will visually provide the look of something larger without having to hide the trains. Under the grade to the loop could be filled in as terrain to add to the mountain feel.

Yes, when the yard extension is added, it will provide something for the train to do. The two sidings in the center sort of need a building with them as a destination customer. This helps with any layout. The center sidings also required having the train traveling in the proper direction to back in. Adds to challenge of dropping off or picking up a car or two.

You'll be ok with the new version. You have to decide by doing it and satisfying your eye as to what results work for you. The right way is your way on your layout. 

Mock-ups and software 3D's only help decide.

Oakfan posted:
Moonman posted:

Nice drawings. Do you have CAD at work or what app did you use?

My personal taste is not to hide the train that much.

I think you will miss the play value of the sidings. You will tire of the running only. But, then you will have something to do - build another or change this one.

I have Autodesk Inventor. At first, I started playing around with the table design to get material cut sheets. Then I decided to draw the track.

Although I like the sidings in the middle, they get in the way of the mountains and supports. I spent a day trying to get it right but I didn’t like how it was turning out. 

229A5A7B-1300-450C-ACEC-D5C2273696C1

Do you think the future 2’x4’ siding table will satisfy the play value? It provides 3 longer sidings than the middle. I was thinking of maybe only having 2 there and add a sawmill or something.

I’m learning it’s a compromise when I have a small space. Yes, a good portion of the track is covered. I’m trying to figure a way to minimize that and still have a mountain logging, mining feel. I’m learning it’s not easy. But I’m having fun so far.

Late to the party, sorry if this has already been covered.

Questioning the use of hardboard on the upper level, especially the pegboard.  Given the distance between supports, I'm concerned that it will sag over time, on its own and especially under the weight of trains. 

Aside from that, I think the plan is good given the amount of space.

MOONMAN, Thanks for the great feed back, Carl. I was trying to use my mock-up to give me an idea for the footprint of the mountains. I don’t really like it as it is now. I’m going to reduce it down some. I like your idea about a tunnel at the start of the incline. I’ll see what I can do with that. I made the straight sections 4” wide since the track is 3” wide. Should I go down to 3-1/2” wide? I’m going to use the plywood for the bridges until I can build the truss and trestle sections, so they will have to be removable.

MALLARD4468, good eye. I’m just using that for mock-up. I had a bunch of scrap pegboard so I figured why not. I’m glad I did because if I had started cutting up my new plywood, it would now be scrap. 

TM TERRY, I appreciate the feedback. After more consideration, I think I’m going to scale back a bit on my mountains.

Add Reply

Post
The Track Planning and Layout Design Forum is sponsored by

AN OGR FORUM CHARTER SPONSOR

OGR Publishing, Inc., 1310 Eastside Centre Ct, Suite 6, Mountain Home, AR 72653
800-980-OGRR (6477)
www.ogaugerr.com

×
×
×
×
Link copied to your clipboard.
×
×