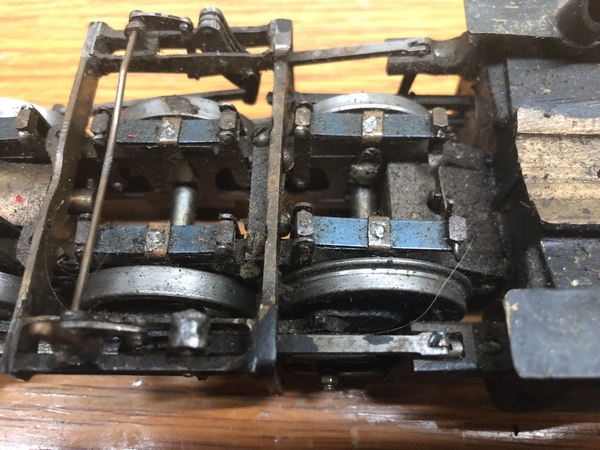
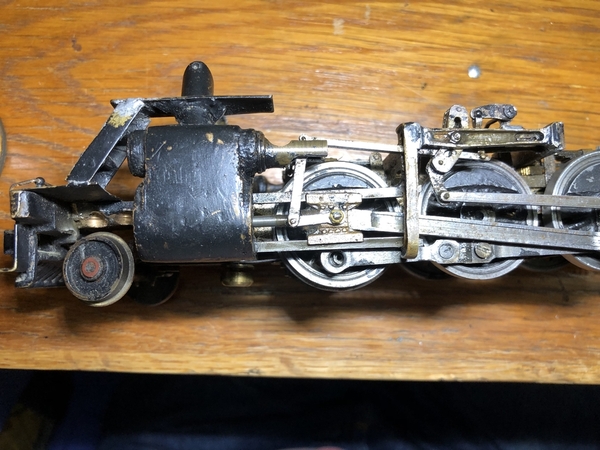
 Well, I’ve just won an auction for a rough and dirty unidentified mikado! This could be interesting! Stay tuned for details…
Replies sorted oldest to newest
I think it is Hines.
I’ll post a bunch of better pics when it gets here, I’m interested in knowing who made it…
Good luck - that's going to need a lot of work. Comparing it to pictures of Hines Mikados, it might use some Hines parts, but a lot of it looks scratchbuilt. Looking carefully at the photos on eBay, it looks like it might have properly equalized drivers - if it does, that's really neat.
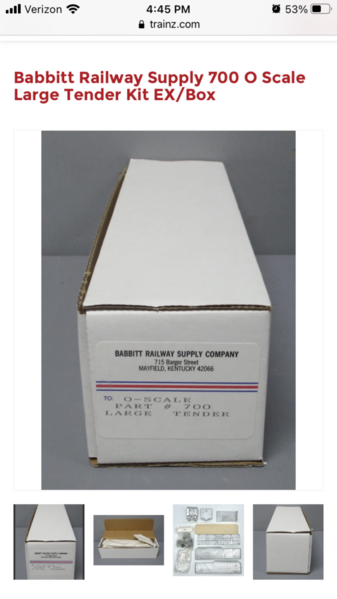
Try looking for an All-Nation Medium tender, I believe they use the same exact castings as the Hines tenders did. They're pretty accurate models of USRA 10,000 gallon tenders.
Cool project! I love that ![]()
Think you've managed to acquire a good challenge there....but one that just might be very rewarding.
It certainly is a project, but that’s what I was looking for…
I’m thinking about making a series of YouTube videos on this engine…
Well, it’s on its way… FedEx said it would arrive this Saturday, then it changed to next Tuesday, now it says this Friday…
I think it might be. That tender usually is paired with the All-Nation Mountain, so it's pretty big. Maybe 25% longer than the medium tender? I don't have one on hand to compare. Fortunately the medium tender pops up on eBay quite often, so you should be able to find one. I'll keep an eye out myself.
Thanks for the input! I could possibly come up with an explanation where a railroad added a larger tender… WMSR 734 for example, that’s a consolidation (admittedly a rather large one) with a 6 axle tender and it doesn’t look out of proportion to me…
The other side of the coin is that I might want to try to model a GTW mike and the medium tender would probably be more appropriate for that…
And then I have a decal sheet left over from my Railking NKP Berk renumber project that has enough left to do this up as the NKP 587… and that had a pretty big tender, at least in excursion service… (edit- the more I look at pics of the 587 the less I like the big tender, it overpowers the locomotive in my opinion… is that a Berk tender??)
So that’s 3 sides to the coin so far…
There was a Lobaugh tender on the Bay that would have worked.
Get some brass sheet and make what you want. Tenders are fairly easy in comparison to locomotive restoration.
Bob has a good point! I didn’t think I could hand-lay a turnout, but then I tried it, and I ended up with a working turnout…
It’s here!! And it’s awesome!
It’s fully sprung and equalized, and all of the valve gear is there!
The wiring is a mess, with a bridge rectifier that looks much newer than the engine, so I’m not sure yet if it runs… gotta figure out how to wire up the motor so if anyone has any suggestions I’m all ears…
Attachments
Nice project. Yes, NKP 587 had a Berk tender behind it during its past excursion years of use. Helped with fuel range. It first had the NKP tender that had a 3 axle under the coal bunker and 2 axle truck under the water tank, then that was swapped out for a Berkshire tender. When first built, being a USRA light Mikado, she had the typical small tender those came with, then NKP kind of swapped tenders around depending on need. Looking forward to see what you do with that old Mikado. AD
Good luck! It's a mess, but someone spent a lot of time on that. I'd start by taking photos of everything, then I'd carefully dismantle it, clean everything, then slowly put it back together making sure everything gets a drop of oil. As long as the wheels turn freely and the rods don't bind, I'm sure it runs - those old motors are hard to kill. I personally prefer to have gone through everything, making sure everything is free, before trying to run anything.
Any tips on cleaning? Solvent/detergent recommendations? I don’t want to damage the insulation in the wheels…
Also- I’ve been doing some reading on field-wound motors and I’m unsure if the field is supposed to be series or shunt(parallel)…
For most parts, you can just wash them in hot soapy water and lightly scrub with a toothbrush. It's important to dry everything off quickly, I typically just set parts in front of a fan to dry. I would only wash parts like that if it's completely dismantled, that way everything can dry properly and you can reach everything. For the motor, I might wash removable parts in water, but not the field or armature. I normally clean the commutator and brushes with cotton swabs soaked in isopropyl alcohol, and use toothpicks to clean out the grooves.
I think this motor should be series. You would reverse the polarity of the brushes or the field to reverse, both would work. I think reversing the field is more common. Unless this locomotive has a reverse switch or reverse unit, it's forward (or reverse, if wired that way) only. I don't know why it would have a rectifier, that motor should run on AC or DC, it's only when trying to run a DC motor on AC is it necessary.
Thanks! I think the rectifier is a relatively recent addition… it certainly doesn’t match the “patina” of the engine. I’m guessing someone was attempting to make it run and didn’t know what they were doing…
I’ve seen videos of vintage O scale outside 3rd rail engines with a “reverse” switch somewhere on the engine. Apparently those would reverse the polarity of the field, thereby reversing the motor rotation… From my (limited) research/knowledge I don’t see a way to change the direction of the motor “remotely”…
Yeah, a switch like that would be what you would typically find on an engine like this, though a reverse unit, like in most 3-rail engines, would work. I don't know if a reverse unit would tolerate DC though.
I think the reverse switch would be more appropriate for this engine…
I would like to be able to put this engine on the front of a local freight and set cars out, so it would be nice if it could go forward and backwards…
You can hook it up temporarily, although I bet the diode is in there correctly.
You want to wire it up in series, with a way to reverse only the field.
I have a drawing somewhere. I run lots of these motors in older O Scale.
If my half-asleep brain (because I just woke up) is reading the diagram right the field polarity will always be the same, but the armature will match track polarity, meaning I can reverse the motor with the switch on the power pack! Thanks Bob!!!
Best of all, these things are under five bucks, and come in smaller sizes.
It runs! I took the axles out and cleaned and oiled the bearings and all of the rods and valve gear. I noticed a screw missing in one of the binders on the rear axle in the auction photos… turns out it’s not entirely missing, most of it is still in the frame… uh oh… that’s gonna be fun to deal with…
There’s a bit of a bind in the valve gear, and I think it might have something to do with the lift arms being loose on the shaft that runs across the locomotive… the radius rods fall into the full forward position and I think the geometry is off enough that the radius rods are trying to move farther than the valves will allow… I might just tack it all together in the neutral position and call it good…
The rectifier works great, thanks Bob!!
The valve gear can be properly adjusted? That's really cool, quite a rare feature. Most models have it permanently fixed in a slightly forward position. You wouldn't want it in neutral, the valve gear won't be as animated. It sounds like the bell cranks are loose on their shaft? I would solder them in place to the shaft, being very careful to make sure that both sides are in the same position. I had to do that on my Pacific or they'd just flop around. You've probably done it already, but remember to oil the valve spindle too - those need to slide freely.
When extracting the stuck screw, remember that if you damage the brass frame you can fix it by drilling and tapping a hole, and then soldering a brass screw into the hole to fix it. Then cut it off and file it flat - you can then properly redrill it.
Yes, the bell cranks are loose on the shaft. I don’t think the radius rods are actually connected to the expansion links like the real thing, but there’s only so much travel between the radius rods and the links, so they do move a little bit with the links…
Attachments
Attachments
You need to strip down and isolate it. Get it all the way down to the side rods, then post again and I will tell you what to look for.
and this is as close as I can get the rod to line up, and this is the spot where it would bind up when I tried to run it…
Attachments
Thanks to Johnbeere’s help I’ve got a tender coming for this engine…
As for the drivers I’m going to see if I can find (or make) a quartering jig and check all 4 axles. I checked the frames with a straight edge and they’re straight, so I’m pretty sure it’s a quartering issue…
So the more I dig into this engine the more interesting it gets…
As I looked closer at the axles I realized that the bearings are not drilled on-center. I then paid closer attention to the bearings and noticed wear patterns matching the suspension on the top of the bearings and scratch marks on the bottom. I re-assembled the chassis paying careful attention to the orientation of the bearings and it runs much smoother (although not perfect). The frame measures out spot-on, so I’m thinking correctly machined bearings would be the proper solution, but I don’t have any machine tools to make new bearings…
I also don’t believe the boiler came on this chassis originally. With the smoke box tight to the saddle there are a few spots where the spring rigging touches the boiler, the top of the gearbox is also a slight interference fit, the air tanks interfere with the expansion links, and the rear cab support is about 1/8” behind the rear of the frame. None of these issues are game-stoppers for me, some careful trimming of the boiler and shortening of the air tanks will allow the interfering parts to clear and will be mostly hidden or not noticeable, and the cab mounts can be easily modified to fit…
It’s just interesting to me, makes me wonder about the history of the locomotive…
Consider it an education.
@bob2 posted:Consider it an education.
Not only am I learning, I’m having fun while doing it!
You might want to grab onto something sturdy, the track just got really rough ahead…
So… I decided to strip the boiler down to clean it up. I took all the detail parts off, removed the running boards, and pulled the cab off… that’s when it got interesting…
I noticed that the engineer’s side of the firebox was separated from the backhead, then I realized that the bottom of the boiler was coming apart just in front of the firebox. So now the boiler is in two pieces…
I’m getting the real steam locomotive restoration experience! A “quick overhaul” is never quick, and you always uncover lots of hidden issues…
I’ve got some ideas on how to put it back together better than how it was done before…
Attachments
You are a very brave person... 😳 🙂
Mark in Oregon
Hmm, brave… yeah, we’ll go with brave. Sounds better than what I was thinking…
I put the cab back on and tacked the boiler back together in front of the firebox… when I mocked the 2 halves of the boiler back together on the frame I discovered that everything lines up perfectly without the backhead in place…


