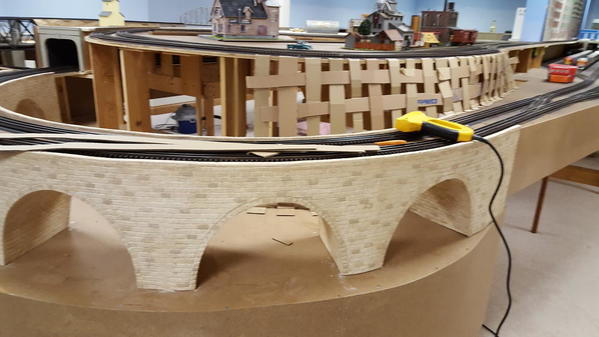
Art, what is the grade on the track connecting the two levels?
It is 2% on one and 2 1/2% on the other.
Art
Beautiful job so far! I wish my father was into trains. You could call it a work of Art!
great looking layout plans. If I wanted to do that many switchs I would have to spend my kids money! LOL
Now take that fascia and paint it black, which will REALLY draw your eye to the scene.
If you need further convincing, a before and after shot of my latest scenery project:
The paint was still a bit wet when I shot the photo.
As far as I'm concerned, this is one of the best things that can improve the look of a layout with the least amount of effort. I liked the look so much, I went and finished all my fascia.
On the original part of my layout, I used green. The thinking back 20 years ago in the model press was to use a color indicative of the area you were modeling, so, if you were doing Santa Fe in the desert, use a sand color. I am going to redo everything with black.
Regards,
Jerry
Attachments
Jerry - That is an interesting suggestion. I have already decided to put black skirting below my fascia, but so far have liked the earth colored fascia. Your layout looks great.
Art
Art,
When I saw your "tunnel" photos previously, it occurred to me that it would be a neat feature and visual "surprise" if you created even a small diorama looking inside the tunnel--such as timber supports, rock wall tunnel facings, minimal lighting, etc. even if the scene was only 1' or so in length and viewed through Plexiglas attached to the fascia. It'd be more work, of course, but surely a very neat feature.
In any event, it's very enjoyable to read about your progress and, as a dad, to read about your collaboration with your son.![]()
Well designed and constructed layout for sure, but your train room really is finished off nicely, well lighted, and the perimeter is clean. I admire how neat and orderly that room shows off the layout. Your visitors are really going to enjoy it.
Fantastic!
Peter
Pingman posted:Art,
When I saw your "tunnel" photos previously, it occurred to me that it would be a neat feature and visual "surprise" if you created even a small diorama looking inside the tunnel--such as timber supports, rock wall tunnel facings, minimal lighting, etc. even if the scene was only 1' or so in length and viewed through Plexiglas attached to the fascia. It'd be more work, of course, but surely a very neat feature.
In any event, it's very enjoyable to read about your progress and, as a dad, to read about your collaboration with your son.
That is a good suggestion. I saw something similar to that on a layout tour on last year's O Scale convention where they did that on a coal mine. I started adding tunnel walls made of 1/8" foam painted black, but the first one was too close to the track and my 21" California Zephyr cars hit it. So back to the drawing board.
Art
Art, you may have previously described your operating system (card/waybill type) but I am curious what you use and how complicated it can get.
pennsynut posted:Art, you may have previously described your operating system (card/waybill type) but I am curious what you use and how complicated it can get.
In the past my "operating sessions" were very casual to say the least. They were primarily to run unit trains and passenger trains with little or no switching. Passenger trains were supposed to stop at scheduled stations and etc. We would run a circus train on the freight mainline for variety and etc. Running trains through crossovers across another mainline to get to the interchange track to take the train to the upper line would add some excitement and variety.
I am working toward using car cards and way bills in the future. I have to get individual numbers on all my cars, get my control panels completed so visitors can operate switches, and hopefully finish some of my industries before that can happen. I changed my Intermodal yard with two tracks and no yard lead to a 4 track classification yard that is double-ended and has a fair sized yard lead. That gives me two decent sized freight yards and a passenger terminal for operations. I don't have a lot of industries with sidings, but hopefully enough to keep some people busy for awhile. I do not plan on using a fast clock at any time in the foreseeable future.
Art
Thanks Art. I will have to get pretty creative with my imagination to do a waybill operation but the idea intrigues me.
Anyone can see you're having a rockin-good time of it, and to be able to work on that excellent project with your son is a memories-builder you'll have in your heart to cherish forever. I'm happy for you. You're exactly the kind of person who deserves such joy, Art. And the results that we can see are fabulous.
FrankM
Thanks, FrankM. I do feel very blessed to have a son that loves trains like I do, lives fairly close, and enjoys helping me with my layout. The truth is that I have been relying more and more on him as I get older. He does excellent work and when I want something done right, I tend to want to wait until he is available to help me.
Art
Art,
Very well done! Your layout is coming along fine.
The last RR-Track plan you posted, above - is that a 2-ft grid?
Thank you for sharing, and keep the updates coming.
Alex
Ingeniero No1 posted:Art,
Very well done! Your layout is coming along fine.
The last RR-Track plan you posted, above - is that a 2-ft grid?
Thank you for sharing, and keep the updates coming.
Alex
Thanks, Alex. Yes it is a 2 foot grid.
Art
Chugman posted:Pingman posted:Art,
When I saw your "tunnel" photos previously, it occurred to me that it would be a neat feature and visual "surprise" if you created even a small diorama looking inside the tunnel--such as timber supports, rock wall tunnel facings, minimal lighting, etc. even if the scene was only 1' or so in length and viewed through Plexiglas attached to the fascia. It'd be more work, of course, but surely a very neat feature.
In any event, it's very enjoyable to read about your progress and, as a dad, to read about your collaboration with your son.
That is a good suggestion. I saw something similar to that on a layout tour on last year's O Scale convention where they did that on a coal mine. I started adding tunnel walls made of 1/8" foam painted black, but the first one was too close to the track and my 21" California Zephyr cars hit it. So back to the drawing board.
Art
Hey Art Do you have any pics of that coal mine or where I could see it?
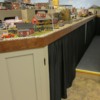
Art, I'm a huge advocate of black fascia, as it does a couple of things. It tends to disappear and allows your eye to focus on the trains and the layout, and it just makes things POP. You've already gone with black skirting, finish the job with black fascia. It can be a little scary at first. I wouldn't have it any other way on my layout.
This is an interesting photo, because it shows the contrast between the black and the brown of the raw Masonite.
Even without scenery, you can see that pop. The contrast between the black fascia and the blue sky.
Attachments
Hello Art, just a quick question is that a Helix over on the right side of the photo's you posted.
If so this is interesting.
MarkStrittmatter posted:Hello Art, just a quick question is that a Helix over on the right side of the photo's you posted.
If so this is interesting.
Mark, that's not Art's layout with the helix, I think it's Jerry's (GNNPNUT).
Thanks Elliot, either way it looks like a neat helix !!!!
Thanks again !!!!!
MarkStrittmatter posted:Thanks Elliot, either way it looks like a neat helix !!!!
Thanks again !!!!!
I agree Mark. I think Jerry's home layout is HO. He did O with the now defunct modular group along with Hot Water and some other forum members.
Art,
As Elliot and others have suggested, a black fascia really does wonders. I have doors in the front of my layout (first picture), and these provide access to the hidden world of the underneath. Other than that, I have black curtains, which were very easy to install and also provide easy access to the underneath. Of course, I have a rather unique resource for the curtains, among many other contributions - my wife Judy.
I ended up adding curtains all around, and this really helped keeping the temptation of those curious eyes (smaller kids) from wondering under the layout.
Keep us up to date with your progress!
Alex
Attachments
Alex, that looks great! Thanks for sharing pictures of your beautiful layout. The only one that doesn't like black fascia is my wife so far. Stay tuned.
Art
I was reading and looking at the black facia pictures yesterday, and I went and bought a gallon of flat black. Mine were white and besides looking dirty they stood out. I painted them all black last night, and love how it makes the scenery pop and hides the trestles for the upper level.
Another example of painting black:
Paint it black

Starting in the mid-1950s, Mercury engines were produced in a rainbow of colors. In fact, Mercury advertised itself as "the most colorful name in outboards" until 1958, when "Stark White" became Mercury's signature engine color. But with the introduction of the 6-cylinder 100hp "Tower of Power," outboards suddenly grew taller and wider. Designers feared the new engine looked out of proportion to the boats it powered, and they sought ways to make it appear smaller.
Here's where a legend begins: One night, the mother of head Mercury engineer Charlie Strang wandered into his office. Charlie explained the engine dilemma to his mother, who offered a practical suggestion: "Well, a large woman always wears a black dressWhy don't you paint the engine black?"
"Just for the heck of it, we painted one black," said Strang, "and the engine looked like it shrank by about 20 percent!"
Over the next several decades, Mercury built a brand in part on its signature "Phantom Black." In just a few weeks, Mercury will offer its Verado engine in two shades of white – hot and cold – in addition to Phantom black.
Regarding black fascia, it depends upon your intent.
If you want the room to be all about the layout, a dark fascia makes a big difference, as Elliot noted (and his train room will certainly be all about the layout). You would need a well-lit layout to get the maximum benefit from this approach.
But I like the look of the portion of Ingeniero No1's layout that has the doors below the layout surface. A layout designed with such a look all the way around would resemble furniture and offers a friendlier atmosphere. Of course, if a whole layout was designed that way, access below the layout would be a problem, unless the fronts were removable.
Agreed. I'm definitely going to have to do the underside of at least part of my layout as open shelves or cabinets, as I must share the space with a downstairs "den" area. I really like the decorative look of Alex's cabinet doors in the included picture (as well as his drop-down turntable). There are areas where the black curtain may be a better option.
Chugman posted:Jerry - That is an interesting suggestion. I have already decided to put black skirting below my fascia, but so far have liked the earth colored fascia. Your layout looks great.
Art
I am ready to install skirting below my fascia. How are or how did you fasten the skirting below the fascia?
Thanks Buzz
GG1 2340 posted:Chugman posted:Jerry - That is an interesting suggestion. I have already decided to put black skirting below my fascia, but so far have liked the earth colored fascia. Your layout looks great.
Art
I am ready to install skirting below my fascia. How are or how did you fasten the skirting below the fascia?
Thanks Buzz
For our layout, my wife got a bunch of those adjustable spring loaded round curtain rods. She made each skirt with a curtain rod fold at the top of each skirt, put the round rods through the skirt, and then pressed the spring loaded rod between the leg supports. Instant, and easily removable skirts.
Hot Water posted:GG1 2340 posted:Chugman posted:Jerry - That is an interesting suggestion. I have already decided to put black skirting below my fascia, but so far have liked the earth colored fascia. Your layout looks great.
Art
I am ready to install skirting below my fascia. How are or how did you fasten the skirting below the fascia?
Thanks Buzz
For our layout, my wife got a bunch of those adjustable spring loaded round curtain rods. She made each skirt with a curtain rod fold at the top of each skirt, put the round rods through the skirt, and then pressed the spring loaded rod between the leg supports. Instant, and easily removable skirts.
Jack - That is pretty much what I plan to do with mine. No sense trying to over think it like we all sometimes have a tendency to do.
Art
Concerning fascia colors here is my dilemma. I understand and agree with the black focusing all your attention on the layout, which of course is good, but I am also concerned with the effect on the over all room itself. I have beige colored carpet, neutral or ecru colored walls, and stained oak woodwork. I want the fascia to be in harmony with the total room. Oh, did I mention that I am not a decorator? I am leaning toward keeping the earth colored fascia with black skirting below it. That will keep the eyes from the floor area and make a gradual transition from the earth colored fascia to the layout itself. I have seen green fascia and I like that too, but keep coming back to the earth color so far.
Art
Chugman:
Love the layout & great to watch its progress. Any tips on working with Atlas flex track? I've been told it can be a bit of a pain to work with, but I will need to use it to "fudge" certain areas of the layout I'm planning to build. I know from playing with it a little that tends to hold its shape vs. spring back to straight. I assume one should plan well first so you only need to bend once when laying it down? Thanks.
- Neal
Fridge56Vet posted:Chugman:
Love the layout & great to watch its progress. Any tips on working with Atlas flex track? I've been told it can be a bit of a pain to work with, but I will need to use it to "fudge" certain areas of the layout I'm planning to build. I know from playing with it a little that tends to hold its shape vs. spring back to straight. I assume one should plan well first so you only need to bend once when laying it down? Thanks.
- Neal
Atlas flex works great, but as you mentioned can be difficult if you are trying to bend too sharp of a curve. And I learned the hard way that it doesn't flex very well after it has been painted. I reused a section recently that I had previously sprayed with Camo Brown and it didn't want to bend. The paint kept it from sliding on the rails as it usually does. It worked, but it wasn't as easy as usual. Just anchor it good at one end when you are bending it and screw it down as you go. You probably will have to cut off one of the rails to properly match up with the next normal piece of track.
Art
When we started laying Atlas flex track for our layout, we very quickly learned to solder 3 or 4 or 5 full sections of it together, then with 5 or 6 men, force the darned stuff into position, glue and screw it down, and hope!!!!! Some many days later, I removed all the screws, and reused them to lay more of the track. Once all the track & turnouts were laid and glued in place, I removed ALL the screws.
While my son, Jim, has been building my new control panels I have been trying to get some scenery work done. I have been avoiding getting into doing plaster as I haven't done it in a long time. Well, tonight I just decided it was time to get started. So, I began by cutting strips of cardboard and then stapling them to the layout in a grid pattern. I got a fair start before I ran out of time.
Here are a few pictures of the progress.
Art
Attachments
Chugman posted:.... I have beige colored carpet, neutral or ecru colored walls, and stained oak woodwork. I want the fascia to be in harmony with the total room. Oh, did I mention that I am not a decorator? I am leaning toward keeping the earth colored fascia with black skirting below it. That will keep the eyes from the floor area and make a gradual transition from the earth colored fascia to the layout itself. I have seen green fascia and I like that too, but keep coming back to the earth color so far.
Art
Art,
Going with your color scheme, I would suggest going with a light brown or tan curtain instead of black. This should carry the earth color fascia "to the floor" and keep focus on the layout. The black would provide too much contrast and your eye might actually be drawn to it.
Fred
Art,
I have the same fascia as you, beige carpet and black skirts. My first attempt had the skirt attached to the lower edge of the fascia and it just did not look right. As you looked at the layout you saw the modeled portion of the layout, then the brownish fascia and then the black skirt. I moved the skirt to the top of the fascia, covering the entire fascia, and it looked much better. My advise is whatever color skirt you go with, mount it to the top of the fascia. For your color scheme I'd go with a beige skirt so it blends with the other colors in the room. It will dissolve into those colors and then the layout will really pop.
Dave
I thought I would contribute to Dad's thread and show the progress of the three panels I'm rebuilding for his layout. Two of them are in frames and prewired to the devices and one is ready for framing. Hope to have two ready to install on the layout by this next week.
Jim


