
Since I started with this layout, my plans have evolved. First it was about getting things started and running some trains, then I realized I wanted to finish the room – unfortunately around the layout – I migrated to liking more scenery, and so on. Over this time I found I really liked to run longer trains and more running than my current layout could allow. I liked the scenery work I had done (maybe 1/3 done) and I didn’t want to lose the work I had sunk into it. All this had me thinking about ways to expand what I had done, but shift to the approach I was looking for, a new base to grow from.


Here is the basic track plan I started with, while the scenery and building placement is not real accurate here, the track plan is what I have been running, it take up about 24ft x16ft. I use Atlas track and switches.

rich layout
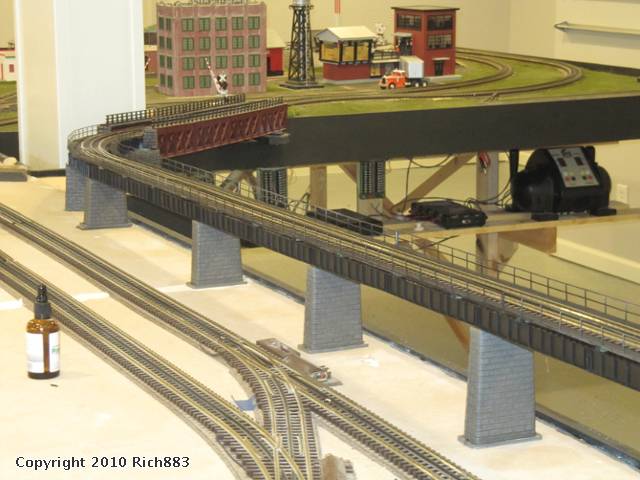
Here are some photos taken a bit before I decided to make some changes.


IMG_0184IMG_0185IMG_0186IMG_0187


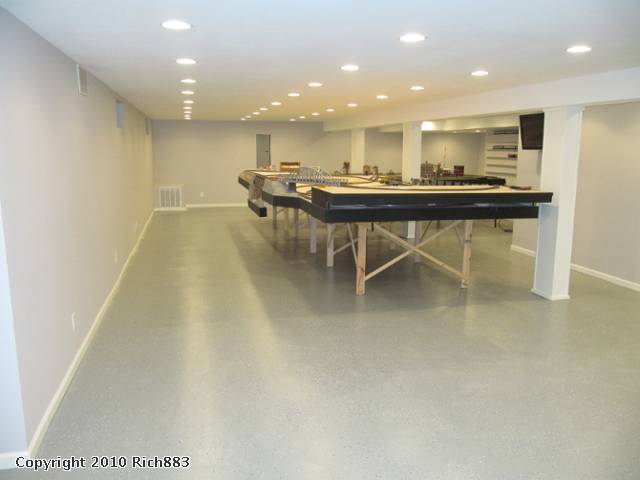
It seemed the sooner I started, the less track I had to rip up (literally in the case)After some thought I looked to move to this track plan, while I expect some changes like adding more sidings for industry, the basic flow will remain the same. I wanted to take advantage of the large wall space I had, and create some peninsulas to break up the viewing angles and set some different scenes. This one is about 43ftx30ft.

rich layout 5-11
To accomplish this I had to cut the existing bench work apart, and move the two pieces to create two different peninsulas.

IMG_1715IMG_1716IMG_1717IMG_1718

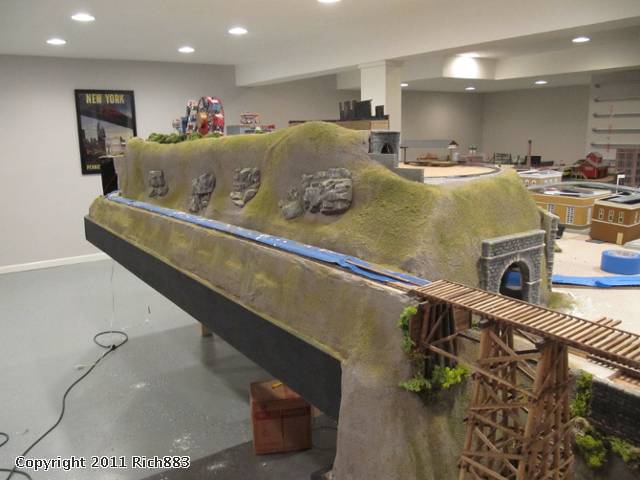
The goal was to keep the existing track work and buildings/scenery in place, and move these to a new location, which turned out to be both harder and simpler than I thought. The separate pieces were much too heavy to lift and drag around the room, and while I had leveling feet, I did not build the bench work with wheels. What turned out to be simpler than I thought was to jack up the bench work and place mover’s dollies under it, and once all feet were up, pushing the entire piece into place was not too hard.

IMG_1720IMG_1721IMG_1722

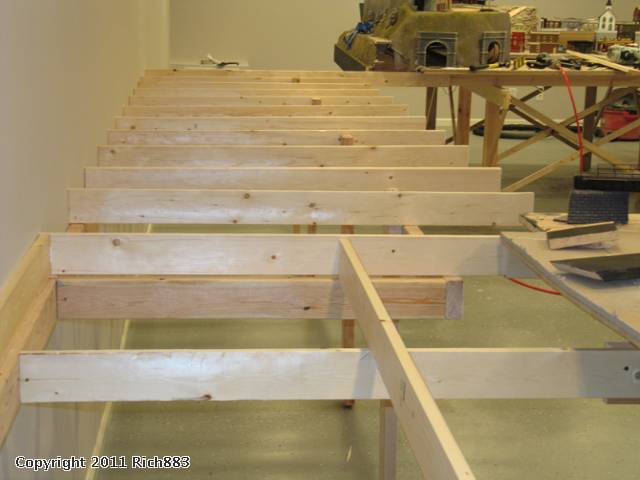
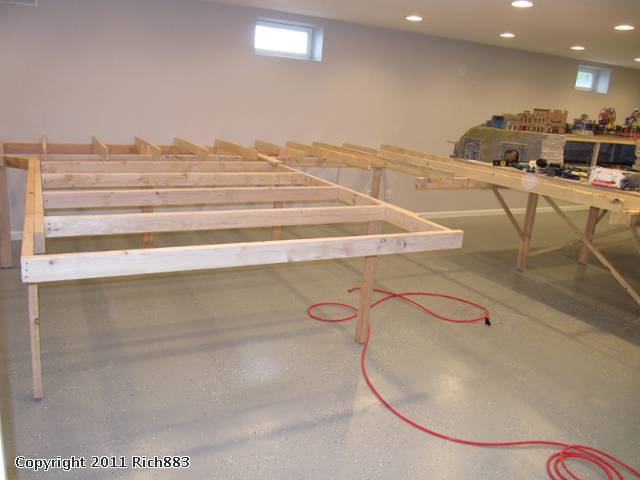
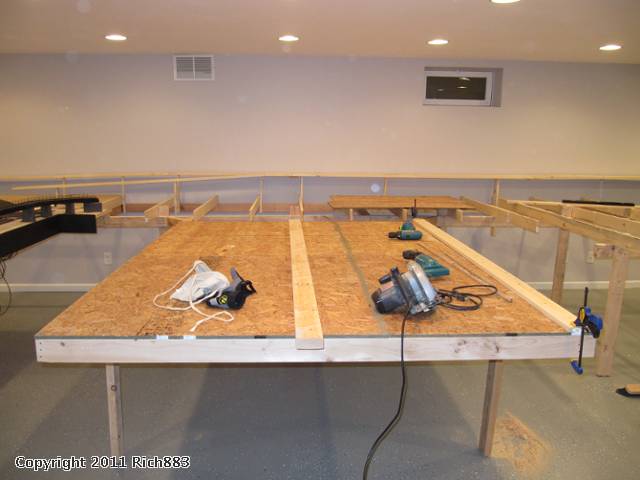
Once the existing pieces were in place, I started adding the bench work support structure to tie the pieces together. Construction is with dimensional lumber, mostly 1x4 and 2x4 with a combination of screws and nails to secure it together. I have started covering the frame with ½” OSB, and that will be covered with homasote. The elevated grade at the back will have homasote on it before I lay cork roadbed and track.

IMG_1725IMG_1726IMG_1727IMG_1728IMG_1729IMG_1730


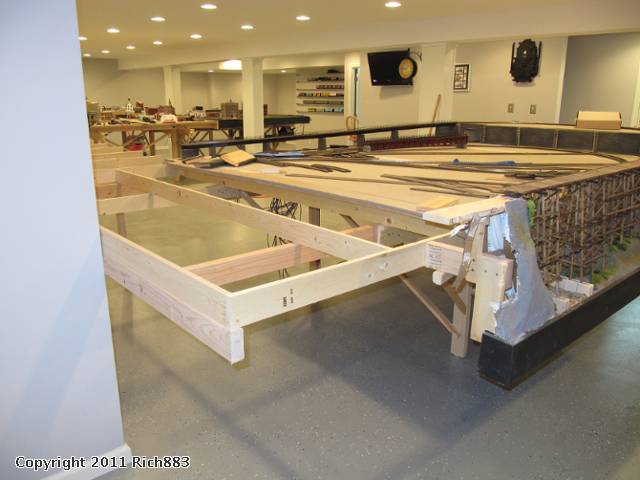
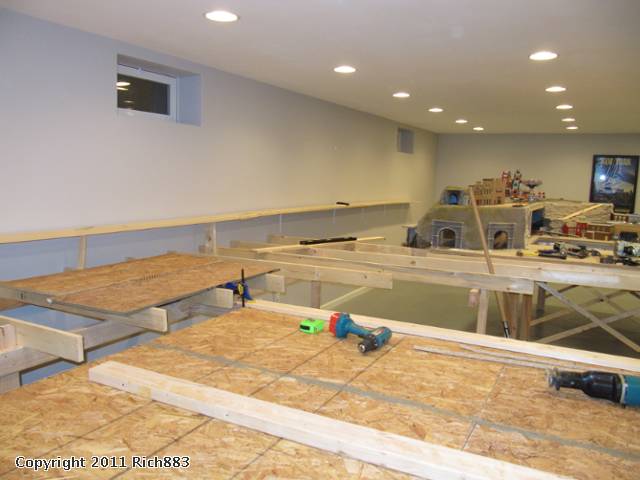
I think I am about half way done with the bench work. I will post more photos as I make some progress, and of course comments welcome.

Attachments

Images (19)
  • rich layout
  • IMG_0184
  • IMG_0185
  • IMG_0186
  • IMG_0187
  • rich layout 5-11
  • IMG_1715
  • IMG_1716
  • IMG_1717
  • IMG_1718
  • IMG_1720
  • IMG_1721
  • IMG_1722
  • IMG_1725
  • IMG_1726
  • IMG_1727
  • IMG_1728
  • IMG_1729
  • IMG_1730
Last edited by Rich883
Original Post

Replies sorted oldest to newest

Rich,
I have to Laugh,
How many layouts are you building?LOL
When i first seen your layout in the middle of that big room, I said to myself boy this guy has alot of discipline or a strict wife to stay in that area with so much room to use.
I also pulled that "wheel trick" on the wife.LOL Sections could be wheeled out of the way for when company comes over. Their still under one section of the layout. I know you did it for a different reason.Great idea.

I like the new shape of the layout, Wink Your going to have one heck of an empire.I cant wait to see how it evolves. Great bridge work to. It keeps growing and growing.LOL
That's funny Patrick I thought the same thing. Personally I feel it's only a matter of time before that entire basement is filled... Smile Wink

Rich it is looking great, you are gonna have alot of fun when all is operational. Congrats on the approval of more land from the Land Appropriation Commity...(The Mrs.).. Wink That is gonna be one fine layout, and it's amazingly clean in there...how did that happen? Anyway great job and it looks great, keep the pics coming.
Me three! After reading this thread all I could think is it's probably a little late to suggest you use the entire lonely looking space for the whole train layout. Big Grin
By the way it looks like you have an extra 7-8' left on the left side of your room, you may as well stretch her out while your at it.
I've always admired your work and I kind of wondered why you didn't use the whole space for a perimeter layout, I just figured you had your reasons. Nice work as always and keep us up to speed on your progress.
Beautiful work Rich. I know the feeling about always looking for a way to expand. My layout is nowhere near scope of yours, but after about 2 years of tinkering with RR track, and finally deciding on a plan, the benchwork was barely completed, and I decided to punch through a wall to get more space. I think we all have this affliction, of constantly trying to figure out how we can get just that little extra space.

Your's is a major undertaking, I'm sure you'll be happy in the long run that you made the expansion decision early enough in the process.

Looking forward to your future updates.

REV
Thanks guys,

The room is pretty neat in these pictures, some more sawdust after cutting some more wood, but thanks to the vac not too bad.

the layout started in the middle of the room before I finished the room, so originally there were no walls.

Pretty lucky, not too hard to get the space, she has space upstairs.

The portion at the far left has some book shelves, couch and chair for lounging, and in the far corner I will add a wine cooler and some wine racks.
Dear Rich

In the scheme of things, I'm a sixteen-year-old warehouse sweeper who's saving up for a downpayment on a used Honda Civic, but I'm ogling your Lamborghini.

Your space and your layout are what dreams are made of. Thanks for sharing!

(Enough ogling by me for now. I have to get back to figuring out what I'm going to do with 9.5' x ~6'.)

--Jaddie

Thanks for all the great feedback guys!

I have been completing more of the construction, here are some additional photos. At this point I have completed the framing, legs, girders, cross braces in the bench work, and covered it with OSB sheeting. Next step is to add the homasote. I intend also to add some additional elevation using dimensional lumber, and foam.
I also found a Lionel lift bridge I intend to use in the harbor area.
The gap you can see in the second to last photo is the access to the breaker panel that is behind the framed poster. This will have some lift out bridges to provide better access with less reach.
IMG_1731IMG_1881IMG_1882IMG_1883IMG_1884

Attachments

Images (5)
  • IMG_1731
  • IMG_1881
  • IMG_1882
  • IMG_1883
  • IMG_1884
Last edited by Rich883

Bench work Construction complete!
Well back at it again, I have made some more progress completing the bench work construction. The entire layout is now covered with Homasote. I have placed this down as the base on top of the OSB. It is also on the elevated sections at the back of the layout. The grade to and from these elevated areas will be a combination of a trestle extension (I will extend the trestle at the back left of the layout to make a curve to meet he back elevated area) the inside track will ramp up using foam. The same type of approach will be on the back right corner where it comes back down.

The homosote is painted with a flat latex paint, a kind of “sandy – mud - dirt color” I didn’t do this before, and when I saw the results others had here on the forum I tried it out.

After the homasote was installed and painted, I added wood trim boards around the layouts – 1x6 dimensional lumber and then painted flat black to match the existing construction.

View from the bottom of the stairs 
IMG_2163
Harbor area in the foreground right, look back across the city to the left. The harbor will have 2” foam to elevate the pier, I plan to install that next. I have removed some of the supports from the elevated line on the city peninsula, I am reworking that to have a line run beneath it, and then two sidings for passenger cars for a large passenger terminal. 
IMG_2164IMG_2165
Harbor in the front left, looking at the smaller town and the “mountain” top “ amusement park on the right.

IMG_2166IMG_2167
I have started to stage track and switch’s amongst other things in the yards and service area

IMG_2168
Yards to the right, the gap you see is so I can get to the breaker panel behind the framed poster. This will have a few removable bridges for easy access.
 
IMG_2169IMG_2170IMG_2171IMG_2172
Looking back at the service area

IMG_2173


I stocked up on some conduit clamps to start installing for wire management, and while at it I will re layout my central wiring area to get better access to the AIU terminal strips.

Things always seem to take longer than I expect, but I think the progress is OK. I am looking forward to putting the saws away and working on track and wiring next. As always comments and suggestions welcome.

Attachments

Images (11)
  • IMG_2163
  • IMG_2164
  • IMG_2165
  • IMG_2166
  • IMG_2167
  • IMG_2168
  • IMG_2169
  • IMG_2170
  • IMG_2171
  • IMG_2172
  • IMG_2173
Last edited by Rich883
quote:
Things always seem to take longer than I expect, but I think the progress is OK. I am looking forward to putting the saws away and working on track and wiring next.


I think your progress is excellent. I've had a touch of builders block lately, I am following a track plan, but lines on a paper don't always translate to what I am after in the building phase. I have wired on side to test switches and see trains run through the sidings, since I am still cutting roadbed it breaks up the monotony of the same old thing. Nice work, I've enjoyed watching your progress.
quote:
Builders block---I like that term. I'm having a tough time with my track plan????


Joe S.
Sometimes I just find that once you begin 'doing', things evolve and those things you were stumped on begin to work out. I have a hard time working within a set of rigid or confined parameters. My track plan is merely a 24x36 scaled drawing of the room and benchwork with nothing more the pencil lines depicting what I think I want/like. After fretting over a track plan for so long I resolved to get going on it rather than continue in the endless search of the perfect plan and so far I am happy with the progress. Good luck and please share some photos.

I have had some travel for work recently, and been unable to get things done on the layout, but I had some time this week to complete a few things. I have mostly been working on laying track, and installing the cork roadbed under it. I generally layout the track first following my track plan, and slide the cork bed under the track. I secure the cork to the Homasote buy using some HO track spikes a simple nails.

The first thing I did was to construct a curved trestle to join the side with the back of the layout elevated tracks.

IMG_2199IMG_2200IMG_2218
While the track plan didn’t change much in the foreground with this elevated areas (to be part of the city) I have been changing out the all curves to O 81 or O 90 where I can fit it, and a minimum of O 72. (I previously had O72 everywhere, but wanted to expand while I could)
IMG_2215IMG_2216IMG_2219

One of the new areas of the layout is to add a harbor area. This is on a peninsula that is about 8.5’ by 6.5’. I built the bench work lower to provide for the depth of the piers. The loop around it has sidings to provide access to some planed oil storage tanks, and a freight house. I built up the piers using some 1.5” and 2” foam. The Lionel lift bridge serves as the entrance to the harbor, and is anchored to some risers of wood attached to the bench work. The back area will have another bridge for the overpass of the track coming from the elevated section on the previous peninsula. This has yet to be fabricated, so I used some MTH bridge supports for the time being.

IMG_2220IMG_2221IMG_2222IMG_2226
This view looks back at the small town/city that I had previous stated before I worked on this expansion. This is where the expansion ties into this existing peninsula.

IMG_2223IMG_2224IMG_2225

Here is a shot looking back across the layout in the direction of the first peninsula and the stairs.

IMG_2227 

Next I will be laying the mainlines on the last portion, the new yard and service area on the far wall. Once done with that I will begin wiring.

As always suggestions, comments and critique always welcome. This layout includes lots of ideas I have gotten and skills learned here on the forum, so thanks to all who contribute.

Attachments

Images (14)
  • IMG_2199
  • IMG_2200
  • IMG_2218
  • IMG_2215
  • IMG_2216
  • IMG_2219
  • IMG_2220
  • IMG_2221
  • IMG_2222
  • IMG_2226
  • IMG_2223
  • IMG_2224
  • IMG_2225
  • IMG_2227
Last edited by Rich883

Add Reply

Post
The Track Planning and Layout Design Forum is sponsored by

AN OGR FORUM CHARTER SPONSOR

OGR Publishing, Inc., 1310 Eastside Centre Ct, Suite 6, Mountain Home, AR 72653
800-980-OGRR (6477)
www.ogaugerr.com

×
×
×
×
Link copied to your clipboard.
×
×