I am learning to patch, repaint, and 2 rail some rolling stock for my RR construction & leasing company BOPX.  I thought I'd document the process as I learn what works and what doesn't for me.

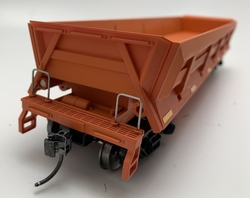
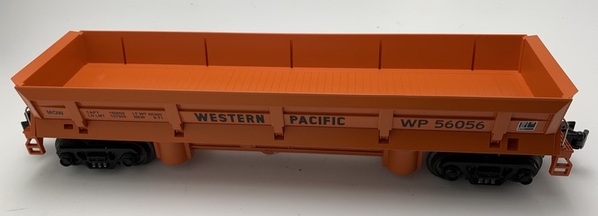
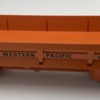
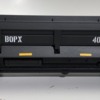
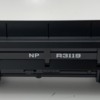
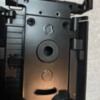
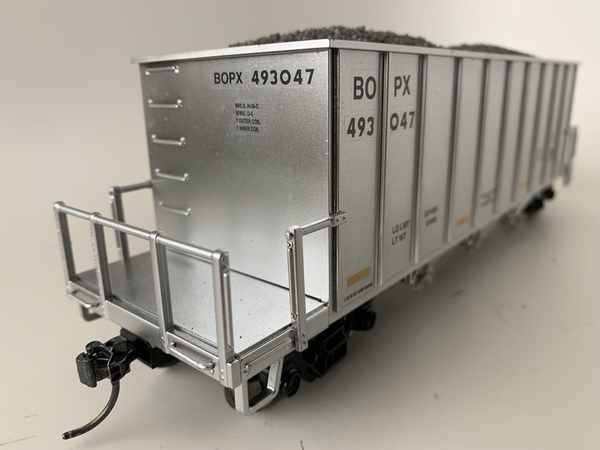
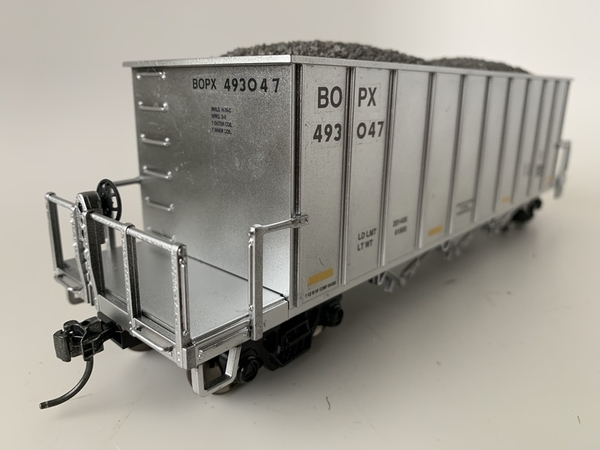
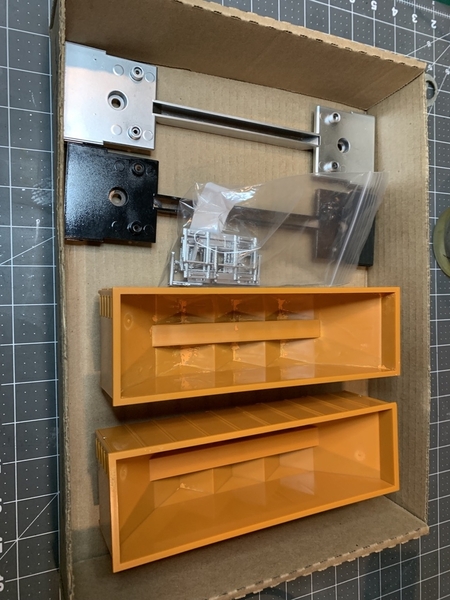
This RK Diffco side dump hopper's WP lettering was removed with 100% isopropyl and a magic eraser.  Paint was touched up and lightly textured using TCP Chessie Orange with a (mostly) dry brush.  Decals are by CMR, flat clear coat was applied over decals.  2 mm reflective pinstripe safety tape was applied.  2R trucks are MTH.  Eventually I would like to weather the car, but am enjoying it clean for now.  The electronics for dumping the car were left inside for future dead rail use. 

Diffco 1 After

Diffco 1 End Shot

Diffco 1 Before

Attachments

Images (3)
  • Diffco 1 After
  • Diffco 1 End Shot
  • Diffco 1 Before
Original Post

Replies sorted oldest to newest

Thanks Bob2, I believe Atlas bought the molds and will be releasing the Diffco cars soon.

https://shop.atlasrr.com/c-160...rating-dump-car.aspx

The Diffco cars have a cool motorized dumping feature when used with an accessory track.  I tried to power the car with (2) 3V coin cells and a reed switch to activate, but I think it was too much current or back EMF for the batteries as the motor would stop half way and the batteries got warm.  (Testing with my bench power supply showed 6 VDC worked with 60 mA of current draw.)  I might use a rapid discharge hopper with larger battery inside to power a few of these in the future.

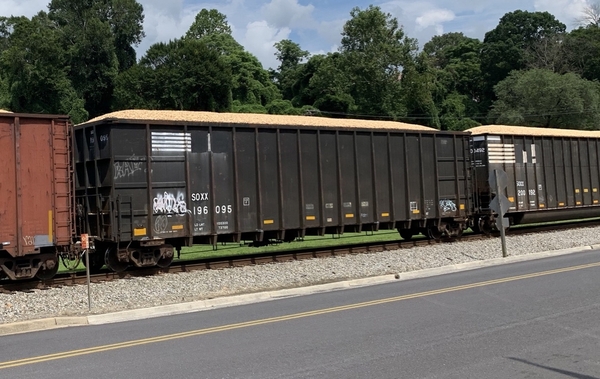
Ron045, Boilermaker was correct (thanks) in that I am re-lettering the cars for my RR and "patching out" the old reporting mark.  Below are some photos of real life patch jobs.  I have plans to make a patched NS wood chip hopper.

IMG_3877IMG_3876

Attachments

Images (2)
  • IMG_3877
  • IMG_3876
Last edited by ESPEE 8722

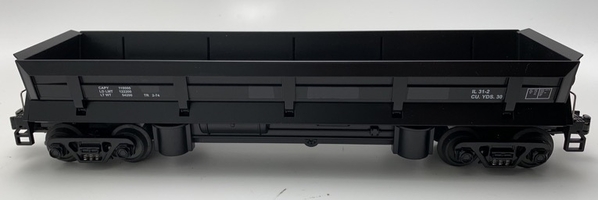
Another victim, this time an NP Diffco car.  Same process as before, except the NP markings were patched out using a black gloss enamel paint pen.  After it was sprayed with a flat clear coat, it is hard to see where the paint pen was used.  Decals went on better as the factory finish wasn't affected under the decals.

Diffco 2 After

Here is the car before mods:

Diffco 2 Before

After using the paint pen, before the flat clear coat.:

Diffco 2 Patch

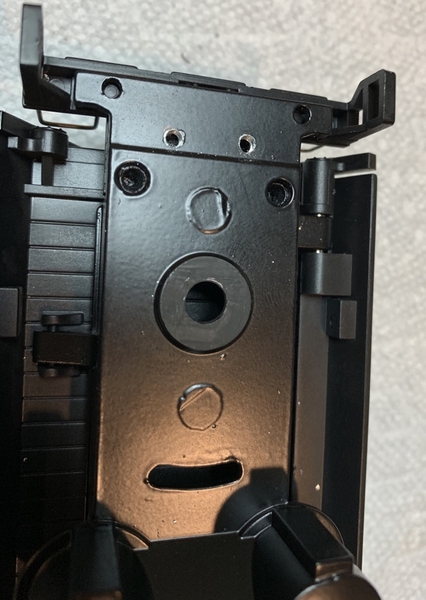
The metal base was tapped with #2-56 threaded holes for the Kadees, and a partial shim was required to compensate for the height difference between the end sill and bottom of the car.

Diffco 2 coupler tapsDiffco 2 coupler

Attachments

Images (5)
  • Diffco 2 After
  • Diffco 2 Before
  • Diffco 2 Patch
  • Diffco 2 coupler taps
  • Diffco 2 coupler
Last edited by ESPEE 8722

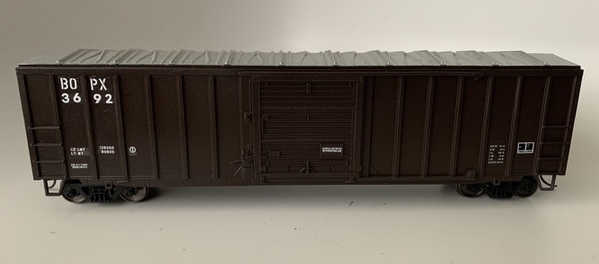
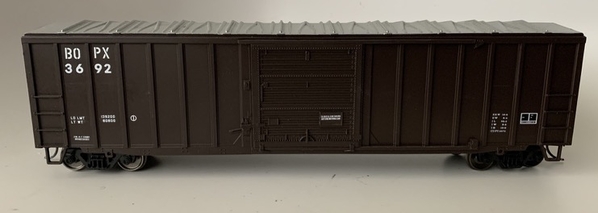
Currently planning the decals for this box car and wanted to ask the forum masters how to treat the areas which will be under the decals. The car is painted flat brown.

Was thinking about brushing Microscale Gloss on the areas where the decals with be placed?

I saw that Microscale recommends airbrushing the gloss, but I try to minimize my airbrushing (hassle to clean).
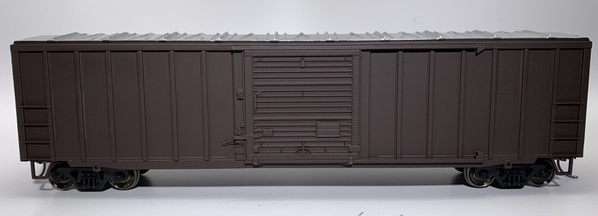
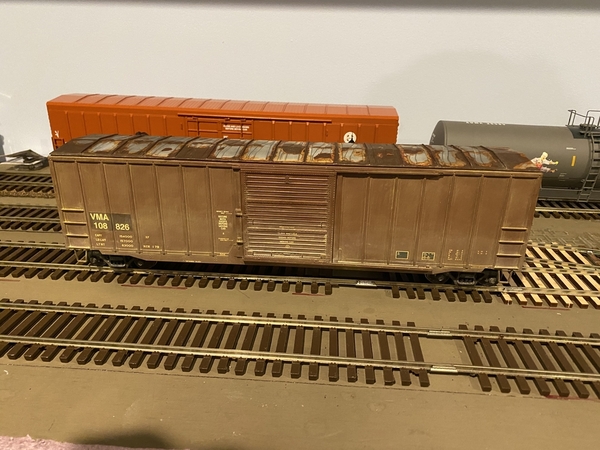
IMG_4535IMG_4536


Some background on this box car project:

This 50' box car started out as a BNSF Lionscale (former Weaver).  It became a "learning" car while I tried different methods to remove and eventually patch out the original graphics.

The printing method which Lionel uses (UV-cured ink) proved indestructible to both 100% isopropyl alcohol and easy-off oven cleaner.  The easy-off would take the paint off, but the graphics remained.

Next I decided to patch out the graphics with brushed black gloss enamel paint.  That didn't work well, I needed to put a lot of paint on to hide the graphics, and probably didn't mask it well enough as I got some runs.

What you see here is a repaint with flat brown and a "metal look" craft paint on the roof.   From reading some posts on a RR weathering forum, apparently overspray of the car body paint onto the roof is very realistic.  The texture looks galvanized to me.

When held in the right light,  you can still make out the the embossed graphics from Lionel. My previous patches are also very evident.  It is supposed to be a "used" box car, so I am OK with that.

Trucks are Weaver with IM wheels.

Attachments

Images (2)
  • IMG_4535
  • IMG_4536
Last edited by ESPEE 8722

I wouldnt brush anything under decals. Brush strokes and too much risk of a blob or a bristle getting stuck in it. Decal film will show anything, so you want it as smooth as possible.  Use spraycans for modeling if you dont want to break out an air brush.  Tamiya spray cans or testors if you can find it will do the job. Dont need RR colors for patch work. Tape off the patches, spray them a patch out color (black, white, not quite the same brown, whatever). Then gloss coat the whole car. Do the decals, gloss coat again. Let it dry for several days. THEN dullcoat it. The galvanizing on the roof turns whitish as it oxidizes.  You can wash the roof with diluted light grey acrylic to get this effect, it also dulls it down.
Last edited by Boilermaker1
@bob2 posted:

Me too - but way better to start with a gloss color coat.  Then the Future can be applied with a Q-tip, before and after decaling.  Dullcote after everything is done.

Stretch it out over a week, allowing drying between each step.

I paint mostly with ScaleCoat II as it has a gloss finish. Then I apply decals then use flat over the decals and then can also weather the car.

Dick

It's been a while, but I finished a few cars in the past several months.

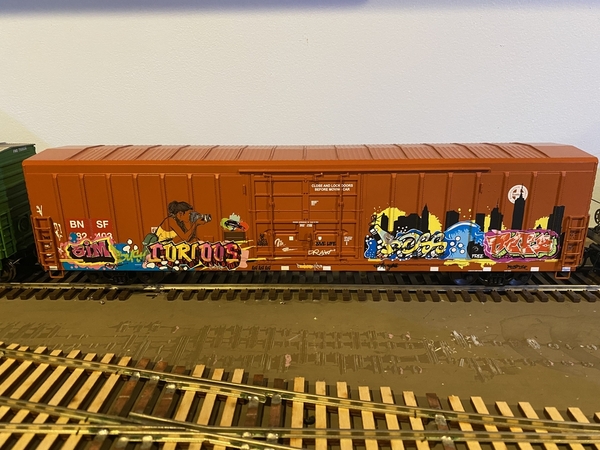
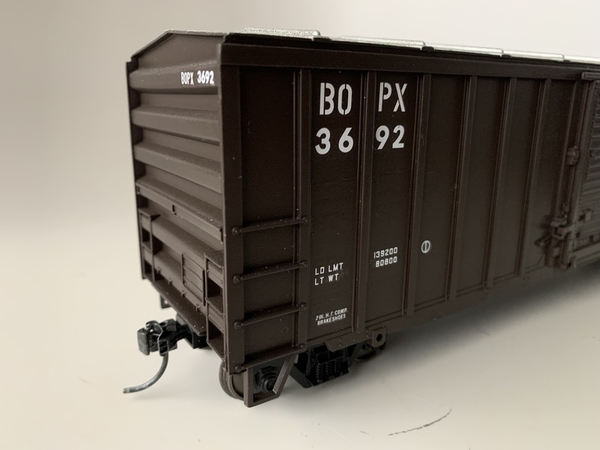
The box car turned out OK.  In the areas where I had messed up the base paint trying to remove the Lionel "forever ink", the decal edges are visible.  In the other areas with the good paint, using the gloss & matte finishes, I'm happy with the result as a repaint.

The guys in the paint shop need to hold the CMR and Microscale stencils straight next time!

IMG_5772IMG_5773IMG_5774

Attachments

Images (3)
  • IMG_5772
  • IMG_5773
  • IMG_5774
Last edited by ESPEE 8722

Also finished my NS Woodchip hopper which started as an MTH SF hopper with 2 broken ladders. The new ladders are Plastruct G scale with mounting clips.

Decals turned out better, it helps that I listened to you all and used gloss paint this time...

Microscale Southern woodchip hopper and CMR NS box car decals were used.

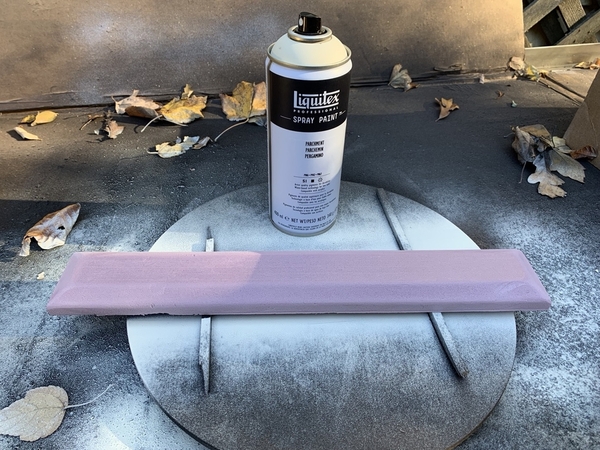
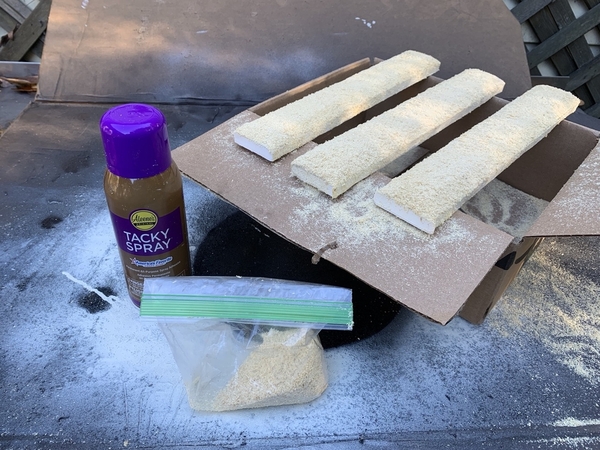
The woodchip loads are XPS foam cut and beveled on my mini table saw, sanded, painted, then sprayed with adhesive, sprinkled with sawdust, repeated 2X.

IMG_5775IMG_4485

IMG_5060IMG_4538IMG_4539

Attachments

Images (5)
  • IMG_5775
  • IMG_4485
  • IMG_5060
  • IMG_4538
  • IMG_4539
Last edited by ESPEE 8722

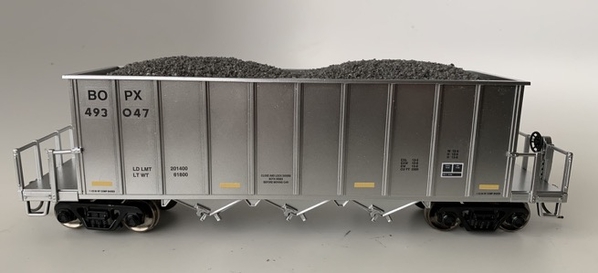
Finished my repaint / 2Ring of an MTH rapid discharge / Ortner hopper.  Decals are by CMR for Conrail ballast hoppers.

Paint was stripped with 99% Iso Alcohol, and a black gloss primer was used.

The Tamiya silver metallic lacquer (TS-083) paint gave it a great metal look.  You can't use spray clear coats with this paint though, so the decal edges are pretty visible.  I didn't want to mess with other coats (like wax or floor cleaner) since the paint is fragile.  When I over sprayed one railing (brake wheel side), the metal formed into chunks.

The MTH rock load was painted dark grey then sprayed with adhesive, sprinkled with ballast, and repeated 2x more.

The coupler mount is two pieces of 1/16" laser cut acrylic stacked to 1/8" thick total and tapped for 2/56" screws. An All Nation Line 3D printed coupler shim was used also.

IMG_5841IMG_5842IMG_5846IMG_5847IMG_5840IMG_5289

Attachments

Images (6)
  • IMG_5841
  • IMG_5842
  • IMG_5846
  • IMG_5840
  • IMG_5847
  • IMG_5289
Last edited by ESPEE 8722

Is there a decent website to show modern patched-out boxcars and suchlike? I know of Railroad Picture Archives and Railpictures.net, but struggle to find 'modern' photos of older, Ex-Class 1 or ex-Per Diem cars for instance. What search terms work the best?

For those of us on the wrong side of The Pond (a.k.a. Atlantic Ocean) it's not an option to just take a trip to the lineside and look out for what rolls by. I have some 'fallen flag' cars I'd like to patch for more modern service - including the unfortunate but inevitable rust & graffiti - but would like some prototype references for guidance, so it looks plausible, even if not 100% accurate.

Many thanks, Jordan.

@ESPEE 8722 posted:

Another victim, this time an NP Diffco car.  Same process as before, except the NP markings were patched out using a black gloss enamel paint pen.  After it was sprayed with a flat clear coat, it is hard to see where the paint pen was used.  Decals went on better as the factory finish wasn't affected under the decals.

Diffco 2 After

Here is the car before mods:

Diffco 2 Before

After using the paint pen, before the flat clear coat.:

Diffco 2 Patch

The metal base was tapped with #2-56 threaded holes for the Kadees, and a partial shim was required to compensate for the height difference between the end sill and bottom of the car.

Diffco 2 coupler tapsDiffco 2 coupler

I did an Atlas AGP car by covering the AGP with black decal film from  MicroScale. Worked really well.

Add Reply

Post

OGR Publishing, Inc., 1310 Eastside Centre Ct, Suite 6, Mountain Home, AR 72653
800-980-OGRR (6477)
www.ogaugerr.com

×
×
×
×
Link copied to your clipboard.
×
×