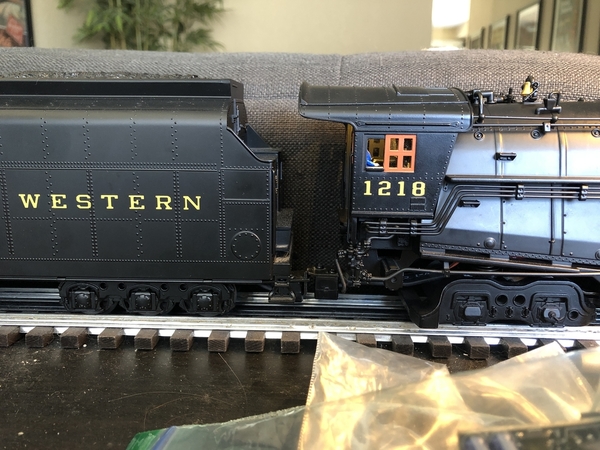
So far I’ve converted only two loco’s to Legacy an early Lionel AC-9 , and a 3rd Rail T&P 610. I’ve been promising this build for about 2+ years now. I had great success with my early AC-9 conversion. Ive been so busy with other peoples items I haven’t had any time to “clear my desk” and start work on this. But that ends now. This will be the First Scale Lionel Class A with Legacy in existence (to my knowledge) it will have full Legacy sound and features. This includes whistle steam and possibly a swinging bell (which I don’t believe is “prototypical”) I have had a lot of time to think on how to approach the installation and its pretty much the same as my AC9 project in that respect. The real hurtle will be adding the whistle steam feature-ill have to clearance the shell, drill some holes, and route plumping which if I mess up will be a costly mistake. I will be using a Dual Smoke Unit at this point in time. Another hurtle as always is building the harness for the loco, making a clean install using factory style plugs and crimped ends. I’m really excited to get this project rolling.


I did ask on the forum before if people would want this conversion on their own model. You can wait and see how this project turns out. You can always contact me via email about the pricing, FYI... Lionel most likely will not reproduce the Class A. They would have to start from scratch, create new tooling and we all know how often Lionel does that...


Follow me on this adventure!

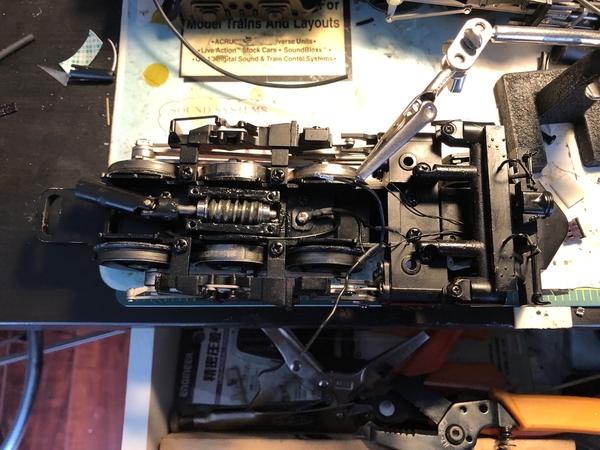
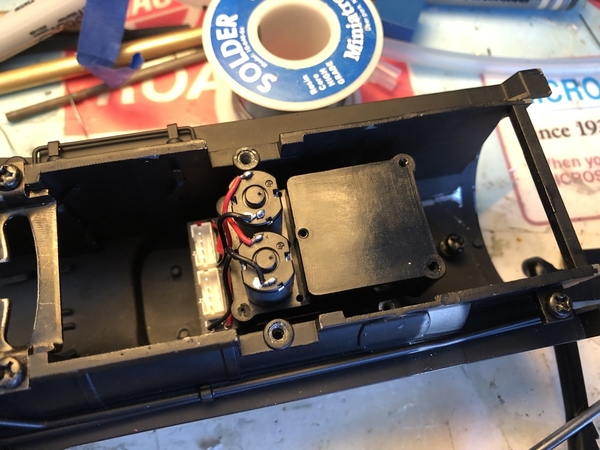
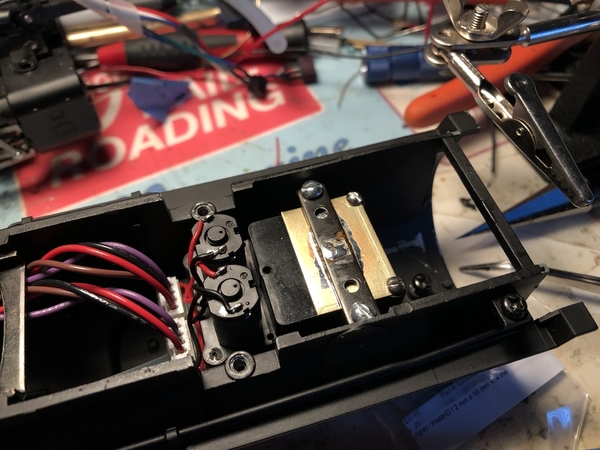
Here is the start of the tear down!

F625F54A-1BFF-424C-92F7-BDA8BD93EF6A91697422-D208-4E97-86D8-B8CD492355A8

Attachments

Images (2)
  • F625F54A-1BFF-424C-92F7-BDA8BD93EF6A
  • 91697422-D208-4E97-86D8-B8CD492355A8
Last edited by Bruk
Original Post

Replies sorted oldest to newest

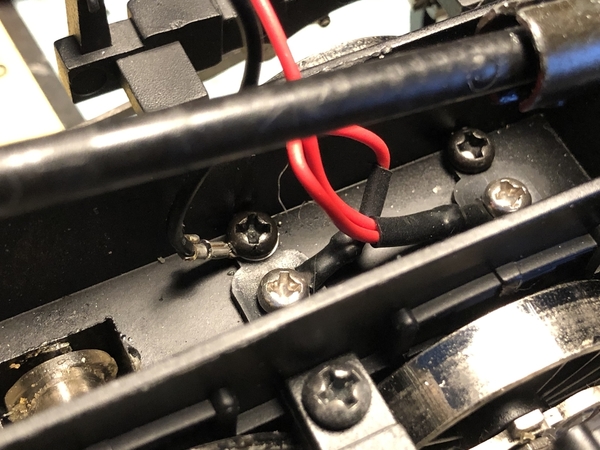
Hey Bruk, in the picture of the engine, there is a small black plug, with male pins inside it, sticking up just above the DCDR. By chance could you tell me where the end of the red wire connects to? I've been converting mine to a cruise M, and just as I was wrapping up, I notice this red wire is loose and I cant tell where it should go to. I believe its for the headlamp?

Keith L posted:
Bruk posted:
FWI Lionel most likely will not reproduce the Class A. They would have to start from scratch, create new tooling and we all know how often Lionel does that...

What about Lionel's scale Class A tooling that was made in Korea?

It was stolen from MTH I believe. Look at how similar the Protosound 1 version compared to this model. 

The Scale N&W Class A, Pennsylvania RR T-1 and New York Central Dreyfus Hudson were the 3 engines at the center of the lawsuit from the documents I have read. While I would never say never, it certainly is unlikely to see  those 3 rereleased.

Like you Bruk, I had my TMCC Class A gutted and converted to Legacy using the lionmaster A components and it’s very much worth it.

What a Beautiful locomotive now - especially with that perfect hooter whistle. 

Last edited by M J Breen

These are the types of projects that interests me the most. Very cool to see this happen. Hopefully I can find a way to put the legacy prr t1 sounds into my scale t1 that was made only with tmcc. 

And Bruk - The shay still runs great! Thanks for a great job. SInce you could fix my problemed shay you can do this install (t1 one someday to?

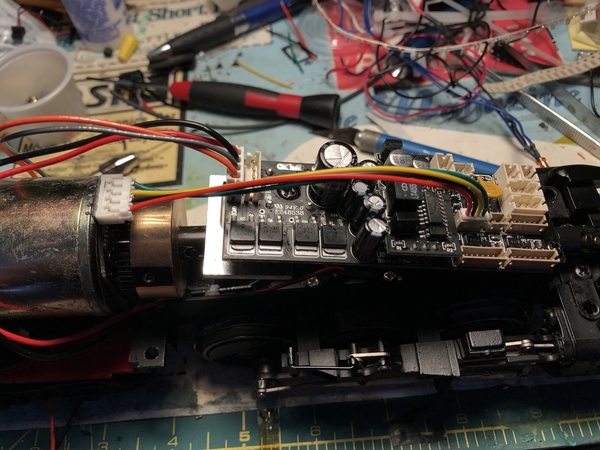
Got all the unneeded boards and wire stripped from the loco. I like to reuse some of the wiring/plugs at times so ill keep it close. I also got the motor reworked mounted with a new flywheel and encoder. I had to shorten/grind down the shaft common to the worm gear so I could fit the dog bone properly mounted the RCMC mount to the drive block. Ill be doing the front drive and reworking the headlight/harness. When I do these kind of conversions on older models I always disassemble the drive/entire motor. Then clean I and reapply fresh lubricant to the needed areas. 

Attachments

Images (5)
  • 9ACEA42C-839A-4A1F-ADE0-A9B48EC4E6D8
  • 95249D1D-2AEA-48D1-AA46-D834E1C4B5CE
  • A89F8EC6-AD23-4039-BBED-56B929677FD1
  • 970422AE-CEAF-4F2F-ABFF-159C58F269DF
  • 28D1DE18-F70E-4497-AB12-0425B2893D2A
Ted S posted:

@Bruk I'm curious, what was your donor engine for the T&P 610?  Or did you just buy the motor and boards from Lionel service?  In order for the speed steps to match "factory" Legacy locos, the inches traveled per revolution (i.e., driver size divided by gear ratio) have to be close.

The T&P project used Lionels BEMC board not RCMC. BEMC uses back EMF instead of an flywheel encoder and uses a Hall Effect Sensor/Magnet for chuff... If you go back into that thread and the wiring diagrams I have created that are on this forum I talk about how they function.

The only time I have stripped another Loco for harvesting was an early Legacy Lionmaster 3985 Challenger and I threw the parts into the Scale JLC 3985 Challenger. 

Typical Gear ratio that I have seen from Lionel is 16 revs of the motors flywheel is 1 rotation of the drivers so (16:1) 

Last edited by Bruk
M J Breen posted:

The Scale N&W Class A, Pennsylvania RR T-1 and New York Central Dreyfus Hudson were the 3 engines at the center of the lawsuit from the documents I have read. While I would never say never, it certainly is unlikely to see  those 3 rereleased.

Hmm, I guess that really explains a lot. I would use one of my quotes, "AHA!", which is loud and drawn out. Well, I'm also one who will be optimistic. I know that if I talk about these 3 engines a lot when around some of the folk at Lionel, that maybe it will start a ball slowly rolling and we'll see these down the road(3 years or so). I would imagine that they will have to get around to them because they can't keep them off the drawing board for too awful long.

@Bruk, what you're doing is darn cool, I know I couldn't do it even if someone else was operating my hands. Can't wait to see more.

Last edited by Dave NYC Hudson PRR K4

Wednesday night in the 3 hours I had. I reworked the front drive. The roller bearings common to the drive/worm gear were really rough and tight felt worn out, one of the bearing cover actually popped off, I removed them and cleaned them out with some IPA, repacked them and tapped the covers back on and good as new!


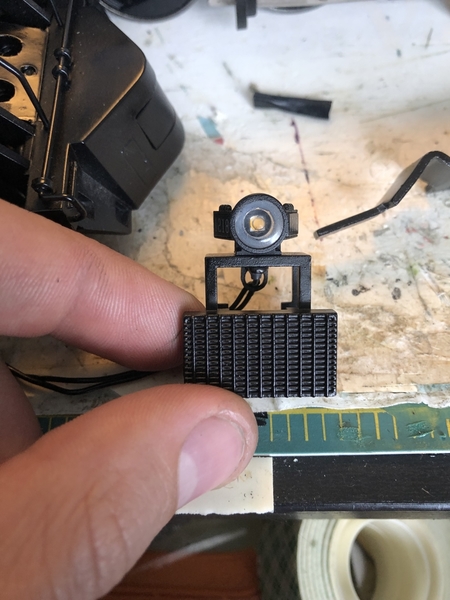
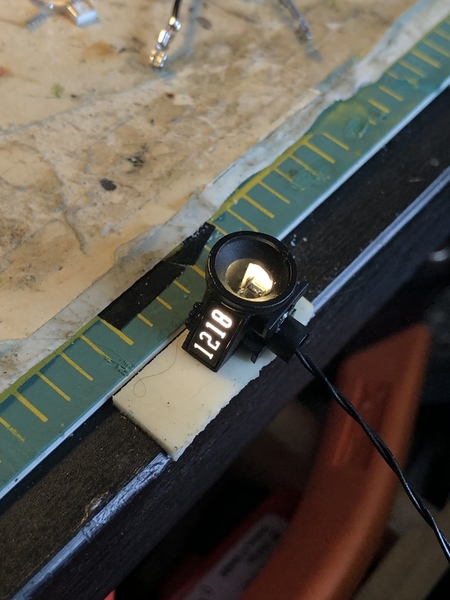
After that I started work on the headlight, I originally inserted one 3528 LED in there and I wasn’t pleased with how the number boards looked. I ended up adding separate LEDs for the LH/RH side then separated the power from the headlight. So they lite up via track power and the headlight will come on via RCMC function similar to the AC9.


With the headlight I decided to try a Dual Sealed Beam look. I took two 0603 LEDs separated them on a small PCB and then glued it in place. I filled in the cracks in the housing then painted it silver. The headlight Lens had to be cut/filed down so it could fit in the housing. Got it mounted back on the pilot and reworked the wiring/harness between the loco and drive.

8A9D11EA-5A35-403F-8EAC-640DEACF0C11E52A61D9-E479-496B-9E81-708ACE8E20C02A3EB42B-C693-4856-AC78-1CCB089D3090C38DE0DC-ABD5-418F-AA8D-AC8302E6F07B21EF4E0F-E6BA-4CED-9127-60CD80615ED313EFB4DF-C61D-42C8-8852-CC9695601502

Attachments

Images (6)
  • 8A9D11EA-5A35-403F-8EAC-640DEACF0C11
  • E52A61D9-E479-496B-9E81-708ACE8E20C0
  • 2A3EB42B-C693-4856-AC78-1CCB089D3090
  • C38DE0DC-ABD5-418F-AA8D-AC8302E6F07B
  • 21EF4E0F-E6BA-4CED-9127-60CD80615ED3
  • 13EFB4DF-C61D-42C8-8852-CC9695601502
gunrunnerjohn posted:

I love the headlight treatment, I'm impressed you get four LED's in there, I'd like to see that a little closer!

This is going to be a very deluxe job!  I know that Lionel somehow fits multiple LED's into these lamp holders for Vision Line stuff, but they have the money for custom molds and the like.

I dont think i could show you again at this time. Id have to destroy it!  

Lionel uses a small PCB with three wires connected to it. On that PCB is three 0603 or Right Angle LEDs. They are grounded together but side facing and forward facing LEDs are separately powered. 

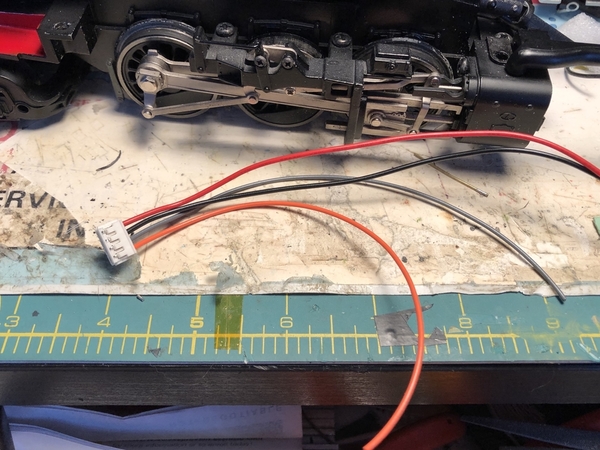
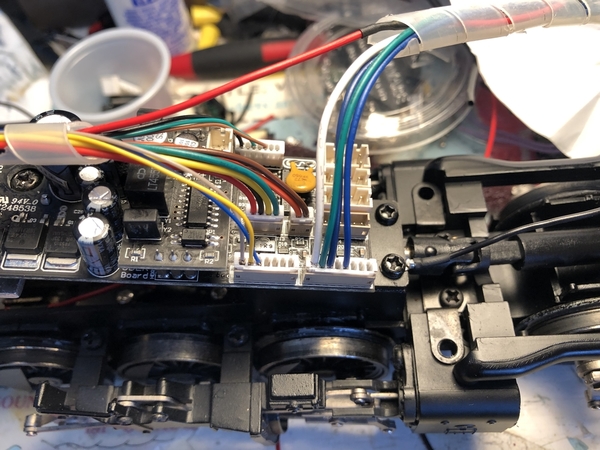
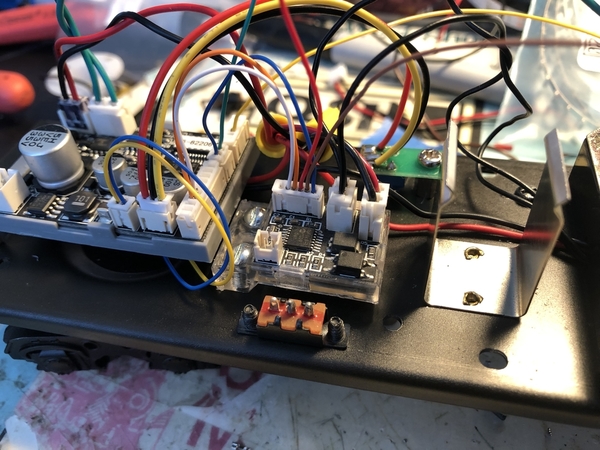
I got a lot done in 6 hours Friday after work, I got 80% of the harness for the locomotive made up. I still got to make a plug for the antenna wire that goes between the shell and RCMC board. I also need to make and install the new cab lights instead of the original single light bulb.

When I start with a conversion in any scale I always start with the motor and power pick up.  I then work my way “up” the chassis. I also try and follow the NMRA standard for wire color common to those outputs. But since this is all Lionel parts and Lionel uses all grey wire now I’m not going to be to broken up about the proper wire color.

So I started with the power and motor wires. I trimmed and crimped new plug inserts for the board. Then I made a harness for the flywheel encoder. I flipped the plug on the encoder board for a cleaner install. I reused the original IR/wires since it isn’t a 3 wire. I also reused the Prg/Run switch and the Smoke On/Off switch. Usually on a Lionel factory engine there are multiple On/Off switches for the smoke units. I haven’t decided yet if I want to go through the trouble of adding another switch for the whistle steam effect. Ill probably just tie both into the one switch.

I accidentally damaged the female plug on the firebox flicker board with the soldering iron and didn’t have a replacement so I just soldered the wire directly to that board. After that I created the harness for the connection with the headlight and center roller pick up on the front drive. I also made a small harness from the RCMC to the front marker lights. I reused the clear twist wire holding tubing stuff  to hold everything together nice and clean. 


B2FD34C5-26E4-40AC-8BDF-4A45CBCA584DBAC4B78E-7048-4AB1-BC53-AFEA089F291AAB111B39-18CD-4776-BC0F-042552CF293942D7C812-81B1-4CB6-8542-0EF137E4BD57AC1D8D80-C2DD-41C3-BEC0-033D847FEBD5A81DBCEF-FBC9-4E53-9C62-0F8316868AAF8C855944-4C03-4BF9-8968-D3AA3653E9B6A1399CB9-40CE-497D-BE45-8B7A25F9FC547FEC2761-F4CE-4919-9BFA-CA6BE718B04586319274-D78E-4091-8BFF-734F6757C9A022ECB052-AAEB-412C-9528-8795535E02D8A06DC715-00A2-4F94-8D14-5700A9A4AD8A

Attachments

Images (12)
  • B2FD34C5-26E4-40AC-8BDF-4A45CBCA584: Blank Slate
  • BAC4B78E-7048-4AB1-BC53-AFEA089F291A: Power and Motor wire harness
  • AB111B39-18CD-4776-BC0F-042552CF2939: Hand crimped! Its beautiful.
  • 42D7C812-81B1-4CB6-8542-0EF137E4BD57: Power pick up
  • AC1D8D80-C2DD-41C3-BEC0-033D847FEBD5: Soldered Motor Wire/Power Wire
  • A81DBCEF-FBC9-4E53-9C62-0F8316868AAF: Reused the Chuff Switch bracket
  • 8C855944-4C03-4BF9-8968-D3AA3653E9B6: Scratch built Encoder harness.
  • A1399CB9-40CE-497D-BE45-8B7A25F9FC54: More completion
  • 7FEC2761-F4CE-4919-9BFA-CA6BE718B045: Added a Center PWR pick up wire for the front drive.
  • 86319274-D78E-4091-8BFF-734F6757C9A0: Lighting Harness
  • 22ECB052-AAEB-412C-9528-8795535E02D8: Switches
  • A06DC715-00A2-4F94-8D14-5700A9A4AD8A: Complete Cook up between both main and rear drive.
Last edited by Bruk

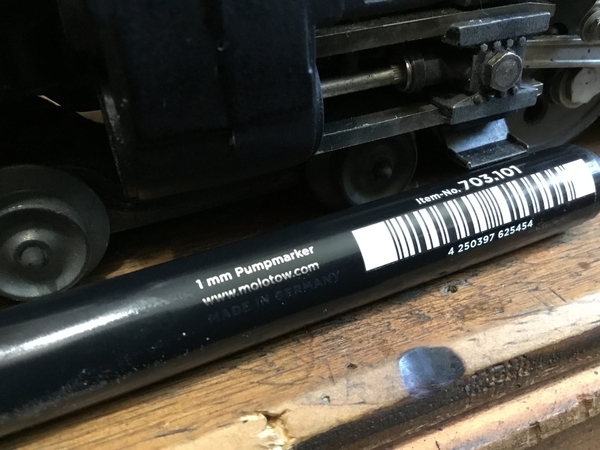
44EFAB76-9218-4CF8-B0AE-D8FBCE89EE85Bruk, I can not take all the credit for making nicer headlights for NYC stuff, Pete’s the one that turned me on to making better than OE headlights ....these are brass stampings I’ve made from a doming set......the reflector on the outside is painted with the Molotow liquid chrome paint pen....the other reflector with out any hole punctured yet, is obviously raw brass....but as you can see, the Molotow pen is worth it’s weight in gold, or chrome....ha ha ha...........Pat


Attachments

Images (1)
  • 44EFAB76-9218-4CF8-B0AE-D8FBCE89EE85

I found mine on eBay but you will find it at Amazon, or many art stores like Blick's. I bought  1mm and 4 mm pens plus a refill bottle of paint that you can use in an airbrush for bigger jobs. I may have pointed it out to Pat but he told me the best way to use it for this application. Basically flood the area with paint and let it flow around. Don't try and paint it on like you would a magic marker if you want to high gloss shine.

Pete

Last edited by Norton

So after everyones good input ill will be re-doing the headlight reflector, I just need to go get that marker! 

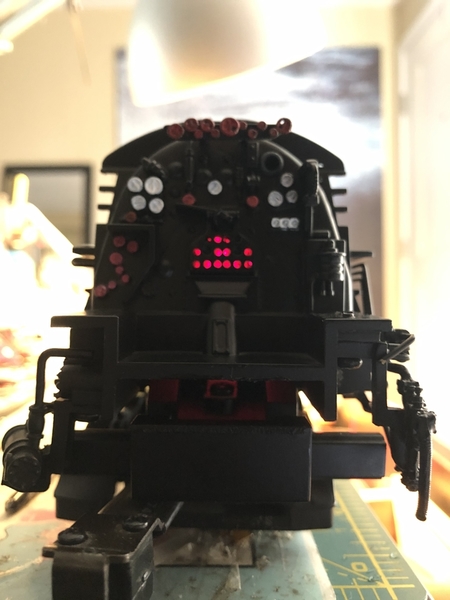
I continued work on the engine yesterday. I reworked the marker lights on the front. They were wired in series so they were a little dim for my taste. I rewired them to be in parallel and they look much better now. 

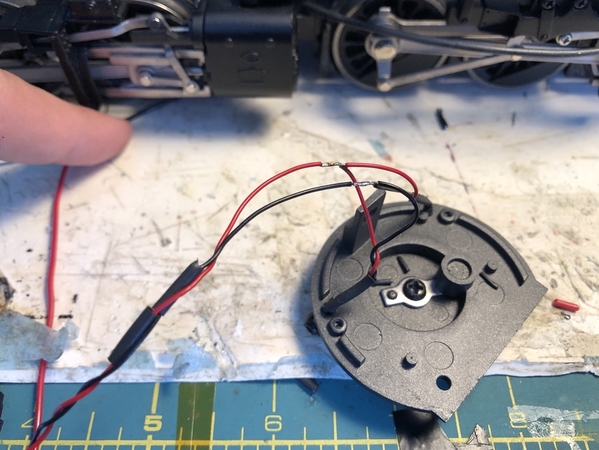
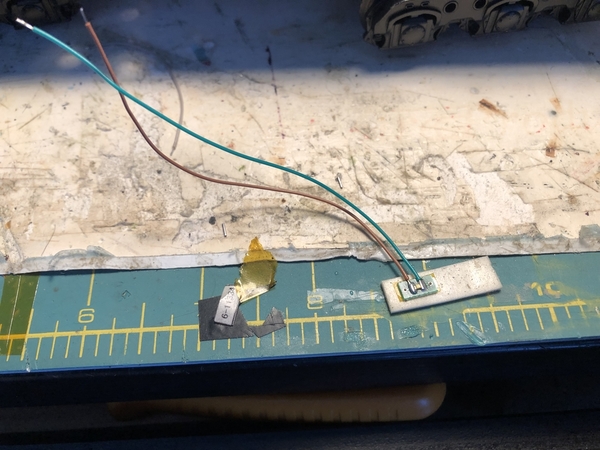
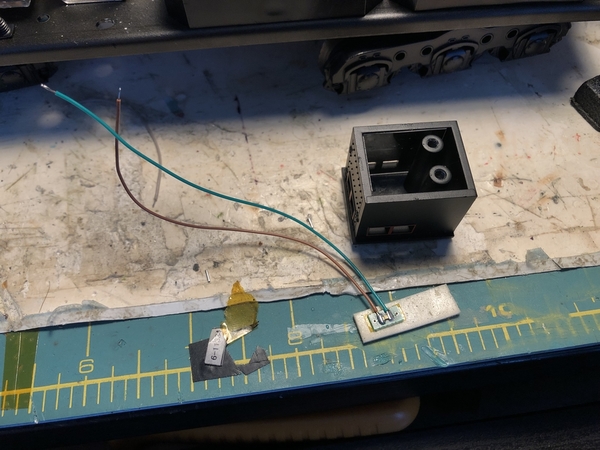
I also added new Cab lights. I took these little solder pads you can get a Ngineering.com and I solder two 0603 WarmWhite LEDs to them. I super glued them to the underside of the cab roof then wired them in parallel. I ran the wires through the old cab light hole and tied it in with the RCMC board. 

I adjusted the Firebox flicker boards height with some small brass stock so it line up with the fire box doors. I added some sticky back red LED strips to the sides of the motor to shine down through the ash pan. I solder them to the motor leads with a tiny Bridge Rectifier in line so the LEDs would always glow according to the motors polarity.

BFCE8583-5678-4AB2-8785-8102CFB4C4754BC6ACAC-B9B8-4523-BBD9-DA6D7BF311D0127FA17D-0D84-46F1-A658-13C5BA37BF73242F4553-CF5A-4746-8806-6E434F97D2E958818EFC-8326-4D2A-8660-6B3490E19B4B169AD69F-5313-49A7-80D7-4C78F9DD5F772A289EA6-3E6F-4B78-8D99-02179F63CAD6C30EDAB9-64B2-4042-8A93-E3534390CF746ADD3BA2-7E55-4222-9D59-A616AF85C13C1A1B4724-CBB3-4A74-8935-628F8E1DF6662BDF5445-762B-4DFE-B27B-36A66B635A58A11BBEE4-A82E-4F01-A975-F6C24B86F3B7077EFC51-2C0F-44A2-A0FD-ABE96F615A57

Attachments

Images (13)
  • BFCE8583-5678-4AB2-8785-8102CFB4C475
  • 4BC6ACAC-B9B8-4523-BBD9-DA6D7BF311D0
  • 127FA17D-0D84-46F1-A658-13C5BA37BF73
  • 242F4553-CF5A-4746-8806-6E434F97D2E9
  • 58818EFC-8326-4D2A-8660-6B3490E19B4B
  • 169AD69F-5313-49A7-80D7-4C78F9DD5F77
  • 2A289EA6-3E6F-4B78-8D99-02179F63CAD6
  • C30EDAB9-64B2-4042-8A93-E3534390CF74
  • 6ADD3BA2-7E55-4222-9D59-A616AF85C13C
  • 1A1B4724-CBB3-4A74-8935-628F8E1DF666
  • 2BDF5445-762B-4DFE-B27B-36A66B635A58
  • A11BBEE4-A82E-4F01-A975-F6C24B86F3B7
  • 077EFC51-2C0F-44A2-A0FD-ABE96F615A57

So I wrapped up the wiring in the engine minus the smoke unit(s) everything is working as it should. I set the loco aside and started working on the tender.

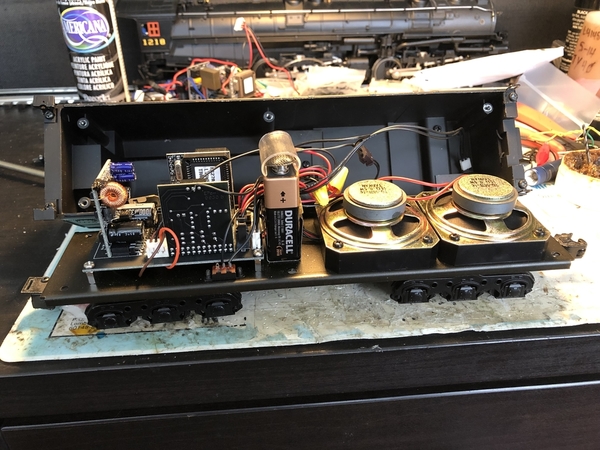
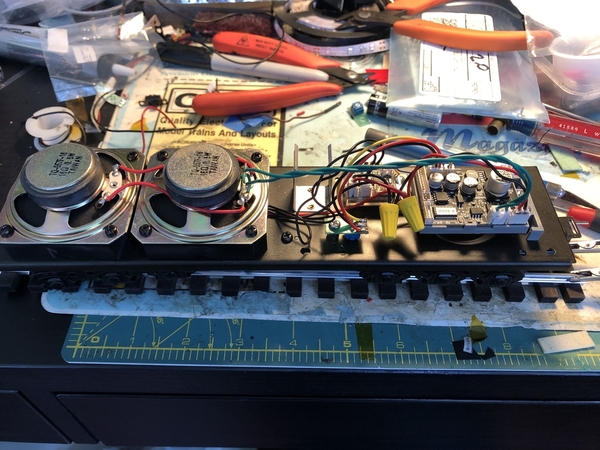
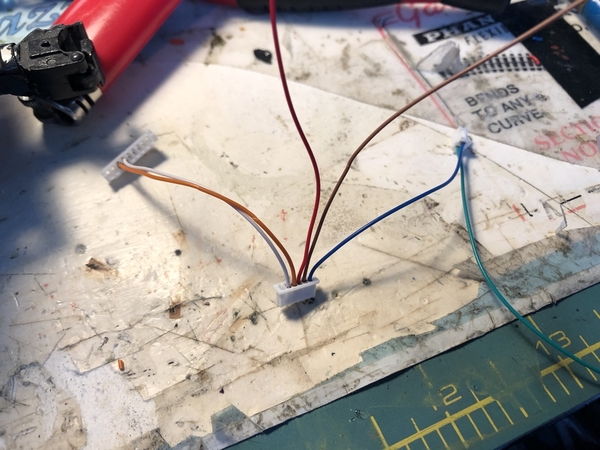
I laid out where I thought the best place for the boards would be and drilled and tapped for 4-40 screws to hold the boards in place. I’m using a MTH trim pot in place of the old one and mounted it above the Original Hole. I started wiring up the power leads to the LTC and RS board trimmed and crimped new connectors. I had to rework the IR wires to be smaller and longer due to the size of the connector that is used on the RS board. I had to cut off the original coupler connector and crimped the proper one that is used. I also wired in the trim pot to the RS board.

Since all of the harness’s used on this are made from scratch I had to make another to connect between the LTC and RS board. Crimping the 1.25mm connectors are a pain. I had to redo a couple because they rolled over in the crimps but in he end if not better than factory...which is not saying much.

I added a 0603 Warm White LED to the top of the doghouse and fed the wires down through the original bulb hole. I didn’t take a picture but I painted the wires black.

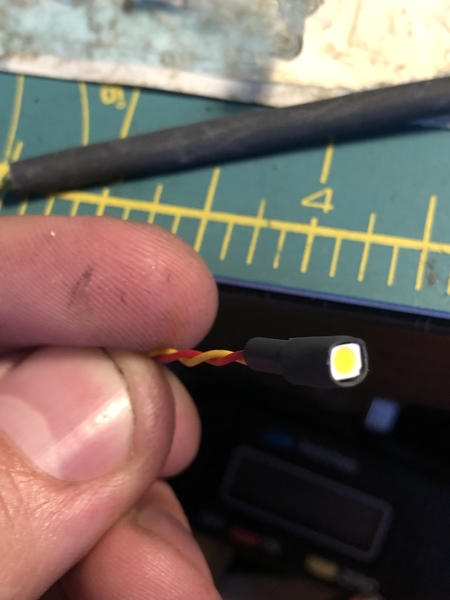
I used a 3528 Warm White LED for the reverse light. I covered it in heat shrink and used it zip tie around the old mounting bracket to hold it in place. I ran all four wires together into a 4pin connector and connected that to opposing side that connects to both the RS and LTC board.

I’m currently using the old speakers. I plan on installing different speakers for my loco. Probably going to go what Lionels calls “FatBoy Speakers” Which are just large coiled speakers. Hoping these will deliver more base. 

B2ADC372-181A-4621-B9A6-7B2A192CF18BA4366C7F-4DA1-4571-AA74-A7B6BA5FCA32726AFFBE-43F0-4297-ABFE-A0DEA80CBDA529757315-0870-4045-BFB5-E9B55CE854E51A85D72F-951C-4D44-BE2C-4FAA4E15334AFDE980D2-C421-463A-8C4C-B73EBC96BFF5BC91DC05-634E-4312-B4C5-6A45991E0DB39D1068B1-D28F-4240-80CE-6C037007234820831598-9F4B-4C9D-8396-3089F27C8E69015A5F9A-2243-4B5C-92EF-0571C7232185845A68FC-EF7F-4633-8097-A41F65DD5A42B53E6616-C796-4F57-B97D-08E97F031E9C

Attachments

Images (12)
  • B2ADC372-181A-4621-B9A6-7B2A192CF18B
  • A4366C7F-4DA1-4571-AA74-A7B6BA5FCA32
  • 726AFFBE-43F0-4297-ABFE-A0DEA80CBDA5
  • 29757315-0870-4045-BFB5-E9B55CE854E5
  • 1A85D72F-951C-4D44-BE2C-4FAA4E15334A
  • FDE980D2-C421-463A-8C4C-B73EBC96BFF5
  • BC91DC05-634E-4312-B4C5-6A45991E0DB3
  • 9D1068B1-D28F-4240-80CE-6C0370072348
  • 20831598-9F4B-4C9D-8396-3089F27C8E69
  • 015A5F9A-2243-4B5C-92EF-0571C7232185
  • 845A68FC-EF7F-4633-8097-A41F65DD5A42
  • B53E6616-C796-4F57-B97D-08E97F031E9C

BRUK said:

"I’m currently using the old speakers. I plan on installing different speakers for my loco. Probably going to go what Lionels calls “FatBoy Speakers” Which are just large coiled speakers. Hoping these will deliver more base. "

Fabricate an enclosure for the speakers. Doesn't have to be fancy, just keep sound from leaking out the back.

rex desilets posted:

Fabricate an enclosure for the speakers. Doesn't have to be fancy, just keep sound from leaking out the back.

I actually liked the sound better out of the original speakers compared to the new ones.

When I reassembled the original speakers to the frame, I sealed those risers to the frame and the speakers to the risers to get a better air seal and it made it even more louder. I probably will build a baffle out of Styrene later. But the tender shell does a nice job already. 

Bruk posted:
gunrunnerjohn posted:

Time for some smoke!

I know! I spent a couple hours trying to come up with the best way to do it. Still haven’t gotten there yet....

It's going to be tricky getting whistle smoke and an easy way to fill the unit.  I have looked at several that I'd like to do that on, but I'm hesitant to start drilling holes in the boiler and have it not work well!

gunrunnerjohn posted:
Bruk posted:
gunrunnerjohn posted:

Time for some smoke!

I know! I spent a couple hours trying to come up with the best way to do it. Still haven’t gotten there yet....

It's going to be tricky getting whistle smoke and an easy way to fill the unit.  I have looked at several that I'd like to do that on, but I'm hesitant to start drilling holes in the boiler and have it not work well!

Maybe get a shell of eBay for a simple engine that's cheap. Of course I guess it wouldn't be the same because of the interior space constraints. Almost like working on a Jeep changing the oil and the doing it for the old Ford Escort. My uncle hated that little car, he was more comfortable helping out on my Jeep(more room).

gunrunnerjohn posted:
Bruk posted:
gunrunnerjohn posted:

Time for some smoke!

I know! I spent a couple hours trying to come up with the best way to do it. Still haven’t gotten there yet....

It's going to be tricky getting whistle smoke and an easy way to fill the unit.  I have looked at several that I'd like to do that on, but I'm hesitant to start drilling holes in the boiler and have it not work well!

That was my feeling on my 3rd rail T&P I couldn’t bring my self to drill that hole. There is plenty of room... in there.

ironman1 posted:

I wasn't aware that Legacy was available for upgrades. Not being a technical/electronics guy & I never installed any aftermarket upgrades, did I miss something? 

It’s not an official upgrade kit like MTH Ps3 or ERR items. The only way to do these “upgrades” is find a donor loco or you have to know everything there needs to know about this generation of electronics, hows its wired how it functions and the different styles of installations in previous models. 

Last edited by Bruk

So after many, many long thoughts about how to approach the smoke unit features this is what I did....

When it comes to the main stack, I found that the best look and performance is to make the exhaust port as large as you can but not to large where the smoke wont blow out very well because there isn’t enough air pressure.

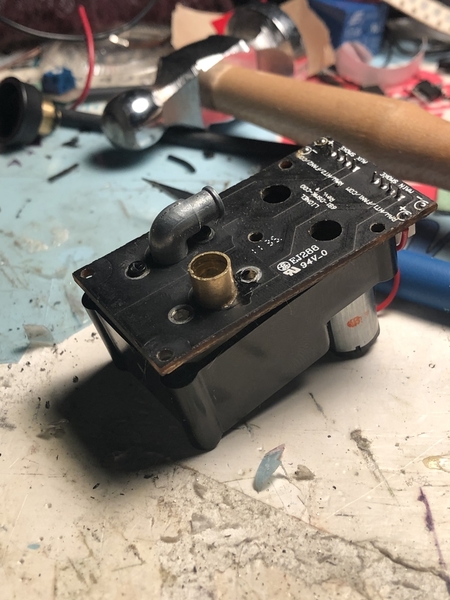
I created the “exhaust funnel” out of brass tubing. First I oversizes the hole in the PCB and stack common to the shell. The tubing became press fit through the PCB. The hole common through the smoke stack was much smaller in diameter. I drilled it up to the same size as the diameter of the brass tubing.

Since the stack on the loco is brass and press fit. I popped it out and solder a small piece of the tubing to the end of it. This gave me just a little bit more material to be able to connect the smoke unit and shell with some silicone tubing. This makes is easier to service later.

After lots of cutting, filing and soldering you get a exhaust stack. I had to clearance the inside of the shell slightly for the wider smoke unit body. I also had to grind away on the lower pipe detail to fit both fan motors. Insulated the base so the motors don’t ground out.

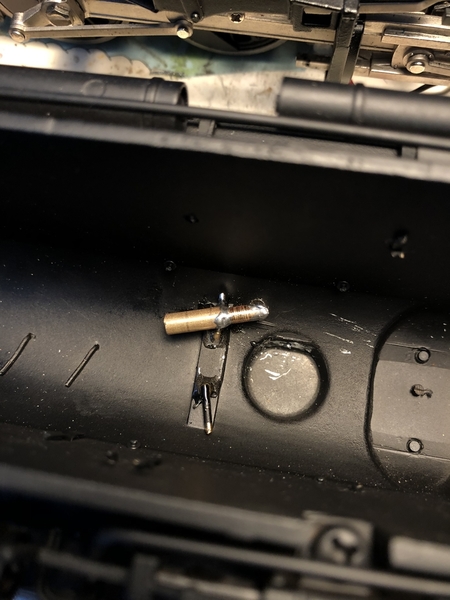
For the whistle steam. I had to remove the actual whistle detail part first. It was incased in epoxy on the inside and had I had to Dremel it away. Once I got the whistle off I could align where I wanted the hole. I painstakingly drilled a hole into the shell underneath where the whistle sits (Killed me a little) and angled it slightly help direct the flow. It matched the outside diameter of the brass tubing I’m using.

Soldered some tubing into an elbow and I lucked out and solder it to some brass standoffs in the shell.

I had to also create a bracket to mount the smoke unit into the shell. I reused the old brace and new brass stock. Made standoffs with the brass tubing and 4-40/2-56 screws.

Had to also create plugs between the RCMC and Smoke unit.

3E68C07E-65C4-4B86-9EAB-9C57B6D37FED634DDCE9-8824-4504-A7EE-8B704F56554F5B0E21E6-43E2-44E1-90CB-D9F55D07C03703DA0A17-DF9F-44B4-ACCA-8A6397BA10D5400D9D74-12EF-4322-8CFC-58753997FBD8996779DE-92CA-4F92-869A-0B3C6C156B6CE54897A8-192A-4DEF-BD74-0E6EBCE1E9C889ED041C-0DC1-42BA-ADE2-5E6D765779BEA31A0413-DE1F-41B1-AAA5-09F5191B127EADAE4AA1-73A3-4295-889A-449BFFCAE5F5A4947167-E49C-4057-B871-19D97CC82F69569654A4-5352-4F67-90E6-4E75C3B57B78D8B5C590-7ED4-4637-AD42-2663DA6B6EC711B758C7-38BA-403A-A377-88DA6667FA07CEF8C3D3-4E86-4AFF-9E2E-F8AB58E850992FF1A8E2-45FE-4731-9514-727EFBB8E528C3E5AC78-C178-4035-8D9F-8A454990080D069ED53E-FA58-4D79-9460-8A515B66D09BC4AF38BA-E27A-402E-97D1-001ED06F53FAFDFE8688-AF2F-4BDC-92A3-923DC891BE90

Attachments

Images (20)
  • 3E68C07E-65C4-4B86-9EAB-9C57B6D37FED
  • 634DDCE9-8824-4504-A7EE-8B704F56554F
  • 5B0E21E6-43E2-44E1-90CB-D9F55D07C037
  • 03DA0A17-DF9F-44B4-ACCA-8A6397BA10D5
  • 400D9D74-12EF-4322-8CFC-58753997FBD8
  • 996779DE-92CA-4F92-869A-0B3C6C156B6C
  • E54897A8-192A-4DEF-BD74-0E6EBCE1E9C8
  • 89ED041C-0DC1-42BA-ADE2-5E6D765779BE
  • A31A0413-DE1F-41B1-AAA5-09F5191B127E
  • ADAE4AA1-73A3-4295-889A-449BFFCAE5F5
  • A4947167-E49C-4057-B871-19D97CC82F69
  • 569654A4-5352-4F67-90E6-4E75C3B57B78
  • D8B5C590-7ED4-4637-AD42-2663DA6B6EC7
  • 11B758C7-38BA-403A-A377-88DA6667FA07
  • CEF8C3D3-4E86-4AFF-9E2E-F8AB58E85099
  • 2FF1A8E2-45FE-4731-9514-727EFBB8E528
  • C3E5AC78-C178-4035-8D9F-8A454990080D
  • 069ED53E-FA58-4D79-9460-8A515B66D09B
  • C4AF38BA-E27A-402E-97D1-001ED06F53FA
  • FDFE8688-AF2F-4BDC-92A3-923DC891BE90
Bruk posted:

So after many, many long thoughts about how to approach the smoke unit features this is what I did....

When it comes to the main stack, I found that the best look and performance is to make the exhaust port as large as you can but not to large where the smoke wont blow out very well because there isn’t enough air pressure.

I created the “exhaust funnel” out of brass tubing. First I oversizes the hole in the PCB and stack common to the shell. The tubing became press fit through the PCB. The hole common through the smoke stack was much smaller in diameter. I drilled it up to the same size as the diameter of the brass tubing.

Since the stack on the loco is brass and press fit. I popped it out and solder a small piece of the tubing to the end of it. This gave me just a little bit more material to be able to connect the smoke unit and shell with some silicone tubing. This makes is easier to service later.

After lots of cutting, filing and soldering you get a exhaust stack. I had to clearance the inside of the shell slightly for the wider smoke unit body. I also had to grind away on the lower pipe detail to fit both fan motors. Insulated the base so the motors don’t ground out.

For the whistle steam. I had to remove the actual whistle detail part first. It was incased in epoxy on the inside and had I had to Dremel it away. Once I got the whistle off I could align where I wanted the hole. I painstakingly drilled a hole into the shell underneath where the whistle sits (Killed me a little) and angled it slightly help direct the flow. It matched the outside diameter of the brass tubing I’m using.

Soldered some tubing into an elbow and I lucked out and solder it to some brass standoffs in the shell.

I had to also create a bracket to mount the smoke unit into the shell. I reused the old brace and new brass stock. Made standoffs with the brass tubing and 4-40/2-56 screws.

Had to also create plugs between the RCMC and Smoke unit.

3E68C07E-65C4-4B86-9EAB-9C57B6D37FED634DDCE9-8824-4504-A7EE-8B704F56554F5B0E21E6-43E2-44E1-90CB-D9F55D07C03703DA0A17-DF9F-44B4-ACCA-8A6397BA10D5400D9D74-12EF-4322-8CFC-58753997FBD8996779DE-92CA-4F92-869A-0B3C6C156B6CE54897A8-192A-4DEF-BD74-0E6EBCE1E9C889ED041C-0DC1-42BA-ADE2-5E6D765779BEA31A0413-DE1F-41B1-AAA5-09F5191B127EADAE4AA1-73A3-4295-889A-449BFFCAE5F5A4947167-E49C-4057-B871-19D97CC82F69569654A4-5352-4F67-90E6-4E75C3B57B78D8B5C590-7ED4-4637-AD42-2663DA6B6EC711B758C7-38BA-403A-A377-88DA6667FA07CEF8C3D3-4E86-4AFF-9E2E-F8AB58E850992FF1A8E2-45FE-4731-9514-727EFBB8E528C3E5AC78-C178-4035-8D9F-8A454990080D069ED53E-FA58-4D79-9460-8A515B66D09BC4AF38BA-E27A-402E-97D1-001ED06F53FAFDFE8688-AF2F-4BDC-92A3-923DC891BE90

Brilliant mate! 3 Cheers for an amazing job!Now.. if only we can eventually get the Cylinder and Pop Off, and Blow down effects, and we will be Triple Platinum! But really, great job ! 

Last edited by VintageClassics
gunrunnerjohn posted:

Interesting question Pete.  It could be simply in the firmware they load for the specific application, that's how the RCMC is programmed.  Note this is just speculation on my part, I don't really have the answer.

I agree with John. They come flashed to the specific loco. The RCMC board came from a Southern PS4 Pacific with Legacy. I chose that because of the smoke outputs and the driver Diameters were close. Come to find out last night the 4 chuff per rev is not quite 4 chuffs more like 3. I most likely will swap the board from a loco such as AC12 that has a smaller wheel diameter and see if that fixes my problem there and preform some mischief with Lionels part department. 

I’m starting to wrap this project up. I airbrushed the drivers/handrails looks way better. Also touched up some nicked areas. I sprayed the brass tube for the whistle steam and the mount under the smoke unit. 

I also had to shortened the drawbar because it was way to long and that was something that had always bugged me. I cut that down .525 of an inch. I was able to solder that together and reinforced it with a small piece of brass. Did a pull test at 10 pounds and it held together! Reassembled and reapplied new heat shrink over the wires. Put it back together looks much better.


D1524411-17C4-4263-AD68-FD31721FF46ADDA0A9EA-C6CE-4445-BC67-5AE287A5B733712077F5-0B76-48DA-AF7D-F20C4A8BF2D1959605C4-89A2-4777-AA18-06CC2F1A1188D9714726-16BD-4332-B8E0-615F01229A347FAE0DAC-64A8-4448-B88A-1B35E16E9759E7A7D590-02A4-44CF-A48A-5B1F194B53DC 

Attachments

Images (7)
  • D1524411-17C4-4263-AD68-FD31721FF46A
  • DDA0A9EA-C6CE-4445-BC67-5AE287A5B733
  • 712077F5-0B76-48DA-AF7D-F20C4A8BF2D1
  • 959605C4-89A2-4777-AA18-06CC2F1A1188
  • D9714726-16BD-4332-B8E0-615F01229A34
  • 7FAE0DAC-64A8-4448-B88A-1B35E16E9759
  • E7A7D590-02A4-44CF-A48A-5B1F194B53DC
Last edited by Bruk
@T1Titan_ZachF posted:

And Bruk - The shay still runs great! Thanks for a great job. SInce you could fix my problemed shay you can do this install (t1 one someday to?

I was re reading this and I over read this! I’m glad the Shay is working great! Such a dumb design with an easy fix.

And YES!

I have been in the market for picking up a Scale Lionel T1 (4-4-4-4) for some time now and I do want to do an upgrade with Legacy using RCMC and the Sound board from the LionMaster #5511 version with Whistle steam. It would be a nice conversion with whistle steam.

Bruk posted:
@T1Titan_ZachF posted:

And Bruk - The shay still runs great! Thanks for a great job. SInce you could fix my problemed shay you can do this install (t1 one someday to?

I was re reading this and I over read this! I’m glad the Shay is working great! Such a dumb design with an easy fix.

And YES!

I have been in the market for picking up a Scale Lionel T1 (4-4-4-4) for some time now and I do want to do an upgrade with Legacy using RCMC and the Sound board from the LionMaster #5511 version with Whistle steam. It would be a nice conversion with whistle steam.

Good to hear from you again! I have the older lionel scale T1 5511 and its a heavy loco. It was built to last

gunrunnerjohn posted:

Hmm...  I happen to have a Legacy LM T1 Duplex and waiting in the wings is a brass scale T1-Duplex.  I could upgrade that one with the LM electronics.

As my brothers say. “Bet you wont”  😂

If it was me and since its brass id try and use the BEMC but since you have a donor loco... you could reuse a lot of that. 

gunrunnerjohn posted:

I have time to think about it, I have a layout to build and a pile of repairs and upgrades to do first!
Just to let you know, I just picked up/received in the mail a Lionel Scale T1 (6-28063)

I have already started a parts list for the conversion. Ill be using the “Vision Steam” LionMaster Version for the sound. 


6347EA2B-7467-4EC9-B1B9-909ECEEF5418

Attachments

Images (1)
  • 6347EA2B-7467-4EC9-B1B9-909ECEEF5418
Last edited by Bruk

A little Update:

Ive been waiting a couple months for Lionel to get some boards back into stock, finally they did

I installed a different RCMC board in the Loco. I was using a board from a PS4 Pacific originally thinking that driver size would have an effect on the chuff rate, this gave the loco a 3 chuff per revolution. I did not find this acceptable. So I decided to go with what I used in my AC-9 conversion which was board from AC-12 cab forward. Both locos have a 16:1 wheel to motor ratio. 

As you can see in the video I got my 4 chuffs now. They aren’t in the same spot every time because its not cam/switch driven chuff timing and you’ll notice that on all your legacy locos.

More to come in a new thread for my next Legacy Conversion. 

Attachments

Videos (1)
Class A Conversion
Last edited by Bruk

Add Reply

Post

OGR Publishing, Inc., 1310 Eastside Centre Ct, Suite 6, Mountain Home, AR 72653
800-980-OGRR (6477)
www.ogaugerr.com

×
×
×
×
Link copied to your clipboard.
×
×