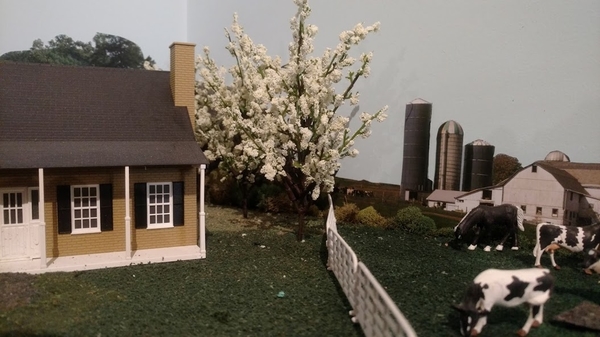
Our hobby has many standard techniques, materials, and tricks-of-the-trade. By "standard", I mean that they are well-known, frequently used, and often discussed on this list. Most of them became standard because once upon a time, they were written about in some influential book or article. 

But, I was just thinking that there are many other great techniques that are NOT well-known. They are obscure and rarely employed. I though it would be fun to start a thread where folks can share some of their "secrets", i.e., useful techniques that are not so well-known. 

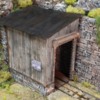
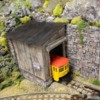
I will get the ball rolling by describing two tricks that I used on a very modest building that I built awhile ago.  It is a simple shed meant as a "trolly barn" for a Lionel postwar trolly. Here is the finished structure:

TrollyBarn 8TrollyBarn 9

Trick #1 -- Old plank siding

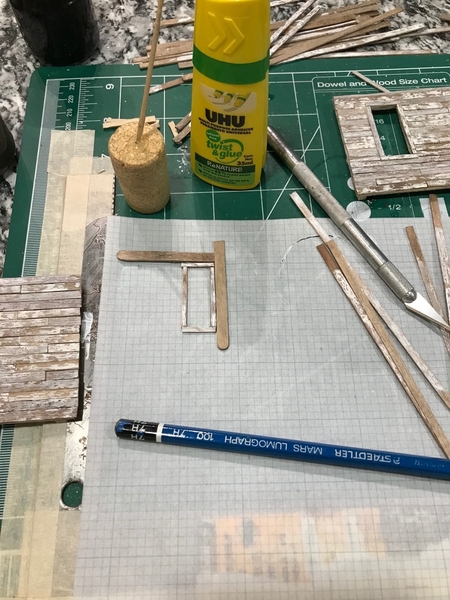
This is a method that I learned from the great Troels Kirk, creator of the Coast Line RR. The vertical planks that make up the exterior walls of the shed were cut from a single piece of Bristol Board. Each plank is a separate piece, glued onto foam core.  The trick is to paint the Bristol Board with a random pattern before cutting the planks:

TrollyBarn 4

You then just mix up the planks randomly before mounting, so the pattern is lost. The result is a very convincing simulation of old, highly-weathered wood.

Trick #2 -- Pink Foam blocks

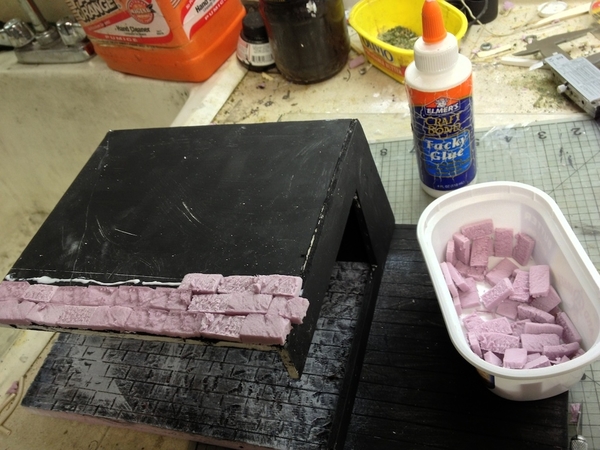
The cut stone wall and foundation were made by cutting a strip of pink foam insulation into very thin rectangles, and glueing them to foam-core. If you cut the foam with a not-very-sharp instrument, it will crumble a bit, producing a rough texture that is easily painted to look like real stone:

TrollyBarn 3

These are great techniques that I have rarely seen mentioned on this list.

OK, your turn. Share a few secrets!

Attachments

Images (4)
  • TrollyBarn 8
  • TrollyBarn 9
  • TrollyBarn 4
  • TrollyBarn 3
Last edited by Avanti
Original Post

Replies sorted oldest to newest

First, just wanted to say that the trolley barn looks fabulous. A great job. I don't have any pictures but, will share an easy, super fast weathering technique that I read somewhere (not here) for cars or even locomotives. Get some different colors (gray, white, rust/brown) of Tempura Powders. They're really inexpensive. Take a stiff brush and rub the powder color into the wheels, undercarriage and some of the car/loco body. Then spray with some fine mist water. The powder will turn to "paint" and adhere to the surface. If you want more weathering, repeat. If you want less, rubbing with a rag will remove it or soften it. That's it.

Last edited by Jerrman

Pete the shed looks great! Thank you for the ideas, and for wanting to share. Great idea Jerrman! I’m a relative novice, but one thing I try to do is to visualize before I weather something, where will this item be more worn or dirty, and how is it used? Is it close to the track, or farther away? Is it an older item, or newer. I think it gives things a “story” and a more realistic look.  

Andy

Hot-glue and Cyanoacrylate glues can burn fingers and stick to anything used to brace or place the materials. I've taken to using Teflon sheet I raided from our food dehydrator: https://excaliburdehydrator.co...ucts/pfp14-paraflexx™-premium-non-stick-drying-sheet-14x14

These sheets seem near indestructible - I've also soldered on them - yet are easy to cut into any shape needed to get a scrap just the right shape into just the right spot to hold a joint for setting, soldering, gluing etc.

Here's one: Using a digital caliper for everything. 

With the price of these running in the low $20, you can beat them up and simply replace them when they wear out. I use it for more transferring and scribing than I do for actually measuring anything. I use it for:

  • setting the stops on my Chopper, I use the depth gauge tail that sticks out of the end to touch the razor blade and set the stop to coincide where the end of the bar.
  • a marking gauge with the two pointy inside measuring ends to step off a specific distance from the edge of a piece and scribe a line parallel to the edge.
  • transferring very tight spacing between to pieces of styrene by capturing the distance between the inside points and then using the outside jaw points to transfer this exact distance to the piece I want to cut. These two sets of points are designed to be at the exact same distance.


Great topic idea that I wish would get more love.  It took me some time to figure out how to add something to the mix here as the difficulty lie in that the thread required more of a "cheat" than a "technique".  Here's a little cheat I've been using that has proven quite useful ...

I have taped a small carpenters square down on my hobby cutting mat.  This affords me a 90 degree, right angled, squared, and perfectly straight and raised surface to butt up against when cutting.  It has proven an invaluable short-cut and cheat during my scratch-builds.

IMG_4671IMG_4675

Attachments

Images (2)
  • IMG_4671
  • IMG_4675
Last edited by bfishma1

Like Trainman, I used my digital calipers as a scribe to first measure the depth to be removed from LIONEL bridge piers to achieve a rail height equal to that provided by LIONEL's "A" trestles.

First, the calipers were used to measure the depth of the material to be removed; and then I used the calipers to scribe both plastic piers to mark how much material to remove.  Came out great.bridge piers 001


Attachments

Images (1)
  • bridge piers 001

My own hack was to use a vacuum cleaner's upholstery attachment to ballast Gargraves track.  Simply load the attachment with ballast with a finger over the narrow end; place the narrow end between the rails; and, pull or push the attachment along the tops of the ties until the tool is empty.  Reload and repeat.

Works just as well on the outside of the outer rails and creates a natural shoulder of material.


I suspect this is not really "lesser known"...but it works for me...i make hedges from strips of dollar store green pot scrubber pads...in this case i laminated two thicknesses together to make the hedge wider...see the photo...this is a scale model of a client's home i made a few years ago...she uses as part of her Christmas village display...

Howard...

www.littleglitterhousrs.com

www.cardboardchristmas.com

dollar store pot scrubber pad hedge

Attachments

Images (1)
  • dollar store pot scrubber pad hedge
Last edited by sawdust43
sawdust43 posted:

I suspect this is not really "lesser known"...but it works for me...i make hedges from strips of dollar store green pot scrubber pads...in this case i laminated two thicknesses together to make the hedge wider...see the photo...this is a scale model of a client's home i made a few years ago...she uses as part of her Christmas village display...

Howard...

dollar store pot scrubber pad hedge

Looks Great~!

Wow just working on the same idea. I bought the green scotch brite pads and was looking at the green pad that you put underneath a floor stripping/polishing machine.

I was thinking of strawing them with a spay adhesive the put them in a can with green seanery flock then spray them with a flat clear spray to keep the flock intact.

After it dried I would sink and glue tooth picks in the base and just push on the hedge in place.


sawdust43 posted:

RONH...

yes...it can be coated with adhesive and covered with the scenery flock...you might want to try a white glue diluted with a little water in place of the spray adhesive...the diluted glue will soak into the fibers and the flock will really get inside the "hedge"...

Howard... 

I did something similar years ago by cutting up a artificial Christmas tree (one with the ling needles).

I cut sections off, then trim with scissors to create a pine tree look, spay them with flat green, spray with adhesive spray the clear coat them. You can get a whole forest from one artificial trees and they look good from 5 to 10 ft away


Attachments

Images (1)
  • mceclip0
Avanti posted:
Trainman2001 posted:

Darn right! That tree looks great. For my mountain, I need a ton of them. Perhaps this is the way to do it.

I agree, it does look great. 

BTW: This time of year, the dollar stores often have pretty nice trees at very low prices.

It is getting harder to find the trees with long needles as the shorte needle trees became popular. Look for those trees with the long needles in garage sales during the summer months. Also goodwill type shops may have some to?

K-Line heavyweight passenger car's floors are held in place with six screws.  The floors need to be removed to change light bulbs.  Some baggage cars have sliding doors whose track is in the floor.  Simultaneously aligning those four doors to get the floor in place could be a challenge.  However, if before removing the floor you use painters tape to hold the bottom of each door to its respective sill it will be in the proper position when the floor is replaced.   John in Lansing, ILL 

Not sure these are "techniques", but they are methods to creatively doing your RR on the cheap.  Perhaps re-purposing is a better description.

Oooops Paint.  At the 2 big box stores they re-sell sample paint that was either made wrong or the customer did not like.  They typically sell for 50 cents.

I love to roam the aisles at those stores in search of damaged or open product on the cheap.  They gave me this kitchen backsplash that was open with broken pieces.  I turned it into a bridge pier.

These spring flowering trees are from a larger plastic flower arrangement from Michaels.  Purchased on clearance and used a coupon to boot.  Cut up and stuck in place.

I really get a thrill out of re-purposing.

Have Fun!

Ron

PaintBridge 2Trees

Attachments

Images (3)
  • Paint
  • Bridge 2
  • Trees
HRon045 posted:

Not sure these are "techniques", but they are methods to creatively doing your RR on the cheap.  Perhaps re-purposing is a better description.

Oooops Paint.  At the 2 big box stores they re-sell sample paint that was either made wrong or the customer did not like.  They typically sell for 50 cents.

I love to roam the aisles at those stores in search of damaged or open product on the cheap.  They gave me this kitchen backsplash that was open with broken pieces.  I turned it into a bridge pier.

These spring flowering trees are from a larger plastic flower arrangement from Michaels.  Purchased on clearance and used a coupon to boot.  Cut up and stuck in place.

I really get a thrill out of re-purposing.

Have Fun!

Ron

Bridge 2Trees

Have check out the craft stores, what a great idea.

Add Reply

Post

OGR Publishing, Inc., 1310 Eastside Centre Ct, Suite 6, Mountain Home, AR 72653
800-980-OGRR (6477)
www.ogaugerr.com

×
×
×
×
Link copied to your clipboard.
×
×