
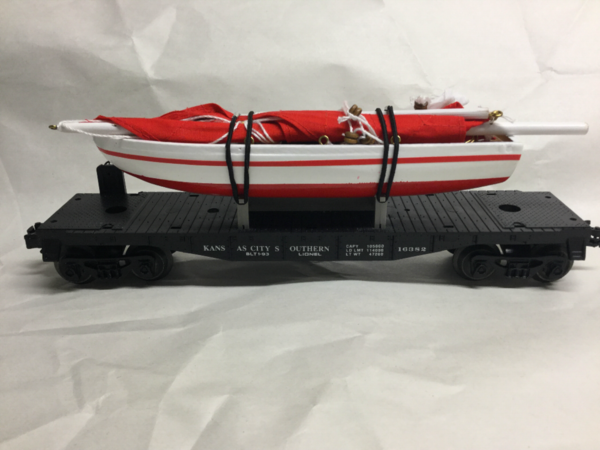
Post a write up and pictures of Homemade Lionel (or other) style cars or engines you have made or modified or scratch built.

I have made homemade copies of several Lionel cars when I cannot find them or afford them at the time.  I will start with my recently completed Lionel 6413 Mercury Capsule transporting car.  This is a Junk CarBash.

After looking for a reasonable or inexpensive Lionel 6413 Mercury Capsule transporting car or raised-center flat car body (they are rather hard to find and I have never seen one at a train show) I decided to make one.

I have the other two center raised-center flat cars.  The first car is the Lionel ACMX 6519 Allis-Chalmers condenser car and it needed a raised-center flatcar deck to handle the tall height of the condenser (made 1958-61).  Then Lionel made the Lionel TLCX 6544 Missile Firing car using the raised-center flat car body from the 6519 (1960-64).  Later, the Lionel TLCX 6413 Mercury Capsule car (made 1962-63) was made from the Lionel Allis-Chalmers Condenser raised-center car body and the Mercury Capsule from the Lionel 3413 Mercury Capsule Launching car Missile.  This let Lionel use the body molds from the Lionel Allis-Chalmers car for to two new cars, and to double use the Mercury Capsules, a typical thing Lionel does.

IMG_2297IMG_2298


Here are a couple of the Lionel 6413 Mercury Capsule transporting cars I want to home make (picture from the internet).  The slightly aqua green blue car in the front is rarer and brings more money.  Notice the track can be seen in the openings between the two metal straps holding up the Mercury Capsules.

Lionel 6413 aquamarine 1 2-16-2018


Zero money was used to make the car.  A Lionel 6800 flat car, with a broken corner (the plastic  was harder than normal after being stored in the hot attic) and no trucks and wheels were found.  The second car used was a small Lionel un-numbered flat car complete with trucks in my junk box.  Plastic from a discarded daily desk calendar base and a plastic paper easel were used.  On hand glue, blue paint, two toy optical viewers and letter decals and rub-on numbers were used.  I did get to spend many hours of fun time building the car. IMG_2111


For the body of the Mercury Capsule car, the Lionel 6800 flat car was used upside down to make the raised centered car and cut out the middle of the brown flat car leaving the trucks.  IMG_2112


The ends of the small Lionel flat car with trucks were band sawed off to add to the cars height.  I patched the broken corner of the 6800 car and added plastic to extend the skirts of the trucks.

IMG_2120


I decked the top ends of the car with decking left over from the short flat car.  Two small lugs were glued on to the edge to act as hooks for the elastic cord that would hold down the Mercury capsules.  I added in some seams to the side of the raised center car and added skirts to the trucks and extended the raised hump as seen in black plastic in picture below.

I made the rest of the top decking from plastic with holes for the Mercury capsules.  The deck was make a little wider than the car so personal can walk on the deck alongside the capsules.  The Lionel 6413 is wider in the middle than at the ends.

IMG_2148


The Lionel 6413 holds the capsules via two metal brackets across the near bottom of the car with opening from the top to the tracks, presenting a unfinished look.  The Lionel Mercury capsules have cylinder on the bottom to simulate the mercury capsule retro rockets and the capsule is the same one used on the Lionel Mercury capsule rocket with the Lionel  3413 Mercury Capsule Launch Car and Rocket.  The real Mercury capsules would never be transported with the retro rockets attached.  My capsules set on the bottom of the car and the bottom is enclosed, the kind of job one would expect from NASA and the US Government.  The real Mercury capsules are only 6 ft in diameter and 6 ft tall and would easily fit in a gondola or box car with wide doors so the Lionel Mercury Capsule cars is a fun item and allowed Lionel the use of existing molds to make and sell another interesting car.

My Mercury capsules are made from two toy optical viewers that lets the the grand kids see diamonds moving around when viewed and rotated.  I took out the clear plastic end to make the cones lighter.

IMG_2157


I added some heavy paper strips to make the cones look more like they had heat shields on the sides and show the door and window.  The astronaut sits with his back to the bottom heat shield and views through the window.

IMG_2167


I painted the car with Model Masters 35183 F  S Bright Blue paint which I had and is fairly close to the Lionel 6413 color.  I then added “NASA” decals as I did not have room or letters for “Mercury Project Cape Canaveral” that Lionel used.  I also added press on numbers of 6413, not as neat as I wanted and all I had room for.  Clear glossy spray was used to seal on the lettering.  

I added a metal washer to the top of each Mercury Capsule with clear caulking to allow the Lionel Gantry Magnetic Crane to lift them up and give another load for Gantry Crane operation.

IMG_2296

IMG_2285


I think the Mercury Capsule car came out very well and it can serve as another car and load to use my Gantry Crane, to become sort of an action car after all.

IMG_2291


Let’s hear from a few of you car and engine builders about your cars and engines.  I find fixing up a common car into something more special or useful a satisfying part of the model train hobby.  I have several more to share as the topic moves on but do not have the pictures of the building process like the 6413.  Most of them are painting and lettering projects.

Charlie

Attachments

Images (12)
  • IMG_2297
  • IMG_2298
  • IMG_2111
  • IMG_2112
  • IMG_2120
  • IMG_2148
  • IMG_2157
  • IMG_2167
  • IMG_2285
  • IMG_2291
  • Lionel 6413 aquamarine 1  2-16-2018
  • IMG_2296
Last edited by Choo Choo Charlie
Original Post

Replies sorted oldest to newest

This isn't quite on your level, but about a year ago, I repainted a 244 Lionel Scout locomotive pink for my oldest daughter in homage to Lionel's "girl's set". I also included diamond rhinestones over the coal load and left "Lionel Lines" visible on the tender.  She ended up loving it Now she has her own to play with her older brother. 

IMG_2848

IMG_2849

Charlie, your 195Os action packed layout thread inspired me to go forward and get a modest layout up and running in a 5x9 space. Thanks again for sharing all of your great ideas. 

Attachments

Images (2)
  • IMG_2848
  • IMG_2849
Last edited by JD2035RR

JD replied  "Charlie, your 195Os action packed layout thread inspired me to go forward and get a modest layout up and running in a 5x9 space. Thanks again for sharing all of your great ideas. " 

JD  Thank you for the kind words.  I enjoyed building it, and writing it up and you comments fulfill the hopes I had when writing up the post.


Mitch

I really enjoyed your Razorbacks adorned cars and engines.  I have lived in Razorback country 3 separate times.

Also liked your giraffe engines to go with the Lionel giraffe cars, one of my kids and then grand kids favorites.

Charlie

Last edited by Choo Choo Charlie

Another homemade car was a Gold Bullion car.  Windows were cut in both sides with a Dremel Moto tool with saw blade and a razor saw and plastic windows were added.  Gold bars were made from kitchen match sticks painted gold.  Two 12v or 7v in series mini Christmas lights were added, a feature the Lionel version does not have.  A light pick up was made from brass shim stock.

Gold Bullion car 4-20-2016 001


Detail of homemade Pickup is below.  A piece of tin can was added to improve durability of shim stock.

Gold Bullion car 4-20-2016 008

Come on you closet Homemade car fans, lets see them.

Charlie

HEre are some Custom Jobs done:

K-Line_MP15a

K-line MP15 Switcher

K-Line_MP15bK-Line_MP15c

Complete with Full cab interior

K-Line_MP15eK-Line_MP15g

Custom N.T.T.X. 5 unit Container Spine car. 

NTTX-Spine001NTTX-Spine003NTTX-Spine005NTTX-Spine006

The White Spine unit is what this car was originally developed from. 

NTTX-Spine007PRR_Na1

Custom Built [and not by me] PRR NA cabin car with complete interior

PRR_Na2

PRR Custom built XM Boxcar - All wood Construction

PRR_XKPRR_NDa

PRR NDa made from a Gloorcraft 4 wheeled ND kit.

Attachments

Images (14)
  • K-Line_MP15a
  • K-Line_MP15b
  • K-Line_MP15c
  • K-Line_MP15e
  • K-Line_MP15g
  • NTTX-Spine001
  • NTTX-Spine003
  • NTTX-Spine005
  • NTTX-Spine006
  • NTTX-Spine007
  • PRR_Na1
  • PRR_Na2
  • PRR_XK
  • PRR_NDa

Keep those great Homemade cars a coming.  I have really enjoyed seeing them and knowing other OGR members like making them and saving money.


Here are some of details of my Homemade Centerline Track Cleaning Car, a $3 to $4 version of the brass Centerline, O gauge track cleaning car and it works super.

The price of the Centerline Track Cleaning Cars is quite high listing for $133 plus postage. It is made from brass.  The brass Centerline car is a work of art and not required to do a mundane job like cleaning O gauge track.  I like the cars design as it has no pads to glue on to replace and no pad motor like the Lionel model. 

I worked from a picture of the Centerline track cleaning car and made a body out of wood.  The heavy weight of the brass for Centerline is not needed to clean the track as the roller brush rolls freely in the center of the car.  The center pit of my wooden version was lined with aluminum flashing and glued it in with epoxy.  This area gets wet from the cleaning solution and that would attack the paint and wood of the body.

I used 1 inch diameter mini paint rollers for the cleaning brushes and cut them 1/8 inch of less than the width of the pit (the rollers were the only out of pocket money spent).  Pit is 2 7/16 in wide, 2 7/16 in long and 1 5/8 in deep using a part of 1 in diameter paint roller 2 5/16 in long.   I used a short piece of ½ inch pipe coupling as weight inside the cleaning brush.

Rubbing alcohol is normally used the cleaning solution.  Two or three extra dry cleaning brushes are used after the alcohol saturated cleaning brush and run until the all the wet solution is removed from the track and the dry cleaning brushes show little of the dirty picked up cleaning solution.

The dirty cut off mini paint rollers can be washed in the home washing machine by placing them in a small nylon net bag used for washing small items.


IMG_0941

IMG_0946


Below is Track Cleaning Car, cleaning roller brush and 1/2 in dia pipe coupling used as weight inside roller when cleaning

IMG_0966

Charlie


Attachments

Images (3)
  • IMG_0941
  • IMG_0946
  • IMG_0966
Last edited by Choo Choo Charlie
Choo Choo Charlie posted:

Keep those great Homemade cars a coming.  I have really enjoyed seeing them and knowing other OGR members like making them and saving money.


Here are some of details of my Homemade Centerline Track Cleaning Car, a $3 version of the brass Centerline, O gauge track cleaning car and it works super.

The price of the Centerline Track Cleaning Cars is quite high listing for $133. It is made from brass.  The brass Centerline car is a work of art and not required to do a mundane job like cleaning O gauge track.  I like the cars design as it has no pads to glue on to replace and no pad motor like the Lionel model. 

I worked from a picture of the Centerline track cleaning car and made a body out of wood.  The center pit was lined with aluminum flashing and glued it in with epoxy.  This area gets wet from the cleaning solution and that would attack the paint and wood of the body.

I used 1 inch diameter mini paint rollers for the cleaning brushes and cut them 1/8 inch of less than the width of the pit (the rollers were the only out of pocket money spent).  Pit is 2 7/16 in wide, 2 7/16 in long and 1 5/8 in deep using a part of 1 in diameter paint roller 2 5/16 in long.   I used a short piece of ½ inch pipe coupling as weight inside the cleaning brush.

Rubbing alcohol is normally used the cleaning solution.  Two or three extra dry cleaning brushes are used after the alcohol saturated cleaning brush and run until the all the wet solution is removed from the track and the dry cleaning brushes show little of the dirty picked up cleaning solution.


IMG_0941

IMG_0946


Below is Track Cleaning Car, cleaning roller brush and 1/2 in dia pipe coupling used as

weight inside roller when cleaning

IMG_0966

Charlie


Charlie, 

  Very nice on the car design and especially smart on the weight to weigh down the roller!  Glad to know it works well. 

Tom 

Nice job on the homemade Mercury Capsule cars.

The Lionel car is a favorite of mine. I've run across quite a few of them missing the capsules. I see complete ones on EBay, but not too often at the train shows I've attended. The capsules and the metal plates that hold them have been reproduced. The first repros were probably done around 20 years ago, so they could have the look of age to them. The price on the reproductions was through the roof for a while, but I see that Train Tender has them for $7.50 each now.

Last edited by C W Burfle

The first. I make due mostly with things "on hand".

IMG_20170924_155440more of MINE 20180706_052321_Film1IMG_20180825_171407~24.5x9mineRgt

20180329_191022_Film1

Those balls arent glue to the top, there is a fan.20180329_191230_Film1

back 2" or so is styreneIMG_20170512_000322-120180415_035107_Film120180313_235021_Film120180706_052035_Film120180706_051916_Film1~3

a radical converstion count?IMG_20180707_181609~3lPScrazy8plowfaceIMG_20180819_151115IMG_20170922_175055

Ever cut, work or polish stainless to a mirror?  It's hard working material I promise you.  crusader-3

There's more, but I've gotta wait till later.

Remind me with another post eh?

Attachments

Images (16)
  • IMG_20170924_155440
  • 20180706_052321_Film1
  • IMG_20180825_171407~2
  • 4.5x9mineRgt
  • 20180329_191022_Film1
  • 20180329_191230_Film1
  • IMG_20170512_000322-1
  • 20180415_035107_Film1
  • 20180313_235021_Film1
  • 20180706_052035_Film1
  • 20180706_051916_Film1~3
  • IMG_20180707_181609~3
  • lPScrazy8plowface
  • IMG_20180819_151115
  • IMG_20170922_175055
  • crusader-3

I love what you guys have done. This is nowhere near as creative, simply added the details that MTH "forgot"on their TOFC flats. Like Lee above I used square styrene for stakes and sheet styrene for the sides of the guardrails. Each stake had to be tapered to fit in the pockets. To simulate wood rails the sides were scraped with a razor saw. Lionel ramps were added and the cars lowered to bring them closer in height to Lionel and Weaver cars. So far I have done 6 cars. 

Pete

Last edited by Norton

Thanks Lee. I think at one time Lionel sold the hitches but no more. I have not checked to see if MTH sells them. The chocks should be easy to make. I suspect a plain platform with a hole in would work for a hitch as its mostly covered by the trailer.

192 stakes and counting. I no longer buy MTH flats unless they are close to free.

Pete

Made this Milwaukee Road open air car from a LaBelle wood coach kit. The Milwaukee used them in summer across the Cascade Mountains. Working electric marker lights and full interior. It's not Lionel but these are wonderful kits and fun to bash or build as is. I used Atlas metal trucks. Please click on picture to enlarge. Don

O-356open air #1

Attachments

Images (2)
  • O-356
  • open air #1
Last edited by scale rail

I have really been enjoying every ones homemade cars:  keep them coming.  Homemaking cars has been one of the more enjoyable parts of the hobby for me.

A homemade aquarium Car was made by cutting out the windows of a small Lionel box car like Gold Bullion car in a prior post.  A Lionel Aquarium car sea background was purchased at a train show but one can be made from parchment paper.   Plastic fish were cut out of clear plastic from old toy boxes and colored with Sharpies.  The fish were suspended from the roof with 4 lb fish reel clear leader line and glued to the fish and roof with glass clear cement.  This allows the fish to wiggle and move with the train motion.  Lights were added to the roof and a pickup made.

IMG_3477

Gold Bullion car 4-20-2016 004

This is my favorite early home made car I have built.  The action of the swinging fish is great when the car is moving and it has a smallish 027 size.

I have since purchased a Lionel Aquarium car but run this homemade one more often.

Charlie

Last edited by Choo Choo Charlie
Choo Choo Charlie posted:

Keep those great Homemade cars a coming.  I have really enjoyed seeing them and knowing other OGR members like making them and saving money.


Here are some of details of my Homemade Centerline Track Cleaning Car, a $3 to $4 version of the brass Centerline, O gauge track cleaning car and it works super.

The price of the Centerline Track Cleaning Cars is quite high listing for $133 plus postage. It is made from brass.  The brass Centerline car is a work of art and not required to do a mundane job like cleaning O gauge track.  I like the cars design as it has no pads to glue on to replace and no pad motor like the Lionel model. 

I worked from a picture of the Centerline track cleaning car and made a body out of wood.  The heavy weight of the brass for Centerline is not needed to clean the track as the roller brush rolls freely in the center of the car.  The center pit of my wooden version was lined with aluminum flashing and glued it in with epoxy.  This area gets wet from the cleaning solution and that would attack the paint and wood of the body.

I used 1 inch diameter mini paint rollers for the cleaning brushes and cut them 1/8 inch of less than the width of the pit (the rollers were the only out of pocket money spent).  Pit is 2 7/16 in wide, 2 7/16 in long and 1 5/8 in deep using a part of 1 in diameter paint roller 2 5/16 in long.   I used a short piece of ½ inch pipe coupling as weight inside the cleaning brush.

Rubbing alcohol is normally used the cleaning solution.  Two or three extra dry cleaning brushes are used after the alcohol saturated cleaning brush and run until the all the wet solution is removed from the track and the dry cleaning brushes show little of the dirty picked up cleaning solution.

The dirty cut off mini paint rollers can be washed in the home washing machine by placing them in a small nylon net bag used for washing small items.


IMG_0941

IMG_0946


Below is Track Cleaning Car, cleaning roller brush and 1/2 in dia pipe coupling used as weight inside roller when cleaning

IMG_0966

Charlie


Great ideal,  And good looking.

I seen one made from square steel tubing and small "C" channel iron and welded together. Your 1/2" coupling is from the oil/gas fields and not the standard type find in hardware stores.

Not really Charlie. Not at all.   It's a different style of build.  I respect "modelers" and "builders" both for what they do to achieve a goal.(inculde yourself in both catagories please).  A little better supplies is all you lacked imo.  The end result is more than inspiring; it's empowering.

   The knowledge behind an engineering degree, doesn't mean they turn screws the right way without a second thought; that is a gift  

  (I'm not making it up, and the guy designed for Caddy, Ford, and Tesla so far; which is fine by keyboard..... but hide the tools from him eh?  

Choo Choo Charlie posted:

Several of you train men really have some imagination and building skills.  Great jobs, especially the prior four posts.  And a super job documenting and photoing your projects. 

Your efforts shame my attempts to copy Lionel and others rolling stock.

Keep them coming.

Charlie

So true I work with several engineers that couldn’t figure out righty tighty lefty loosey. It’s a piece of paper that anyone can get if they pass a test and pay some money. You want to have some fun, start asking about the differences between MET’s and ME’s.... that can be a fun one....  l’ll stop before I get into trouble. It takes all types and everything in this thread is creative and neat. Grace and detail usually come with experience, so the more you do, the better you get for the most part. 

When my grandnephews were in their "lego phase", I added a lego baseboard to a few flatcars.  They could then customize a train with lego parts to build different types of cars... and whatever!

Open air touring car:

P1010713

Not a car,  but a modified set of Lionelville buildings to make an M&Ms factory and adjoined store:

mnm2

Minion train:


Attachments

Images (2)
  • P1010713
  • mnm2
Last edited by eddiem

I bought a Reynolds Metal covered hopper car without the 12 roof hatch covers.  I made a more modern, easy to use center fill cover for the car.  The older 12 hatch covers require a special loading bridge with 12 filling spouts and require the opening, closing and applying a security metal seals on each of the 12 hatch covers.  The center fill uses 3 or so loading spouts into the center of the car and has a four part center car long cover.  The covers overlap each other and require only opening and closing four covers and only one security seal saving time and money.


IMG_3543

Charlie

Here are my Great Northern woodchip cars. MTH electric trains makes a smooth side woodchip car. They do not make one in the Great Northern Road name. None of these woodchip cars have ribs steel supports on the sides as the ones do in real life. I had to completely redo the car. It is a custom paint job with the correct big sky blue paint I am a member of the Great Northern Railway historical society and have color chips. The decals were also completely custom made. The only thing that is original about this car or the trucks the couplers and the square box belongs to MTH. Everything else is mine.20180825_174312

Attachments

Images (1)
  • 20180825_174312

I made a homemade Chicken Dispatch car.  A Lionel small stock car was used to make the Chicken Dispatch car.  Every other slat was cut out of the side boards and parchment paper was used to Sharpie paint the chickens on. Lights were added to the roof and a pickup made.    No chicken poop sweeping man though !

I later bought a Lionel Chicken Dispatch car with the sweeping man but I enjoyed making this car.


Homemade power pick ups were made for all homemade lighted cars from brass shim stock and Lionel plastic sided trucks.

Pickup detail.  A piece of tin can was added to improve durability of shim stock.

Gold Bullion car 4-20-2016 008

Charlie

Attachments

Images (2)
  • mceclip0
  • blobid0
Last edited by Choo Choo Charlie

Atomic Generator Car

This car started life as a Kusan  KMT (later K-Line) search light car Number USA 401098 without the search light and operator.  I added a mini Christmas tree flasher light bulb and socket, light for the new operator and control panel and a red plastic "thing a ma jig" red flashing light cover.

The car now enjoys life as an Atomic Generator Car.  Every train layout needs a portable power source for emergencies.

Charlie

IMG_1117

IMG_1123

Attachments

Images (2)
  • IMG_1117
  • IMG_1123
Last edited by Choo Choo Charlie

I made a ballast hauling gondola car load and placed a small back hoe machine on top to add to my track maintenance train.  The ballast load was made from a piece of Styrofoam (to keep it light weight) with ballast glued on with Elmer's glue.

IMG_1124


Part of Maintenance Train

Keep your homemade cars coming in.

Charlie

Attachments

Images (1)
  • IMG_1124
Last edited by Choo Choo Charlie

"Prewar cast iron" loco made from an old Marx 999 with styrene and copper parts.

20180106_190109

"Prewar" freight cars made from various parts...

load

Caboose is a real prewar Flyer item. Gondola and boxcar graphics were drawn on the computer and printed on photo paper. Gondola body is cardstock with the photo paper glued to it.

20180105_104043

Beaver-tail observation made from AF prewar coach.

20160729_203242

Attachments

Images (4)
  • 20180106_190109
  • load
  • 20180105_104043
  • 20160729_203242

Nothing as awesome as what you guys have done; I  guess I'll need some stock to run on 3 rail track to go behind my new loco.

I've had an old Athearn boxcar sitting around for years, so I slapped on a couple of Atlas/Roco trucks and now at least I have a full-size O scale car with big flanges:

IMG_20180922_100615403

Still have to add details, but it's a start.

Disclaimer: I am not responsible for the crappy glue job on those grab irons; this car came to me this way, I swear! 

Mark in Oregon

Attachments

Images (1)
  • IMG_20180922_100615403

  Cab-Forward Engine

Years ago I purchased a Lionel 2025 2-6-4 steam locomotive that came with a homemade enclosed cab and white wall painted wheels.  I left both intact.  The Lionel 2025 and 2035 are my favorite engines to run on my layout.


My closed cab Lionel 2025 with white walls

IMG_1096


Recently I was reviewing a March 1999 Classic Toy Trains magazine and read a product review of a 3rd Rail Brass O gauge Southern Pacific Cab-forward 4-8-8-2 steam locomotive.  I was not familiar with cab-forward engines.  The article pointed out cab-forward steam locomotives were made to solve a life and death problem Southern Pacific had due to asphyxiation of crew when operating in long tunnels and snows sheds in the Sierra Mountains in the early 1900s.  Baldwin developed the cab-forward style locomotive and over 195 engines were made from 1920 and used into the 1950s.


Real Cab-Forward steam locomotive

cab forward 10


Since I already, more or less, had a enclosed cabin steam locomotive, the Lionel 2025 mentioned above, all I would have to do to make a cab forward locomotive is find oil tender (an oil tender must be used as there is no way to get coal from a coal tender to the fire box with the cab in the front of the train).  Next was to make a hookup connector from the front of my 2025 steamer to the front of the oil tender at the tender slot coupling.  I know a Lionel 2025 2-6-4 is not a 4-8-8-2 which would have no chance of running on my O27 track !

I found a metal case from a junk DVD player as a source of sheet metal for the connector.  This metal sheet is thicker than tin can, strong enough for the connector and can be cut easily with a pair of tin snips.

Sketch of connector

IMG_1106


Bottom view

IMG_1104


Top view with tabs going on top of front wheel axle

IMG_1083


View of connector in action, it turns well and navigates my Marx 1590 switches

IMG_1095


Lionel 2025 as Cap-Forward engine pulling oil tender

IMG_1100


Close up of an oil tender I found I already had

IMG_1090


Connector is strong enough to pull other cars after the oil tender

IMG_1094

The connector was quick and easy to make and works well.  It is a little weird to see a steam locomotive tooling around the layout backwards !  Someday I may add a headlight and markers lights to the front of cab-foward  loco.  (see headlight on first picture of real cab-farward Loco)

Charlie

I attached a coupler to the front of a General's pilot truck after figuring out with a body mount, the front overhang pulled cars right off the rails in curves, or if heavier, the cars dragged the drivers off. I imagine fast angle wheels wouldn't do as well; the flat tread and deep flanges of early and loco wheels do a great job keeping the pilot truck on the rails, though you'd likely think "not". I think it's that the center of gravity and attachment point is so low; nearly at pilot truck axle height.

  I expect making a "home-bilt" Vanderbilt tender would be pretty easy for you too Charlie.. hint, hint,


Here is a project I just completed. I took an inexpensive Lionel woodsided reefer and transformed it into a representation of a Mathers outside braced boxcar...

The donor car...BAR Reefer 2

and the prototype I am attempting to relatively mimic...

C&IMC&IM2

Here are some shots with the first color sprayed...IMG_1117IMG_1118

and then the second color...IMG_1119IMG_1120

and now the finished car with Protocraft decals applied and some weathering...IMG_1129IMG_1130IMG_1131IMG_1132IMG_1133

Attachments

Images (12)
  • BAR Reefer 2
  • C&IM
  • C&IM2
  • IMG_1117
  • IMG_1118
  • IMG_1119
  • IMG_1120
  • IMG_1129
  • IMG_1130
  • IMG_1131
  • IMG_1132
  • IMG_1133

I once did a series of articles for the TTOS publication, in the theme, "Getting what YOU want", and l have done and continue to do dozens of Lionel and Marx based  bashes, three railed kits,  and scratchbuilds. Many have been posted on here.  I am glad many others do the same.  Most of mine are intended to be prototypical, but l have a whimsical pickle shaped tank car and pepper shaped water tower to support my Menards, now pickle, plant, and kitbashed packing plant . Keep posting...

I did not make this modification to a Lionel General 4-4-0 but thought this is a good post to share it.

This past weekend (11-3-2018 in Ponchatoula, LA at the TCA meet) I purchased  a Lionel 1862 General 4-4-0 w/tender that has a home made wooden cab and cow catcher.  I think the prior owner did a very good job in this improvement.  I do not know if any real 4-4-0 locomotives had wooden cow catchers but this fellow went to a lot effort to build it and the cab.  I wonder what happened to the original cab and cow catcher?  Maybe the best part is this Lionel 1862 is a great runner, better than my other one and only cost $15 (probably low priced due to wooden cab and cow catcher) !  I will have to be extra careful not to crash that wooden cow catcher into another car or loco.

Charlie

General w wood cab 11-7-2018 2018-11-07 004

General w wood cab 11-7-2018 2018-11-07 009

General w wood cab 11-7-2018 2018-11-07 015

Attachments

Images (3)
  • General w wood cab 11-7-2018 2018-11-07 004
  • General w wood cab 11-7-2018 2018-11-07 009
  • General w wood cab 11-7-2018 2018-11-07 015
Last edited by Choo Choo Charlie

Since Mountain Dew, or Pepsi for that matter, saw fit to Pepsi or Dr. Pepper everything they could get their logo onto, and Mountain Dew got shafted, the only things I could find were a tanker from a set that was sold on Ebay as a separate item, jumped at that one.  A K-Line box car with some a surfer wearing sunglasses, and the most ridiculous Lionel fat car with a box truck on it that had Mountain Dew on the side of it.  Looked liked something an 8 year old would design.

So I found a Tractor/Trailer that was 1/64 scale, had the modern Mountain Dew logo on the truck and trailer, bought an intermodal flat car with the proper accessories needed to mount the trailer, and managed with some crazy glue to fit the trailer to the flat.  Not exactly the right scale trailer but it looks cool.  Sorry, no picture, but let me get my trains set up and I'll fire one off to you.


Hi Folks,

I wanted to add a roller coaster to my amusement park section of my layout (2 Lemax items so far, still trying to figure how I will fit this in), so I decided to do a Disney-like coaster based on the new Slinky Dog Dash coaster in Disney World.  So this is the first part, and I intend to have a car with seated "guests" pulled by the Slinky locomotive.

I will paint the non-running surfaces of the rails (and the ties) bright red, and perhaps cheat the minimum radius of the O27 down to O24. Hard to see, but I have LEDs in the track for the 'proof of concept' demo above.

Take care, Joe.

Last edited by Joe Rampolla
Choo Choo Charlie posted:

Joe

I really like your Slinky Dog Dasher coaster. 

I encourage others to watch you super video on your post as it not only shows it running but shows you building it like one of those U tube videos on repairing a carburetors!

Great job on building it and making the video.

Charlie

Thanks, I hope to have a follow-up at some point.

As part of a year 'round informal train gang that met Wednesday evenings at Richard Sherry's home in Chicago in the late '80s, I'd seen a photo of the "Silver Sky" dome-obs car on the California Zephyr and thought a PW 2531 could make a reasonable facsimile.

Fortunately, one of the guys worked in a machine shop and told me all I needed was to give him the shell and a dome which I did.  A week later I had this.   It languished in a box through a couple of moves until a few years ago when it made its maiden voyage pictured below.

I didn't physically make it, of course, but it turned out pretty nice.  And I have more plans for this resurrected 2531 in 2019.

photo [1280x554)

Attachments

Images (1)
  • photo (1280x554)
Last edited by Pingman
Adriatic posted:

  IMO building things by hand was what made trains a "real" hobby vs another eccentric's collectable "toy" or model.  I don't feel I do enough really.

I really admire you folks who, after spending good money for a model, have the guts and skill to modify it to make it unique or otherwise more interesting. My fear is that if I tried to do that, I would just turn it into a piece of junk.

I had a Marx 1998 switcher missing the Marx shell.  I found a Lionel SW2 shell and cut out about 1 inch of the Lionel shell to shorten to fit the 1998.  I painted it black, white and red in the colors of ALCOAs Bauxite and Northern short line railroad from the Bauxite, ARK alumina and chemical plant in Bauxite, ARK to the a major railroads main lines.  The Marx1998 is a great running engine and I love to run it. My adult daughter loves to run it very fast and  always beats other engines in racing through the oval and figure 8 on my layout.

Bridges & Water T 2016-8-10 2016-07-26 002

Charlie

Last edited by Choo Choo Charlie

I've created the following two items:

The sailboat, above, I found on eBay and subsequently on Amazon. It fits perfectly on the boat/rocket frame. The mast for the sail can be inserted into the boat. The boat is wood and does float.  This is a recent build.

Mint car with shredded money load.  The car is the KC Fed Reserve. The attention to detail part: The shredded money is also from the KC Fed Reserve. Car and money found on eBay.  I  built this earlier this year.

Steve


Attachments

Images (2)
  • mceclip0
  • mceclip1
Pingman posted:

As part of a year 'round informal train gang that met Wednesday evenings at Richard Sherry's home in Chicago in the late '80s, I'd seen a photo of the "Silver Sky" dome-obs car on the California Zephyr and thought a PW 2531 could make a reasonable facsimile.

Fortunately, one of the guys worked in a machine shop and told me all I needed was to give him the shell and a dome which I did.  A week later I had this.   It languished in a box through a couple of moves until a few years ago when it made its maiden voyage pictured below.

I didn't physically make it, of course, but it turned out pretty nice.  And I have more plans for this resurrected 2531 in 2019.

photo [1280x554)

my late father made one also years ago, however the one he did had a damaged roof, I don't know if its packed away in on of the boxes, or if he sold it off.......


This is a quicky to build special interest car.  I made it this week.

I have had a couple of HO toy 0-4-4 General locomotives for several years probably from a garage sale (where else?).  A plus was they had different style smoke stacks.  Picked up a few Lionel flat car bodies at a recent train show and have lots of trucks in a shoe box.

Found a section of HO track and the locos fit perfectly.  I glued the track to top of one flat car with Aleene's Tacky glue and strung some fine black elastic cord to hold down the locos.

Now I have a neat looking flat car load of half size 0-4-4 General locomotives that could be used for pulling small real trains at for fairs, large city parks, train museums or used to provide paid rides at other sites.

The car looks good in my giraffe car train and in a 0-4-4 General civil war period train for a change of pace.

Charlie

Flat Car w-0-4-4 Gen load 12-4-2018 2018-12-04 001

Flat Car w-0-4-4 Gen load 12-4-2018 2018-12-04 009

Flat Car w-0-4-4 Gen load 12-4-2018 2018-12-04 010

Flat Car w-0-4-4 Gen load 12-4-2018 2018-12-04 013

Attachments

Images (4)
  • Flat Car w-0-4-4 Gen load 12-4-2018 2018-12-04 001
  • Flat Car w-0-4-4 Gen load 12-4-2018 2018-12-04 009
  • Flat Car w-0-4-4 Gen load 12-4-2018 2018-12-04 010
  • Flat Car w-0-4-4 Gen load 12-4-2018 2018-12-04 013
Last edited by Choo Choo Charlie

Currently making with my brother an "inspection" locomotive using a redwood valley MPC general, the body will be made using a lionel passenger car body. Body will need to be cut and shortened to fit on The loco.20181130_074356cat4080 The loco will need a few changes like the drive rods to be changed out so they work with both wheels, rewiring to run on A.C. track and seperate details fitted. Not sure yet on what color it will be painted or what railroad it will be lettered for 

Attachments

Images (2)
  • 20181130_074356
  • cat4080
Last edited by Blake

None of my creations hold a candle to the imagination I'm seeing here.  All I did was find a way to secure three bulldozers to a three different flats and used store bought jewelry chain on line to fake that they are chained down to the deck.  The most creative part was done by a friend of mine who is good with a drill press and had the right sized tap to tap out the hole for a screw.  The only part of the custom flats that's me is that I dreamed up the idea, bought the cars, bought the dozers, and then farmed out the critical work.  I did however glue the chains to the deck.  I really like this thread.  It's given me ideas for future projects that I will probably farm out.

By 1910, Northern Pacific Railway still had on their roster a handful of flatcars 28-36' long from the 19th century. I worked with a few railroad historians, a historic-railcar wood kit maker, and several historic-railroad brass & plastic parts makers to create models of these cars.

 nprr_flat2

The consist uses link & pin couplers; trucks with Lionel couplers are used for the loco and caboose.

nprr_flat3

I never found just the right custom decals to add roadname & numbering; maybe I'll restart that search soon.

Attachments

Images (2)
  • nprr_flat2
  • nprr_flat3
Blake posted:

Currently making with my brother an "inspection" locomotive using a redwood valley MPC general, the body will be made using a lionel passenger car body. Body will need to be cut and shortened to fit on The loco.20181130_074356cat4080 The loco will need a few changes like the drive rods to be changed out so they work with both wheels, rewiring to run on A.C. track and seperate details fitted. Not sure yet on what color it will be painted or what railroad it will be lettered for

I can't wait till we get started.

Adriatic posted:

I've seen it, but thought the Yellow Sub was an actual release 

The Speedy Rocket Launcher; I want to know everything about it 

The Yellow Submarine started out as a log unloader. I just made a cradle to hold the boat.

No.8

Speedy is from a Revell BOMARC kit. I credit "ScaleRail Don" for the inspiration! The launch pad is bolted down to the car from underneath into the jack-stands and the boxes are from Frenchman River, the decals I made. It was nice that the wing tips were separate parts. They are in the retracted position for clearance.

 IMGP3799

Attachments

Images (2)
  • No.8
  • IMGP3799
Last edited by Big Jim

It was awhile before I realized this thread included locomotives, so here is my "Frankenstein" loco,..

IMG_0591IMG_0592IMG_0593IMG_0594IMG_0595

THe story goes like this, years ago I bought an early Williams SD-45 with the idea of converting it into an SD-38. When I was ready to start the project, I opened the box and immediately noticed those Trainmaster trucks. Ugh! no way I can use those for an SD-38, so I decided to make a trainmaster. The shell is an MTH version, with Precision scale details, Scale coat paint, Shell scale decals, ERR sound commander and Evans designs LED Head light.

BTW I did eventually acquire another Williams SD-45 with the proper 6 wheel trucks, so that project will be done one day.

Attachments

Images (5)
  • IMG_0591
  • IMG_0592
  • IMG_0593
  • IMG_0594
  • IMG_0595

I might as well throw my hat into the ring.  I have modified/kitbashed several cars over the past few years.  This was mostly out of necessity as models of these cars are not commercially available in 3 rail.

DSC04774

The first is a Penn Central N9 transfer caboose.  I started with a Lionel PS-1 boxcar.  Stripped it down to the frame and built everything on top. My model represents an earlier version that used propane for heat.  Later units used fuel oil for heat.  The propane tanks were replaced by a rectangular tank that fuel oil could be pumped into.


DSC02130

This is a Penn Central N8A cabin I kitbashed.  Penn Central inherited NE6 cabooses from the New Haven.  Most were in poor condition and relegated to transfer duties.  The best ones were modified for road service by sealing off the copula windows and adding bay windows.  Toilet facilities were added, with water supply tanks installed in the copulas.  Roller bearing trucks were also installed for road service.  My model is based on an Atlas O NE6 which I modified by adding bay windows and sealing several other windows.  The picture shows the car with friction bearing trucks, but these have since been replaced by roller bearing trucks.


DSC02436

This is a MTH Railking crane car right out of the box.  I felt the cab sat too high and the ride was too high.

DSC02442

I lowered the cab by modifying the pivot.  The ride was lowered by modifying the bolsters.  Bettendorf trucks replaced the factory roller bearing trucks.  The smoke stack was cut down.  A heavy dose of weathering completed project.  I was originally considering adding smoke and work lights, but the smoke unit would have required extensive modifications to the cab mounting.  Wisdom told me that was a can of worms I didn't want to open.


DSC02443

The modifications took away the toy-like appearance and made a respectable model of a 150 ton crane.

Tom

Attachments

Images (5)
  • DSC04774
  • DSC02130
  • DSC02436
  • DSC02442
  • DSC02443
tcripe posted:

This began as Lionel's Union Pacific 19121 smooth side dome car. With the help of some Plastruct, it is now D&RGW's California dome lounge, used for special occasions and the Ski train.

Terrycalifornia1california2

Plastruct makes several sizes of corrugated siding. I used "N" gauge for the roof fluting and "O" gauge for the side fluting.  Both applied with epoxy. The roof sections were then wrapped tightly with thick rubber bands every 1/2" or so until  the epoxy had set. I used clothes pins to do the same for the sides. Small pieces of Plastruct were used to blank out window areas per photos of the car,  also held in place with epoxy. I made some decals of screening and applied them over small pieces of Plastruct and glued to the roof to simulate the air vents along the sides.

Terry

Wow, you guys have some great ideas for cars and do great building work.  I am enjoying see all your cars and love that others enjoy this section of the hobby too.


Santa Sled and Reindeer Flat cars for my Christmas Train

I know this is a week late for Christmas but I find after Christmas and New Years, with the lousy winter weather, a great time to build train cars and stuff.

I added a Santa, sled and 8 reindeers plus Rudolph the red nosed reindeer to my Christmas train.  I made the reindeer cars from three junker scout sized flat cars and figures and reindeer from a Hallmark Cards Santa, Sled and Reindeer set.  I painted the flat cars white as reindeer like snow and will show up better with a light color. 

One car carried the Santa sled and two reindeer, a second car carried four reindeer and third car carried two reindeer and Rudolph the red nosed reindeer.  The reindeer were simply glued to the flat cars with 5 min epoxy glue.

IMG_0027


The original Hallmark Cards Santa sled was too big so a smaller one was made from balsa wood and sized for Hallmark Cards Santa.

IMG_0455


A blinking red light was installed in Rudolf’s nose and a power pick up was added to the car. 

IMG_0458


The Christmas Train is usually stationed on the hidden track behind the background and comes out by surprise for the kids after watching the trains run for a few minutes.  The train has a Christmas candy in a gondola also and is one train always used at Christmas time.

Charlie

Attachments

Images (1)
  • IMG_0027
Last edited by Choo Choo Charlie

I did not build this unit but i thought i would post this home built E-unit.

This locomotive started life as two Postwar Canadian pacific F-3's and a postwar Trainmaster .

Found this at my local shop in a collection they had acquired. I enjoy collecting some of the period custom built units as it turns the clock back on our Hobby.  This locomotive shows us a time in our hobby when building was the only way to ever get a locomotive that would never be produced. 

The creativity and the skill of the people that created models like this out of what was available is fun to study. 

Attachments

Images (6)
  • thumbnail_IMG_2169: jan. 25.1960
  • thumbnail_IMG_2170: used a couple f units to help secure the graft.
  • thumbnail_IMG_2171
  • thumbnail_IMG_2172
  • thumbnail_IMG_2391
  • thumbnail_IMG_2392

Here is a modified sloped back coal tender I made years ago and just found it on the train shelves.  Seems Lionelville coal tenders are always full of coal.  This one is empty and the switcher was heading for the coal tower when the tender derailed.  I just cut out the coal load added walls and a floor.  Being empty will make it easier to put the lead trucks back on the tracks!

I love coal tenders.  I picked up a box of 30 or so junked coal tenders years ago so hacking up one is no big deal.

Coal tenders 3 2019-01-17 024

Charlie

Attachments

Images (1)
  • Coal tenders 3 2019-01-17 024
Last edited by Choo Choo Charlie

Here's my contribution to the thread.

My heavily detailed Chessie Steam Special. This is an LTI 6-18011 with a 6-18064 Mohawk Tender. There is work that still needs to be done. Up grades include AC Commander, Super Chuffer, Fan Driven Smoke Unit, Large Steam Rail Sounds, Electro Couplers on the tenders plus all the detailing on the front of the engine and the painting of course.

DSCN0013DSCN0015

Attachments

Images (2)
  • DSCN0013
  • DSCN0015
Last edited by Jayhawk500


Here's our take on a yellow submarine car.  Built/assembled the model kit and mounted it (with magnets) to a well car:

IMG_8977

Scooby-Doo, painted for my daughter when she was in the middle of a Scooby phase:

IMG_8978

A dragon transport car I made to go with our Hogwarts Express:

IMG_8980

P-51 transport car.   This one was actually my first ever "kitbash" attempt...  Lots I would do different today, but still a fun piece:

IMG_8981

McQueen and Mater...  this one was for my kids' "Cars" phase while running trains at the club:

IMG_8983

Coyote and Roadrunner:

IMG_8984

...and speaking of Acme, here is my high-powered magnet car.  Works really, really well for clearing the tracks of small metal debris:

IMG_8985

The magnet lifts out from the top, allowing all the accumulated debris (clinging to the underside of the car) to fall into a trash can:

IMG_8986IMG_8988

...and, of course, on our layout Thomas blew-off his responsibilities one too many times.  He now stands as a reminder to other engines to be really useful:

IMG_8990

Attachments

Images (10)
  • IMG_8977
  • IMG_8978
  • IMG_8980
  • IMG_8981
  • IMG_8983
  • IMG_8984
  • IMG_8985
  • IMG_8986
  • IMG_8988
  • IMG_8990

This is my entry into this thread. This is my built-from-scratch EMD F3 diesel unit. Downloaded a parts diagram from Lionel and began assembling the various parts from a number of different sources. Took about 3 months to get everything. Custom paint and decals by me. Full TMCC electronics, LED lighting and rear electro coupler.

Attachments

Videos (1)
IMG_0826
Last edited by EricaAnn
Choo Choo Charlie posted:

Frizzenbee

My favorite of your many cars is the P 51 plane in crates on a flat car.  Great job.

IMG_8981

Charlie

Thanks!  Even though that's one of my early ones, that's a favorite of mine as well.  My number one favorite, though, is probably the passenger cars in my daughter's train set.  Back when she was ~3, we put pictures of all her favorite stuffed animals in the windows.   I could do a better job of this today... but for nostalgia reasons I like it the way it is:

IMG_2446

Attachments

Images (1)
  • IMG_2446

These will be for sale along with 40+ other items at the upcoming Lonestar Hi-Railers Train-a-Palooza on March 2019 in Grapevine, TX. 

D10F6FC6-9DAC-4479-8423-532BD558A1057A5BD9E8-63BD-4B12-B36D-AD0C567E4CFBF9A9CC4A-F6A0-41B8-ABDA-695D759172EA

They are Atlas autoparts boxcars repainted for Quanah, Acme & Pacific Rwy. In reality these cars never existed although the QA&P hauled lots of autos “back in the day”.  The Frisco-QA&P-ATSF scheme cars commemorate the joint symbol freights: QLA, QSF, and CTB which ran from coast to coast.  After these photos were taken, I later applied lube plates, ACI badges, and matte finish.

I have always liked the way these cars turned out, but I have GOT to reduce my collection. 

Attachments

Images (3)
  • D10F6FC6-9DAC-4479-8423-532BD558A105
  • 7A5BD9E8-63BD-4B12-B36D-AD0C567E4CFB
  • F9A9CC4A-F6A0-41B8-ABDA-695D759172EA
Last edited by Rob Leese

This Alaska GP7 started out all blue on a black frame in a '90s Lionel set.  It became my second airbrush project after a Grumman F4C plane model.  I masked it off I went to town with yellow to match the prototypical ARR paint scheme and added a winterization hatch. camera%2520download%2520072714%2520113 Some time later I picked up the GP9 from a Titanic set break up and swapped out the bodies so now my ARR GP7 has a yellow frame and basic Railsounds.

This USAF switcher stared out as a K-line SP Black Widow S2.  Shaved off cast in grab handles and used staples for add-on grab handles, re-painted and cut off stamped steel steps and added better pilots.camera%2520download%2520051416%2520005

Attachments

Images (2)
  • camera%2520download%2520072714%2520113
  • camera%2520download%2520051416%2520005

I picked up An early MTH RK N&W Y6B and wanted an auxiliary tender to go with it.  I just couldn't justify the going rate for such items so I tried my hand at making one.IMG_1490IMG_1491IMG_1492 Years back I picked up a couple of the Lionel separate sale whistling tenders, swapped out the frames for some starter set tenders so one was a perfect candidate.  I cut out the coal load, laid in some styrene sheet trimmed to fit inside the sides and around the water hatch.  The treads are actually cut from sanding sheets, added a ladder and acostume crystal for the back up light lens.

Attachments

Images (3)
  • IMG_1490
  • IMG_1491
  • IMG_1492

I am really enjoying seeing all the great ideas and construction-bashing jobs by so many.  This type of stuff gives me more pleasure than most parts of the our great model train hobby.

Coach Joe:   Great work on your GP9 and auxiliary tender.  The tender job encouraged me to keep rounding up parts for my planed Vanderbilt tender.  Got most of them now and I have reviewed pictures of them and just need to "get round to it".

The GP 9 turned out super.  What did you use or what did you do to get the great letters and numbers on the repaint job?

Charlie

Last edited by Choo Choo Charlie

Lee, Pola Max?  O gauge? Kit?

Here's another two:IMG_1062 If you look closely at the car numbers they're all 510.  The 510 came in a MTH RK set of full vista domes with an F40PH.  Long before MTH came out with that set, I picked up a set of RK Santa Fe streamliners with the red stripe and 2 additional vista domes that i intended to re-paint into Alaska RR colors.  That project morphed into converting them into NYC Empire State Express cars.  Before that happened I picked up both the ARR full dome set and some ESE cars and the Santa Fes languished for a while.  I then won an ebay auction for 3 of the 510 bodies, end doors and diaphragms.  So far the 2 additional vista domes have contributed frames, trucks interiors and vista domes so now my ARR passenger train is 5 cars long instead of 3 and I have the K-line Denali business/observation car to bring up the rear.    RK passenger car mounting to frame has changed over the years so the bolster in the body had to be removed and holes drilled in the bottom of the body to allow screws to mount to the roof bolsters.  Still have 1 more 510 to finish up.  Not sure if I'll sacrifice the vista dome from the set or the coach.  A couple of close ups of one:IMG_1482IMG_1484

Attachments

Images (3)
  • IMG_1062
  • IMG_1482
  • IMG_1484
Last edited by coach joe
Lou1985 posted:
Rob Leese posted:
Lou1985 posted:
Rob Leese posted:

ATSF_marker5ATSF_marker7

This is an MTH coach with the added modifications of tail gate and marker.

Where did you get the gate material?

After some digging I found the 2014 thread that lead me to the parts I used:

https://ogrforum.ogaugerr.com/topic/atsf-marker


I looked through it but didn't see a part number for the gate you ended up using. Perhaps I missed it?

Here is a link to download Keil Lines O gauge parts list.  The item is called a vestibule gate.

http://www.oscaledirectory.com...keillineproducts.pdf

When I was first got back into the hobby and started going to local train shows I picked up 3 flat car shells real cheap.  One brown, one navy and one a very pale blue.  I added some plastic K-line trucks and added loads.  Here's the brown one, wearing UP HO decals, and the navy one with Alaska with individual dry transfer letters.  IMG_1487IMG_1488IMG_1489 

Attachments

Images (3)
  • IMG_1487
  • IMG_1488
  • IMG_1489
Rob Leese posted:
Lou1985 posted:
Rob Leese posted:
Lou1985 posted:
Rob Leese posted:

ATSF_marker5ATSF_marker7

This is an MTH coach with the added modifications of tail gate and marker.

Where did you get the gate material?

After some digging I found the 2014 thread that lead me to the parts I used:

https://ogrforum.ogaugerr.com/topic/atsf-marker


I looked through it but didn't see a part number for the gate you ended up using. Perhaps I missed it?

Here is a link to download Keil Lines O gauge parts list.  The item is called a vestibule gate.

http://www.oscaledirectory.com...keillineproducts.pdf

The part is now sold by Scale City Designs here is the link :

http://scalecitydesigns.com/sc...r-details/vestibule/

CSX Al posted:
Rob Leese posted:
Lou1985 posted:
Rob Leese posted:
Lou1985 posted:
Rob Leese posted:

ATSF_marker5ATSF_marker7

This is an MTH coach with the added modifications of tail gate and marker.

Where did you get the gate material?

After some digging I found the 2014 thread that lead me to the parts I used:

https://ogrforum.ogaugerr.com/topic/atsf-marker


I looked through it but didn't see a part number for the gate you ended up using. Perhaps I missed it?

Here is a link to download Keil Lines O gauge parts list.  The item is called a vestibule gate.

http://www.oscaledirectory.com...keillineproducts.pdf

The part is now sold by Scale City Designs here is the link :

http://scalecitydesigns.com/sc...r-details/vestibule/

Thanks for the link.

99272FDE-009B-49E3-AF26-068AEFFB232375F7CB86-0BF9-4FF4-A86F-D3586C78ABE68791E6B0-D6BF-4D12-B0E2-D4DC0075D0AD74D66038-3572-41AF-B06C-D0E3001ECA18These are prelim photos of a current project. 

As an adaptation from childrens’ literature:  “who will help me obtain a Frisco MO/W F unit?  ‘Not I said said Lionel. Not I said said Atlas. Not I said MTH.’  Then I will do it myself said the old Frisco switchman.”  And he did. 

The trouble is, nobody makes O gauge decals for this Frisco paint scheme.  It may be a while finishing this one.

Mike Condren photo included.


Attachments

Images (4)
  • 99272FDE-009B-49E3-AF26-068AEFFB2323
  • 75F7CB86-0BF9-4FF4-A86F-D3586C78ABE6
  • 8791E6B0-D6BF-4D12-B0E2-D4DC0075D0AD
  • 74D66038-3572-41AF-B06C-D0E3001ECA18
coach joe posted:

HO scale decals work well for O gauge flats.

This isn't home made but I modified it.s-l1600st.maarten 003st.maarten 004st.maarten 005First picture is how it comes out of the box.  i fabricated pilots, added windows, engineer, fireman and hand rails to the door.  Safety stripes on pilot were individually applied. 

Nice job! Joe, I like those air tanks up on the hood

Rob Leese posted:

74D66038-3572-41AF-B06C-D0E3001ECA18These are prelim photos of a current project. 

As an adaptation from childrens’ literature:  “who will help me obtain a Frisco MO/W F unit?  ‘Not I said said Lionel. Not I said said Atlas. Not I said MTH.’  Then I will do it myself said the old Frisco switchman.”  And he did. 

The trouble is, nobody makes O gauge decals for this Frisco paint scheme.  It may be a while finishing this one.

Mike Condren photo included.

 The on

Rob,

Great start!  As far as decals go, try making your own printing them on clear decal paper (or even on white decal paper in your case).  I use a series of fonts from "railfonts(dot)com" to make my own.  "Frisco" font looks a LOT like Great Northern's lettering, which they have (and which I downloaded for a project).  They also have a font called "heralds" which will give you with one keystroke a herald of almost any American railroad (Frisco included).  You download their program and install it in your word processing program, and type away.  Complete instructions are on their site.  I highly recommend it.  The only trouble is, printing ink isn't completely opaque and lighter colors may need two decals to bring out the color.  The Frisco red is nice and vibrant but still may need one decal on top of another to bring out the color.  But it's red lettering and herald on a white background, so try it.  I used that technique on a yellow decal over dark blue and the results weren't bad.  So red over white will turn out even better.  The signature below was made using the Chesapeake and Ohio font.  Good luck and let us know if your mission (should you decide to accept it) is successful!

I couldn't find a photo of the yellow on dark blue that I did, but here's dark blue on yellow.  The boxcar is made in S, but not in C&O colors, so I copied the O gauge and prototype placement using the railfonts program:

Attachments

Images (1)
  • blobid0
Last edited by poniaj
coach joe posted:

Lee according to another thread Lionel put those air tanks on only 3 switchers, this Alaska 8154, it's predecessor, Alaska 614, and orange tanks on a DT&I switcher.  they do give this switcher a different look.

Good job on the flat.  i knew I wasn't the only one using HO decals on O equipment.

Thanks for the information on those. I use HO decals a lot on O scale stuff 

Add Reply

Post

OGR Publishing, Inc., 1310 Eastside Centre Ct, Suite 6, Mountain Home, AR 72653
800-980-OGRR (6477)
www.ogaugerr.com

×
×
×
×
Link copied to your clipboard.
×
×