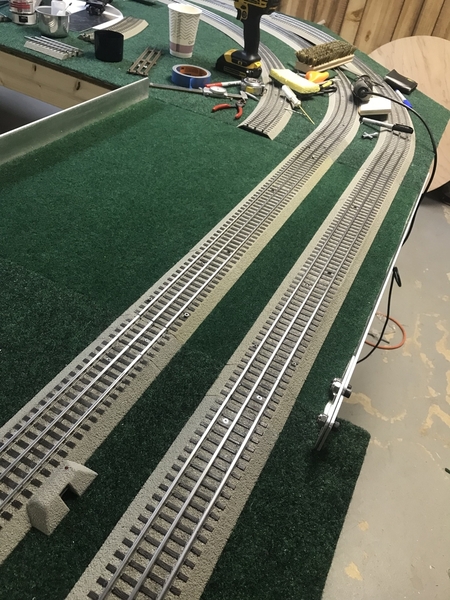
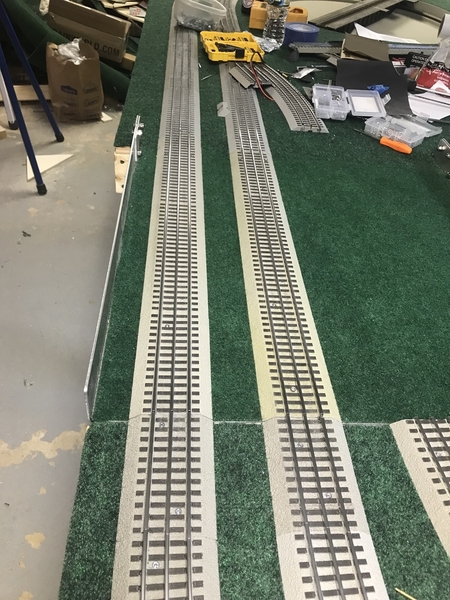
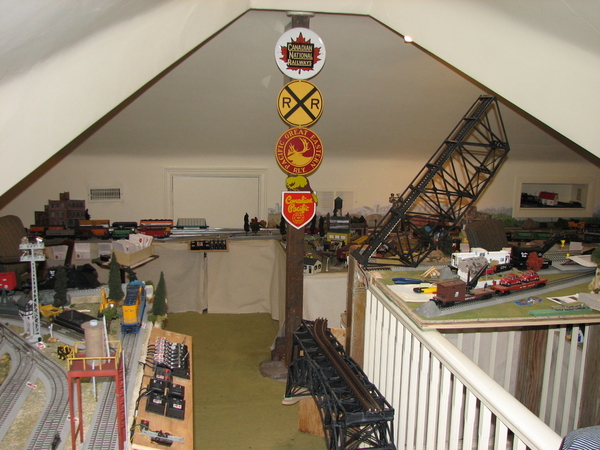
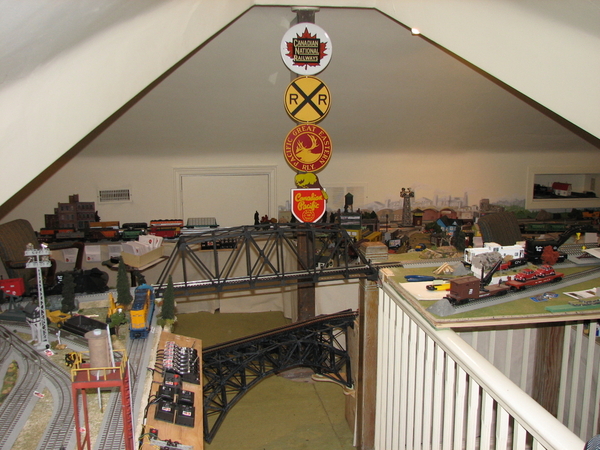
Todays progress.. I wish it wasn’t but the weather here absolutely is junk
Great job and thanks for sharing. The critical point in this mechanism is the raised pivot in the hinge to prevent the track from binding when opening the unit. I also have a lift up section and followed the design of Jim Barrett in a past article in OGR Magazine. Showed how to make the pivot point above the level of the unit to avoid track binding. A bit trick but it works!
Enjoy!
Michael
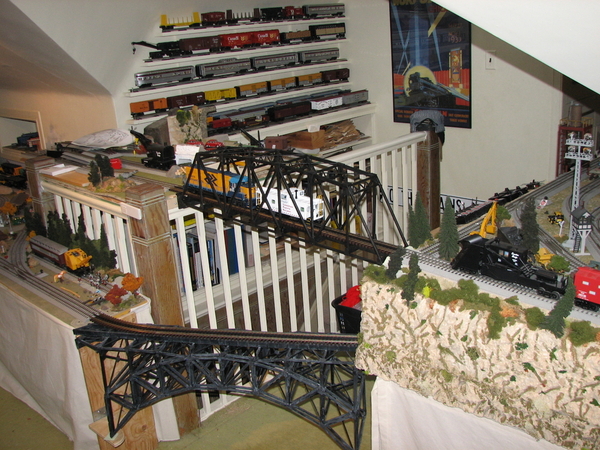
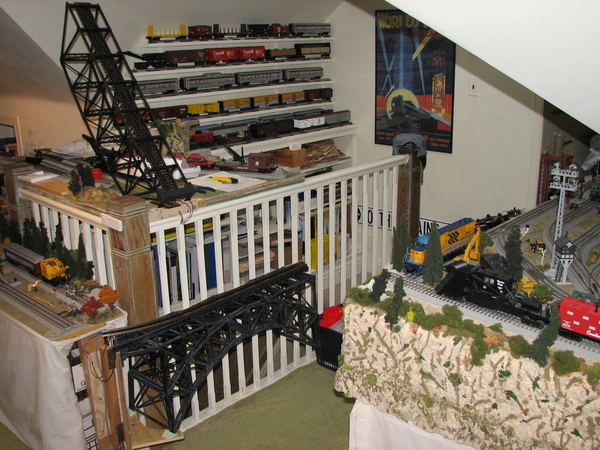
I used the lift up type bridge on the top level, and a swing type (like a door) on the bottom level. The hinge on the top is above the track level as stated earlier. I painted the hinge flat black like the bridge, and it kind of disappears. The hinge was from Home Depot.
I used Atlas track on the bridge, and Fastrack on the rest of the layout.
Since the bridge is light, I just open it by hand and gently rest it on the track on the approach side. Some people add a counter balance or cylinder mechanism to open & close the bridge automatically.
I aligned the track with a simple wooden wedge that holds the ties on the bridge track in place, both vertically and horizontally. The layout track on both sides of the bridge is held in place with a screw through the tie and shimmed for the desired height.
I then power the track on the bridge with two wires soldered to the bridge track center and outside rail then connected to a terminal strip on the layout side of the bridge.
Attachments
@Michael Pags posted:Great job and thanks for sharing. The critical point in this mechanism is the raised pivot in the hinge to prevent the track from binding when opening the unit. I also have a lift up section and followed the design of Jim Barrett in a past article in OGR Magazine. Showed how to make the pivot point above the level of the unit to avoid track binding. A bit trick but it works!
Enjoy!
Michael
Thank you! .. works perfect
@Joe K posted:I used the lift up type bridge on the top level, and a swing type (like a door) on the bottom level. The hinge on the top is above the track level as stated earlier. I painted the hinge flat black like the bridge, and it kind of disappears. The hinge was from Home Depot.
I used Atlas track on the bridge, and Fastrack on the rest of the layout.
Since the bridge is light, I just open it by hand and gently rest it on the track on the approach side. Some people add a counter balance or cylinder mechanism to open & close the bridge automatically.
I aligned the track with a simple wooden wedge that holds the ties on the bridge track in place, both vertically and horizontally. The layout track on both sides of the bridge is held in place with a screw through the tie and shimmed for the desired height.
I then power the track on the bridge with two wires soldered to the bridge track center and outside rail then connected to a terminal strip on the layout side of the bridge.
Nice!! Great pics
@Joe K posted:I used the lift up type bridge on the top level, and a swing type (like a door) on the bottom level. The hinge on the top is above the track level as stated earlier. I painted the hinge flat black like the bridge, and it kind of disappears. The hinge was from Home Depot.
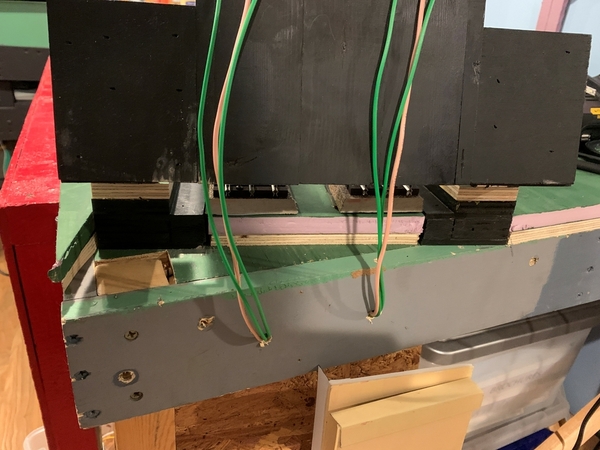
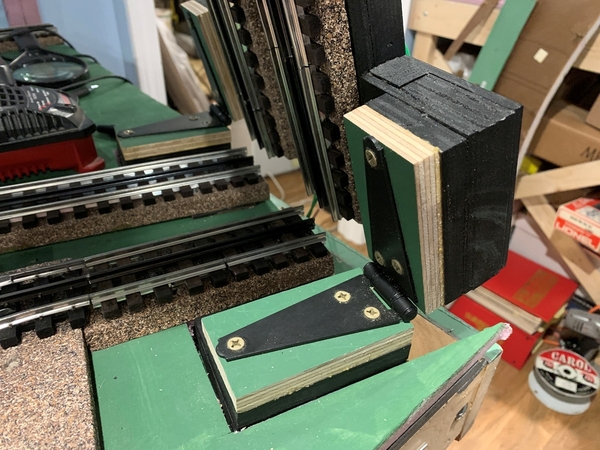
I used the same Home Depot hinges on my bridge. They are heavy duty so they handle the load well and don't shift. I like how you hide them so you see very little of them from the top down. Mine are exposed but I will finish them with flat black paint so they look part of the bridge. I also like your wedges you made for the other end. Great idea. I just cut a chunk out of the foam and 1/2 plywood table top to fit. But I'm going to try the wedges on my 2nd level bridge and a lift out I already installed on another part of my layout. 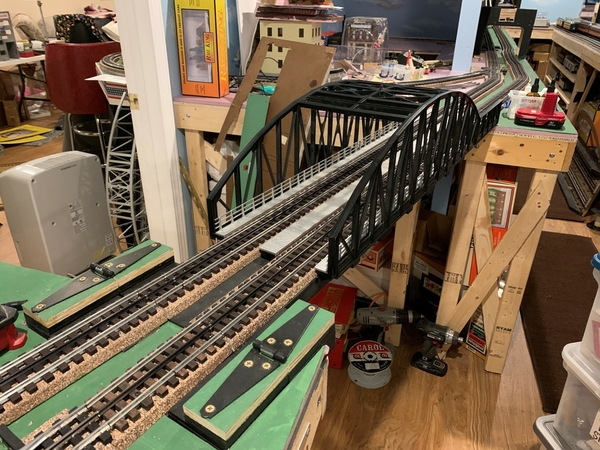
Attachments
Heres some more on the Bridge..While i was perfectly happy to lift up and down manually I made the mistake of telling my 3.5 yr old Grandson while I was installing it the "Maybe Papa will put a motor and a Button "..last week he was trying to lift it and stopped and turned to me and asked wheres the button Papa??..Sooooo Linear actuator with control and a remote has been installed ..this vid is from earlier today Ive since cleaned up wiring and re arranged the mounts so its just hit the button and it goes up and hit it and goes down
Attachments
Hmm... I do have a linear actuator around here somewhere, maybe I should make mine do that? ![]()
That is really a neat setup there. Very well thought out.
Jeff
@gunrunnerjohn posted:Hmm... I do have a linear actuator around here somewhere, maybe I should make mine do that?
it was easy!! .. like i said I was fine with lifting up and down manual..But the Lil man is the boss so..
@mowingman posted:That is really a neat setup there. Very well thought out.
Jeff
Thank you Jeff..i spend an awful lot of time thinking all this stuff thru..I really need a break!
Snkbittin, great addition with the actuator. You’ll probably have more fun lifting and lowering that section rather than running trains.
Two layouts ago and 2,600 miles away in PA, I designed a lift out bridge with two interesting features.
First, the bridge was held in place with cabinet latch magnets which were wired at one end for power to the center rail and outside rail power at the other end. You can see the wire soldered to the magnet housing in one of the pictures. The other end (metal plate to which the magnet attaches) is soldered to and wired to the bridge track.
Second: I protected the approach tracks with normally open push buttons at each end which cut power if the bridge was out.
To stabilize the bridge, brackets were attached to each side:
Attachments
By the way, Snkbitten, that's a nice print of the Arado Ar234. Where did you get that?
@stangtrain posted:Two layouts ago and 2,600 miles away in PA, I designed a lift out bridge with two interesting features.
First, the bridge was held in place with cabinet latch magnets which were wired at one end for power to the center rail and outside rail power at the other end. You can see the wire soldered to the magnet housing in one of the pictures. The other end (metal plate to which the magnet attaches) is soldered to and wired to the bridge track.
Second: I protected the approach tracks with normally open push buttons at each end which cut power if the bridge was out.
To stabilize the bridge, brackets were attached to each side:
Hi Stangtrain, that's a very cool bridge! The safety switches are a heads up idea. Oh man, without the switches if you did forgot and ran that Big Boy off the layout, that would be painful. Speaking of Big Boy, I can't tell from the photo, but is it LionMaster or Scale? Nice work!!!
@stangtrain posted:Two layouts ago and 2,600 miles away in PA, I designed a lift out bridge with two interesting features.
First, the bridge was held in place with cabinet latch magnets which were wired at one end for power to the center rail and outside rail power at the other end. You can see the wire soldered to the magnet housing in one of the pictures. The other end (metal plate to which the magnet attaches) is soldered to and wired to the bridge track.
Second: I protected the approach tracks with normally open push buttons at each end which cut power if the bridge was out.
To stabilize the bridge, brackets were attached to each side:
Very slick! Thanks for sharing
@breezinup posted:By the way, Snkbitten, that's a nice print of the Arado Ar234. Where did you get that?
It’s part of a set that focuses on unit markings that where unique .. the Artist was named Dennis Davidson and I’ve had it for yrs now ..I have that and TA-152 and FW-190D 9 I’m a big fan of WW2 aviation with a strong leaning to German machine s
@stangtrain posted:First, the bridge was held in place with cabinet latch magnets which were wired at one end for power to the center rail and outside rail power at the other end. You can see the wire soldered to the magnet housing in one of the pictures. The other end (metal plate to which the magnet attaches) is soldered to and wired to the bridge track.
That cabinet latch magnet system is slick. At first, I thought, "How do you connect the outside rail?", but then I realized you said you used another cabinet latch magnet on other end for the outside rail -- so they are off set. Brilliant. I'm going to try that on my lift outs. I currently have a lift out that's wired just on one end and my lift out sits below, tethered by the wires. But this eliminates the wiring entirely and allows you to set the lift out anywhere. Thanks for sharing this!
Mike
Snkbittin, Outstanding job on the lift bridge! Runs nice and smooth!
Here is the one I build a little over 3 years ago. I built it in my office while I was building my train room off the back of my garage.
and here it is in the train room.
Hope you enjoy it!
Attachments
Hi, that's exactly what I need. Can you show a closeup of how you got the rails to line up each time? Thanks! Robert


