Team,

i have the 2011 Lionel 18 inch Milwaukee Road 7 car passenger set from 2011 that I never opened until today. Half of the cars will light up and the other half don’t.

I stored them in my attic which might be the reason they don’t work.

I have the correct replacement bulbs, and replaced them on the one coach and they still don’t light so I am thinking that the board in the roof is not good or the on / off switch on the bottom of the car is bad.

Two question from the smart folks on the forum

1. Would the heat from all these years ruin the board and bulbs? The bulbs are 18V - Lionel doesn’t have them but are looking to get more but I got an alternate from them, inserted and the car still won’t light up.

2. Is there a better alternative, say and LED replacement board that would be plug and play. If so, where would I locate them? The upcoming York Show?

Thanks.

Attachments

Images (6)
  • 88D2DE98-9927-48D7-AB02-5E34554D17CD: Car Body
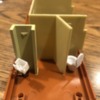
  • FB9E9E1C-A77C-4D63-ACDE-29268F4B2C49: Lighting Board inside the car mounted on the roof
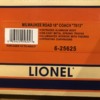
  • 28D8FA21-55E5-4467-BB40-D227C91EB59B: Model Number
  • 1714AC91-0276-40E7-9330-B5C653B0B7EA: Connector for Lighting to trucks
  • 6D3B969C-C911-4535-8F63-2B98C283380E: Board with Lights
  • 8B438DCA-456C-4054-BE63-EEFCEB6AC14E: Another picture of board mounted to the roof
Last edited by PSU1980
Original Post

Replies sorted oldest to newest

BobbyD,

No I did not but I will definately do that and will report back. I will need to get myself a new meter. I have a super old one that is pretty much shot. I will report back.

I am assuming the I just need to touch the ends of the meter to the ends of the bi plug bulbs. That would tell me the bulbs are good, correct?

First off, heat in the attic didn't kill the bulbs, they'll survive much more than that.

Truthfully, if you have to tinker with the cars, I'd be going for an LED lighting upgrade.  It's not expensive or difficult, and you'll have flicker-free lighting that's much more even, adjustable intensity, and the current draw will be less than 10% of the incandescent bulbs.

All that you really need to do is take the old board on the cars, solder LEDs onto the old light connections, and add a resistor to the red wire that plugs into the trucks.  It probably wouldn’t take any more time than installing a new board.  If it’s running on 18 volts I’d you let me know how many lights would go in I can calculate the type of resistor you would need to complete the job.  This way would also be much cheaper than having someone else install new lights or even buying a kit to install yourself.

Thanks guys for the information. The kit looks great although at $20/car a little pricy. Is it possible to just add one LED strip/car with a resistor to the red wire as mentioned by Evan? Or am I missing something?

I purchased a role of LED strip lights a year ago with the intention of trying an upgrade. Could these be used, they're 12V with just adding a resistor? Please see attached image.

Thanks!LED Strip


ironman1 posted:

Thanks guys for the information. The kit looks great although at $20/car a little pricy. Is it possible to just add one LED strip/car with a resistor to the red wire as mentioned by Evan? Or am I missing something?

I purchased a role of LED strip lights a year ago with the intention of trying an upgrade. Could these be used, they're 12V with just adding a resistor? Please see attached image.

Thanks!LED Strip

You could definitely use the LED strip! At 18v input with 12 volts needed you would need a 100 ohm resistor from my calculations.  This would be a red-violet-yellow-yellow color pattern.  Let me know if you need any help!

Last edited by Evan Cihlar
Evan Cihlar posted:

All that you really need to do is take the old board on the cars, solder LEDs onto the old light connections, and add a resistor to the red wire that plugs into the trucks.  It probably wouldn’t take any more time than installing a new board.  If it’s running on 18 volts I’d you let me know how many lights would go in I can calculate the type of resistor you would need to complete the job.  This way would also be much cheaper than having someone else install new lights or even buying a kit to install yourself.

Well, that will provide light, but there's a couple of issues with that approach.  You don't get variable intensity, flicker-resistance.

If you're going to run on AC, one way to avoid damage is to have half the LED's one polarity, and the other half the other polarity on the strip.  This allows the LED's that are lit to protect the unlit ones from excessive reverse voltage, they're only rated to around 5V reverse voltage.

You will also be using more power with all the LED's in parallel vs. the strips that have three in series for each group. 


Last edited by gunrunnerjohn
For ease of installation without bothering learning much on what is what with leds, the kits are the way to go. With Radio Shack now gone and prices for bulbs at Auto parts stores being so high priced, I'll be slowly moving to led also, even on postwar items (I still prefer the look of incandescence though). The way I see it, the led kit is about paid for in or around ten years.(three-four bulb changes) The #1 thing is that leds use DC voltage, don't try ac only. As John stated, reverse voltages of ac can do damage, a diode must protect them (or a Light Emiiting Diode; an L.E.D ). (Diodes are a one way "valve", they can stop an ac wave direction, to get one direction. This formed DC is lumpy, pure DC is not. A capacitor acts like a mini battery, smoothing the lumps by saving up excess power when it's strong, and feeding power when the power lumps get weaker. #2 never exceed thier max voltage at all. They usually light far below that max. The resistance is mostly tayloring the max supply voltage to the lesser needs of the leds, keeping it under the led's max. The kits make use of capacitors to get flicker free lights. Some custom fits I've done, lit for near two minutes after power was shut off. That's how little power an LED actually uses. If you are handy, making an led system isn't hard. It is a learning experience, and is cheaper overall too. But the convenience of the kits is worth the price as well IMO. If you don't have continuity from rollers to board, the kit won't fix that. Start there. As a side note, continuity is a good way to check for bad bulbs. It beats trying to see a wire break inside them. I've received boxes of bad bulbs that looked fine, but found no continuity between leads. A rule of thumb: a 6v bulb fed 3v will burn half as bright and last for twice as long. Feed it 12v and it burns twice as bright but lasts half as long. There are some excess heat issues with some swaps to watch out for too, but swapping bulbs isn't usually too radical if care is used. (14v-24v at low watts would be close enough for most applications)

  I've had composer and photo issues today too. Likely they are preparing for an update of some kind. Try again. (My last post was not written as a "solid block of text"; I know how hard that can be to follow for tech reads. That is just how it posted itself)

  The led route isn't hard. It may seem so at first, but it really isn't. You already figured out a better place to pull the power, I bet you could get a better handle on it quickly.(most solid state electronics switch on the ground leg fyi )

 In kit form it's nearly as simple as two new wires to connect. 

To assemble a driver from scratch might be cheaper than one pack of bulbs too. ($4-$8 just for a 2- pack here. Near a 100% jump in price just since the corner RS closed)

  Usually it just takes the right way of someone stating the same old stuff a little differently and it all clicks together suddenly

ironman1 posted:

Thanks guys for the information. The kit looks great although at $20/car a little pricy. Is it possible to just add one LED strip/car with a resistor to the red wire as mentioned by Evan? Or am I missing something?

I purchased a role of LED strip lights a year ago with the intention of trying an upgrade. Could these be used, they're 12V with just adding a resistor? Please see attached image.

Thanks!

Your photo came up "Image Not Found". Is it something like this? ($8 on Amazon)

LED Strip light

If so, you can get the circuit boards from the kit by themselves for $20 a pair and simply hook each one to an appropriate-length snipped from the strip and your pickup roller feed (no resistor required). Bonus: you can customize the brightness of the strip.

---PCJ

Attachments

Images (1)
  • LED Strip light
Last edited by RailRide

Or buy a few single led , enough for a mistake or three, and some general purpose diodes, a variety pack of resistors maybe two, and a couple of capacitors, and play "mad scientist".

  Start with low volts, high resistance. Lower resistance to see results. Raise resistance again, raise voltage, lower resistance watching results, repeat till you burn it up.

  Now you know what to expect from that LED# for under a buck lost. You know which resistor to use for the job too, order a pack of those. You know enough to make more sense of some parts of the spec sheet too.

Cheap, fun, educational, and confidence building.

You WILL find a use for a single lit one when done too   Deciding on a narrow or wide focused beam is another user consideration for buying fyi. But as simple as narrow for headlight or sconce, or a wide for "room" lighting. Or not being so picky as long as there is light

Before you balk, look close at some parts costs at supply houses and eBay. The individual parts are not expensive or numerous per circuit.

If you're as cheap as I am at times, you'll even salvage some of the parts from about anything with a cord heading for a garbage can.

(Avoid the TV sets.. there is a high voltage line with a cap in there that is no joke. It does not need to be plugged in to bite you. It looks like a sparkplug wire.  At least watch a Youtube video on safely bleeding the charge to a ground)

The kit prices are still a time saving bang for the buck imo... If you can spare the extra few coins

Doing 20 slow, I think prototypically you'd have some variance in light intensity from lounge to coach to dome to diners, sleepers, etc., anyhow. We just tend to like it evened out for models. 

Add Reply

Post

OGR Publishing, Inc., 1310 Eastside Centre Ct, Suite 6, Mountain Home, AR 72653
800-980-OGRR (6477)
www.ogaugerr.com

×
×
×
×
Link copied to your clipboard.
×
×