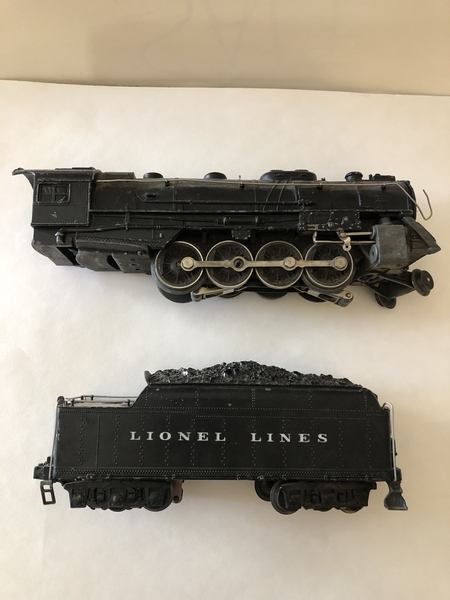
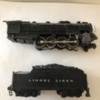
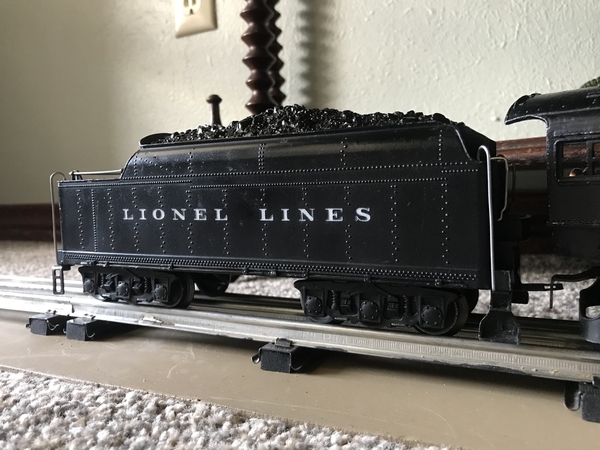
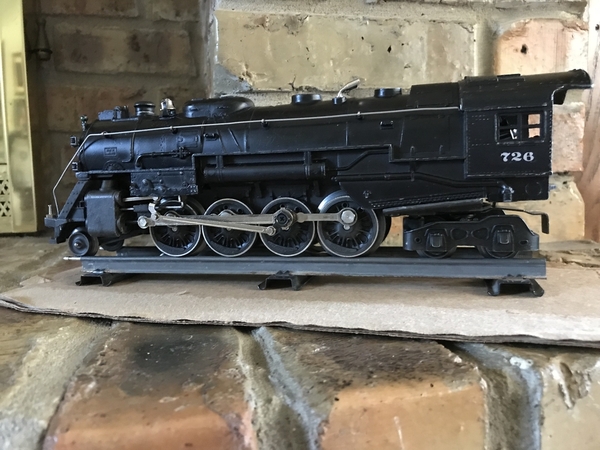
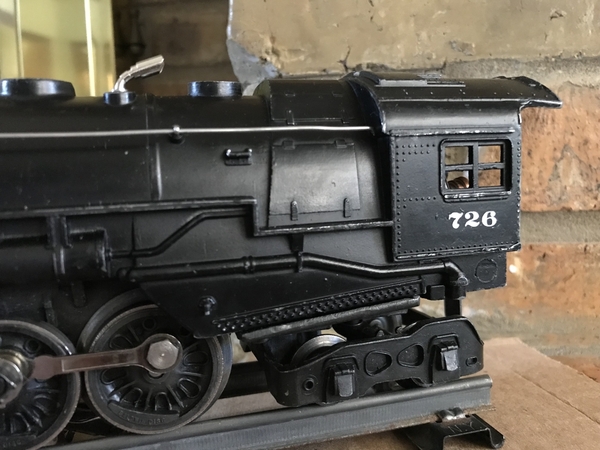
This is a recent acquisition from “mowingman” who happens to live just 30 minutes away. It’s a “in need of a total restore but fabulous engine and tender combo”. Probably a 47 or maybe a 48. Not quite sure but mowingman thought the earlier. In the transaction I got to actually meet in person a fellow forumite and tour his setup to boot. My train efforts pale in comparison to him as well as to most of you!  Great fun.

The engine has some wear but I think it will come out real nice.  Still barn fresh. Missing a couple of hard to find items (boiler front and steam chest) but after checking with the TrainTender and others I found TrainWorx In Pennsylvania had both after a referral from Harry Hennings. The boiler front is a new repro hard casting that TrainWorx is just starting to crank out. I’ll share that when I get it.

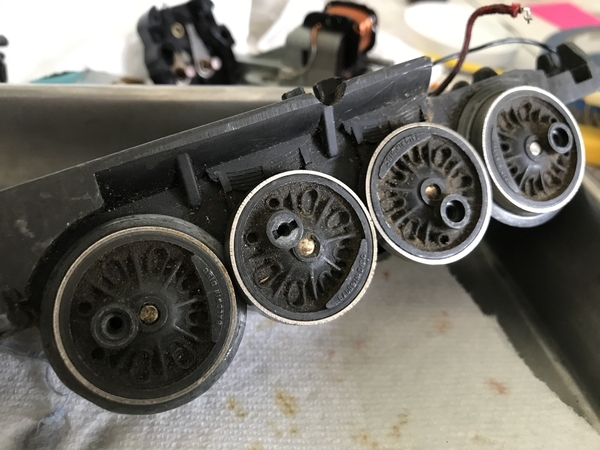
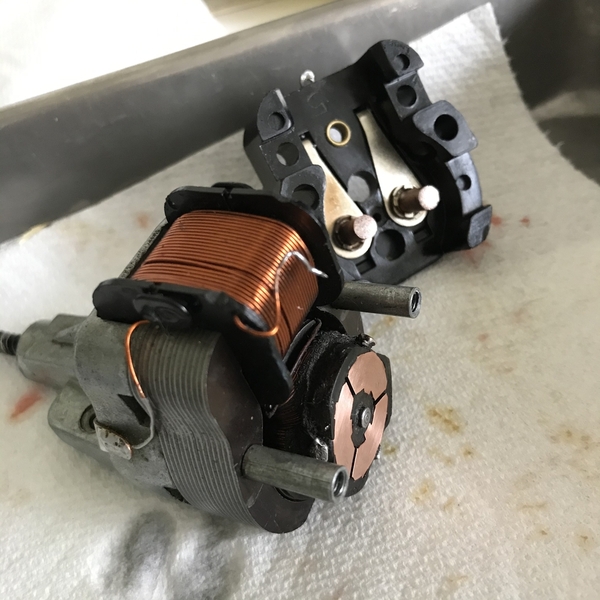
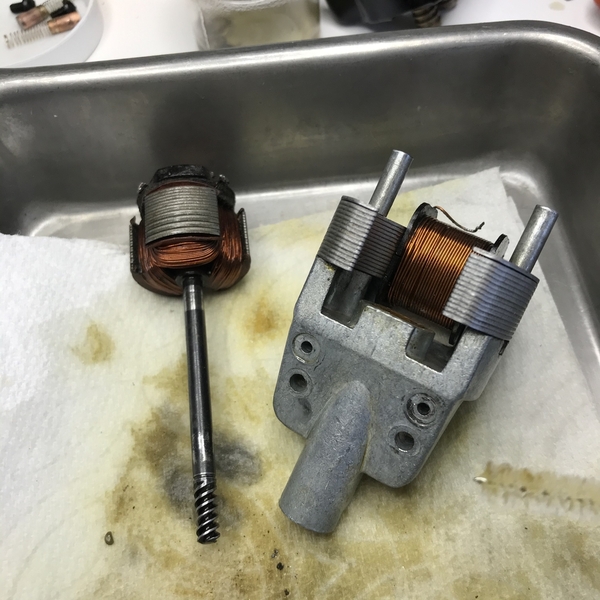
Photos below. At this point I’ve completely torn down the engine.  It did not run. It was so gunked up the brushes were stuck up in the tubes. Did not seem to be oil on the brushes but was fouled with carbon black.  They cleaned up nice.

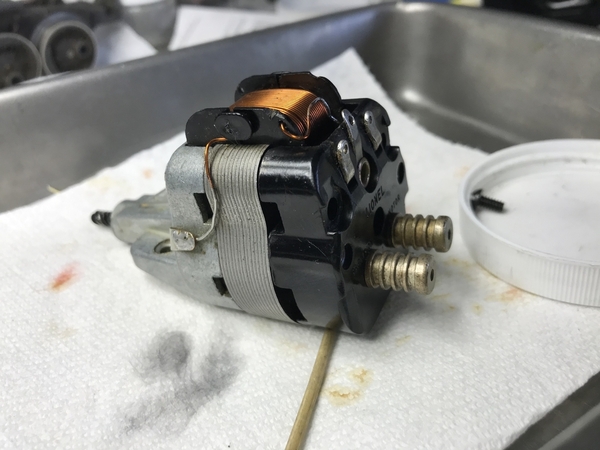
Test runs smooth as can be.  This is the loose bearing variant 671m-1 I think.  Anyway it had 11 bearings total.  I reassembled it and then remembered I had a leftover bearing cage with five ball bearings from a 726RR rebuild.  So I redid the setup with 11 bearings in the rear and the bearing cage in the front.  It seems to run better with more bearings. Fit up really well and with one extra shim on the front it has a hair under 0.01” axial play.  Much better than my other motor.

NOW MY QUESTION and the reason for the post: on both of these engine rebuilds I have not been able to completely remove the armature.  I see in other threads that it can be done.  For me the shaft end with the worm is always too large in diameter and it simply cannot pass through the front oilite bearing.  What is the proper procedure?  

In the end feel fine with my result as I thoroughly flushed the rear with oil.  Same with the oil hole and front bearing.  Then reloaded the shims and loose (rear) and caged bearing (front) with grease.  Any thoughts welcome...I thought about spinning it under power and hitting the worm with a 600 grit wet-o-dry sandpaper but in the end got lazy.

The first photo used with permission from Jeff Thomas, all others mine.

lionel 726 plus 2426w side1FD845AD-FA12-4C62-BF99-C2B19747C8DA07A667FC-05BA-4399-BB60-6FD04381E09400461099-65B3-44D1-B783-EE69BEB862A9

Attachments

Images (4)
  • lionel 726 plus 2426w side
  • 1FD845AD-FA12-4C62-BF99-C2B19747C8DA: 70+ year old dust!
  • 07A667FC-05BA-4399-BB60-6FD04381E094
  • 00461099-65B3-44D1-B783-EE69BEB862A9: I’ve always felt this style engine is a work of art.
Original Post

Replies sorted oldest to newest

On your 671M-1 motor, I checked some of the parts in the Lionel Engineering Standards. The rear bearing is 671M-20 and, by design, has an ID of 0.191”.  The front bearing is 2020M-20 and, by design, has an ID of 0.1875”. The armature is 671M-6 and has shaft 671M-7. The design of the worm on this shaft shows a Do (maximum diameter) of 0.186”. So the worm should fit through both bearings, but the front bearing is tight. You may want to examine the worm to see if it has developed a slight bur or lip at the edge where it slides on the worm wheel. If so this could be cleaned up with a fine flat file.

The balls that belong in the motor for the thrust bearing are 671M-21. They have a diameter of 0.0625.  The caged thrust bearing is 681-121.  The balls in this bearing are 0.062” in diameter.  These parts should be interchangeable if the OD of the cage fits in the housing. With these tiny balls wear is possible.  When I work on a motor I like to change all of them to be sure they are all the same diameter and will share the load. Mc Master Carr carries precision balls in this size for a very reasonable price.  

Wow.  Thanks for the detail David.

So first thing to confirm I used all the original loose balls in the rear and one could assume they are all the same size... BUT on principle, proper maintenance practice would be too replace them all, correct?  If so I may do that.

They are really old course so it makes sense.  (I wrench my own vintage bike builds and rarely don’t always replace old bearings).

Your data gives me confidence to clean up the shaft just enough to let it pass.  I will go with loose bearings.  More balls to carry the load (also my practice with bikes!).  Thanks.

ADD: I can feel a small raised edge on the side of the groove on the shaft that was cut for the e-clip.  Just a quick deburring with a fine file should do it.  Amazing what you can see if you look.

Last edited by Obuckler

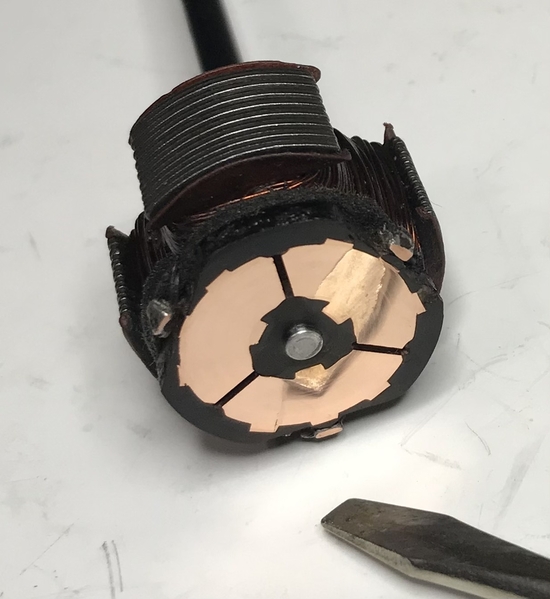
Success!  So glad I did this. You can see all the gunk that came out after I thought I was done.  Now for new bearings.  And I need to flatten the commutator face per David’s instructions I found from 2016 or so in an old post. So double thanks David. I am doing this because my test runs clearly showed some skipping of the brush contact and you could feel an edge of the commutator segment was higher than it’s adjoining segment.  Now to drill a hole in a chunk of metal and find my extra fine garnet sandpaper.  Thank goodness I’m also a woodworker. TOO MANY HOBBIES :-) !!396063AE-99F3-4421-A68B-DDA1821AFCC7

Attachments

Images (1)
  • 396063AE-99F3-4421-A68B-DDA1821AFCC7
Last edited by Obuckler

B478E196-46D3-4895-8401-016C319A482DThanks Jeff.

I am currently in a holding pattern. The motor will remain unfinished because I decided the brushes were oil-fouled not carbon dust dirty.  So I still have the tender to take apart to make a list of any needs there before I place one parts order.  In the meantime I refurbed the e-unit which just needed a tear down and cleaning.

And back on the motor I did one last final polish on the commutator.  It shines now for sure.  

Attachments

Images (1)
  • B478E196-46D3-4895-8401-016C319A482D

292882FC-9F71-4531-AEC9-C634388D6F8DB90DE04F-F8E4-46F3-A2DB-CF2BAFD5AE2BThe tender is now completely done and has a very nice clean whistle sound. Paint was in pretty good shape under all the muck.

The engine is all together but I left off a couple of items on my parts order so the smoke unit is not functioning (missed the housing top and padding under the heating element).  Also still missing cab numbers (have a stamp coming from JLM).

Runs very smooth and my quietest runner (comparing to a 2046, a 675, and several 2025s). Difference after getting all that barn dirt out is dramatic.  

Interesting that I could not get a good ground on the headlight bulb.  Probably because the staking on the bulb bracket was a bit loose.  I just tied a ground wire to the bulb socket to the smoke housing screw to take care of that.

Paint is original on the engine but with reversible touch ups.  So it keeps its patina and presents well at the same time. With the replaced boiler front and front end this will never be an original specimen but it is an awesome runner.

Attachments

Images (2)
  • 292882FC-9F71-4531-AEC9-C634388D6F8D
  • B90DE04F-F8E4-46F3-A2DB-CF2BAFD5AE2B

@Sitka :  six posts above (I have wondered why this forum does not number posts) I put a link which describes the method (from David Johnston) to shine up a commutator face.  The only engines I have where the armature can easily be removed are my two 726s. Essentially you remove the armature and chuck it up in a drill press and lightly kiss it with a range of wet-o-dry sandpapers- think I did 600-800-1200-1600-2000.  And just a kiss. Don’t want to remove more than you need.  And I would not recommend doing this with a hand held drill. I also found it better to replace the brushes because doing this so clean made me realize how much oil impregnates into old brushes. It is really cool doing this but for my motors that are cleaned in situ also run well, so I do not consider this a must do procedure in all cases.

@mowingman. Kudos again to you for passing this gem on.  I thoroughly enjoy it!!

FAAF2B0D-6641-4C67-A391-C0F3FB071C7C56BF2CC2-DAFD-43B1-AEB5-77DA55ECE27351E03F72-ED45-4D9E-8A8C-C8733BDA52FAFinal touches are done. Smoke unit finished and installed. Upon viewing these photos I noticed the smoke stack was a bit proud.  I remember on final assembly I had a bit of a hard time which was unusual.  I even split the smoke felt gasket in half to reduce height.  I see now that this smoke unit may be assembled a bit taller than normal I guess. From the top looking in it is all aligned correctly.  O well.

I am very impressed with my 726 rubber stamp from JLM Trains.  With a few practices I hit it it on the first try and second try on opposite side.  One had a bit too much ink but looks just like any production job.  A very easy to use stamp.

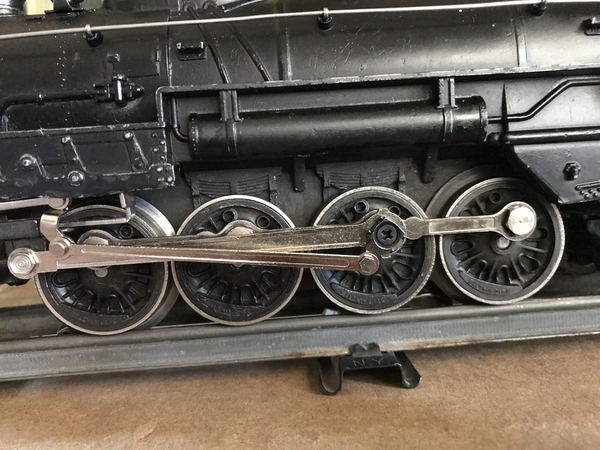
I love the engineering on this 47-49 model—the Baldwin wheels and how they mate with the side rod and side rod screws is so much more efficient than my 726RR by comparison.  Much less slop.  I have been toying with how to add a bushing to my 726RR— of course I may find it needs that slop?

Attachments

Images (3)
  • FAAF2B0D-6641-4C67-A391-C0F3FB071C7C
  • 56BF2CC2-DAFD-43B1-AEB5-77DA55ECE273
  • 51E03F72-ED45-4D9E-8A8C-C8733BDA52FA
@Obuckler posted:


Runs very smooth and my quietest runner (comparing to a 2046, a 675, and several 2025s). Difference after getting all that barn dirt out is dramatic.  


I could never do what you've done! Very impressive. Nice to hear it's running so well.  I had a 1948 726 a number of years ago. One of those I sold and then really wish I hadn't. I was amazed at how smoothly it ran, and quietly. It ran, as the old saying goes, like a Swiss watch. That big AC motor, and all those parts meshed together and moving with it, and running that smoothly after all those years. It was something. Had a 2046 from the early '50s at the time, too, but there was no real comparison between the two.

I have a noisy 2046 as well that I have worked on like crazy to quiet it down. After much trying this and that I did get it to run better, but not quieter.  Seems the spur gears are inherently noisier.  The jerkiness I had though I narrowed down to the second intermediate gear having a worn stud and/or gear hole. Taking that apart is a big challenge for me.  I did buy the parts but never installed them. I effected a temporary fix by inserting a nylon washer behind the gear to keep it aligned more properly. It at least runs well now.  Used to intermittently slow down going forward.  

Add Reply

Post

OGR Publishing, Inc., 1310 Eastside Centre Ct, Suite 6, Mountain Home, AR 72653
800-980-OGRR (6477)
www.ogaugerr.com

×
×
×
×
Link copied to your clipboard.
×
×