So does anyone know the specific train cars in either of the new Lionel Excurion 3 and 4 packs?  These are Lionel 2027230 Union Pacific Excursion Expansion 3 Pack and Lionel 2027240 Union Pacific Excursion Expansion 4 Pack.  Very little information in the 2019 V2 catalog or on Lionel's website.  Would love to know what the 7 cars are?

Steve

Last edited by WileE
Original Post

Replies sorted oldest to newest

WileE posted:

So does anyone know the specific train cars in either of the new Lionel Excurion 3 and 4 packs?  These are Lionel 2027230 Union Pacific Excursion Expansion 3 Pack and Lionel 2027240 Union Pacific Excursion Expansion 4 Pack.  Very little information in the 2019 V2 catalog or on Lionel's website.  Would love to know what the 7 cars are?

Steve

They are Pack 3 and Pack 4, each of which has two cars.  I would assume that names of the 4 cars are what is shown in the art work.

WileE posted:

OK, now I get it. there are only 2 in each pack. I read that as a 3 pack and a 4 pack. Good now. Thanks guys

Don't feel so bad, I had the same problem. I read the title of the car packs the same way you did. Over all its a bummer that it was not a 3 or a 4 pack of cars because then it would have made the price worth it. Oh well. 

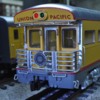
The Lionel 2027240 has the "Lone Star" Business Car with EOT Lights and the "Harriman" Dome Observation with EOT Lights that are controlled by a switch. The "Harriman" Dome Observation has Lionel Kinematic couplers on both ends.  The "Lone Star" has a scale coupler on the rear of the Observation Tail.

The 2027230 has a 36-seat "City of Denver" Dining Car without sound and another Dome Observation, "Walter Dean" in the Excursion 2-pack #3. 

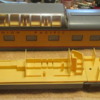
The Excursion Dining  Dome will probably appear as a Camera Dome.  There are two posts on the lower level to hold the camera board electronics over the heads of people in the recessed lounge.

Sincerely, John Rowlen

IMG_2208

IMG_2250

the "Harriman" and "Walter Dean"


Attachments

Images (2)
  • IMG_2208: Lone Star Business Car with EOT Lights.
  • IMG_2250: Harriman Dome Observation with EOT Lights.
Last edited by John Rowlen
@Norton posted:

I started converting one of my Lone Stars to a Kenifick since I didn't want to purchase the whole Bush train to get this one car. Still trying to optimize the drum head.

Ken_Walter4014Drum_On

Pete

That looks great. Did you use Molotow chrome ink on the railings, drumhead and other metal trim? I was thinking of doing the same with mine when I can get to it - although the broad tip pens Molotow comes in tend to spread the cover around unevenly. I have airbrushed it successfully but not tried hand brushing a three-dimensional assembly like yours.

Regarding John Rowlen's earlier post, I have not seen this Excursion car interior assembly before - either for the dome table seating or main level:

Challenger-Interior

Interesting to see how Lionel dealt with this dome dining car, including eliminating partitions that in their other Excursion car interiors run down the middle of windows! However, I can't see that you'd get anything but legless passenger figures seated at those one-piece molded dining tables . . .  


Attachments

Images (1)
  • Challenger-Interior
Last edited by Hancock52

I did use Molotow but used a brush with the refill ink. I knew it had to go on heavy to get the shine but may remove it and spray it on for a more even finish. It comes off easily with alcohol but the alcohol also discolors the yellow so I would have mask it off if I did this.

This is another drumhead done on photo paper with an inkjet printer. better dpi at 2400 but can't seem to get rid of the blueish tinge. The one above was done with a 600 dpi laser jet on transparency. Closer to the original but less resolution.

image

Pete

Attachments

Images (1)
  • image
Last edited by Norton
@Norton posted:

Thanks T. I am tossing around the idea of scratch building a new railing system. The model is pretty clunky compared to the prototype.

Pete

I can see what you mean but the railings and other trim must be separately applied parts that could come off for spraying. In fact, allowing for the fact that photos exaggerate any unevenness in reflective finishes, your finish is a great improvement on the stock one - especially around the drumhead. I was wondering how you got either a marker or a brush over all those rails.

The color on the inkjet printed drumhead is unfortunately a matter of trial and error in my experience. I generally print more than one version on the same sheet with slight variations in the background color to see which comes out closest to what I want. With most inkjet printers and using software like Photoshop Elements, the color shown on screen just won’t be exactly matched by the print version - especially if the primary color is some variation of blue.


Sorry if you have already said this but how did you make the drum head?

A few forum members posted pictures of this car here at my request during the 4014 run to the Golden Spike. I used this image along with a program called Irfanview to size and print the image. Irfanview is freeware that runs on Windows and has been around for many years. It allows you to size the image exactly in inches or centimeters that is printed. So far I have tried 4 printers, one inkjet, one color laserjet, and two B/W laserjets to try and match the prototype. Still not completely satisfied. 

I also cut circles out of plastic to mount the images on using a heated cork borer, actually a sharpened thin wall tubing. Makes a nice clean cut. White milk bottle are the best so far.

image

Attachments

Images (1)
  • image
@Norton posted:

A few forum members posted pictures of this car here at my request during the 4014 run to the Golden Spike. I used this image along with a program called Irfanview to size and print the image. Irfanview is freeware that runs on Windows and has been around for many years. It allows you to size the image exactly in inches or centimeters that is printed. So far I have tried 4 printers, one inkjet, one color laserjet, and two B/W laserjets to try and match the prototype. Still not completely satisfied. 

I also cut circles out of plastic to mount the images on using a heated cork borer, actually a sharpened thin wall tubing. Makes a nice clean cut. White milk bottle are the best so far.

image

Thanks for responding and going through the steps you took to get to the final result. I might just try it but first I have to get the set and that is going to hard to get approved by the CEO.

Hancock52,

You are correct about legless people at the round lower level tables.  Fortunately my Dremel Tool Sanding Drum is close to the Circumference of the Tables.  I have also had to grind a little off the backside of the figures to help coax them into the seats.  I touch up paint on the figures to provide the best fit and looks at the tables.

The first picture shows an offset circular grinding of the old lady with a cane.  To keep the cane, I started grinding from the opposite side, leaving a little of the dress, hand and cane that is visible through a window.

The overweight man's legs straddle the sanding drum and there are legs on either side of his chair.  The figures are Preiser 65602 Unpainted Seated People that I painted.

Have a good week.

Sincerely, John Rowlen


IMG_2289

IMG_2287

Attachments

Images (2)
  • IMG_2289
  • IMG_2287
Last edited by John Rowlen

Add Reply

Post

OGR Publishing, Inc., 1310 Eastside Centre Ct, Suite 6, Mountain Home, AR 72653
800-980-OGRR (6477)
www.ogaugerr.com

×
×
×
×
Link copied to your clipboard.
×
×