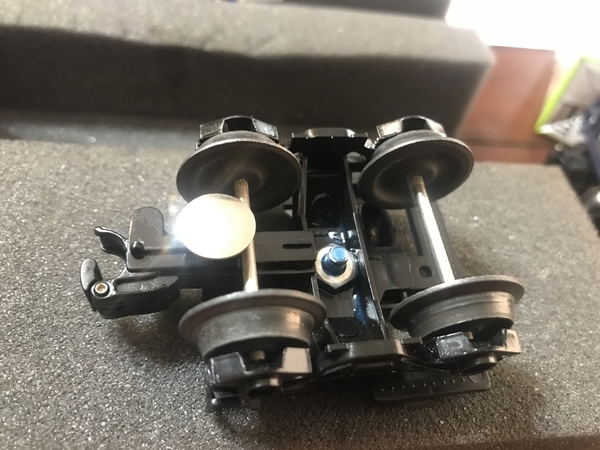
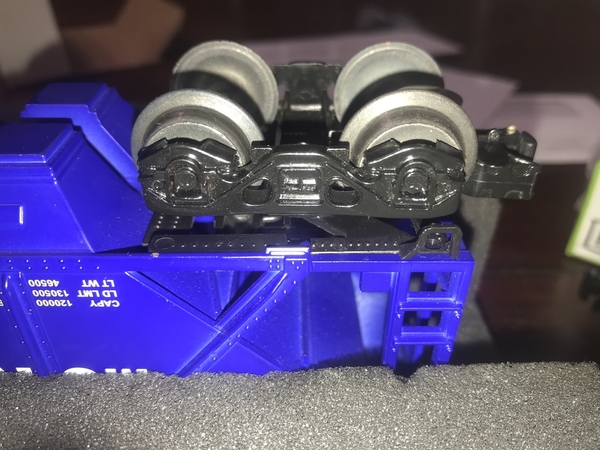
For some reason I can’t get the search function to work this afternoon.  I am looking for pictures of how others have modified their Menard’s hoppers.  Specifically did you cut the ladder steps off or just try to bend them out?

 I will be using some Mth trucks I already have on hand, and do not want to delve into another discussion on truck quality- please leave that commentary out and let’s just talk about making things more serviceable.

(Edit- I ended up using mpc era plastic Lionel trucks from my project bin.  The mth trucks are great but have a raised boss in the center and I didn’t have the right size washers on hand to get the effect I wanted.)

imageimage

As you can see, without seriously shimming up the mounting, plate, bending out the ladder pieces (or cutting them off), there is still interference.  If anyone has tried bending these, do they move or snap off?  Any notes on your experience is appreciated. 

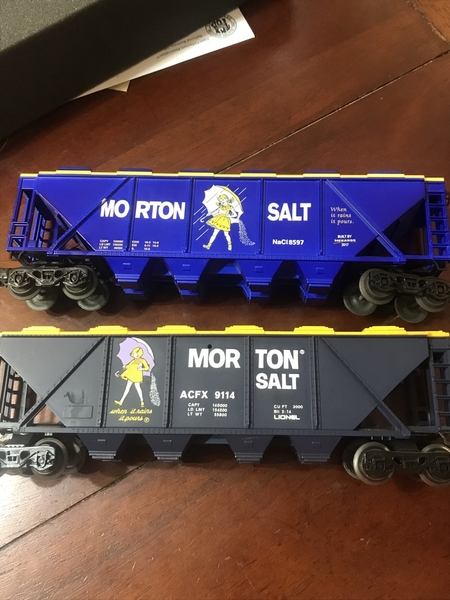
I would rather not cut off the steps as I would like the Menard’s hopper to closely match my 1974 Lionel hopper when finished.  

image

My helper says hi! 

image

Attachments

Images (4)
  • image
  • image
  • image
  • image
Last edited by jhz563
Original Post

Replies sorted oldest to newest

  Plastic or metal? Heat would be the way around cracking, but is no guarantee on some metals, just puts odds in your favor. (A soldering iron/gun will provide heat without flame, touch to metal, radiant/proximity for plastic)

  If you do snap them, companies like Scale City will have something you could add as a replacement.... if you can handle that scale look.

Give "smiley" a return hello

The safest way is boiling water. But that will make each step a noodle; harder to keep straight. I think a soldering iron near it, maybe with a heat shield of tinfoil on the lower portion, heatimg the rung only near the connection points would be safest.

The step should get soft long before the panels.

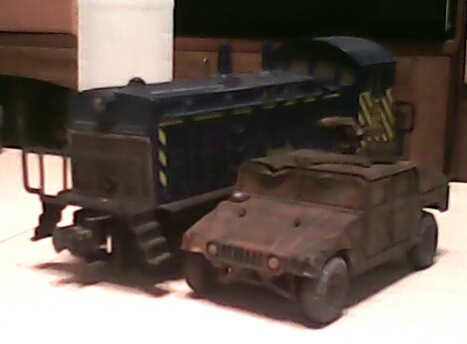
Be ready to remove the heat fast, and to hold still for 20-30 seconds. Maybe an ice cube nearby to cool it etc.; some plastics stay soft a while, some don't.  Maybe practice on a broken toy, model sprue, etc..   I've been doing similar for decades.  (Even by accident. note where the soldering iron rolled away one day and landed on the Humvee roof for an nice but unplanned "battle dent.")IMG_20180311_063533

Attachments

Images (1)
  • IMG_20180311_063533

Switching to the Lionel frames for $6 per car seems like the simplest, cleanest fix.  IMO, trying to heat the steps is time consuming and risky.  Otherwise, cut them off and either live without them (the cars aren't scale anyway) or fashion replacements from 14 or 16 gauge wire and use CA to hold them in place.

I have a couple of these, and my solution is to just run them on the wider-radius loops.

Okay - parts came in from Train Trnder today, so here we go.

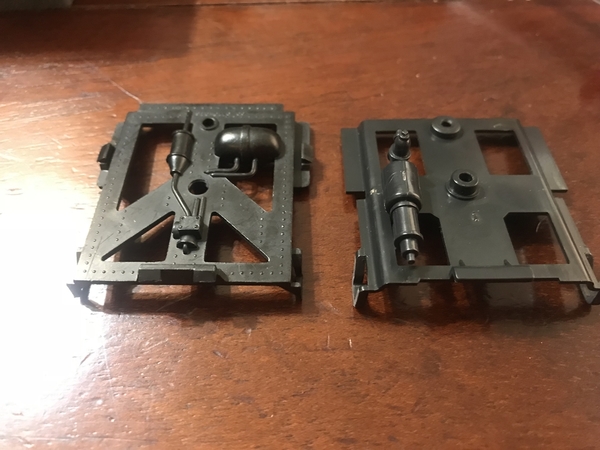
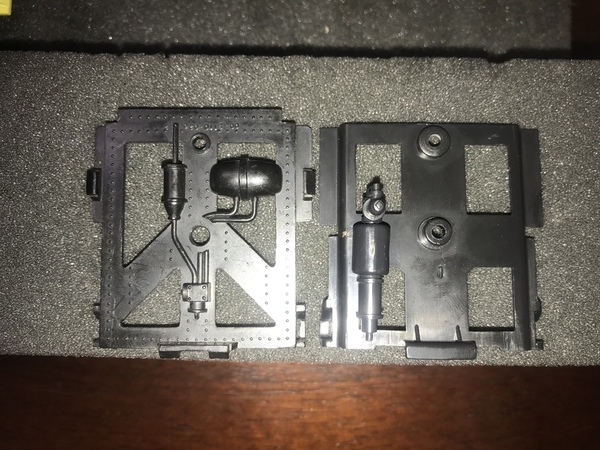
TT part on the left, Menard’s on the right. Notice TT part doesn’t have the raised boss in the center. Also the TT parts clip into the car body where the Menard’s part depends only on the screw and one clip towards the outboard end of the car.

2DD71CC6-89AC-4969-BB42-3975167AB8951D83ACC9-B286-4006-AEB6-9722364D754196223562-6D72-46E4-8671-CA6C8F1E7B71

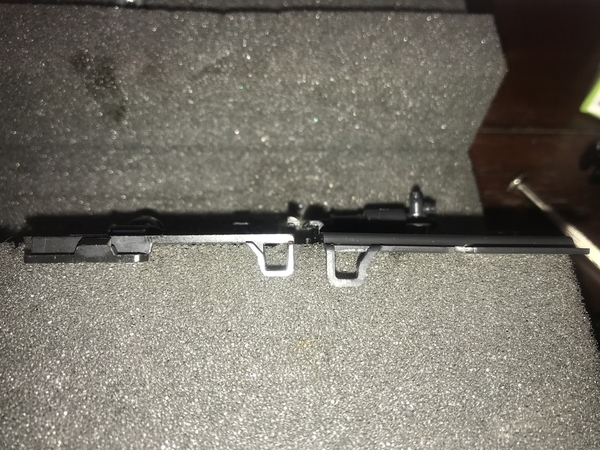
The main difference is seen in the second photo. The bottom of the stair simply doesn’t extend as low. Its at least an 1/8” difference.  

0156959F-5324-49AC-A40B-B14302188A192272C064-471C-4D33-8579-DFEA36EFD34C

A few pieces of hardware from the garage and a bit of thread locker and we are in business!!!

BDB47A5D-5897-46CC-9368-4CF3F14A1669

Menard’s body on top, Lionel 1974 production on the bottom. This is what I wanted months ago.  Thanks to Granpstrains for the suggestion and part number! I hope any one else struggling with these hoppers find this thread.

Attachments

Images (6)
  • 2DD71CC6-89AC-4969-BB42-3975167AB895
  • 1D83ACC9-B286-4006-AEB6-9722364D7541
  • 96223562-6D72-46E4-8671-CA6C8F1E7B71
  • 0156959F-5324-49AC-A40B-B14302188A19
  • 2272C064-471C-4D33-8579-DFEA36EFD34C
  • BDB47A5D-5897-46CC-9368-4CF3F14A1669
Videos (1)
76099258-7C90-4C97-80E8-8E85F2BD8833

I haven't had any problems with mine, but, I'm just running on a carpet central right now with O Tubular straights and O72 curves, no switches. So, when I actually get to the point of laying track with switches to my Salt building, I'll see if I have this issue. JHZ, Thank you for taking the time to document this for those of us that might need to do this on our own cars. You've done the parts research for us, which is at times the most difficult task of a project!

Rusty

Great fix as illustrated and discussed.

however I have a couple of questions.

does anyone have train tenders contact info?

what part number is this truck bolster?

not sure JHZ563, what hardware did you use or can I find specifically ?

what is a thread locker? How to apply? 

thank you JHZ563,without this modification the two I have would it in the box!


Leroof posted:

Great fix as illustrated and discussed.

however I have a couple of questions.

does anyone have train tenders contact info?

what part number is this truck bolster?

not sure JHZ563, what hardware did you use or can I find specifically ?

what is a thread locker? How to apply? 

thank you JHZ563,without this modification the two I have would it in the box!


Train Tender, part 9110-026.

Hardware was a couple small screws and nuts from my garage. I just fiddled around until I found something that fit right. Probably 1/8” but not honestly sure.

Thread locker is an adhesive agent used in all types of automotive and commercial/industrial applications to keep fasteners from backing off.  Think of it as the opposite of never-seize.  Loctite and Permatex make the most commonly known products. Apply a drop to the screw before running the nut on.  It sets up in a few minutes so don’t put it on and then do something else before assembly .  It is very thin and will go everywhere if not careful.  There are a few grades. The red stuff is generally for something you never intended to take apart again until after the world stops turning. The blue stuff, loctite 242 if buying a large bottle, is pretty rigid but can actually be disassembled later if need be.  I always use the blue stuff.  There is a less strong version as well, I think its purple. The point in using thread locker is that you are purposely backing the screw&nut off a turn to keep things slack. Without being tightened the nut will fall off unless something keeps it from moving.

Last edited by jhz563
Leroof posted:

well JHZ563, first off thanks for the info.

Contact being made with Train Tender.

Do you believe that one can make the original truck work in the TT bolster plate?

I guess Trips to the hardware store bins is half the fun!

Have a good week.


While I appreciate the question, one of my goals in starting this thread was to not comment much on the original Menard’s equipment, just on dealing with a specific issue.  I would respectfully like to keep it that way.

My specific question was not qualitative on the aforementioned  product. 

It was specifically asked if that part might fit.  No disrespect to your thread or delving into a discussion about that product. 

Interesting enough I think your fine solution may  additionally work in the RMT hopper with the same  original specific issue.

And thanks for the thread locker info. 


Add Reply

Post

OGR Publishing, Inc., 1310 Eastside Centre Ct, Suite 6, Mountain Home, AR 72653
800-980-OGRR (6477)
www.ogaugerr.com

×
×
×
×
Link copied to your clipboard.
×
×