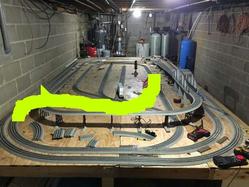
ok I have a 16x8 table. I'm getting ready to do some landscape need some ideas and help. I have never done this before so I'm looking for all the help I can get
Replies sorted oldest to newest
Before you start with scenery You should consider that the center of this layout is not accessible.I would make some modifications to your plan to address this.You will be sorry in the long run if you don't.Nick
Unless you keep it sort of barren, use grass mat rolls, and like climbing tables, Nick is right. A small hatch would be a pleasant feature.
It doesnt necessarily mean you need to change the track plan either. Track can be attached. Climbing on the scenery takes its toll fast, you wont be sorry.
Assuming you want to run trains soon, grass mat rolls are a fast and easy base that can be added to by covering it, or cutting it away in spots, if laid without a ton of glue. Cut to fit, or re-lay the track over it (easier imo).
That would give you a decent look fast, allowing you to learn as you go without rushing. Few folks are ever satisfied with the first efforts at laying track and scenery anyhow....you'll see. Run that for a while and see how your taste developes. You could want a switching layout, or realize all you really like is looping.
You might want to add a sheet of foam or homeasote too. It will be lots quieter allowing you to hear those sound systems better....., and helps to keep you from yelling "what" a lot ![]()
yep, the switches near the wall and installing stuff and scenery are a lot easier if you have some hatches.
The first thing for scenery is to decide where the railroad is located. Then, you paint the deck with a base coat color. This is the color that you see in bare spots or between brush. Lighter is better than darker. The dark areas can always be added. Dave Frary recommends Benjamin Moore, Cocoa Sand.
Then, one just uses Elmer's white glue to hold down various colors and textures of scenic material. You don't need 100% coverage. That's why the base color is there. A little can go a long way visually.
The yard may need an area of gray with some splotches of black before putting down stone/ballast. That can go over the cocoa sand base.
Watch some of Dave's youtube video's. Visit eric's trains website and view his mountain building video's for some scenic techniques. There's some nice layout builds on the forum that display some scenic techniques. Dunham studios has shown some advanced techniques
You may want to consider sealing and then painting the block wall a sky color. I like Sherwin Williams, Tibetan Sky. It's a blue that reminds one of the sky color on a sunny day just above the tree line when looking over them.
So, back to the layout. There should be a hatch at 1/3 and 2/3 in the center. I would also suggest redesigning the center to a figure 8 using the yard switches and the 2 at the crossover coming down from the bridge.
Right now, if you travel counter-clockwise and go into the center and reverse and come out in a clock-wise direction the train cannot be reversed again. There's more play value in reversing than a couple of spurs when starting out.
I didn't want to derail this scenic thread, so check your layout track plan thread.
How do I put a hatch in with track on it
I'll take a look at it, now that I have a track plan. Move the spurs or take the pins out the track and try to land a joint on the seam.
I was able to locate some access hatches with some siding rearrangement and rearranging the loop. The hatch edges begin at the seam of the full 4' x 8'. You can see the location by the rulers as measured from the left corner along the back wall.
The second set is offered for the 2nd reverse track optional track plan and has hatches. The location can be orientated by rulers. Only one uses the edge seam.
If you can get through smaller holes, then make them smaller.
I am sure that you have already discovered that climbing on the table is a pain. If you must leave it this way, make some crawl boards or get a coupe of commercial carpet tile with rubber bottoms to put down on the track. This is an ok way to do it, but eventually it will distort the rails or mess up a joint.
There are top side creepers available. They are about $250 and will make it difficult to reach across 8'. perhaps 5' or 6'.
Attachments
Moonman posted:I was able to locate some access hatches with some siding rearrangement and rearranging the loop. The hatch edges begin at the seam of the full 4' x 8'. You can see the location by the rulers as measured from the left corner along the back wall.
The second set is offered for the 2nd reverse track optional track plan and has hatches. The location can be orientated by rulers. Only one uses the edge seam.
If you can get through smaller holes, then make them smaller.
I am sure that you have already discovered that climbing on the table is a pain. If you must leave it this way, make some crawl boards or get a coupe of commercial carpet tile with rubber bottoms to put down on the track. This is an ok way to do it, but eventually it will distort the rails or mess up a joint.
There are top side creepers available. They are about $250 and will make it difficult to reach across 8'. perhaps 5' or 6'.
I like the second one but the switch on the top left no train will fit under that rise. Is there any way you could show me how to put a second level instead
I would also like to add a along the wall table to the left side of the table I have another 44 ft unrestricted with a turnaround at the end
Raiderofcoffins posted:Moonman posted:I was able to locate some access hatches with some siding rearrangement and rearranging the loop. The hatch edges begin at the seam of the full 4' x 8'. You can see the location by the rulers as measured from the left corner along the back wall.
The second set is offered for the 2nd reverse track optional track plan and has hatches. The location can be orientated by rulers. Only one uses the edge seam.
If you can get through smaller holes, then make them smaller.
I am sure that you have already discovered that climbing on the table is a pain. If you must leave it this way, make some crawl boards or get a coupe of commercial carpet tile with rubber bottoms to put down on the track. This is an ok way to do it, but eventually it will distort the rails or mess up a joint.
There are top side creepers available. They are about $250 and will make it difficult to reach across 8'. perhaps 5' or 6'.
I like the second one but the switch on the top left no train will fit under that rise. Is there any way you could show me how to put a second level instead
Good catch! Here's is a cleaner method that goes under the curve at about 5". It should leave enough for most engines. No maxi-stacks or auto-rack cars.
Sit the engine on a piece of track and slide it under to check the clearance. If it's close, the trestle can shimmed for an 1/8" to 1/4" on the bottom from there to the bridge. That won't kill the grade in that area.
Attachments
Raiderofcoffins posted:I would also like to add a along the wall table to the left side of the table I have another 44 ft unrestricted with a turnaround at the end
You can always put a switch at the corners and provide the option to run left. You have a lot on your plate now. Get a little more settled with Phase 1 and then bite off some more.
I plan on waiting to do that but that is my future plans. I am not happy with the Lionel risers they just don't make sense to me with fastrack with a roadbed lifted ? any suggestions
First off, finally someone with a basement as small as mine. On the question of risers. In the real world track doesn't sit on trestles without girders spanning the trestle bents. Unless there is some commercially available product out there that mimics trestle bents with girders spanning them, I would make my own risers out of wood. Maybe paint them a concrete color or use some of the brick paper and glue it to the piers ( risers ). For the girders maybe find some Plastruct beams though I doubt they make any wide flange or I beams large enough to look believable. Maybe use some wood 2" x 3"s and glue bass wood strips to the 1 1/2" sides to make them look like girders.
I think you mentioned raising an entire second level. There are many ways to accomplish this. You can simply lay an entire sheet of plywood on risers of all the same height. But that hides all of the track in the center of your layout. So that track would then occupy the second level. The second level should be smaller in footprint than the first to allow an outer loop or two, on the lower level, to circle the raised section.
There are many variables too numerous to try and explain in words. Sketches would be optimal.
Raiderofcoffins posted:I plan on waiting to do that but that is my future plans. I am not happy with the Lionel risers they just don't make sense to me with fastrack with a roadbed lifted ? any suggestions
The options always mean spending more. Atlas O and Gargraves look realistic when elevated. You can split the 10" before the elevation begin into a 5" and 5" transition. (6-12040) Both Atlas and Gargraves have pins to transition to Lionel O. The Atlas has 10" sections and O36 curves.
The other option is to make a girder support for the sides that's looks like elevated subway track supports. it is lower than the track, like an upside down girder bridge.
A third option that I don't mind, is using the MTH set that looks like gray block piers, rather than wooden bents. There are examples in the real world on elevated tracks with a stone roadbed.
I think the easiest compromise would be to glue 1/4" or 3/16" square bass wood to the edge of the roadbed. You can stain the basswood.(Check the last photo)
Railroads avoided bridges and trestles as much as possible. Toy train viewer's do not really question the look. The train rising and running elevated provides a show that overcomes the lack of realism.
I would have avoided that issue by elevating the run along the wall and eliminating that elevated section in the center. But, that's what you liked and had already created. Having an elevation and a bridge is definitely visually entertaining.
The tug of realism versus toy train fantasy will always have you second guessing. It's all good, if you like it.
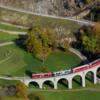
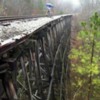
here's some photos that I grabbed Googling "railroad stone trestles" and "railroad trestles" "railroad stone piers".
Attachments
Attachments
I have the double mth bridge like that one I have.I would rather in corporate that one instead. I also have a lot more track like tubs full and I have the fastrack transition pieces . But I like where you are going
I like to run three trains at once. And have two legacy remotes.
Oh and Moonman would you like to meet for coffee one day so I can pick your brain. I have a lot of questions.
Raiderofcoffins posted:I have the double mth bridge like that one I have.I would rather in corporate that one instead. I also have a lot more track like tubs full and I have the fastrack transition pieces . But I like where you are going
I like it when someone has tubs full of track. Save the double track bridge for the expansion.
Raiderofcoffins posted:I like to run three trains at once. And have two legacy remotes.
Oh and Moonman would you like to meet for coffee one day so I can pick your brain. I have a lot of questions.
We can get together. Click on the forum name and shoot me an email.
Moonman posted:
Bingo! Or here (below) to incorpate a landmass, or just because it might float. I can't see for myself anymore.
I like hills and els too. A crane makes a level el that's not connected "work" for me. A favorite switcher, mow critter, trolley, or similar always has a place to run up high. My k4 or an A is the biggest thing I put up there due to twists and turns and weight crashing down on the occasional derailment. The small engines don't mind as much, behave better, and less support doesn't strike me too oddly.
An el will crowd the center without care. I got bored of the small center loop el real quick. Plus reaching to do railing a pita. So I angled and scrambled it and built a "bowl". You have good width. It would crowd less.
A land mass and tunnels on each of the two diagonal corners with an el between town/industrial plateaus? Two small reversing loops with landings on the plateaus, or a dumbbell loop with side by side straights?(advantage-no turnout derailments)... A single track upper level with engine turning WYES or run around tracks and a single tie-in to the lower levels rise might be interesting too.
An On30 feeding the O line lumber or ore ? They have On30 trolleys too ![]()
(I want a trolley, lol)
Going to a different style for elevation also frees you from the limited geometry of the FT with Flex track and easy cutting to length.
How you proceed from here should really focus on your expected look. You have looping, switching, elevation, and grade. Which do you want more of?
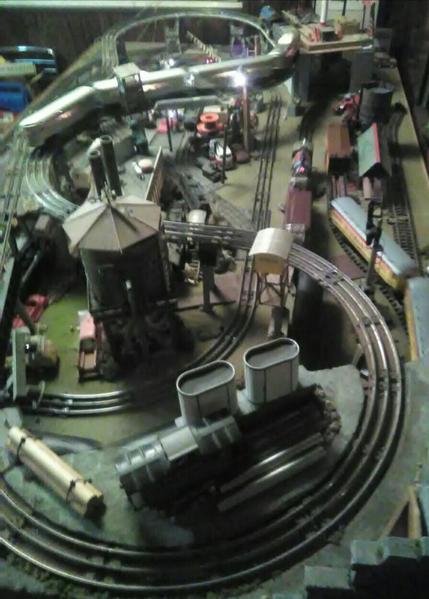
Moonman has given wide open spaces for a view, will you be happy with that? Or do like "crowded and busy". Spreading and separating the two would be easier on you, but this is my "Psgetti bowl"
Hey some vintage Super O? (Bottom track both sides of the depot)
Attachments
I went left just had too I also pulled it away from the wall and now I can touch everything thing with out climbing. ( I need some more straights and switches ) to also want a trolley but I just got a legacy crane (that I have to send in to Lionel for repair ) and a tmcc tie-jector so that will have to wait
Attachments
Raiderofcoffins posted:I went left just had too I also pulled it away from the wall and now I can touch everything thing with out climbing. ( I need some more straights and switches ) to also want a trolley but I just got a legacy crane (that I have to send in to Lionel for repair ) and a tmcc tie-jector so that will have to wait
There you go. Looks good.
I was thinking you were going to make it 8' wide all the way to the left. It's nice to have a long run.
Moonman posted:Raiderofcoffins posted:I went left just had too I also pulled it away from the wall and now I can touch everything thing with out climbing. ( I need some more straights and switches ) to also want a trolley but I just got a legacy crane (that I have to send in to Lionel for repair ) and a tmcc tie-jector so that will have to wait
There you go. Looks good.
I was thinking you were going to make it 8' wide all the way to the left. It's nice to have a long run.
It is going to be a 8x5 table on the other side but ran out of 2x4
Ok I made some changes but I believe I'm satisfied for now but after I put my yard in of course that I have then I can start on some scenery��
Attachments
That's awsome. Way bigger than expected too. I didn't even know the other side existed. I love long straight shots and a little wiggle. Seeing that, it all makes more sense now. Your going to have it made Raider.
You could snake one long trolley line over that; with its own straights for some "Red Devil" speeds, lol.
Adriatic posted:That's awsome. Way bigger than expected too. I didn't even know the other side existed. I love long straight shots and a little wiggle. Seeing that, it all makes more sense now. Your going to have it made Raider.
You could snake one long trolley line over that; with its own straights for some "Red Devil" speeds, lol.
Thanks I hope I stay happy with it because this is my first build. And I still have another 30 ft of tables to build yet. I might put a elevated conventional line on the main table.
Attachments
Great progress ! I see you have your mattress all set up. I love my trains too, but are you taking it a bit too far.....LOL
The empire grows!
With switches and sidings - take the wiggle out.
Attachments
I do Plan on that Carl just had extra pieces now it's time to wire I'm going to send a 12 gauge bus wire to each section then feed the tracks with 16 gauge
Defiantly put a hatch in the middle of the layout.
What I would suggest is to make a opening like a small lake (not square but oval or a lake like appearance enough to get yourself through), then bevel the lake opening sides down as a shore line. Paint the bevel area with brown and adding bits of foliage or what ever. just remember that your body will be rubbing this area so make it simple.
The door could be square to cover the complete lake opening with hinges and a latch.
Paint the top of the door to mimic water.
This is what I will be planning when I do my layout.
Have Fun and enjoy the project!
RonH posted:Defiantly put a hatch in the middle of the layout.
What I would suggest is to make a opening like a small lake (not square but oval or a lake like appearance enough to get yourself through), then bevel the lake opening sides down as a shore line. Paint the bevel area with brown and adding bits of foliage or what ever. just remember that your body will be rubbing this area so make it simple.
The door could be square to cover the complete lake opening with hinges and a latch.
Paint the top of the door to mimic water.
This is what I will be planning when I do my layout.
Have Fun and enjoy the project!
That's what I was planning already just didn't get there yet but I had two one was going to be a suburban street that lifted off the other is a lake and the mountains has a hatch and lifts off


