@PRRMP54: I've thought about designing a floor for the McKeen car. It would be nice to provide for opening doors and a real "entryway" behind the lower door. I have experimented with 3D printed frames before. I may revisit this once I clear my current backlog of jobs.

...snip...

It's Friday the 4th and time is almost out-- reservations for 72' McKeen Cars will be closed at midnight EST. ...snip...

First, thank you for your answer. I asked because I have a USH/KTM/Max Gray(?) short McKeen car and would consider swapping the drive into the longer car.

Second, if you decide to re-open the order book at a later date, I will place one for each.

I have been corresponding with @Dave Koehler regarding his kit. He has discovered a serious flaw in the rear section of the kits that evidently none of us noticed during the prototyping stage. The window spacing on the corners of the curved rear is uneven, resulting in a non-prototypical look and a structural weak point.

Window spacing wrong

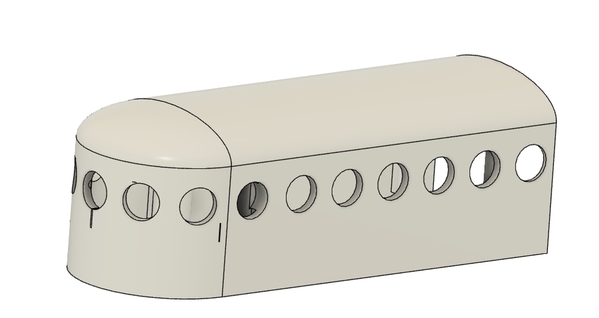
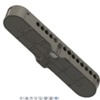
I am redesigning the rear section of the McKeen to correct this. Here is a screen capture of my working draft of the new part. (The lines you see are Fusion artifacts-- the graphics engine really dislikes all the editing I have been doing!)

overview of rear section

I have removed a window from each side and moved the remaining ones. Although not 100% prototypical, this allowed me to set an even 3/4" spacing on the windows all the way around the stern.

outside of rear section

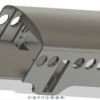
The spaces between the windows are now even which should improve the strength of the part. I was able to work the windows around the rear screw bosses as well.

Inside of rear section

I will be upgrading ALL of the McKeen kits to the improved stern section at my cost. The two kits I am currently working on will be slightly delayed while I replace the stern sections I have already printed. I will be using my emergency reserves of filament to print several additional new sections and will be express-mailing them to the three customers whose orders have already been sent out. This will likely result in a delay to my ship schedule for those still on the reserve list but I need to prioritize fixing this ASAP.

Attachments

Images (4)
  • Window spacing wrong
  • overview of rear section
  • outside of rear section
  • Inside of rear section

I think  the changes  will work and look fine. I have started to remove the growth lines from the body, using emery sticks and a sardining block . Line between the roof and the body is straight as a arrow.  The detail parts are also crisp and straight and I dont know the type of plastic used so I  haven't tried a filler putty yet ., but what ever it is it is strong and seems to be dimensionally stable.   hope to hear what every one is using for the porthole and rivets ,  Ken just send mine regular mail no big rush

Just stumbled onto this thread.  VERY interesting.  Out regional railroad, the Ann Arbor Railroad, had 5 of these at one time in their history, some with parabolic noses, others pointed.  All had the "square" windows...actually arch-topped squares...rather than the more common portholes. 

It would be fun to do one of these for the AA if the window and nose shapes could be printed correctly. 

It would also be a fun project to explore the use of Northwest Shortline's Stanton drive trucks, battery power, gas engine sound card, and wireless control.  That might work for both O2R and O3R applications.  After all, even though the cars had a rear coupler, they seldom had a trailer in tow...if only one or two, at that.

Hmmm....

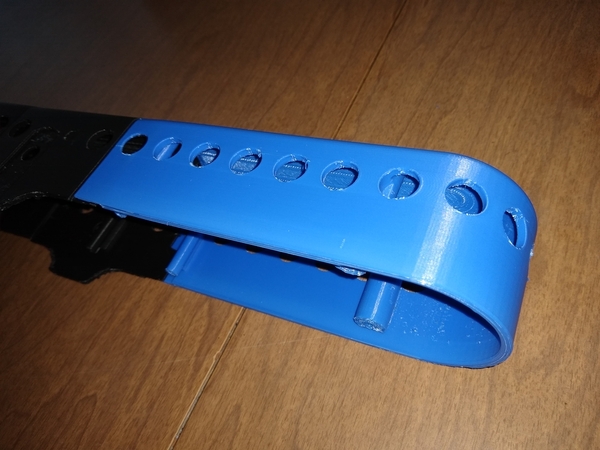
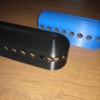
The very first of the improved McKeen stern sections is fresh off the printer.

IMG_20220210_162405675

I don't have enough black ABS to finish the remaining kits AND make the replacement rear sections so I am substituting with my backup roll which happens to be blue ABS. Although it looks very different I have found that this blue ABS is extremely similar mechanically. The fit with the rest of the body is the same as you can see here.

IMG_20220210_162401394

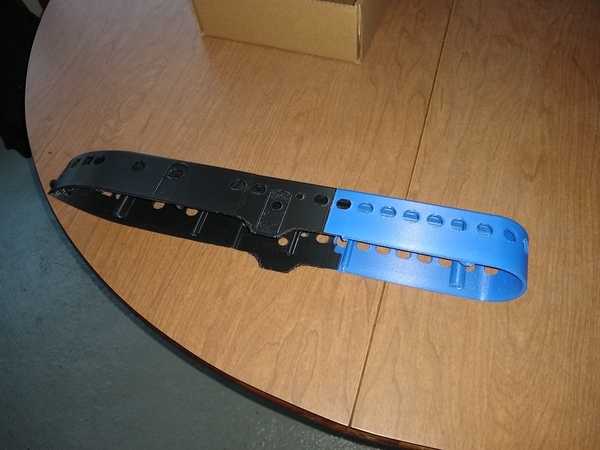
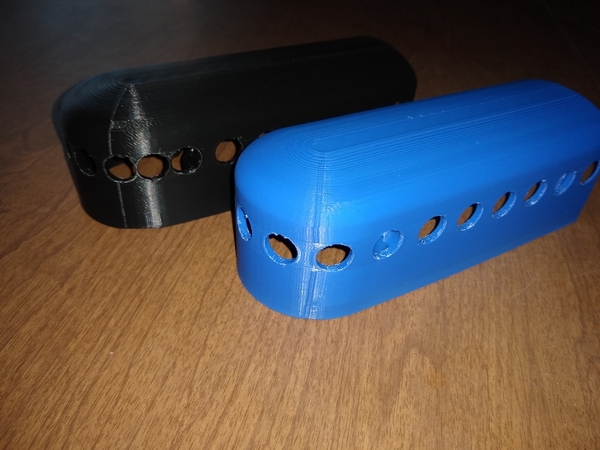
Here's the side-by-side comparison with the original stern section. You can see the changes in the windows and how the surface finish is identical-- I used the same profile I developed for the black filament so the new sections will blend in after you paint your model.

IMG_20220210_162253432IMG_20220210_162301534

Here's the comparison of the interior. On top of the improved spacing, the blue ABS is a bit more flexible than the black so there should not be much concern of the window struts breaking.

IMG_20220210_162312651

I will be printing 4 more of these replacement shells over the next 4 days (each one takes almost 20 hours of printer-time to print so I can only turn out one a day). My plan is to ship out the 3 replacement shells on Monday and then add the last 2 into the work-in-progress kits that are covering my workbench right now.

Attachments

Images (5)
  • IMG_20220210_162405675
  • IMG_20220210_162401394
  • IMG_20220210_162253432
  • IMG_20220210_162301534
  • IMG_20220210_162312651

The very first of the improved McKeen stern sections is fresh off the printer.

IMG_20220210_162405675

I don't have enough black ABS to finish the remaining kits AND make the replacement rear sections so I am substituting with my backup roll which happens to be blue ABS. Although it looks very different I have found that this blue ABS is extremely similar mechanically. The fit with the rest of the body is the same as you can see here.

IMG_20220210_162401394

Here's the side-by-side comparison with the original stern section. You can see the changes in the windows and how the surface finish is identical-- I used the same profile I developed for the black filament so the new sections will blend in after you paint your model.

IMG_20220210_162253432IMG_20220210_162301534

Here's the comparison of the interior. On top of the improved spacing, the blue ABS is a bit more flexible than the black so there should not be much concern of the window struts breaking.

IMG_20220210_162312651

I will be printing 4 more of these replacement shells over the next 4 days (each one takes almost 20 hours of printer-time to print so I can only turn out one a day). My plan is to ship out the 3 replacement shells on Monday and then add the last 2 into the work-in-progress kits that are covering my workbench right now.

That  blue  is a lot easier to read! they look great

@RoyBoy posted:

What is a sardining block ?

" For sanding under water?)   LOL.  cant type worth a dam.    Seriously, I learned to make and use these,  as a jeweler for finish work.   For example  Take a 1x3/16x8" piece , of clear pine or bass wood. Lay and true it up on a sheet of emery paper, score it length wise (dont cut through it) and glue it in place.  You can use  dowel's triangles , what ever shape you want.  I make them up ahead of time in deferent grit paper , they are very handy.


""""""""""""""""""

]

I have the Keilty books on these addressing McKeens, but all photos are B&W.  I understand that many were delivered in dark red but were all, and presume many were repainted in the owning roads preferred colors?  And, the center section with step-down door can be installed with small porthole in front or behind that door.   Photos of various McKeens show that porthole in each location, and show an additional (driver access) door toward front.  So these can be detailed to specific McKeens that operated on specific railroads. But, color?

I have the Keilty books on these addressing McKeens, but all photos are B&W.  I understand that many were delivered in dark red but were all, and presume many were repainted in the owning roads preferred colors?  And, the center section with step-down door can be installed with small porthole in front or behind that door.   Photos of various McKeens show that porthole in each location, and show an additional (driver access) door toward front.  So these can be detailed to specific McKeens that operated on specific railroads. But, color?

I have now come across color photos , Alaska Drk Green, Union pacific Yellow, Sante Fe , Red, and the restored one,  Maroon , which seems  to be the stock color. The main windows  are round , or square , or arched .  Some have extra doors  and deferent front widows.  I dont think there is a right or wrong way  of doing them!

I may make one of these for myself (not for sale). I put a bit more definition on the portholes adding circular window frames present in the actual engine. The roof slope needs work and the front end is too loose.

I only have one printer. So mass producing these shells at a rate of one per day is way too slow.

Talk about supply chain issues!

McKeen progress

Attachments

Images (1)
  • McKeen progress

@colorado hirailer: Mack railbuses and diesels huh? I'm already working on a small Mack diesel, but now you've got me thinking about railbuses. I visited the Pennsylvania Railroad Museum back in 2017 and took detailed photos of just such a vehicle. I've got to think about how I could fit a power unit into one of those.

IMG_20170426_133523854_HDR

@dkdkrd: I saw a picture of one of those Ann Arbor McKeens and was thinking of it when I read your post. I did some more research and started tinkering in Fusion... keep reading this post!

@AlanRail: Mass production and supply chain issues... ugh, sounds like my day job! I find that long prints are fine during the work week since I'm not home to play with my printer anyways.

I've been spending a lot of my weekend and evening time developing more train kits, particularly for other McKeen rolling stock. I might be able to offer some of these next month if there's enough interest. The next of my new designs is a 48 foot McKeen passenger trailer.
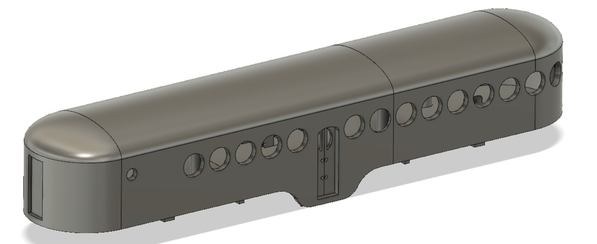
48ft Passenger Trailer overall render

This kit will be 100% 3D printed, everything except the wheels and axles (I even have some trucks and couplers to supply with it). The body would be printed in 2 sections and the frame in 3 pieces. The chassis component you see is about 10 inches long-- my printer is just large enough to do this as a solid piece, but the floor takes 2 parts.
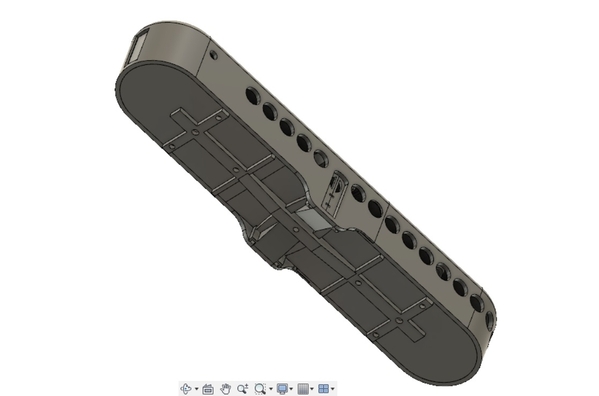
48ft Passenger Trailer underbody render

I designed some slots into the shell and frame so the passenger doors can slide open.
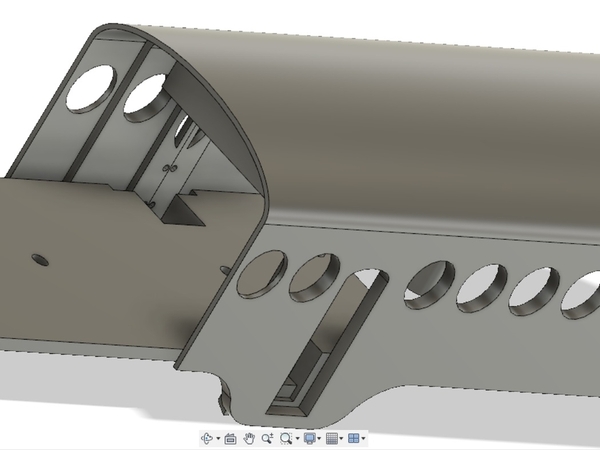
48ft Passenger Trailer door mechanism render

Inspired by @dkdkrd 's comment on the Ann Arbor variant earlier this week, I spent a couple hours branching my standard 70ft McKeen kit into the Ann Arbor McKeen.
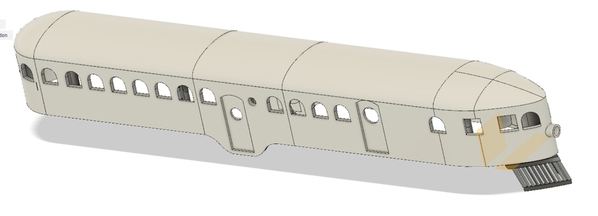
70ft Ann Arbor RR McKeen overall render

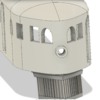
Adding the arched windows was pretty easy but the parabolic nose was a bit hard to render. I had to utilize some new features in the Loft toolset to pull it off. I'm still not 100% sure I have the angles right but it's there.
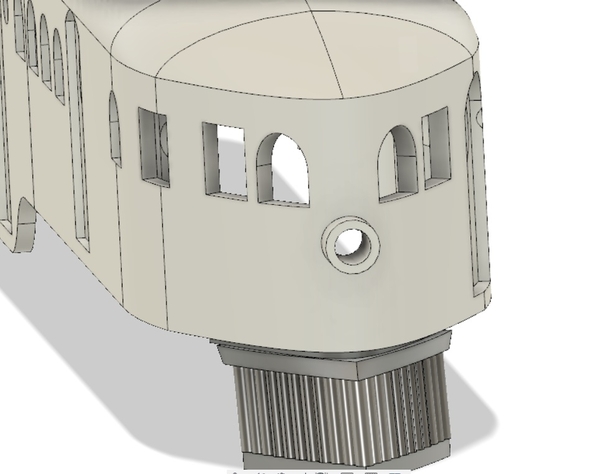
70ft Ann Arbor RR McKeen head on

I also added a driver's access door while I was working on the bow.
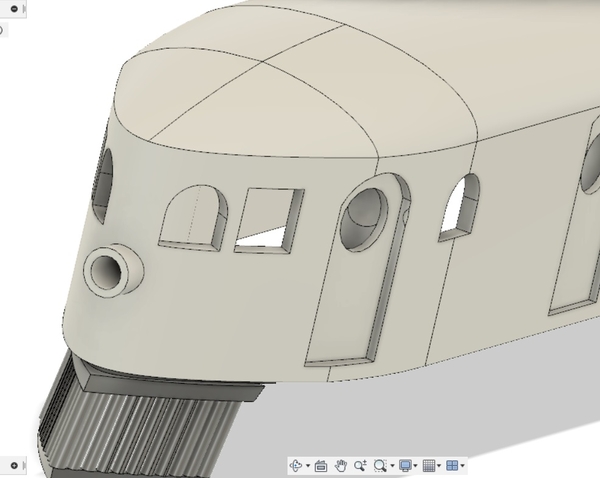
70ft Ann Arbor RR McKeen parabolic nose

Let me know what you think!
Attachments

Images (7)
  • 48ft Passenger Trailer overall render
  • 48ft Passenger Trailer underbody render
  • 48ft Passenger Trailer door mechanism render
  • 70ft Ann Arbor RR McKeen overall render
  • 70ft Ann Arbor RR McKeen head on
  • 70ft Ann Arbor RR McKeen parabolic nose
  • IMG_20170426_133523854_HDR

Ken


i dont mass print large 20 hr objects because I only  have ONE printer. If it breaks down, and they do break, you're done.

Unless I had a printer-farm with 5 or 10 printers, i cannot guarantee a reliable print service for large prints. Look what you needed to do to correct a window issue. That's lost print time.

Anyway. I do appreciate your continued advancement of 3D printing as a standard modeling process.

Dave Koehler:. Does that UP yellow cover the roof, too, or is it a roofing tar black?  The Great Western (Colorado sugar beet road) got two McKeens when it bought the remnants of the Denver,Laramie and Western.  Both were passed back to UP, and one lasted untill 1944. Will paint mine yellow if l can't find their colors while owned by Great Western.

I wish  I had book marked the color photos, but the Up was yellow with a dark tan roof. the photo looks like it was taken  from  an old color film.  These were some of the earliest  al metal cars on the rail at the time.  Painted canvas , over wood  was the most common  at the time, I dont think they would have used tar paper.

@colorado hirailer: Mack railbuses and diesels huh? I'm already working on a small Mack diesel, but now you've got me thinking about railbuses. I visited the Pennsylvania Railroad Museum back in 2017 and took detailed photos of just such a vehicle. I've got to think about how I could fit a power unit into one of those.

IMG_20170426_133523854_HDR

@dkdkrd: I saw a picture of one of those Ann Arbor McKeens and was thinking of it when I read your post. I did some more research and started tinkering in Fusion... keep reading this post!

@AlanRail: Mass production and supply chain issues... ugh, sounds like my day job! I find that long prints are fine during the work week since I'm not home to play with my printer anyways.

I've been spending a lot of my weekend and evening time developing more train kits, particularly for other McKeen rolling stock. I might be able to offer some of these next month if there's enough interest. The next of my new designs is a 48 foot McKeen passenger trailer.

48ft Passenger Trailer overall render

This kit will be 100% 3D printed, everything except the wheels and axles (I even have some trucks and couplers to supply with it). The body would be printed in 2 sections and the frame in 3 pieces. The chassis component you see is about 10 inches long-- my printer is just large enough to do this as a solid piece, but the floor takes 2 parts.

48ft Passenger Trailer underbody render

I designed some slots into the shell and frame so the passenger doors can slide open.

48ft Passenger Trailer door mechanism render

Inspired by @dkdkrd 's comment on the Ann Arbor variant earlier this week, I spent a couple hours branching my standard 70ft McKeen kit into the Ann Arbor McKeen.

70ft Ann Arbor RR McKeen overall render

Adding the arched windows was pretty easy but the parabolic nose was a bit hard to render. I had to utilize some new features in the Loft toolset to pull it off. I'm still not 100% sure I have the angles right but it's there.

70ft Ann Arbor RR McKeen head on

I also added a driver's access door while I was working on the bow.

70ft Ann Arbor RR McKeen parabolic nose

Let me know what you think!

The arched widows look good. I ordered  K&S tubing for my round windows , and have to cut each one of them, and then cut the glazing .

Last edited by Dave Koehler

For me, a Mack rail bus, and Edwards and GE gas electrics would be nice.  I am reviewing my library of McKeen books and articles.  A number of model RR magazines have done articles on McKeens, and two books l have is a reprint of the 1912 McKeen catalog, by Old Line Publishers, 1972, and "The Woodstock and Sycamore Traction Company", by Wm. E. Robertson, 1985. The catalog shows several configurations including a freight only McKeen, and with an RPO compartment. Trailer varieties include the RPO, baggage/express Ken has provided, and an all passenger model, on 4 or 8 wheels. Catalog shows many just delivered McKeens, all with roofs much lighter in color than bodies, in the B&W photos. Pennsylvania #4701, a 70 footer with smoking compartment, is shown.  Foreword states that several came back to the UP in Omaha, and were dropped on GE trucks and resold. If l could find out what color the GW's were under their ownership, l would choose that.  Otherwise, l will go with my freelanced road's yellow and green, with an added driver door, and RPO compartment, which doesn't appear to have separate doors,  mail collector arms, or the mail drop slots of the trailers.

RoyBoy: Not much more info is shown on these two softbound books.  The Woodstock book addresses its two McKeens. The publisher is: National Bus Trader, lnc., Rte. 3, Box 349B, Theater Rd., Delavan, Wis. 53115-9566 (414-728-2591).  The catalog reprint just has : Old Line Publishers, Box 123, Milwaukee, Wisconsin 53201, on the back.  It does show plans and the several varieties of McKeens.

I am curious on how the builds are going, ?   Has any on considered, rivet detail, found this company Archer Fine Transfers, Decals, Surface Details and Dry Transfers for model builders (archertransfers.com) has anyone tried them?

Yes, and they are awesome!!!  Archer originally created these for the military modelers, gamers, et al.  Eventually they apparently discovered the railroaders' market, and....history.
Micro-Mark also now sells rivet decals...

Rivet decal link

...in O and HO scales for the railroad hobbyists,

They're easy to apply.  They're the perfect complementary product for 3D printed items...IMHO, of course.  I wonder that they might even find their way into limited run manufacturing projects...an interesting trade-off to die-making time/cost.  It's a definite boon to those of us who like to use styrene for scratch-building.  There've been a few articles written for the hobby's periodicals in which the decal rivets were used.  Once final finishes are applied they're hard to distinguish from 'punched' rivets using the best of die sets....again, MHO.

Highly recommended.

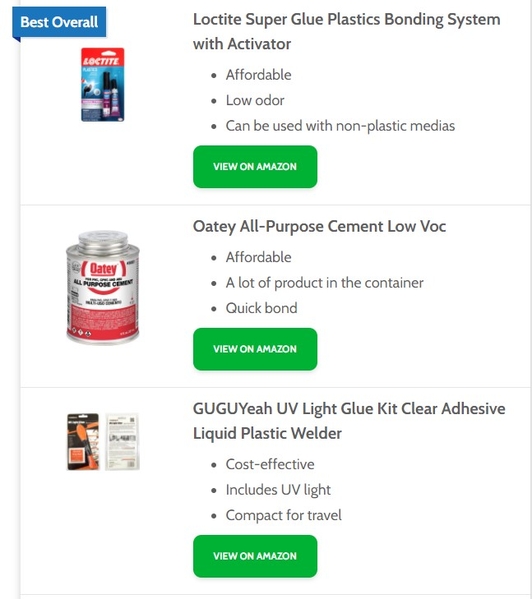
Dave:...Loctite makes a LOT of different adhesives, as l discovered in Loew's. I have used their 2 part epoxy, and hope that is what you are recommending.  I am in process of installing front coupler, and then will lengthen Beep chassis to accommodate the body, so am a long way from a finished model.

Loctite super glue professional  , I was turned on to, this and its predecessor by a friend who was a master model maker for Allen Bradly in Milwaukee!

Made progress on the mechanics of using a Beep for power.  This involved a hacksaw and Zona saw to some extent.  Took a new hacksaw blade to trim front of Beep chassis for McKeen body, and then more saw work to replace front truck side frames.  Supplied truck's wheelbase is perfect for this frame as probably is for the MTH Doodlebug.  Another major sawing lies ahead to extend frame for 70' body, so will assemble body to establish length before extending chassis.  Body will demand added roof vents and rain deflectors.  Not shake-the-box.

Made progress on the mechanics of using a Beep for power.  This involved a hacksaw and Zona saw to some extent.  Took a new hacksaw blade to trim front of Beep chassis for McKeen body, and then more saw work to replace front truck side frames.  Supplied truck's wheelbase is perfect for this frame as probably is for the MTH Doodlebug.  Another major sawing lies ahead to extend frame for 70' body, so will assemble body to establish length before extending chassis.  Body will demand added roof vents and rain deflectors.  Not shake-the-box.

what are your plans for the roof vents?

The only roof vents l could get an overhead view of were on a McKeen model paper weight they gave out to stockholders, and the vents on it were grossly oversized and the double layered rectangular ones.  They also were zigzagged down the roof rather than across from each other, as most appear to be.  And l saw round ones standing up on some prototype versions, so...?     Wish somebody would post a picture of the roof on one of the brass ones, HO or O.         Below l show some progress l gave made using a Beep chassis.

Attachments

Images (4)
  • IMG_20220217_154801316_HDR: Pilot with Weaver #702 coupler installed
  • IMG_20220217_154956156_HDR: Coupled pilot.
  • IMG_20220217_155548706_BURST001: Underview of pilot.
  • IMG_20220217_155724367_HDR: Body with NcKeen front truck test fit

Add Reply

Post

OGR Publishing, Inc., 1310 Eastside Centre Ct, Suite 6, Mountain Home, AR 72653
800-980-OGRR (6477)
www.ogaugerr.com

×
×
×
×
Link copied to your clipboard.
×
×