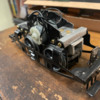
Has anybody mounted a more modern chassis under an early Lionel O gauge electric style locomotive (150, 152, 153, etc...)?  I've been asked to assist with an operational museum display for the Christmas season that would represent a storefront window toy display from the 1917-1923 period (pinning down an exact year will happen at a later date).  My plan is to acquire either a lone shell/frame for one of the locomotives mentioned above to restore into a "like new" appearance, or buy a beater unit that I won't feel so bad about modifying to like new appearance.  A more modern chassis is desired since it'd be running for about 4 hours per night for several weekends and I don't have much of a desire to thrash a 100+ year old mechanism to death.  I'm thinking more along the idea of easier to find/replace maintenance parts vs condemning the quality of early Lionel stuff so that I won't have to worry about it as much over the course of the event.

I'm not quite sure what might fit under one of those small shells.  I'm eyeing the Lionel Postwar #60 trolley chassis since it has double pickup rollers and a bit of weight to it and parts are fairly common.  I'd likely have to shorten it somewhat but could probably easily drill and tap the frame to screw mounting brackets to it for mounting the shell/frame using their existing screw tabs.

I would greatly appreciate any ideas that would help make the above project happen!

Original Post

Replies sorted oldest to newest

I’d think you’d be jumping out of the frying pan straight into the fire just swapping from pre-war to post-war, ….both use AC motors, that are known for making heat run at any long interval, ……I’d suggest something way more modern like a MTH trolley, or similar with a DC can motor,…simple operation can be made by using straight DC track power, or installing a simple bridge rectifier in the locomotive, or at the track,….should be a fairly simple DIY project,…

Pat

Thanks for the ideas.

Pat, the one reason I was thinking about going with the Trolley chassis was that my train club sets up a display for the same event every year and one of our members used one of those trolleys quite frequently for hours on end.  It was beyond well used but kept right on going.  My only other hesitation with going the can motor route was the motor height on a regular power truck might be too great for the small locomotive shell.  As I recall the smaller open frame trolley motor doesn't stick up terribly far from the frame.  The heat issue is definitely a good point and, as you said, wouldn't be much different from the original frame vs the trolley chassis.

Steve and Jon, both are great ideas.  Do you happen to have any pictures (or even a description) of how you mounted the shells to the power trucks or 4-4-2 chassis?  As a machinist, I have a general idea of how I might go about it but any inspiration would be helpful so I'm not reinventing the wheel.

Jon, I might actually have one of the Lionel 4-4-2 assemblies in my parts stash... I'll have to look.  If not I'd certainly be open to taking you up on your offer if I can confirm that one would fit in the specific locomotive I have in mind.  I should be able to do some measuring in a couple of days when my 150 locomotive arrives in the mail.

Last edited by SantaFe158
@SantaFe158 posted:

Thanks for the ideas.

Pat, the one reason I was thinking about going with the Trolley chassis was that my train club sets up a display for the same event every year and one of our members used one of those trolleys quite frequently for hours on end.  It was beyond well used but kept right on going.  My only other hesitation with going the can motor route was the motor height on a regular power truck might be too great for the small locomotive shell.  As I recall the smaller open frame trolley motor doesn't stick up terribly far from the frame.  The heat issue is definitely a good point and, as you said, wouldn't be much different from the original frame vs the trolley chassis.

Steve and Jon, both are great ideas.  Do you happen to have any pictures (or even a description) of how you mounted the shells to the power trucks or 4-4-2 chassis?  As a machinist, I have a general idea of how I might go about it but any inspiration would be helpful so I'm not reinventing the wheel.

Jon, I might actually have one of the Lionel 4-4-2 assemblies in my parts stash... I'll have to look.  If not I'd certainly be open to taking you up on your offer if I can confirm that one would fit in the specific locomotive I have in mind.  I should be able to do some measuring in a couple of days when my 150 locomotive arrives in the mail.

I’d have to go with Jon G’s recommendation on using the little 4-4-2 chassis from the starter sets,….that should be easily adapted, and the drivers would look a lot more appropriate,….

Pat

IIRC, this has been discussed before, and the 4-4-2 chassis can be adapted; its wheelbase pretty much lines up with the prewar journal boxes.   Hope this helps!

Mitch

I was pretty sure I had seen a post showing a similar conversion done, but I couldn't quite come up with the right search terms to locate it again.  

Seems to be three votes in favor of the 4-4-2 chassis so I guess I'll see what I can find/do.  Thanks!

This almost looks like it's going to be too easy...

I purchased two of the cheap plastic DC 2-4-0s that Lionel made in the 80s so that I'll have a backup chassis. They're the same chassis as the later 4-4-2 locomotives but are currently a lot cheaper on eBay.  The main difference between them being a lack of reverse unit and rectification electronics and also pickup shoes instead of rollers (I think they can be swapped easily).  It's rather entertaining to see that the basic chassis style that Lionel used in their lower end locomotives barely changed in the 60 year age difference (and even further beyond) between them.  Why fix what ain't broke I guess...

Size-wise it looks nearly identical to the original chassis.  My plan is to cut down the ends as needed to create the "humpback" look that I assume is necessary to clear the inside of the cab/hoods.  I haven't actually fit it up yet to see.  From there I figure I'll machine a couple of spacer blocks to place in either end to keep the frame sides rigid after the original spacers disappear.  The blocks will also serve to give proper locations for the original frame mounting screws to thread into since it currently looks like they'd just barely miss the frame when placed correctly in relation to the wheels.

BA1E82AB-5D07-4D69-9B6A-8BCD0315EFA5_1_201_a

Attachments

Images (1)
  • BA1E82AB-5D07-4D69-9B6A-8BCD0315EFA5_1_201_a
Last edited by SantaFe158

Certainly not as pretty of a modification as it could have been, but perfectly functional.  Although my modifications are totally reversible, I decided to alter this locomotive instead of one of my stock 150 locomotives since it had already been modified by a previous owner.  This one is restored with 150 lettering but I believe is actually a 152 shell on a modified frame (custom footboard pilot ends grafted onto original side frames as far as I can tell).  Some strategic cutting of chassis from a 1980s DC 2-4-0 and some custom cut/milled aluminum adapter pieces allowed it to simply be a bolt-in fit.  A second chassis received the same modifications so that it can be used as a backup unit should the first one have issues during the Christmas event that it was built for.

IMG_3673IMG_3676

Attachments

Images (2)
  • IMG_3673
  • IMG_3676
@SantaFe158 posted:

Certainly not as pretty of a modification as it could have been, but perfectly functional.  Although my modifications are totally reversible, I decided to alter this locomotive instead of one of my stock 150 locomotives since it had already been modified by a previous owner.  This one is restored with 150 lettering but I believe is actually a 152 shell on a modified frame (custom footboard pilot ends grafted onto original side frames as far as I can tell).  Some strategic cutting of chassis from a 1980s DC 2-4-0 and some custom cut/milled aluminum adapter pieces allowed it to simply be a bolt-in fit.  A second chassis received the same modifications so that it can be used as a backup unit should the first one have issues during the Christmas event that it was built for.

IMG_3673IMG_3676

Looks like a well planned, well executed swap,….I’d say bravo!!…how does she run?…I’d bet it’s night & day difference!…nice work!…

Pat

Pat,

Thanks!  I can't say that it was necessarily well thought out ahead of time   I had somewhat of an idea about how I wanted to go about doing it, but until I started hacking into one of the chassis' I wasn't quite confident that it'd go as planned.  I had to make some adjustments as I went but I just took my time and massaged everything into place as I went.  The chassis I used isn't a very high quality one so I can't really say that it runs amazingly well, but it runs well enough for what it is and that's good enough for me.  I'll be purchasing a few extra can motors to have on hand just in case.


Mannyrock,

The aluminum adapter pieces were made by me for this conversion.  Initially I was going to mill the adapter blocks as one solid piece, but decided to simplify it a bit by using some scrap pieces of aluminum "U" channel that were on hand.  This allowed me to simply mill out a number of "T" shaped adapter blocks to sit on top of the U channel.  There was far less time in setup work for milling this way as there were fewer steps involved.  There are more screws involved in this method but I had more than enough on hand to make it happen.  

Add Reply

Post

OGR Publishing, Inc., 1310 Eastside Centre Ct, Suite 6, Mountain Home, AR 72653
800-980-OGRR (6477)
www.ogaugerr.com

×
×
×
×
Link copied to your clipboard.
×
×