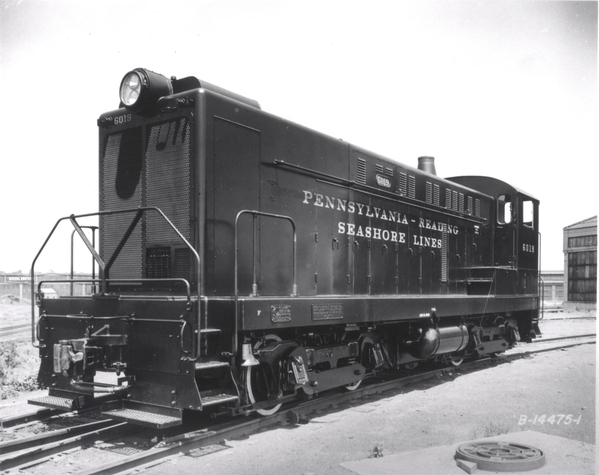
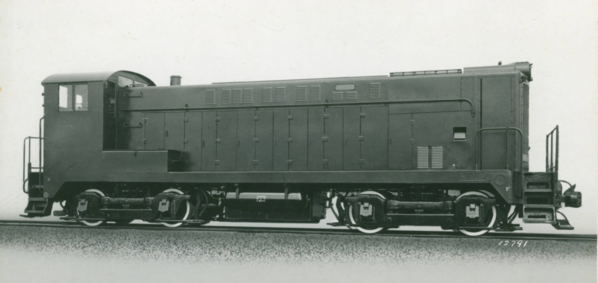
Almost every used Baldwin VO-1000 I've seen on e-bay has a broken pilot front step ( or the pilot casting is missing completely ) due mostly to poor casting design ( they should have changed the profile to a "T" shape where the two bars meet the main body since this is where the maximum stress is if the foot plate gets bumped )

DSC01975

Since replacement VO-1000 pilots seem to be unobtainable ( and would probably break again in regular use ) I looked for a reasonable replacement. Of the three engines I have with the front pivoting  ( the motor is closest to the end of the frame, the pilot casting is short ) switcher truck (EMD SW-8/9,  FM H10-44, VO-1000 )  The EMD pilot ( PN DG-2150017 ) was the closest to the VO in shape, width, height, and profile

DSC01968DSC01970DSC01972DSC01974

By milling ( using a hobbyist micro vertical mill like the Shop Fox ) the hose and lift bar detail from the front face, reshaping the side profile to better match the VO's, and adding a .050 in thick brass spacer between the back of the pilot face and the mounting bosses for the snow plow to reinforce the front face, I've created something reasonably close to the original, or at least close to what the pilot of a Baldwin S12 ( next generation ) switcher looked like.

DSC01997DSC01995Baldwin_S12

Note: To anyone attempting to modify a DG-2150017 pilot like this, hold the mounting tongue in the milling machine's vise, use the snow plow mounting bosses as a level reference ( let them sit on the top of the vise jaw ) and then use a dial indicator to see if the pilot face is level end to end. Use shims between the vise and plow mounting boss to get it as level as possible before machining the front face.

Attachments

Images (8)
  • DSC01975
  • DSC01968
  • DSC01970
  • DSC01972
  • DSC01974
  • DSC01995
  • DSC01997
  • Baldwin_S12: Baldwin Builders photo
Last edited by JET
Original Post

Replies sorted oldest to newest

First fitting of hand bent coupler pin lift bar for coupler clearance.

DSC02052DSC02054

Side stops can be trimmed a bit to move the top of the bar down without interfering with the top of the coupler.

The bar is made of "straight wire shafts 6" stainless steel .032 in" for fishing tackle found on ebay, could also have used

.032 brass bar.  The 4 bar mounts are reshaped 3/64 in. cotter pins.

Attachments

Images (2)
  • DSC02052
  • DSC02054
Last edited by JET

   Final adjustment, the wire diameter ( 1 /32 in ) works out to 1.5 inches in 1/48 scale, which seems about right for a bar that needs to be grabbed and lifted.

   The space between the side lift bar and the pilot ( after grinding with a Dremel disc to get the top bar 90 degrees to the front face ) ended up as .048 inches or 2.3 inches in 1/48 scale which doesn't seem too far off for a space to put a hand in and grab the bar.

DSC02062DSC02063

The second bar and pilot was finished and adjusted to match the original. Next, priming, painting and installation.

DSC02064DSC02066DSC02078

Attachments

Images (5)
  • DSC02062
  • DSC02063
  • DSC02064
  • DSC02066
  • DSC02078
Last edited by JET

After a minor rebuild of my 30 year old airbrush setup ( those internal o-rings get kind of stiff and flat ) I put on a few coats of

TCP-233 CNJ Deep Sea Green, correcting another of MTH's decisions not to produce a Jersey Central engine that the CNJ had five

examples of  (1062 had early style curved trim by the battery box steps and chassis step skirts, 1063, 1064, 1065, 1066 had the

later squared off battery box steps and angular details by the chassis steps.)  This pilot is closer to the late angular design.  If my

cobbled together decal set comes out looking ok I'll add finished photos.

  DSC02104DSC02106

Later production BLW VO-1000 cnj 1064

Attachments

Images (3)
  • DSC02104
  • DSC02106
  • Later production BLW VO-1000 cnj 1064
Last edited by JET

I finally got my Decal mojo working and did a better job than I thought I could ( my least favorite part of modeling )

DSC02166 cropDSC02167crop

DSC02177cropDSC02188crop

Used a thin piece of painters tape in line with the top of where the numbers are to define the herald area and placed the herald,

then placed it on the other side of that line ( as in the photo ) and cut the tops of the numbers flush with the edge so I could slide

it up to the painters tape to align them vertically.

DSC02165

Hope the other side comes out as well.        FYI the decal sets are for the green Jersey Central "Passenger Equipped Online

Service" express boxcars - HO scale for the heralds and O scale for the numbers

https://www.ebay.com/itm/193512341714

https://www.ebay.com/itm/203019034126

DSC02171crop

Attachments

Images (6)
  • DSC02166 crop
  • DSC02167crop
  • DSC02165
  • DSC02171crop
  • DSC02177crop
  • DSC02188crop
Last edited by JET

Add Reply

Post
This forum is sponsored by MTH Electric Trains

OGR Publishing, Inc., 1310 Eastside Centre Ct, Suite 6, Mountain Home, AR 72653
800-980-OGRR (6477)
www.ogaugerr.com

×
×
×
×
Link copied to your clipboard.
×
×