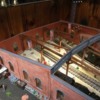
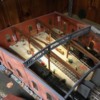
I purchased this kit from a forum member as a winter project and I have debated on putting up a post on it's construction. This is one of the older Korber kits. The instructions are minimal at best and the walls were warped. Baking them at 250* fixed that issue.
I'm starting this post well into the build of this roundhouse. I am now at the point of getting ready to attach the wooden structure to the wood base. I have a few more things I want to do before permanently attaching it. I have watched a couple of Youtube videos on guys building the Korber #304 Roundhouse and an Altoona roundhouse. I have incorporated some features from both of those roundhouses into mine. The picture of my 4449 Daylight sitting in the door just barely fits into the house and missed the structure. This is due to the fact that the structure is not sitting on the round house floor yet. I have done some measuring on my tallest engine and have determined there will be plenty of room.

DSCN0022

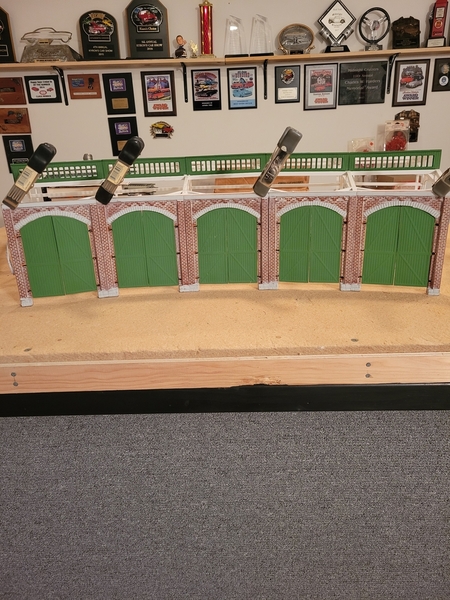
This is the point I was at yesterday morning, just prior to painting the wooden structure white. There will be a black bases of about 3/4" on the bottom of the columns. I decided to go with matte Kelly Green skylights and doors.

DSCN0025

On the subjet of the doors, these will be able to open and close. I'm starting with this option and I'll see how well that'll work. If not, They'll get glued open later.

DSCN0023

The front facade is all glued together. This will be attched at a later date when the structure and the rest of the resin pieces are in place. This is due to the fact that the doors will be attached and I don't want to bust them off, just from the way they're designed.

DSCN0024

Just a quarting view.

DSCN0026DSCN0027DSCN0028DSCN0029DSCN0031

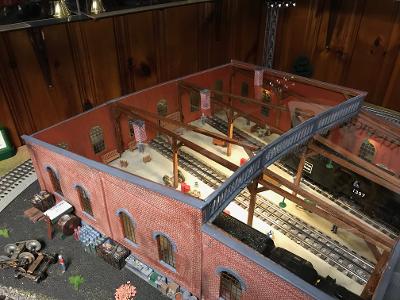
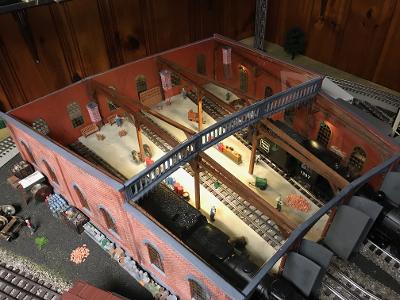
As you can tell, there is lots of added beams added to the framing. This is one of the things I took away from the Altoona Roundhouse kit.

The lamp shades are from Scale City Designs. The brass tubing is 3/64" from K&S. The LEDs are PLCC2 3528s. I'm hoping this will be enough light to illuminate the inside. All of the wires are 30 gauge enameled magnet wire. All of the LEDs were ops checked prior to gluing them in place. The magnet wire is glued to the bottom of the beams to be hidden and will go under the table to a distribuation block. There is a total of 18 lamps. The inside of the lamp shades are painted white and the LEDs are painted white on the back side to help insulated them from shorting out on the lamp shades.

DSCN0032DSCN0034DSCN0035DSCN0036

The doors just hanging on the front facade.
I got kinda lucky and placed the lamps in between the windows. This was completely unexpected, but it worked out very nice.
All the roof panels roughly in place to get an overall effect. The photo of my Daylight sitting in the barn. Just barely fits without the flooring.

DSCN0037

This is where I am as of last night. The structure has been painted white. I will paint the bases of all of the columns black, the lighting pipes will be aluminium and the lamp shades will be a green. I will then place the structure permanently to it's base, add the track, and then add the flooring to the tops of the rails. I am not too worried about a turntable as of yet. The tracks will end about 2"-3" in front of the roundhouse and then be extended to the turntable when I can afford one, but no Bower. I saw the recent posts.

I welcome any suggestions or comments. Thanks for looking.

Attachments

Images (14)
  • DSCN0022
  • DSCN0025
  • DSCN0023
  • DSCN0024
  • DSCN0026
  • DSCN0027
  • DSCN0028
  • DSCN0029
  • DSCN0031
  • DSCN0032
  • DSCN0034
  • DSCN0035
  • DSCN0036
  • DSCN0037
Last edited by Jayhawk500
Original Post

Replies sorted oldest to newest

Looks great so far. The lighting might be bright enough - I didn't have as many drop lights and ended up having to add a couple of LED strips hidden in the rafters. Best to check before final assembly.

I didn't use a base - I wanted it to be free-standing right onto my layout top. After the flooring was fit and glued in place, I inserted thin rods all around the perimeter base of the roundhouse into the floor and patched and painted over the holes. I did the same at the top of the corners where the sections meet That provided enough structural rigidity so that the RH can be lifted and placed w/o having to use a base.

I detailed the interior of mine with figures and detail parts (pulleys, tools, etc.) and was disappointed that the black roof prevented a lot of that detail from being viewed. Although obviously not proto-typical, I ended up tracing the assembled roofs and cut them out of clear lucite and am very pleased with the results. Just an option to consider.   

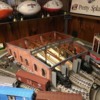
Here you go - not great pic's - in fact, it looks like there's no roof on it, but trust me, there's a clear one on there. You can tell because I added chimneys in the rear.

If you go with a clear roof, be careful how you cut it to avoid chip-outs. Some of the big box stores have a cutting station and you may be able to buy a piece of lucite and have them cut it or take it to a glass shop that has the right equipment. I used a very fine jigsaw blade and it came out okay, but I had to do some fine sanding on the edges before I was satisfied. 


RH - CLEAR ROOF 1RH - CLEAR ROOF 2RH - CLEAR ROOF 3

Attachments

Images (3)
  • RH - CLEAR ROOF 1
  • RH - CLEAR ROOF 2
  • RH - CLEAR ROOF 3
@Richie C. posted:

Here you go - not great pic's - in fact, it looks like there's no roof on it, but trust me, there's a clear one on there. You can tell because I added chimneys in the rear.

If you go with a clear roof, be careful how you cut it to avoid chip-outs. Some of the big box stores have a cutting station and you may be able to buy a piece of lucite and have them cut it or take it to a glass shop that has the right equipment. I used a very fine jigsaw blade and it came out okay, but I had to do some fine sanding on the edges before I was satisfied.


RH - CLEAR ROOF 1RH - CLEAR ROOF 2RH - CLEAR ROOF 3

Rich, where did you source your interior detailing parts from?
I'm trying to find some industrial equipment to go inside the round house.

Thanks

Good morning O Gaugers, Just a quick update on the roundhouse build. I now have the Gargraves track inlayed into a 1/4" sheet of ACX plywood. The green skylight windows have been permanently glued into the roundhouse.
I do have feeder wires placed into the rails so they're isolated like normal.

DSCN0038

DSCN0040

Next up was to add the flooring of the roundhouse. This is 1/4" birch plywood. Mathmatically with the ACX and the Birch plywood, the track stands proud of the floor by a few thousandths. The flooring in between the rails will be glued tight up against the center rail, thus leaving a gap for the wheels on the outer rails. I now have to ensure that the leading and trailing trucks of my locos are gapped correctly. The plan is now to remove the ACX and birch plywood and seal the birch with sanding sealer to get a smooth surface. Then, paint the floor with a concrete color paint, and weather it. I haven't gotten the knact of weathering yet, so it's a slow and painful process for me. I do watch modeling videos, so I believe it'll come with time.

DSCN0041

A couple of shots with some of the walls held on with clamps. I'm waiting to glue these in place, cause I want to install the new laser cut windows I have coming from Mr. Muffins. The windows in the kit were horrid. They were semi-clear, somewhat opaque, with dimples, completely unacceptable. The birch plywood will be trimmed round on the approach to the roundhouse and in the rear before I install the walls. I had thought of trimming the track back some, but have decided to leave it. The portion sticking out from under the floor isn't glued down. So it'll be easy enough to shorten it if the need arises when I install the turntable.
I really like how the lights turned out. Guess I should make sure they work before I glue the roundhouse down permanently.

DSCN0042DSCN0043

Questions and comments are always welcome.
Until next time...

Attachments

Images (5)
  • DSCN0038
  • DSCN0041
  • DSCN0040
  • DSCN0042
  • DSCN0043
Last edited by Jayhawk500

Truly craftsman quality work. That floor looks great. It’s almost a shame to put a roof on it and cover up all that great looking work. My roof is removable but I’m considering Richie C’s approach with the clear acrylic. One thing I’d like to add is smoke jacks. These are available from Altoona Modelworks in their detail section. If you click on the quick view it brings up the whole piece. Basically just a funnel to get the smoke out from a running steamer.

@Dave_C posted:

Truly craftsman quality work. That floor looks great. It’s almost a shame to put a roof on it and cover up all that great looking work. My roof is removable but I’m considering Richie C’s approach with the clear acrylic. One thing I’d like to add is smoke jacks. These are available from Altoona Modelworks in their detail section. If you click on the quick view it brings up the whole piece. Basically just a funnel to get the smoke out from a running steamer.

I saw those smoke jacks also and that's what going to go into the roof. Not the funky plastic tube with the hose washer.

@LT1Poncho posted:

Jayhawk500.....Beautiful work! please let us know how you weather the floor. i am particularly interested in this aspect. Also, will you have each track section isolated and able to be powered on or off individually, or will you power the entire roundhouse track on or off?

Welll, We'll see how that goes. Current plan is to seal the wood, add the normal concrete joints you would find in your sidewalks or driveway. Maybe some cracks in the concrete, then paint, and finally some sort of dark wash to highlight all the joints and cracks.

Yes, each track spur will be powerd seperately.

@Jayhawk500 posted:

Welll, We'll see how that goes. Current plan is to seal the wood, add the normal concrete joints you would find in your sidewalks or driveway. Maybe some cracks in the concrete, then paint, and finally some sort of dark wash to highlight all the joints and cracks.

Yes, each track spur will be powerd seperately.

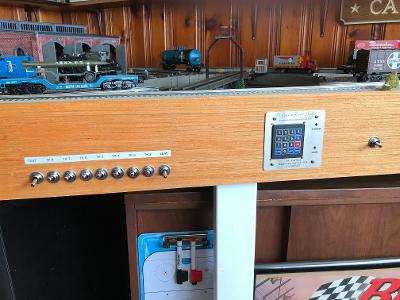
Pic of the switch assembly for each of the Roundhouse tracks. The switches are lighted and numbered above using a label printer, which helps identify which track is powered. You can also see to the right, the Millhouse River TT mounting pad and separate switch to power it on.

FINISHED TT - 3

Attachments

Images (1)
  • FINISHED TT - 3

I received my laser cut windows from Mr. Muffins this morning and I have the availability to oops on one window. So far I'm okay.
So, option time. Please look at the attached photo. Top portion is in matte black like the OE windows. The bottom portion is in the matte green like the doors and skylights as posted above. I can go either way. Please advise.

Thanks

20230223_114323

Attachments

Images (1)
  • 20230223_114323
Last edited by Jayhawk500

Korber Window Install

I have completed the first rear panel of the roundhouse. The "small" Korber laser cut windows are actually too big for my roundhouse. So I had to trim and sand them down to get them to fit into the openings. Oh, did I mention I was inlaying them into the walls? They are mounted flush with the interior side of the wall. These windows are very delicate, but they are strong enough to stand up to the cutting and sanding. Once satisfied with the fit I was on to the finish. I opted to go with the kelly green, same as the doors and skylights. Then glued them into the openings with super glue to hold them in place. I sealed the window opening with wood glue, using my #11 X-acto knife. Finally, I painted the glue to hide it. I still have light bleed through, But another coat of paint w/ a #00 brush will take care of that. From start to finish, the process for one window takes me about 2-3 hours. When it's all said and done, I'll have about 44-66 hours in just the windows. I am one of these guys that likes to see instant gratification in my work. It's hard to walk away sometimes and allow the paint or glue to dry.


DSCN0044DSCN0045


Until next time...

Attachments

Images (2)
  • DSCN0044
  • DSCN0045
Last edited by Jayhawk500
@Jayhawk500 posted:

Korber Window Install

I have completed the first rear panel of the roundhouse. The "small" Korber laser cut windows are actually too big for my roundhouse. So I had to trim and sand them down to get them to fit into the openings. Oh, did I mention I was inlaying them into the walls? They are mounted flush with the interior side of the wall. These windows are very delicate, but they are strong enough to stand up to the cutting and sanding. Once satisfied with the fit I was on to the finish. I opted to go with the kelly green, same as the doors and skylights. Then glued them into the openings with super glue to hold them in place. I sealed the window opening with wood glue, using my #11 X-acto knife. Finally, I painted the glue to hide it. I still have light bleed through, But another coat of paint w/ a #0 brush will take care of that. From start to finish, the process for one window takes me about 2-3 hours. When it's all said and done, I'll have about 44-66 hours in just the windows. I am one of these guys that likes to see instant gradification in my work. It's had to walk away sometimes and allow the paint or glue to dry.

DSCN0044DSCN0045

Until next time...

Chris - excellent modeling. Its coming along real nice!

Good Morning Everyone,

Got an update on my roundhouse. After 10 grueling days I finally have completed the windows for the roundhouse. Although I worked everyday on these, I was also able to get some tasks completed on the roundhouse too. Had to break up the monaughtny of the windows.
To keep a long story short,  I have glued the two sides and all of the rear panels together. I have deliberatly have left off the front door panel, to prevent busting off the doors. I will next flip the 4x4 panel over and wire up the interior lights. I have included some photos of where I am currently. I like the shots through the windows the best.

This was the reason for replacing the windows.
DSCN0011

Windows inset in the back panels.
DSCN0005DSCN0006

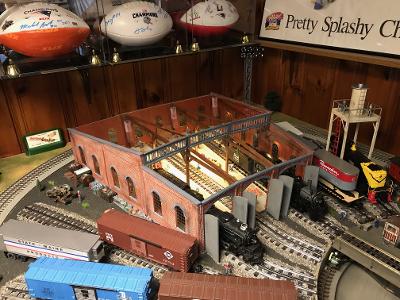
Aerial shot showing the interior.
DSCN0012

Although my PE is not too scale, I added two of my Legacy engines. The next update I'll add my CSS and SP Daylight.
DSCN0004DSCN0007
DSCN0008

Other window pictures.
DSCN0002DSCN0003DSCN0006

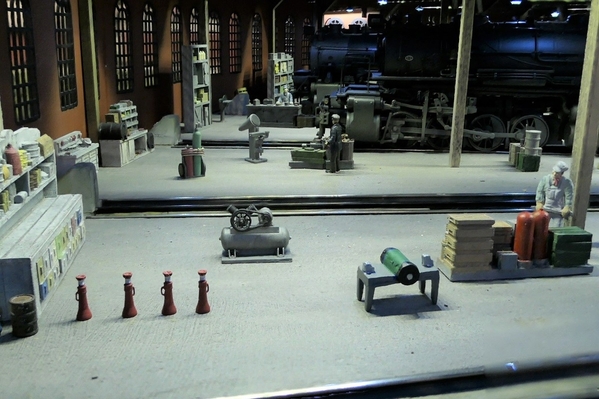
Lastly, a few detailing parts I got off eBay. There will be more parts to follow.

DSCN0009

Until next time....

Attachments

Images (11)
  • DSCN0011
  • DSCN0005
  • DSCN0006
  • DSCN0012
  • DSCN0004
  • DSCN0007
  • DSCN0002
  • DSCN0003
  • DSCN0006
  • DSCN0008
  • DSCN0009
Last edited by Jayhawk500

Add Reply

Post

OGR Publishing, Inc., 1310 Eastside Centre Ct, Suite 6, Mountain Home, AR 72653
800-980-OGRR (6477)
www.ogaugerr.com

×
×
×
×
Link copied to your clipboard.
×
×