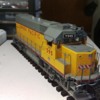
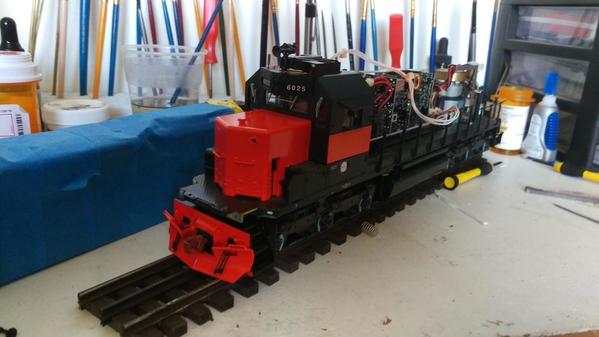
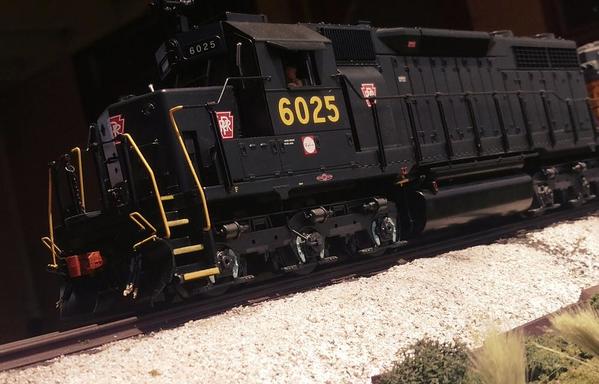
Hello all. Long time member,but never really posted much. Didn't have much o scale till recently. Anyways this is my current little project. As you all can tell its a atlas master SD35 in PRR colors I have been building to represent George's creeks railroads  SD35 rebuild. 

So far it has had the pilots fixed. Kadee 805's installed. Full length hand rails. Overland models plows on each end. Pilot holes filled. New coupler lift bars and a semi accurate drift gear fabricated. PSC mu hoses and stands. PSC horns ,air conditioner,lift rings, modified cab windows. 


What's left to do. Finish the details on the rear pilot. Fabricate a antenna stand. Replace the windshield wipers.  I want to run some I beam down the side to simulate some frame details. Strip the PRR decals and reletter as soon as I can find someone to make the decals I need. And finish the sliding cab windows . New figures. Wire the motors in parallel to slow er done a bit more and then a nice weathering job. 

Anyways. Let me know what ya think. I will be doing a UP GP15-1 conversion soon. Any interest in a detailed write up on the fixed pilot conversion let me know and I'll try to make it happen!!!IMAG0386_1IMAG0391_1
Attachments

Images (2)
  • IMAG0386_1
  • IMAG0391_1
Original Post

Replies sorted oldest to newest

I'm definitely interested in reading about the gp15-1 work, especially all the extra detailing.  I have a two rail version sitting on my desk now that I'd like to spritz up.    They definitely would benefit from the added frame detail.  It's kind of empty in that area.  I like how you list out the extra part that you are using.  That's very helpful.

Jim

Well the SD35 is close to being done...just waiting on my new iwata air brush to get here to finish her up. So I turned my attention to the next engine on the chopping block....a Atlas GP15. So farther only thing I have done is replace the disappointments that are the molded exhaust stacks with some hand fabricated aluminium stacks cut from k&s tubing. As well as mount a PSC air conditioner to get her looking a little better up top. 

IMAG0471

And the stacks. The harbor must Grey isn't a exact match for the atlas paint I see now. Waiting on some badger model flex to get here 

IMAG0472

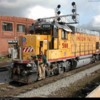
Next step is yank the pilots off there. Toss the lobster claws. And get  all the cast details ground off  and smooth. Then fabricate spacers. Add PSC mu hoses. Cut levers. Simi scale draft gear after filling the massive pilot holes and Kadee 805's. Then I will do all new handrails using music wire and PSC stanchions. Then all the lift rings will be removed and replaced and antenna stands fabricated to replicate its prototype as close as I can...here is some proto pics 


upy0588_0002

It's gonna be fun! And I'll start a new thread when I dig into it! 

Attachments

Images (4)
  • IMAG0471
  • IMAG0472
  • 1357.1075993620
  • upy0588_0002
theteejmiester posted:

Hello all. Long time member,but never really posted much. Didn't have much o scale till recently. Anyways this is my current little project. As you all can tell its a atlas master SD35 in PRR colors I have been building to represent George's creeks railroads  SD35 rebuild. 

So far it has had the pilots fixed. Kadee 805's installed. Full length hand rails. Overland models plows on each end. Pilot holes filled. New coupler lift bars and a semi accurate drift gear fabricated. PSC mu hoses and stands. PSC horns ,air conditioner,lift rings, modified cab windows. 


What's left to do. Finish the details on the rear pilot. Fabricate a antenna stand. Replace the windshield wipers.  I want to run some I beam down the side to simulate some frame details. Strip the PRR decals and reletter as soon as I can find someone to make the decals I need. And finish the sliding cab windows . New figures. Wire the motors in parallel to slow er done a bit more and then a nice weathering job. 

Anyways. Let me know what ya think. I will be doing a UP GP15-1 conversion soon. Any interest in a detailed write up on the fixed pilot conversion let me know and I'll try to make it happen!!!IMAG0386_1IMAG0391_1

I would like to know the details. I have a few mth and Lionel Diesels that would look a lot better with fixed pilots and full length handrails. Looks great so far!


David

Well the horn and air conditioner and Sinclair antennas that are mounted under the stands are precision scale parts. Both antenna stands are scratch built. The conduit is .028 brass wire. And the holders are precision scale .028 lift rings. I get all of my parts from P&D hobby or Des plains hobby. 


Any other questions feel free to ask. 

The pilots were fixed using a .125 piece of styrene cut to shape. Then it was attached to the top of the pilot using epoxy and then shaped to the correct contour. Then the pilot faces were ground smooth and all gaps filled with tamiya putty. Then I drilled and tapped the frame for 2/56 machine screws using the factory holes as a guide for placement. After this I built the coupler mounting locations up using styrene to the correct height. Then mounted the Kadee 805 using the same 2/56 screws. Then filled the pilot holes and attached it to the frame. The hand rails are hand bent .032 steel music wire. I'll do a write up soon 


Okay. First things first. Thank you to all that gave feedback on my thread about choosing a proto freelanced paint scheme. As some of you know I chose to go with the western pacific orange and green scheme. Well there was a few things on the pilot of the SD35 that I grew to not like. First was the draft gear box. Didn't like the first go around. So I stripped it and started over. Figured while I was at it I would start the paint job. It's been a couple days and I have it well on its way so I figured I would post some pics of it torn apart. Let me know what ya think. I love the orange and green. Gonna get the dry transfer numbers on her tonight, and finish the long hood end. Put some sliding windows in the cab and get her back together. 

IMAG0518

I decided to go back to the stock atlas mu hoses. I have decided I like them better than the PSC parts. 

IMAG0521

I also took the opportunity to fill all of the holes in the frame from the factory shorty atlas handrails. As well as modified the pilots for better access to the coupler lift bars. Per FRA rules. I also picked up some aluminium rod to turn and fabricate the ditch lights. And some brass angle for the stands. Will let ya'all know how that turns out. Till then let me know what ya think! I have thick skin so be honest. 

Attachments

Images (2)
  • IMAG0518
  • IMAG0521
theteejmiester posted:

Finished the rear hood up and got the number boards and such back in. This shows the orange a little better 

I'm a fan of the stripes on the ends.  I was hoping to see them on the rear end, and possibly on the nose and pilots.  In my opinion, you can never have too many stripes.

3982503582_60335d9e61_o

Your model looks great though.  Keep it coming.

Attachments

Images (1)
  • 3982503582_60335d9e61_o
Last edited by big train

Add Reply

Post

OGR Publishing, Inc., 1310 Eastside Centre Ct, Suite 6, Mountain Home, AR 72653
800-980-OGRR (6477)
www.ogaugerr.com

×
×
×
×
Link copied to your clipboard.
×
×