
I have been looking for one of these in 2 rail for YEARS to get into the scale.

A few months back my eBay alert finally lit up and she arrived a week later.

Being a modeler since birth, I can never leave anything alone, so the improvements began:

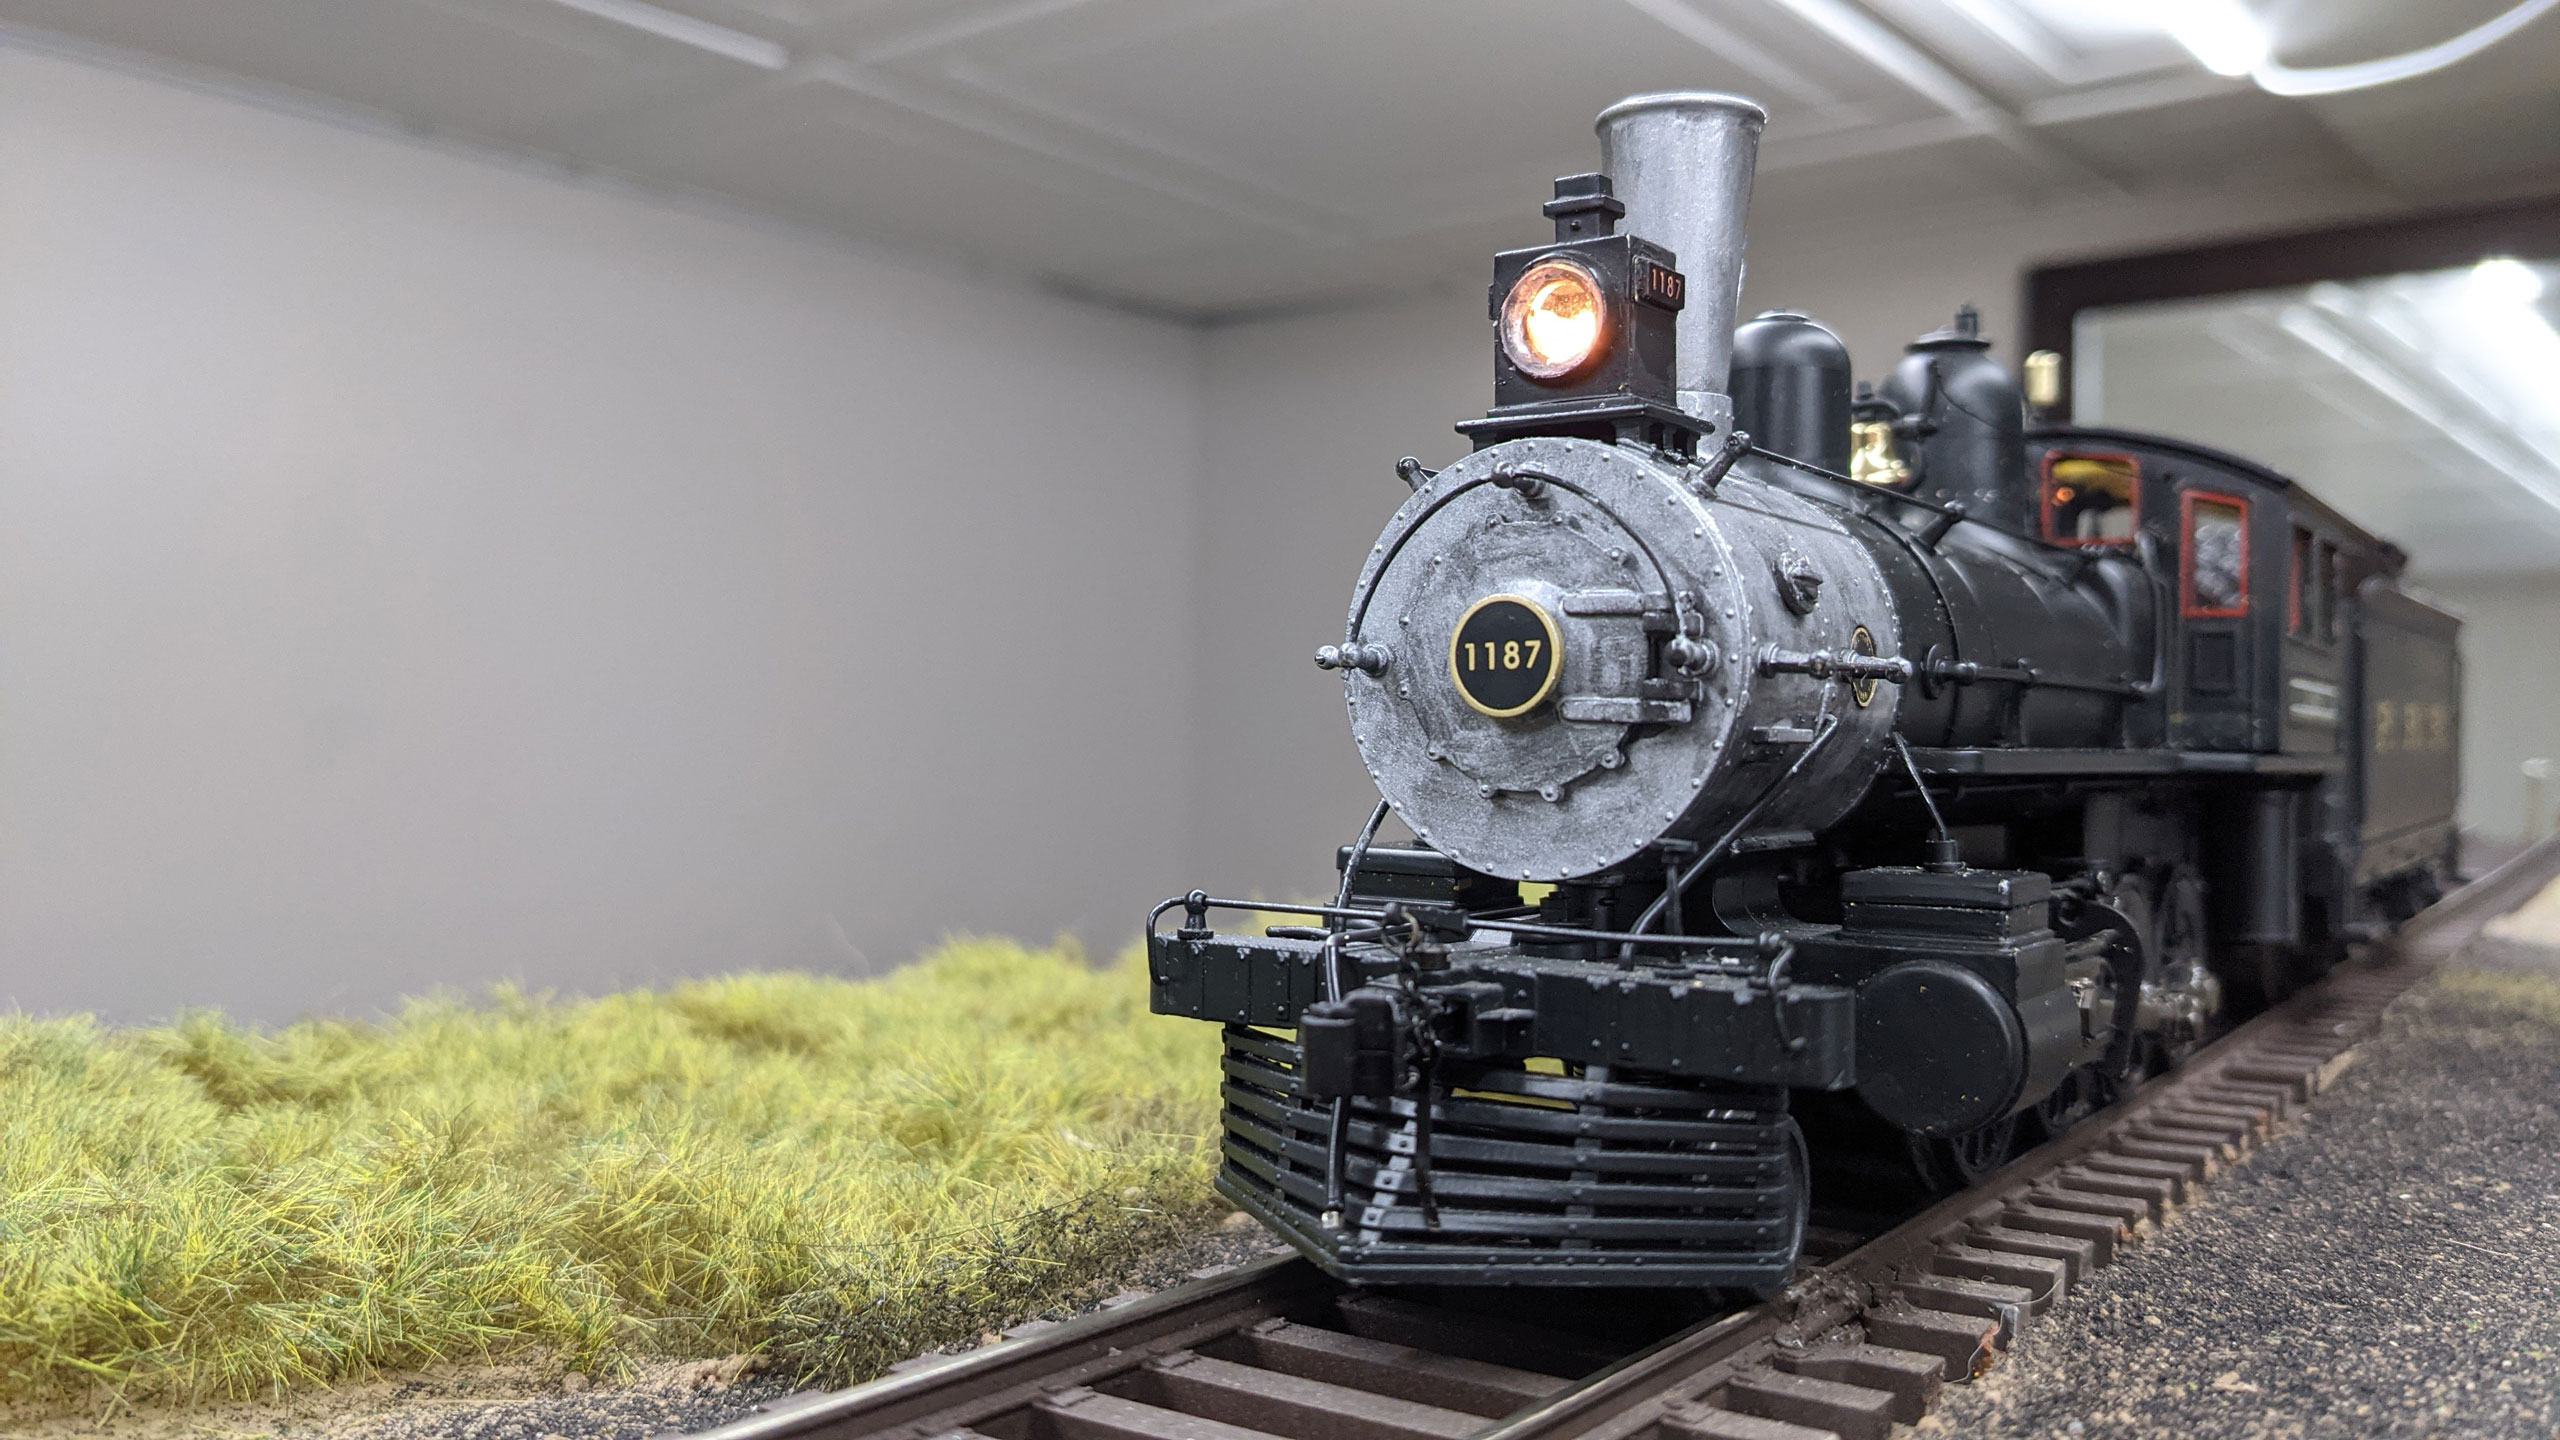
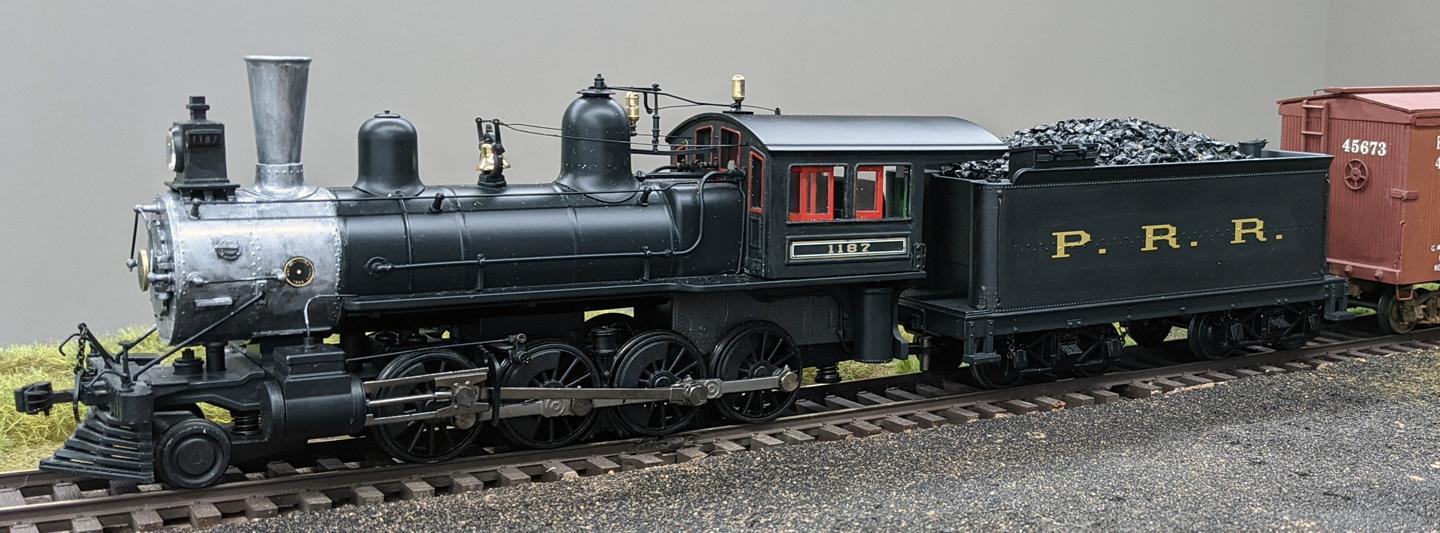
  • Removed the clown makeup striping (it was a model of the real 1187 in the RR Museum of PA which was dressed up like a passenger engine for a Worlds Fair)
  • Removed the load of a fireman in preparation for a better replacement
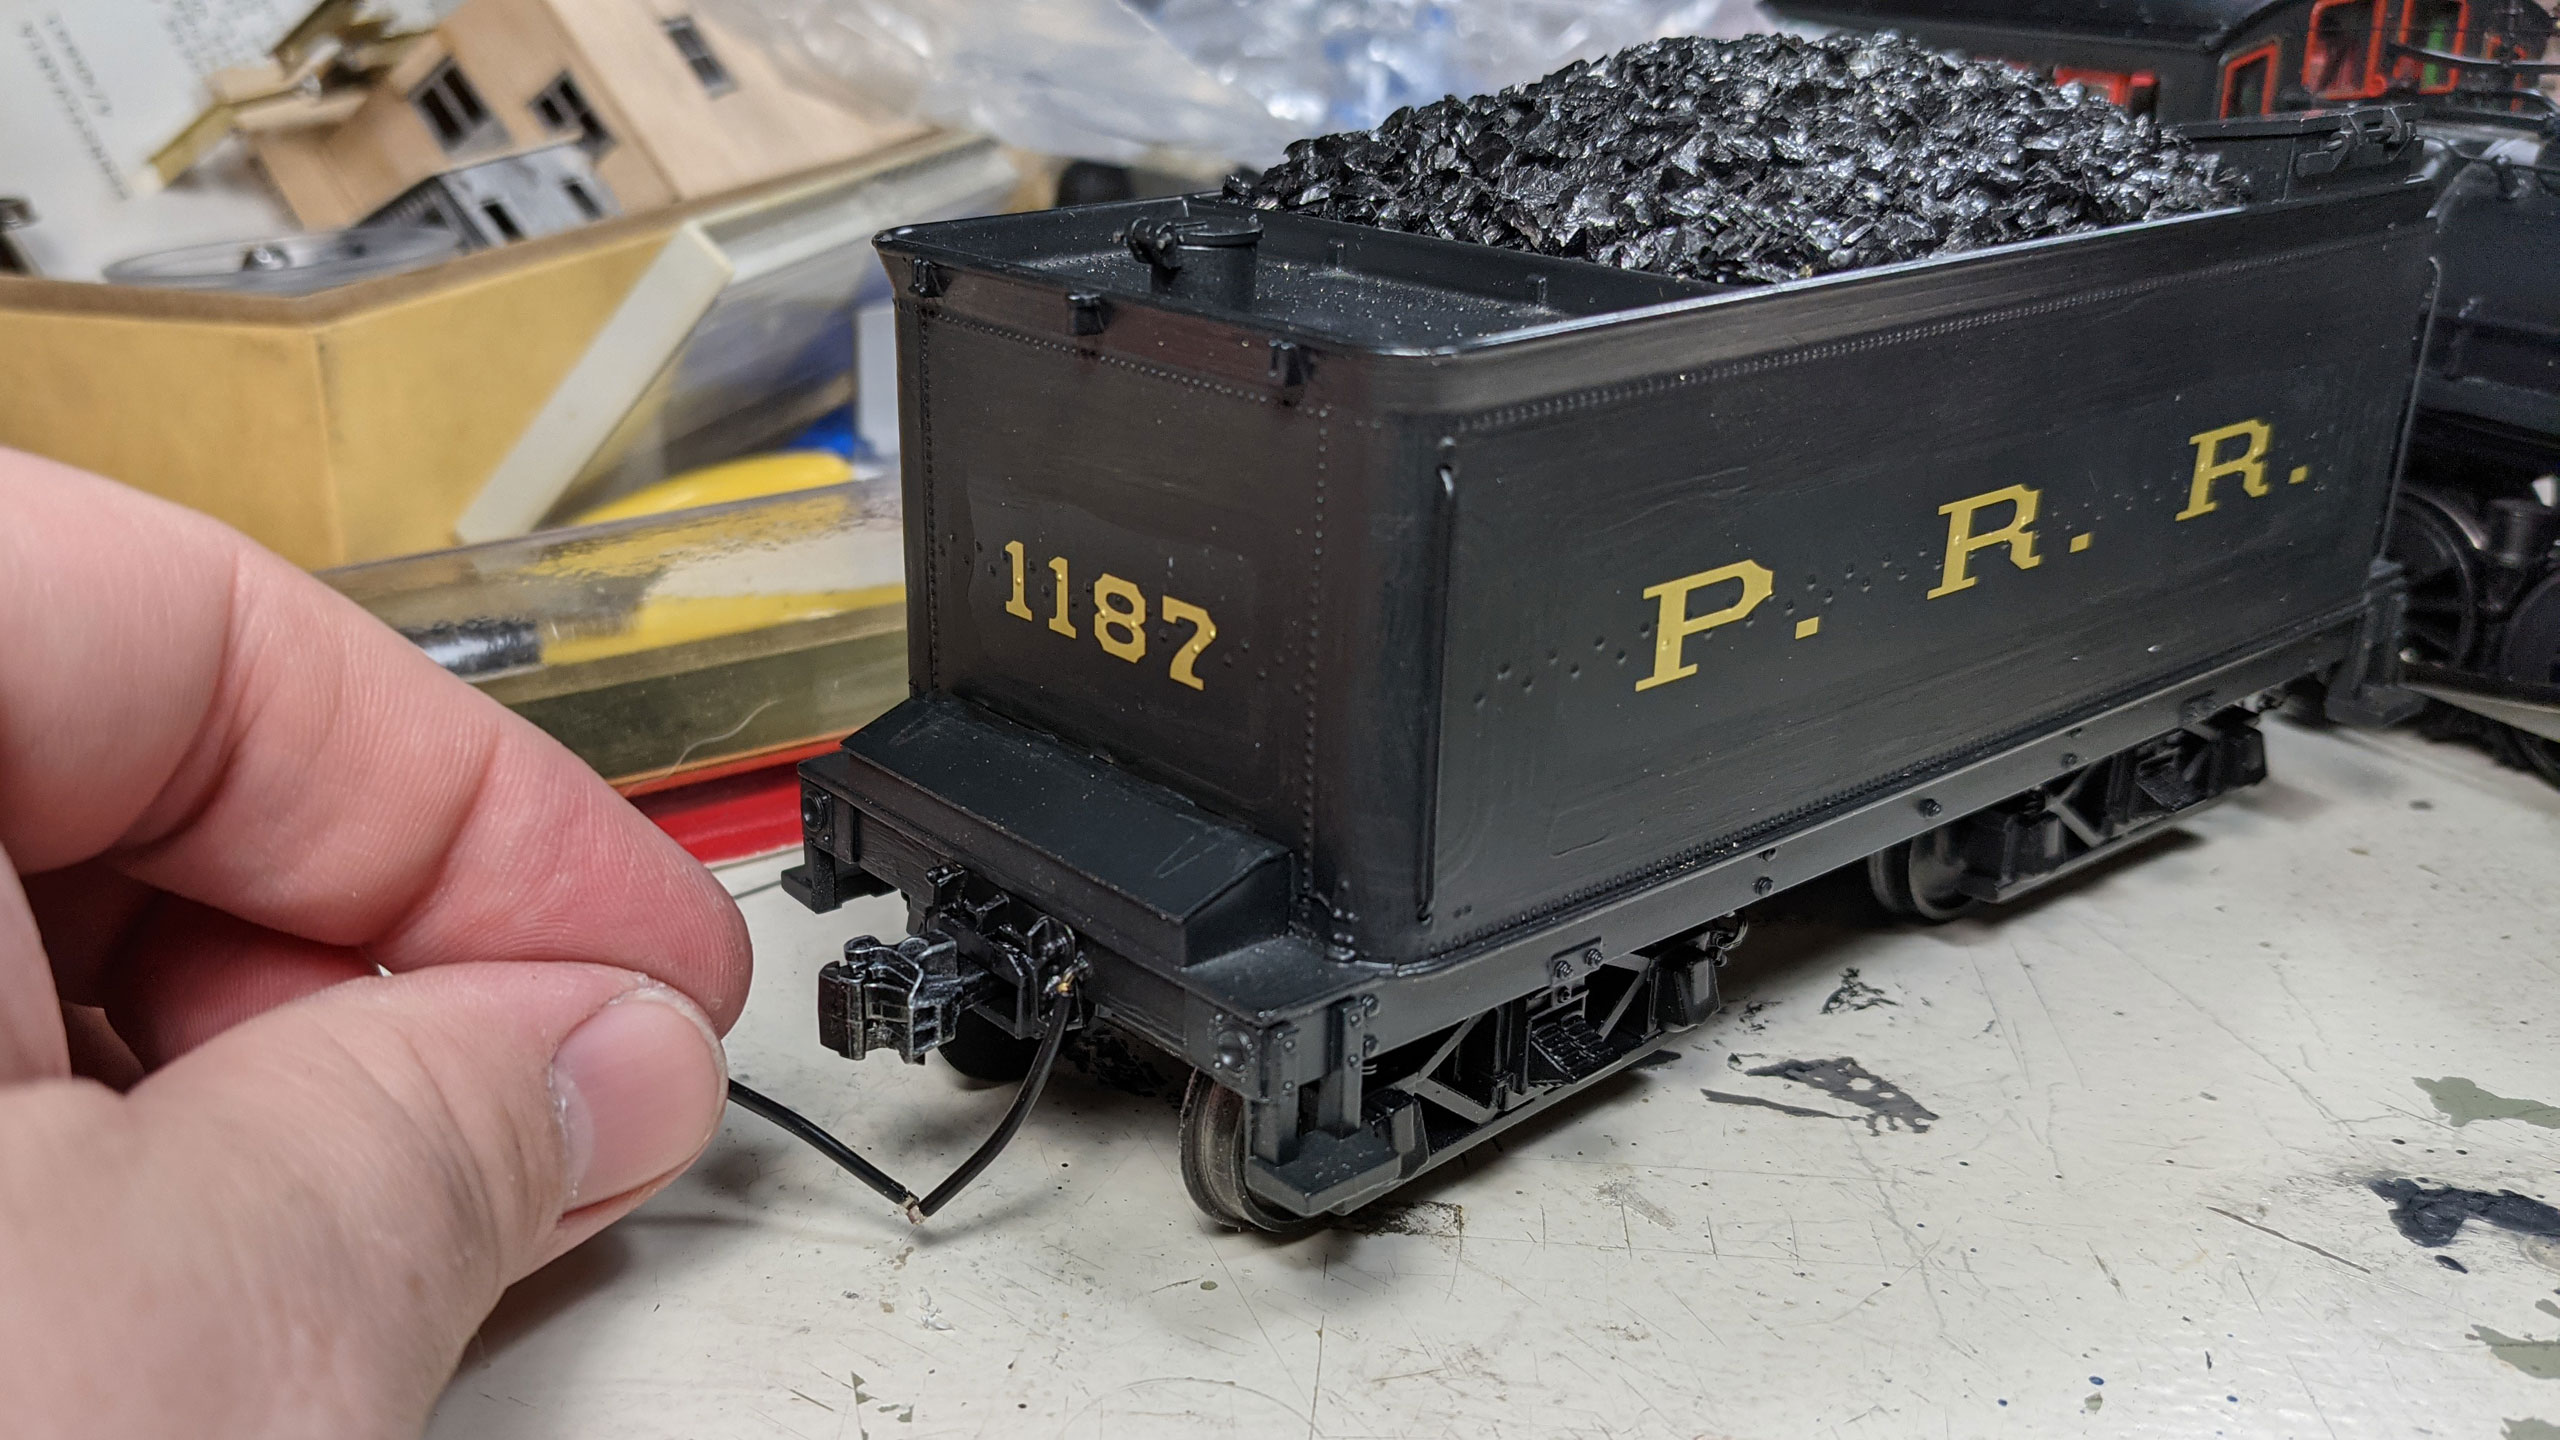
  • Replaced the MTH DCS with a TCS Wowsound decoder & high bass speaker
  • Repainted the smokebox a lighter color for better future weathering
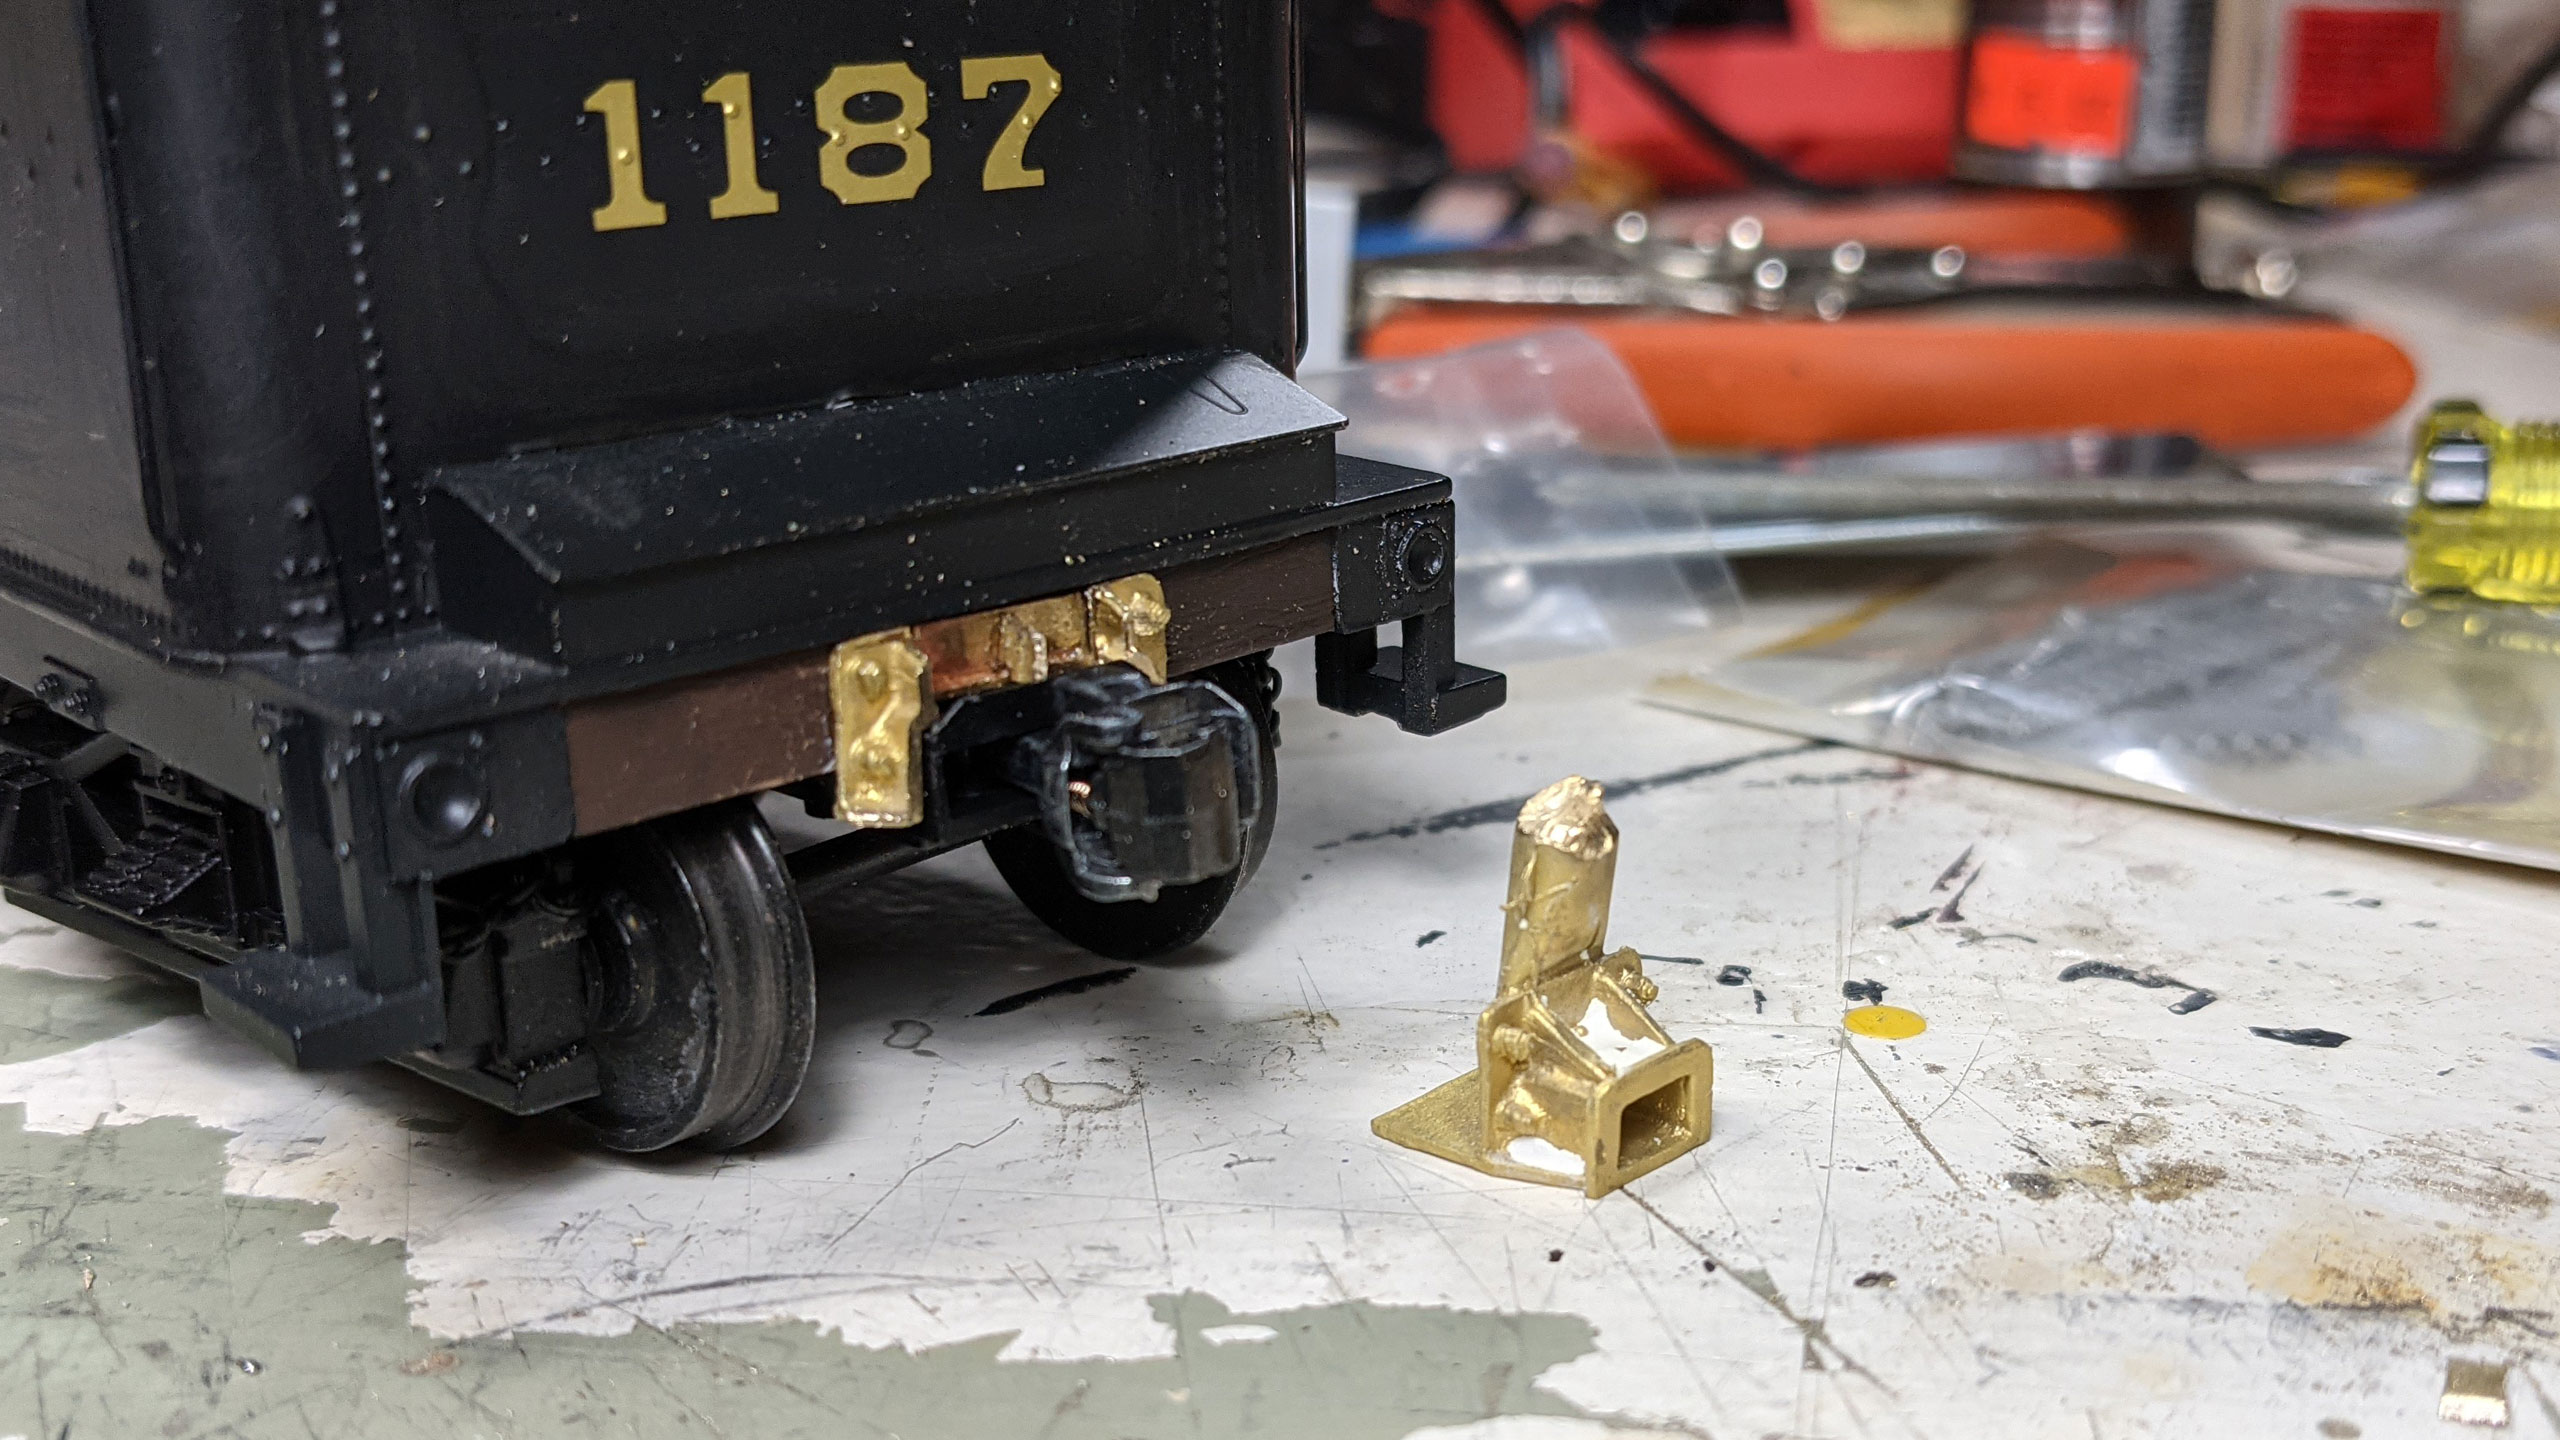
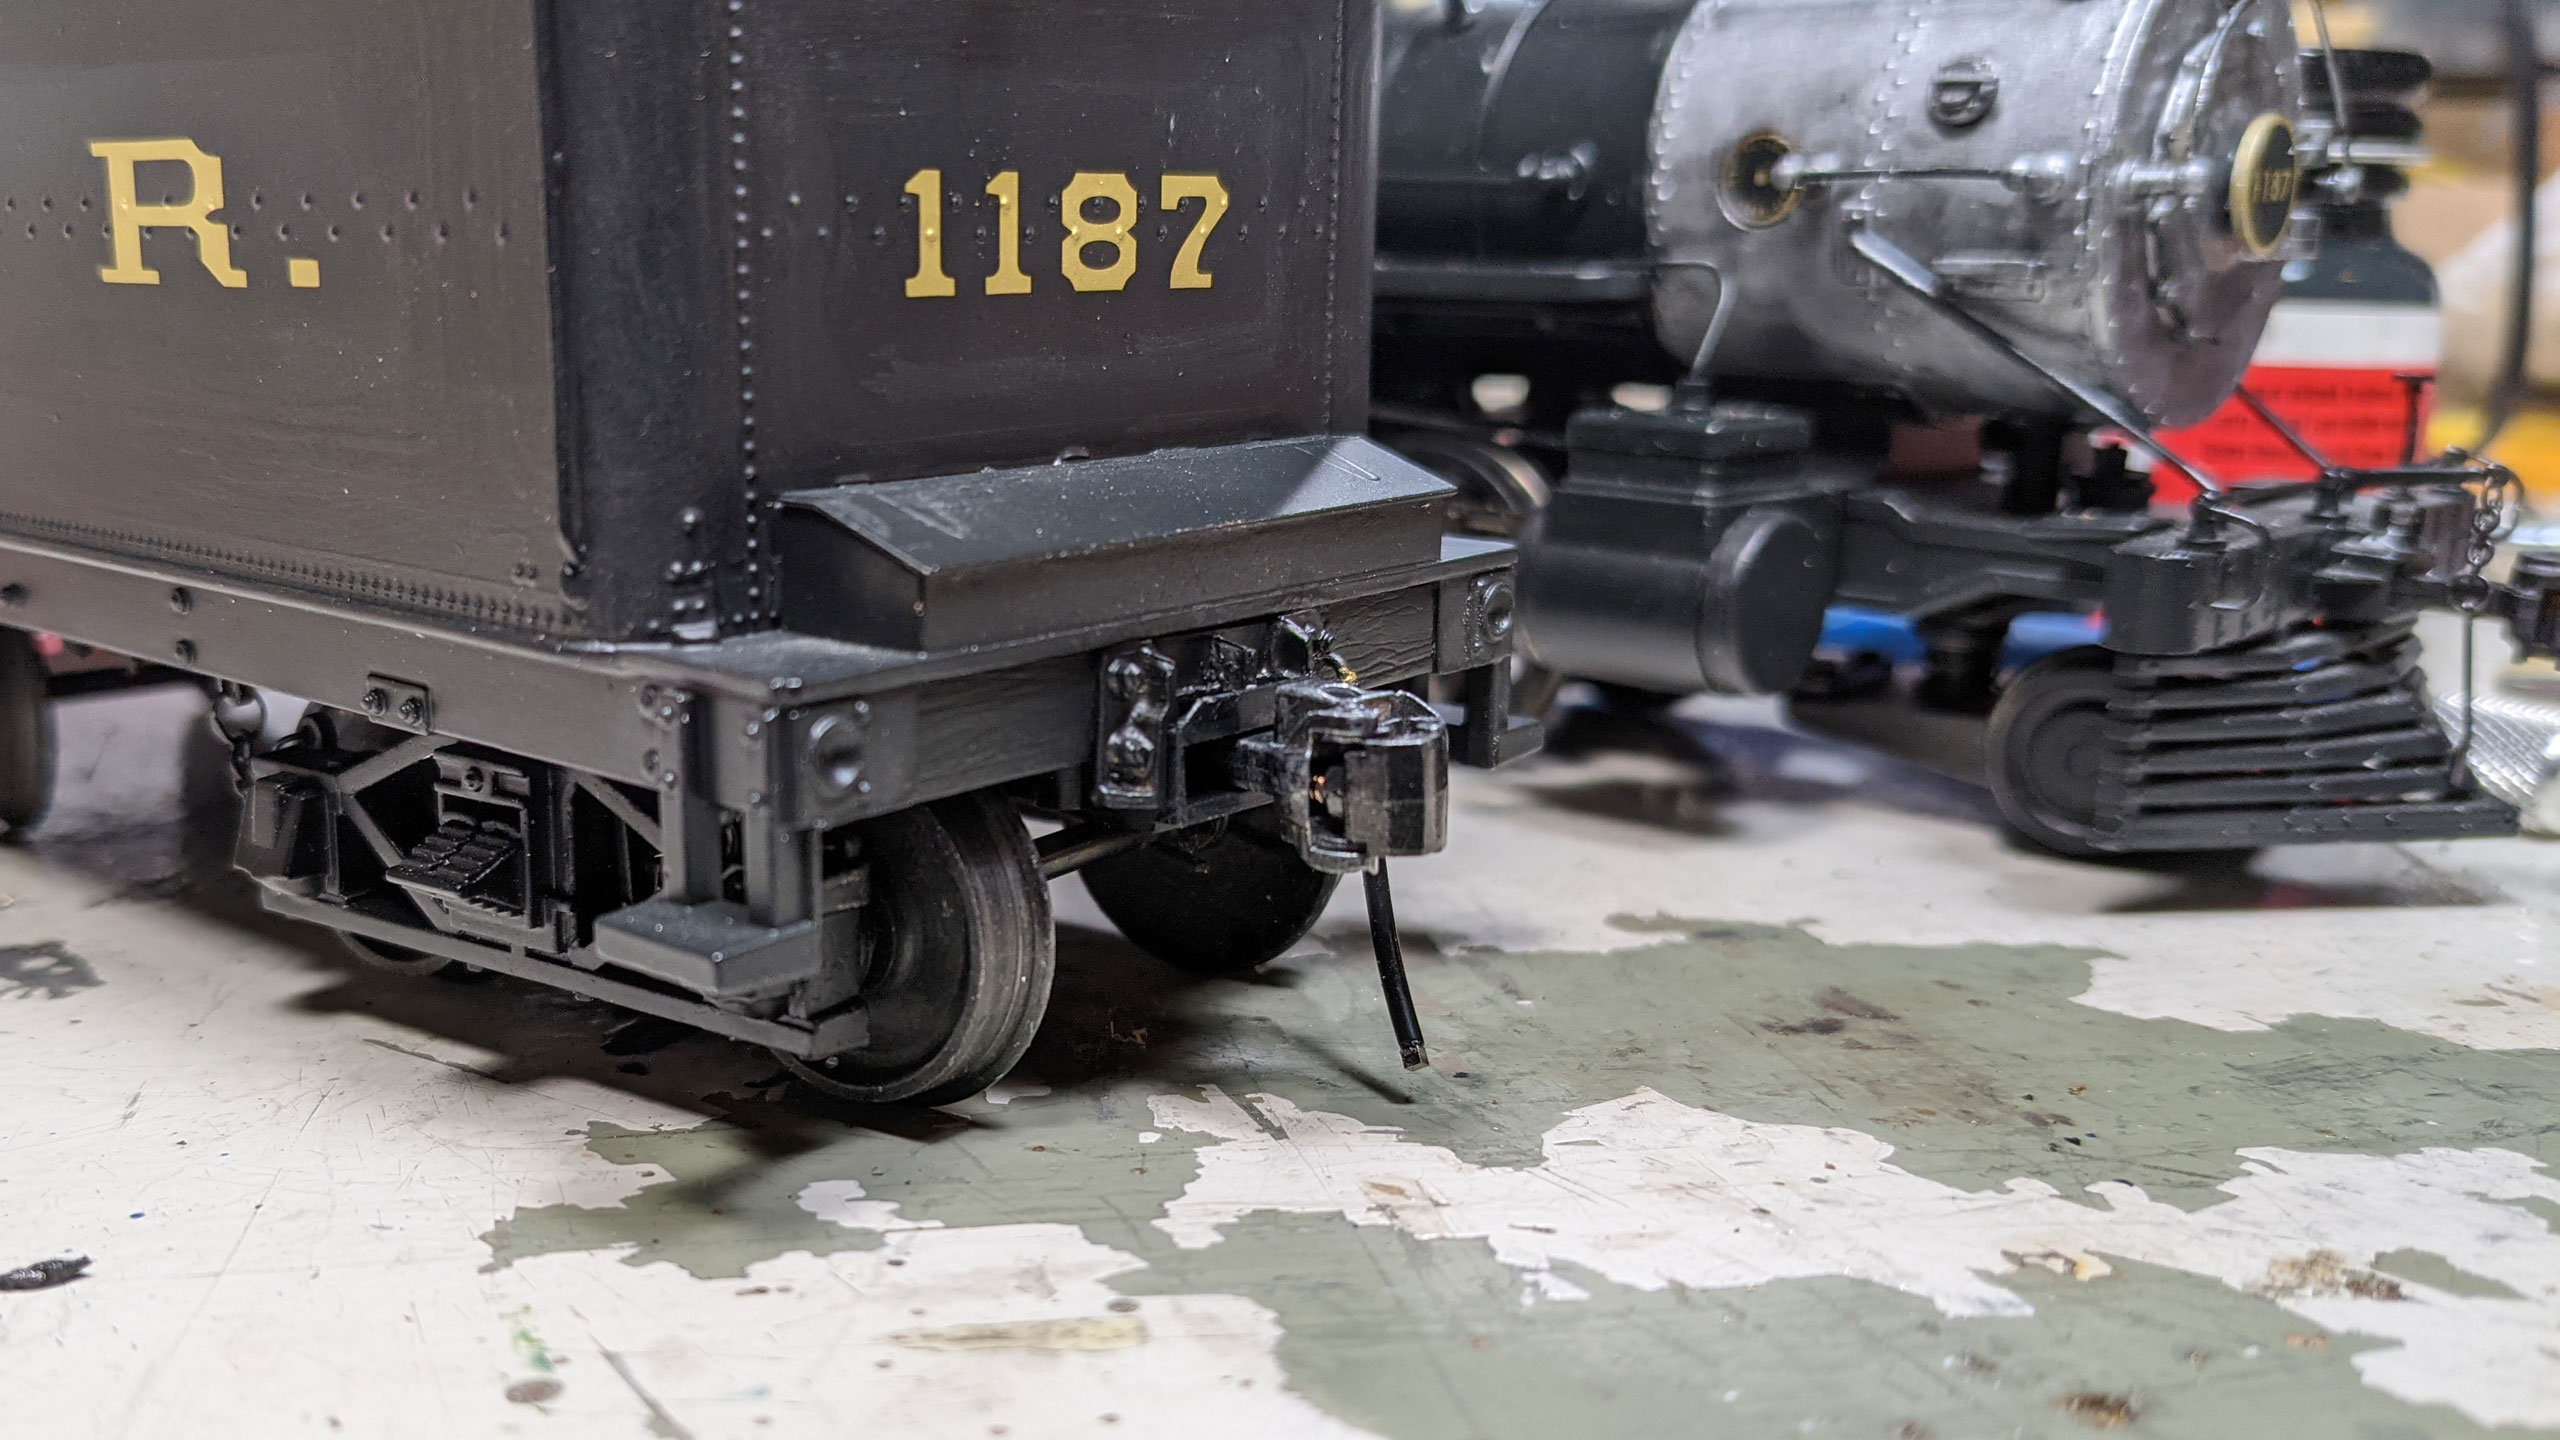
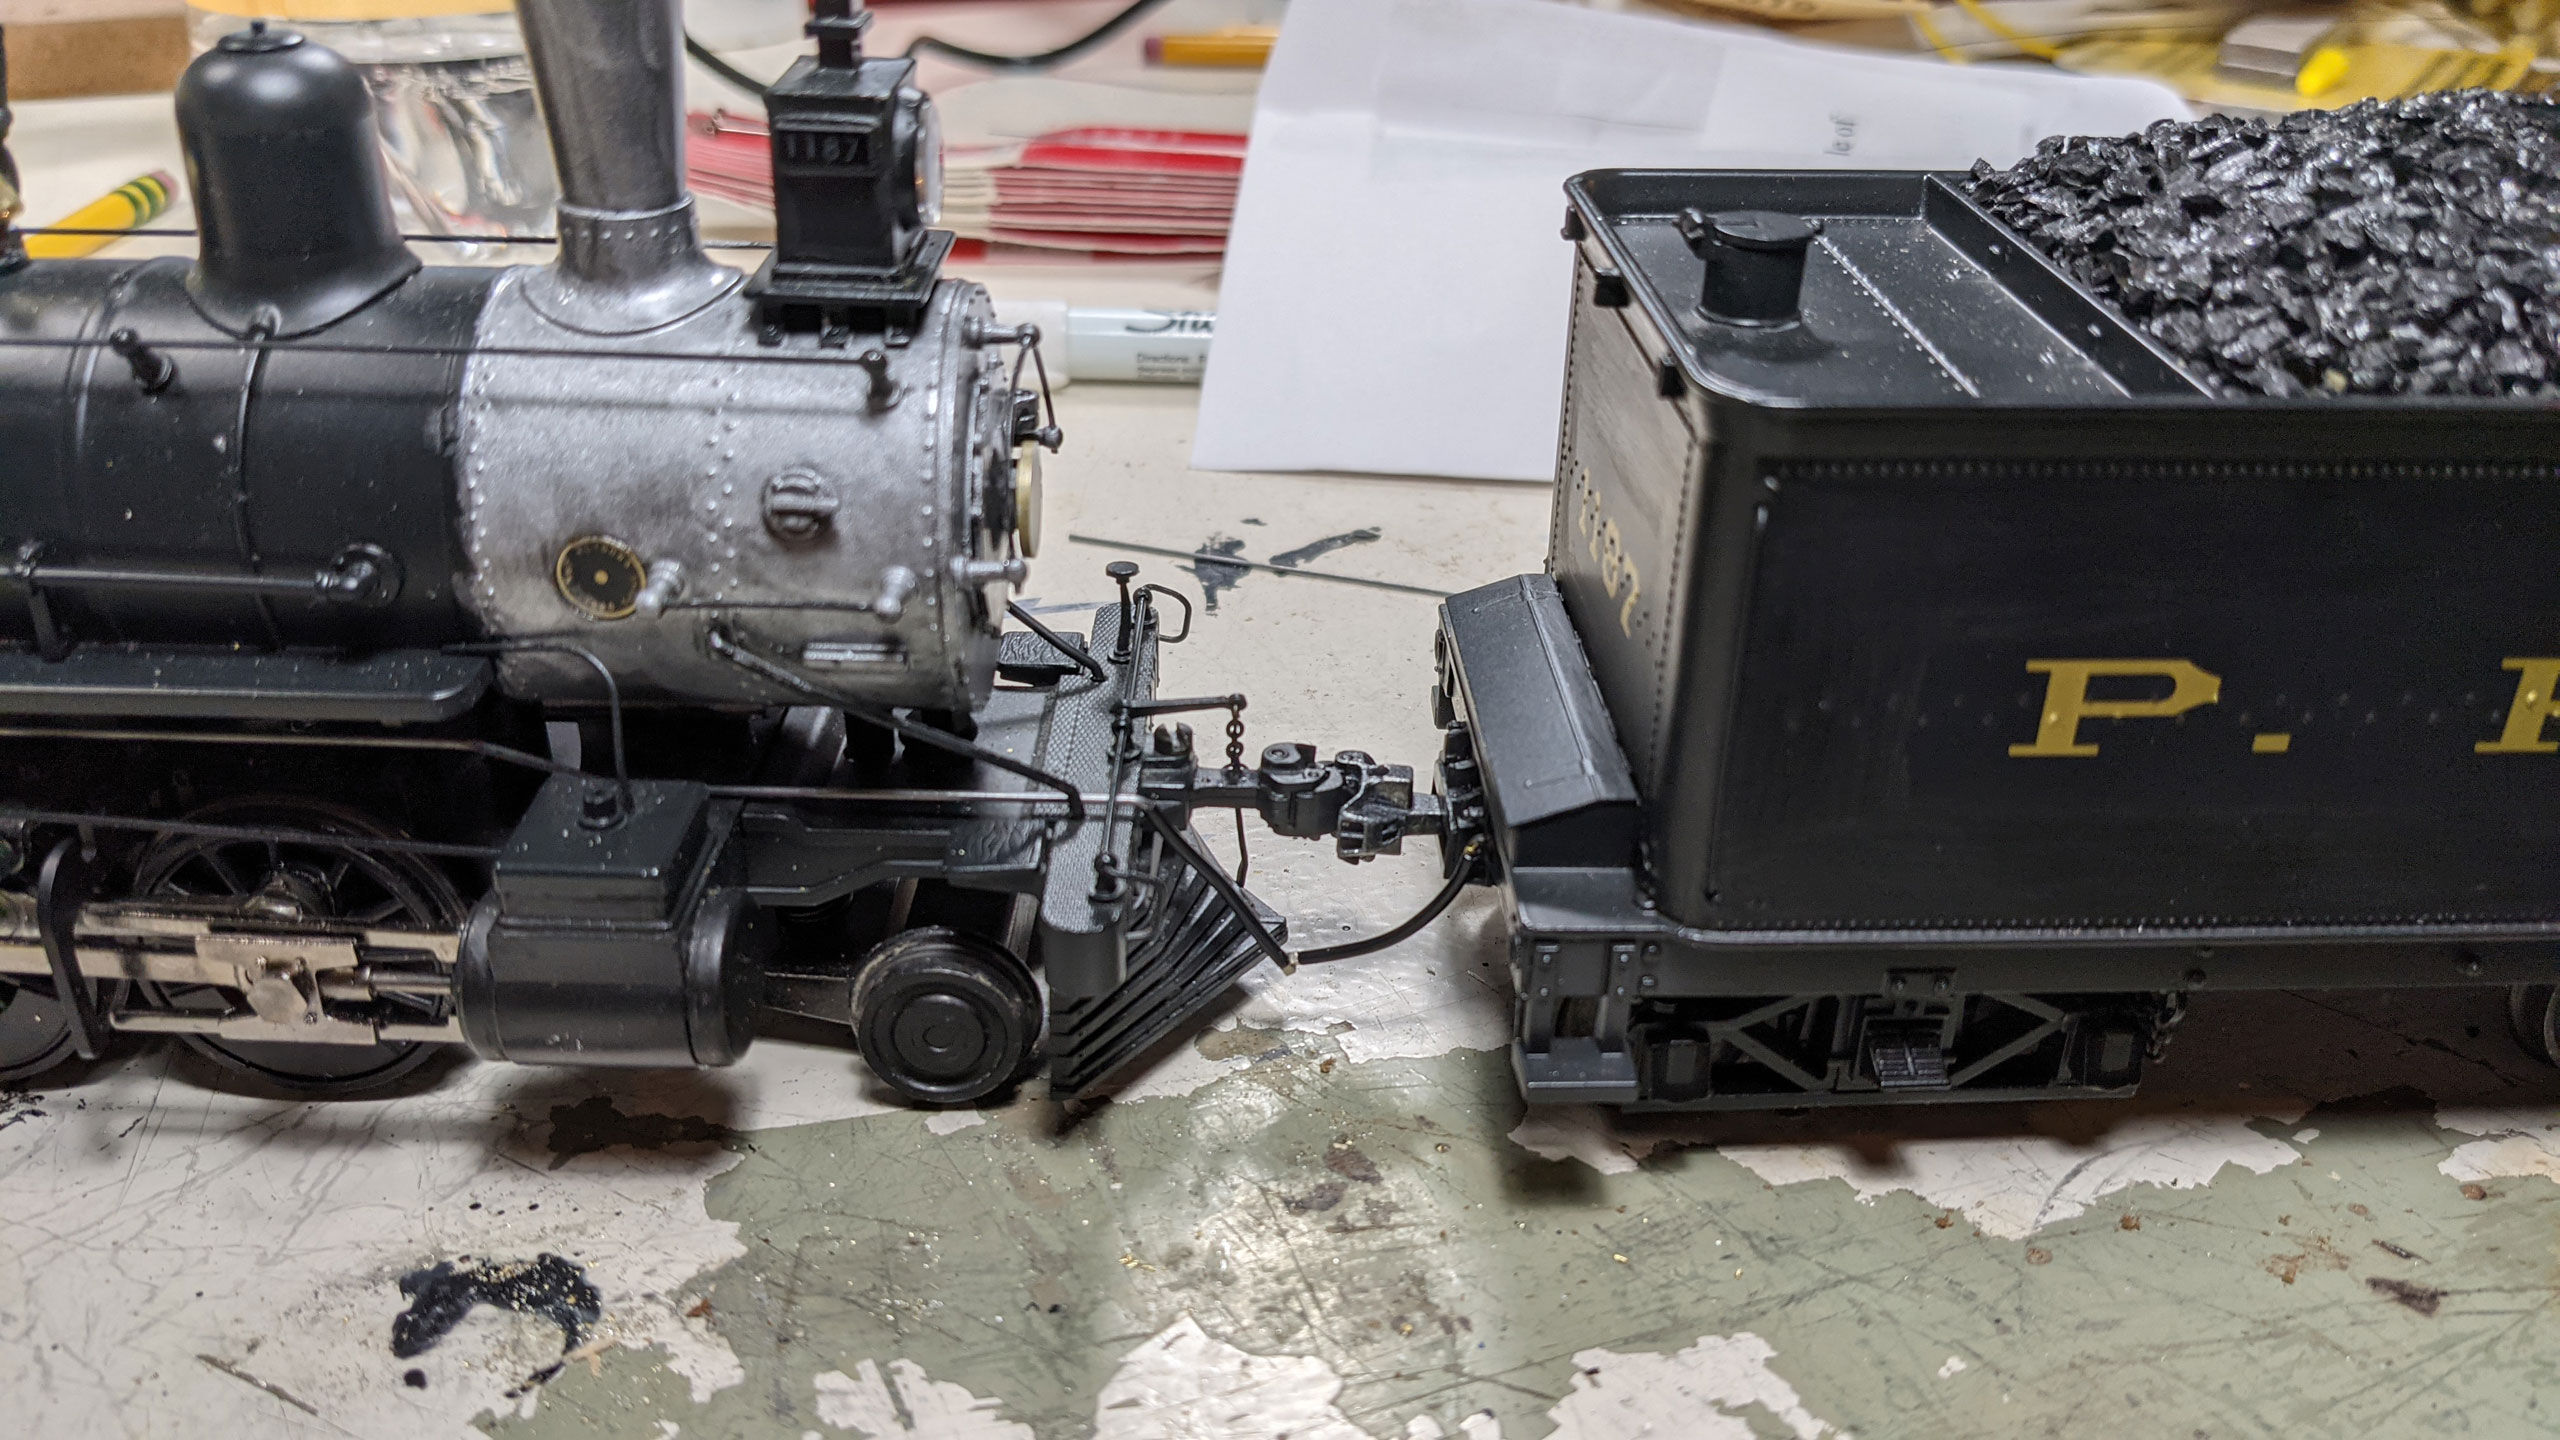
  • Replaced the rear non-scale Kadee with a scale Kadee
  • Replaced front dummy coupler with a working PSC coupler.

The todo list is still long

  • Add working air hoses using modified HO MagnaLock components
  • Replace the headlight lens
  • Detail cab interior
  • Repaint cab interior
  • Significantly darken the cab light (it would be a lantern: there's no onboard electricity)
  • Repaint the bright brass appliances to a darker more realistic color
  • Add an auxiliary speaker in the smokebox
  • Repaint engineer
  • Rebuild the rear "pilot" beam to fill in the gap left for the toy train couplers
  • Add a rear coupler cut lever
  • Fix the front coupler cut lever chain
  • Add a functional tender deck
  • Add piping between engine and tender
  • Add tender brake rigging
  • Add some tools to the tender deck
  • Add piping to the steam brakes
  • Add auxiliary sandboxes
  • Renumber (potentially)
  • Add pilot lettering
  • Re-decal the tender to use the correct sized lettering
  • Light weathering
  • Add an optional deadrail setup to the tender
  • Add a working bell
  • Replace numberplate

Here she is after I finished the sound decoder install but before replacing the OEM MTH speaker.

Original Post

Replies sorted oldest to newest

Great job so far, Ed, I'll be following your work on this.  Love the slow-speed control.  May I suggest also lowering the cylinders, which are too high above the driver center.  I did this on mine, and it wasn't too difficult but does involve re-engineering how the pilot piece attaches to the frame, and you'll have to build up the saddle a bit.  Well worth it, if you ask me.

With the arrival of some Precision Scale parts, work continues.

First: I filled in rear pilot beam. This is some strip styrene cut to fit around the coupler box.

Then I took a Precision Scale coupler pocket (part #40166) and performed major surgery on it. I used some brass scrap to gribble in another bracket, mounted and painted it.

Here you can see the original part and then what I ended up with.

And here we are all painted up. Not too bad!

Now, you might notice the air hose there. That's another precision scale part (#56201) with some Canuck magic applied.

You can really see my brushwork from covering the striping here so I think stripping and repainting the tender is moving up the priority list.

I'm glad you're enjoying the progress! Here's a bit more.

First, the air hoses at work. Pretty nifty!

Next, speaking of the headlight: I did not need to change the bulbs, luckily. I DID however swap out the headlight lens made from Bubbles Glasses for a new one. I hand shaped it from a scrap of a  Woodland Scenics tree package (about the only thing they're good for) and used my chrome pen for the inside of the headlight. I want an MV lens but my search for the appropriate one has been fruitless. The old lens just popped out with some gentle convincing.

It looks good all lit up (although, given the era, that wouldn't be the "default" the way it is today).

I also added a train line to the front pilot. It's odd that it's on the wrong side of the engine, but I was told that was probably to make it easier to see the brakeman when switching. The pipe is still just "set in place" until I get some proper pipe hanger hardware. Trying to find the right way to route it and where it goes was a challenge since I had to rely on photos from the web. When we can leave our bunkers again I might go see the real 1187 and see how this works (so maybe the pipe will remain loosely attached for now).

The good news is that it did make attaching the air hose really easy (it is just a press fit).

She's definitely coming along!

Add Reply

Post

OGR Publishing, Inc., 1310 Eastside Centre Ct, Suite 6, Mountain Home, AR 72653
800-980-OGRR (6477)
www.ogaugerr.com

×
×
×
×
Link copied to your clipboard.
×
×