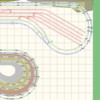
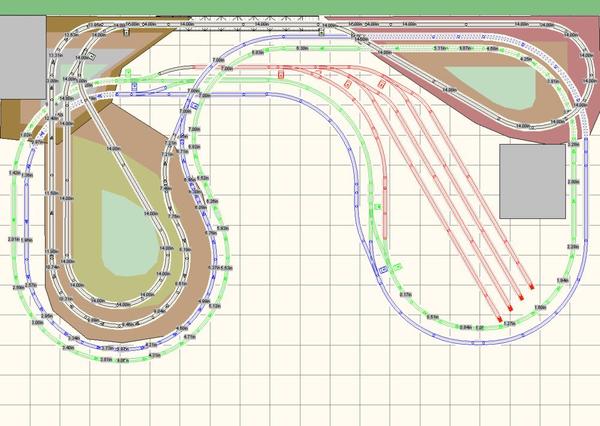
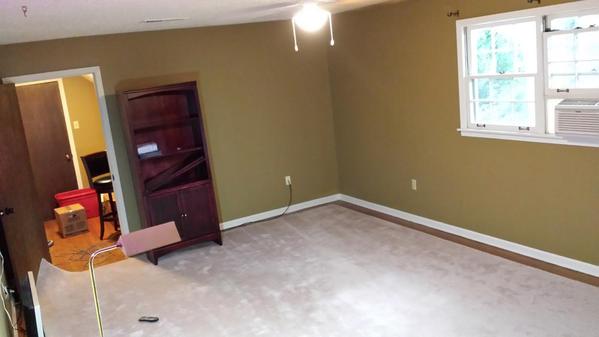
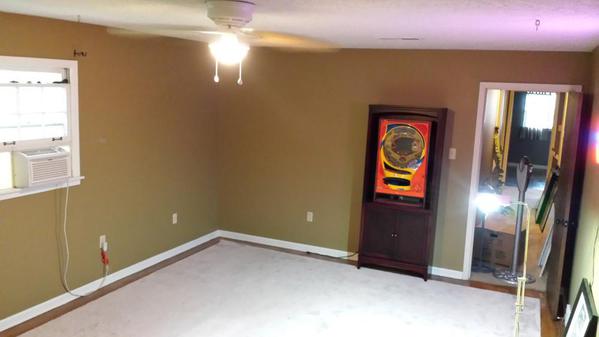
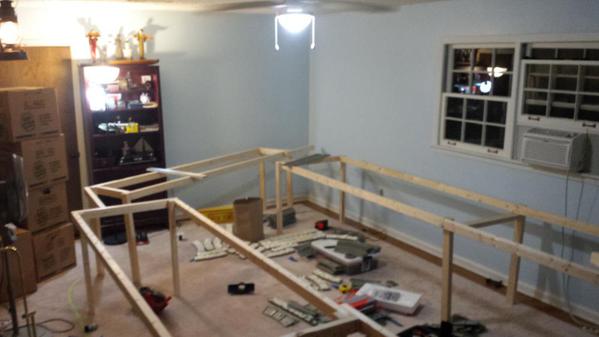
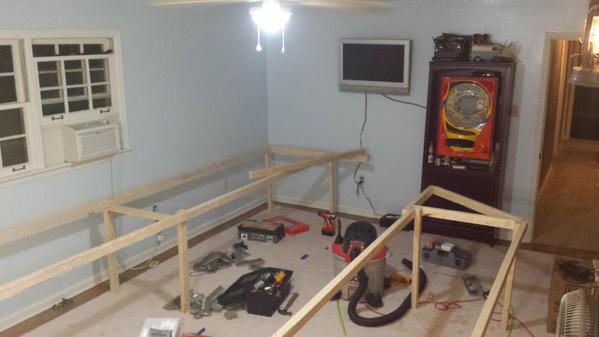
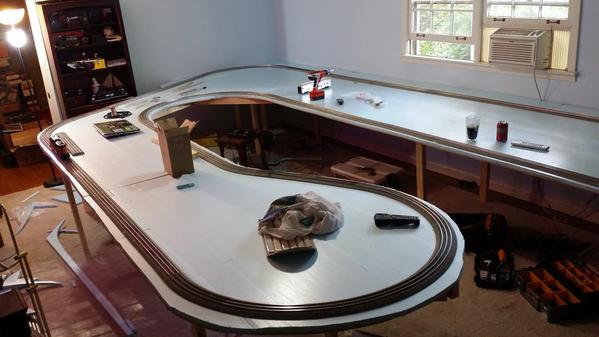
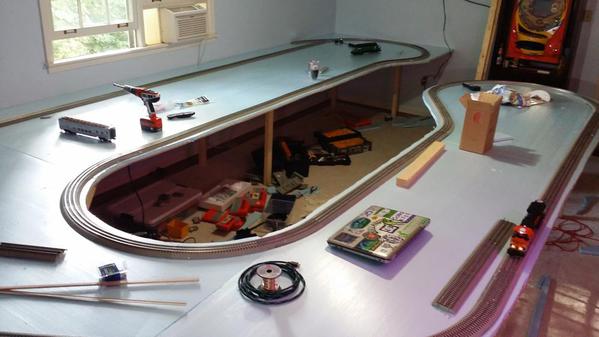
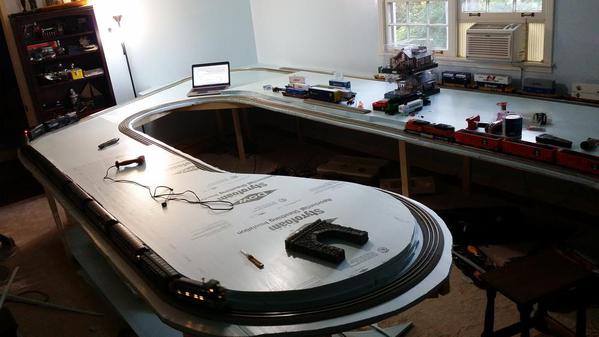
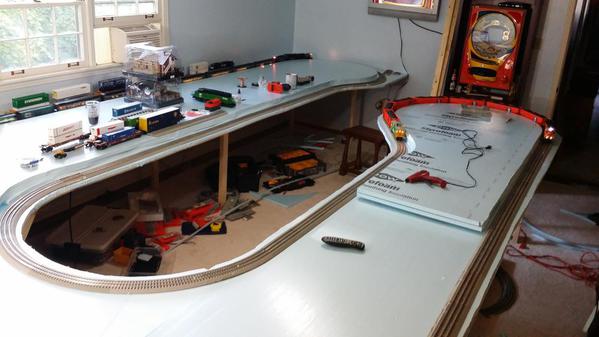
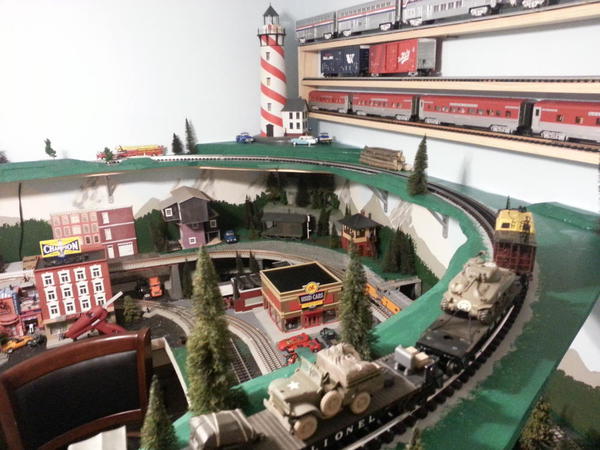
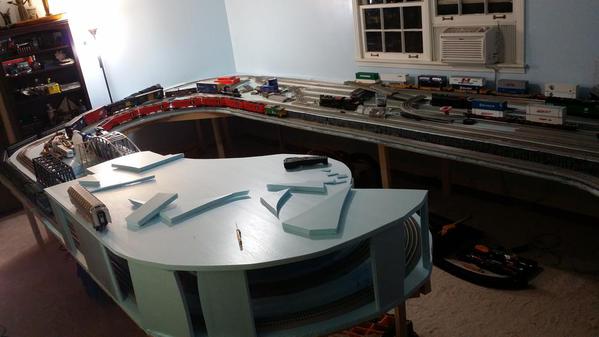
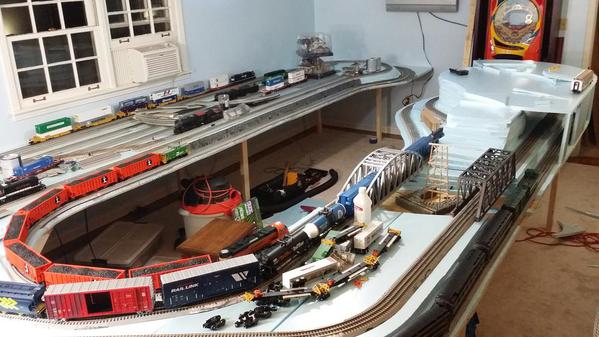
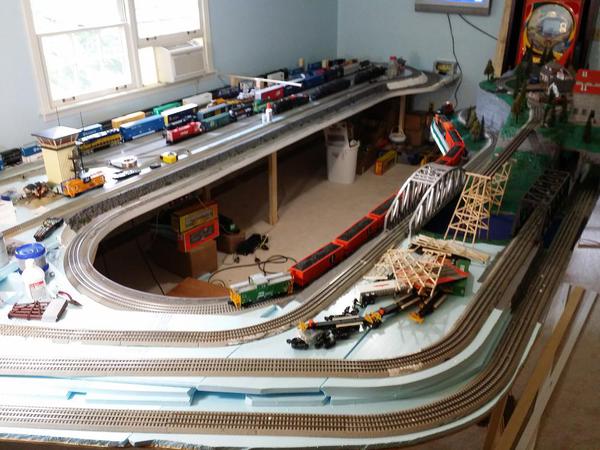
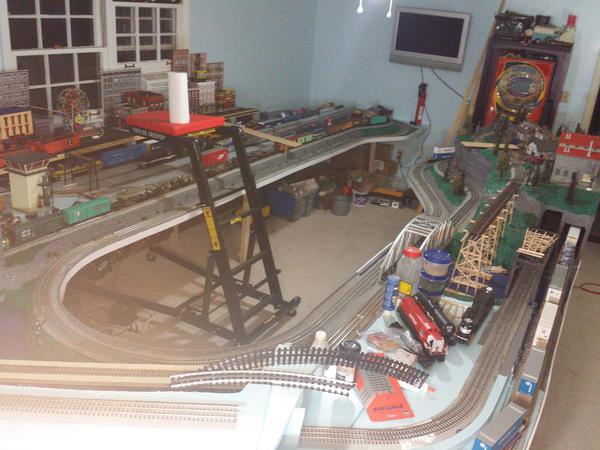
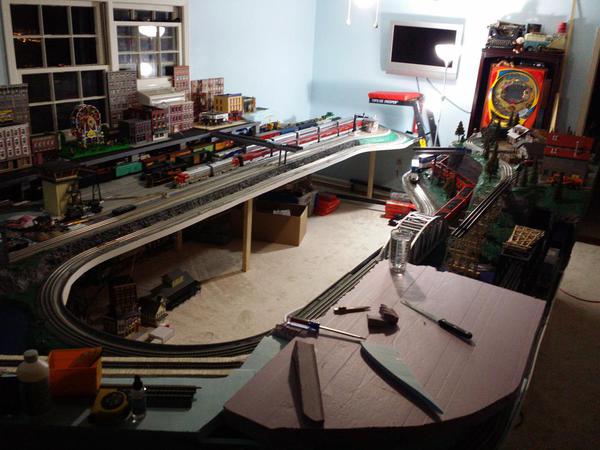
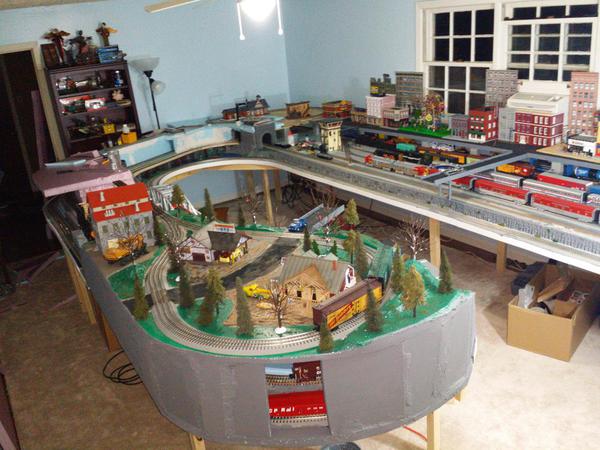
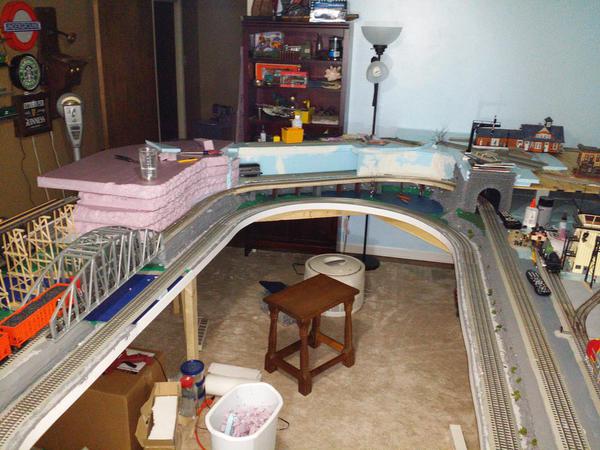
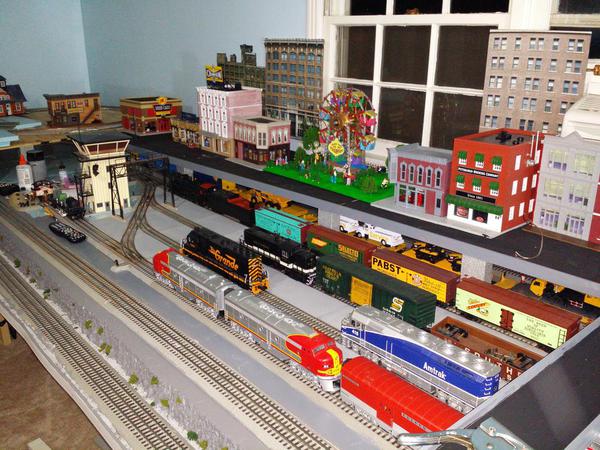
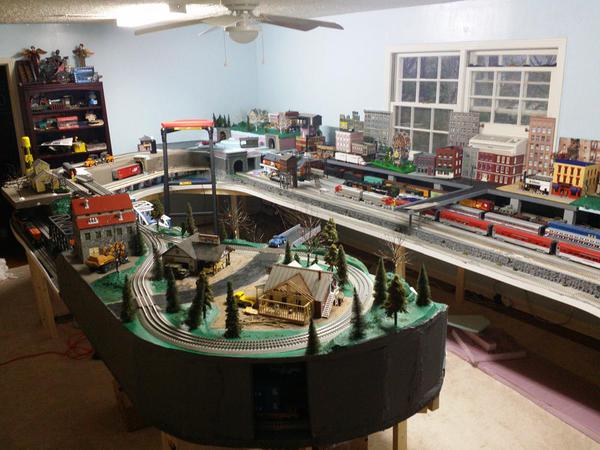
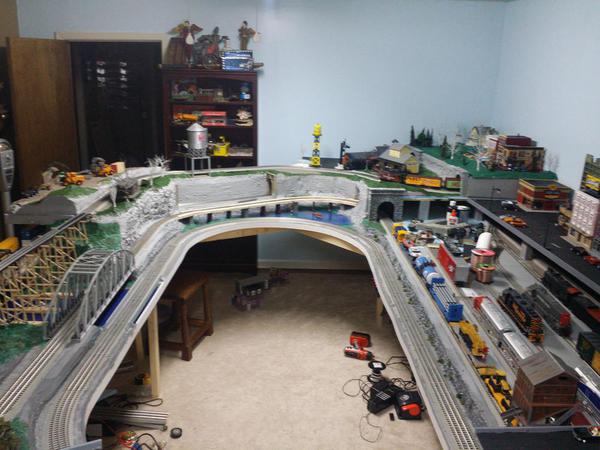
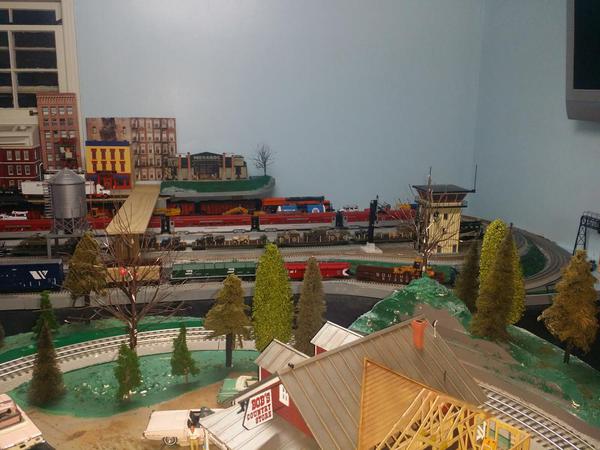
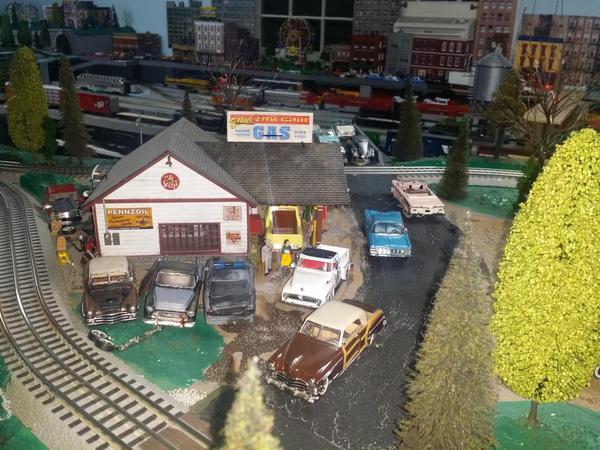
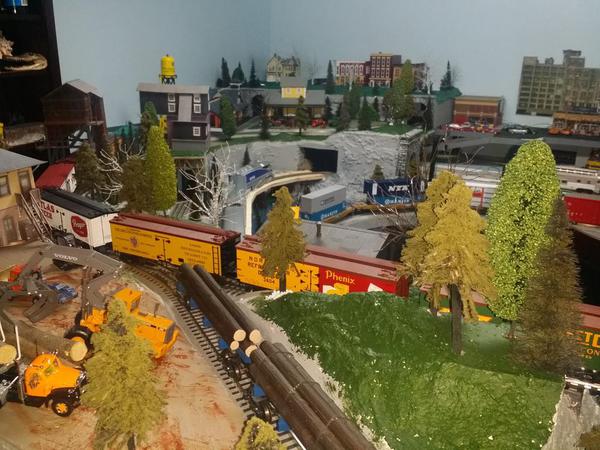
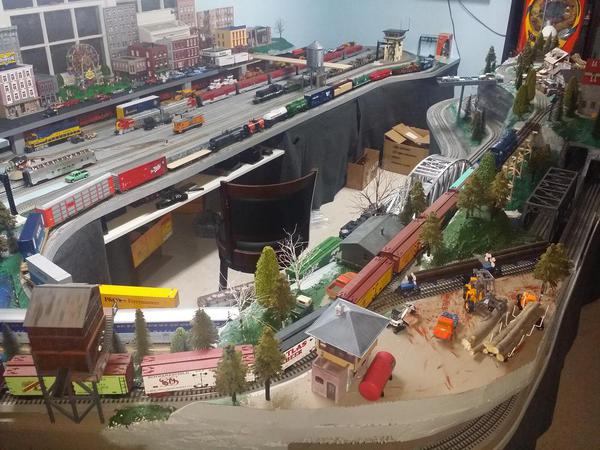
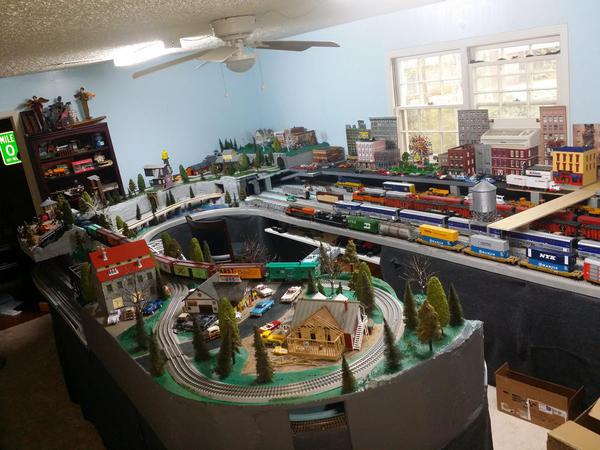
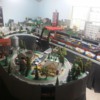
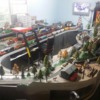
Hey guys, I'm moving to a new house within a few weeks and I'll have a 20x14 room (trying not to giggle like a schoolgirl) and here is what I've come up with so far. Now, I know the track doesn't line up perfectly in some places but there is enough play to fix it. And on the lower right loopback its a little over the lower level line but that also will be fixed via a "rickity bracing" to hold up the line of a log train route. So...... any input is appreciated!
Replies sorted oldest to newest
Hi tackindy,
It looks as if your focus is more on continuous running as a display layout. I would suggest that you leave the red colored tracks as an expansion project or view it a little differently.
Drop it underneath the main level as a staging area for already made up trains. You enough length on the top of the plan to put in an entrance\exit track and create multiple loops within the width of the main deck.
This allows you have the "actors" exit and return or introduce new "actors". This space where the yard is would make a great place for a logging processing operation or an industry and perhaps a small urban scene.
If you elevate the blue line from the top right to the mountain and down to the bottom right on the peninsula, it would provide your entry\exit to the staging area and provide a good presentation for a train on that line.
I hope your goes smoothly. It can be trying.
Any possibility that you could post an image?
Jan
Like the design, but I'd be concerned about the "reach factor" with respect to the turnout and tracks in the upper section.
What size curves are you using in the design?
My understanding is that O31 FasTrack doesn't fit inside O36 FasTrack. I know that you have it elevated, but the supports of the O31 will be on top of the O36 track under it unless your supports will be spanning the O36 track.
The outer blue line is 0-48 curves. The inner green is 0-36 Matt I have thought long and hard about the reach of the switches and that is why the mainline switches to the sidings are remote. The yard switches are manual, but seeing as the table is going to be fairly low and a solid base that could be leaned on if needed, I can reach the yard switches easily enough. The switches on the mainlines are all manual and will auto-switch as the trains pass over.
As for the supports of the upper 0-31, I think if you look CLOSELY you'll see some 1.3 straights in the lower 0-36 curve to spread it out a bit. And the supports for the upper line are going to be on top of a cliff, with the cliff kinda leaning out over the lower line just enough to support the upper. It will be interesting to do. I'm still at least three weeks out from closing on the train roo.... I mean on the house but I'll be posting pictures of progress!
Using all remote switches without the remote controller connected and powered by track power provides a motor assisted non-derail. Some steam locos pilot trucks may not push through the manuals. Sure, cost is a factor, but you may want to give that some consideration.
I have been working on the under the layout staging. Uncle. I give up and withdraw that suggestion. The shape of the layout makes the entry\exit very difficult to design and I can't solve it.
An exposed ladder\railyard looks good anyway. It just uses a lot of real estate.
Again, best wishes for your close and move.
Hmmmmm, you bring up an interesting point about the steamers and manual switches. But I ran the ones I have through them and they seemed to work. I may have to revisit this issue after completing trackwork and before too much scenery goes on to replace them with remote switches!
As for the yard, yes I considered an "under layout" staging area but wasn't sure about the inclines and such to get it done. Plus, I kinda like seeing the trains lined up in the yard and pulling one out onto the mainline to run. Also, I'm planning on a downtown area over the very back of the layout for buildings and scenery, so that will help. It will be over the spur for the big loop and extend out over the yard a little, just enough to fit buildings and a street in front of them.
tackindy, with as much space as you have I strongly recommend you have at least one O-72 loop. I only wish I had so I could run scale articulated steamers. Even if you are a diesel guy, your broad curve loop will be your favorite for it closer to prototypical appearance. That said I offer you a draft of a O-72 twisted dog bone plan that is similar to what you've posted. The mainline goes up and over at the twist. Depending on when you start the grade it could be as little as 2%. If you like I'll be glad to add a parallel main and perhaps a logging/coal line and yard.
Attachments
I do like that, but my only issue is getting past the layout at the bottom, and there is a door that opens in at the lower left corner, along with the main entrance to the right. But you've got a point.
I really like the general arrangement of your plan. The problem I see is, you have a number of long stub-end storage tracks that trains will have to back in or out of, using a curved lead inside a tunnel. If you want to keep those long stub-end tracks, you should at least have a wider radius approach track that is visible.
My own preference would be to have long double-ended tracks to park trains on, because it facilitates operation of different trains without a lot of switching. They could curve along the full length of the layout. To reduce the need for expensive wide-radius switches, you could have "serial staging" on a really long siding/alternate route.
Another preference for me is to have a choice of flat loops for running most trains, and an optional graded route. It can get tedious to constantly be adjusting the throttle for a long train on an up-and-over route.
Not everyone needs wide curves, and big articulateds don't look so great even on O72 curves, IMO. An advantage with the curves you used is that your tables and peninsulas can be narrower, so you don't have as many "long reach" issues. And you have a walk-in plan without duck-unders or drawbridges. Of course, your minimum radius standard depends on the kinds of trains you want to run.
tackindy, I'm hoping that you only need to occasionally access the door in the lower corner, perhaps a closet? If so please reconsider using as much of your layout room for a larger radius plan. I've revised my previous plan based upon your desired features and have added a second main line (O-72, O82 nested curves). At the top there is a logging/coal loop with a 2.3% spur to the mainline. Loops are grade separated by 7". Mainlines grades are max 2.3%. This layout is designed for command control. Crossover switches allow for a train to navigate from the yard to the coal line with a minimum of mainline intrusion. If you like a RR-Track track plan file PM me.
Obsidian
Attachments
Hmmmm, that is a nice looking plan. Unfortunately the door in the lower left goes to the work room so that will be used a lot, but could be taken off the hinges and left open.
Thanks Obsidian, I'm going to play around with this plan and see what I settle on.
Where exactly are the doors and the path of travel between them? I've got another variation of this that may work to allow free access to the lower left and right corners of your train room. Let me know. PS: This track plan is with MTH Realtrax. What kind of track do you want to use?
Well I'm going today for the "Inspection" and I"ll get a chance to measure the room more precisely. I'm going to be using Fastrack throughout. Along with design I'm working on noise reduction. The door on the right end must stay in place as that is the "KITTYZILLA" barrier that is the only protection my layout has from "KITTYZILLA". While I doubt I'll go as big as 0-72 curves (I have none), I do like the over/under part of what you proposed. It adds some action my layout was lacking in the area of grade changes.
Rev 2.0 with free access to lower right and left corners of train room. Due to slightly shorter mainline, grades have increased to max 2.4%, still very manageable for all command controlled engines with a reasonable consist. Note that the yard lead is a bit longer now allowing for switcher to build consists in 4 track yard. The grey rectangles are suggested access hatch locations. All but the two switches in the upper left hand corner are within reach. The logging/coal line uses O-42,54 curves. With this layout you'll be able to run two long trains continuously in opposite directions on the main and a 15 car logging/coal on the upper loop. I'd suggest linking the two ends of the top line with a trestle or girder bridge between the two mountains. Lots of visual drama with two bridges right in the middle stacking 14" above base. Let me know what you think.
Attachments
This current plan can still work with Fastrak. This plan is a variation of a plan I designed for a club mate with Fastrak. His original layout used smaller radius curves but he like many who get into the hobby, desired to own and run larger, scale steam locos. So he tore down the original and rebuilt with min O-72 mainline. My original layout used my O-31 and 42 track I got from starter sets. Now after several revisions I've eliminated all but 3 pieces of O-42. I can now run my 4-8-4 Northerns on all but a small section of my layout. You have the opportunity to build something for a long future of collecting. Buy some new track and in the long run you'll be happier.
Link to my club mates layout video:
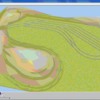
After working on Obsidian's ideas and mine, I've tweaked my a bit adding more dramatic terrain and such but kept the main train layout close to original. I would love big sweeping curves but I've already invested in the track and therefore going forward with this. If I get a BIG locomotive that won't handle these curves I'm going to build an "Around the Room" shelf to run it!
Against that far back wall there will be a platform holding a downtown area with more buildings. The road in the middle lower forground will go over the staging yard to join up with it.
Attachments
Great looking plan. But with all the newer scale models coming out, you will regret going with anything smaller than 060 radius. At least one outer 072 loop would be great.
After working on Obsidian's ideas and mine, I've tweaked my a bit adding more dramatic terrain and such but kept the main train layout close to original. I would love big sweeping curves but I've already invested in the track and therefore going forward with this. If I get a BIG locomotive that won't handle these curves I'm going to build an "Around the Room" shelf to run it!
Against that far back wall there will be a platform holding a downtown area with more buildings. The road in the middle lower forground will go over the staging yard to join up with it.
Wow! So many of you have been asking for updates (ok so not a single one of you actually did)! So here's the latest pictures of some crappy but strong benchwork (it'll be covered by a valence anyway). The flat screen TV is wall mounted after a fresh coat of Eddie Bauer "Sky Blue" paint.
Yes that Fastrack is getting the "Master Lee" treatment of Great Stuff foam being sprayed into it and then shaved off. I did a little test of my own and it really does diminish the sound quite a lot!
There will be more cross braces installed... I just need a few more boards. Soon I'll have a deck on of MDF more than likely. I'm wondering if I will put a layer of Homasote on top of it to further quiet the layout. Any suggestions?
Attachments
Nice update. I would edit your post title to 20 x 14 area layout...update mm/dd/yy. When I see my email notices I think it's another input comment. You did buy the house for the trains!
BTW, the short video just zips to the end. Could you remove it and add it again?
I'm watching. I enjoy watching members during their layout building. It is often very educational to some of us. Good luck with the new home and train room.
Larry
Nice update. I would edit your post title to 20 x 14 area layout...update mm/dd/yy. When I see my email notices I think it's another input comment. You did buy the house for the trains!
BTW, the short video just zips to the end. Could you remove it and add it again?
Thanks Moonman, I did need to do those things and didn't even realize it. While I didn't buy that house just for the trainroom, it did help a LOT. Ha ha
Nice progress. The video does not work.
Nice progress. The video does not work.
I just took out the video. I must have tried six times and even re-edited it in Windows Movie Maker a few times but this site just doesn't like the MP4 format I guess.
In fact, I asked and Rich told me MP4 is the preferred format for directly uploaded videos.
Just upload it, don't embed it or put it in the body.
The base is done and the land features are rising up! The line visible now is the outermost mainline with a spur along the back wall under the windows. Inside the two curves you can see the three layers of foam board are in for the second layer/mainline. The area under the windows is going to be the yard.
Attachments
Fastastic to see your layout in progress. I am learning by watching others who are building layouts.
I hope to embark on my first-ever layout soon. My train room is 17 by 12, but it has FOUR doors in it (three swing into the room, one swings out). I also have one large window in the room.
I can place a long run along one wall about 12 feet wide, then come out from the wall about 9 feet. So my total area for the layout will only be 12 by 9. If I didn't have to contend with the doors I would have been about to dedicate more square footage to the layout.
I will need some expert assistance when the time comes for me to develop a double mainline track plan with a yard (and space for a small town).
Thanks for sharing your project - excellent work! As you continue I will follow your progress.
I see you mastered the video input. Nice.
Terrence you can do a lot in a little space. Here is what a came from at the old house. Its a 10 by 10 room but with doors and such I was limited to 10x8.
As you can see I really stuffed it in there! My trains were chasing their tails but I did it anyway. Now that I have this new room (which is immense compared...) my trains really stretch out and are much more enjoyable to watch. I actually have two running on the mainline in the pictures above due to it taking so long for the train to come back around! Ha ha. 12x9 might not seem like a lot, but when I was at 10x8 I would have killed for another 1 ft by 2 feet! And if you really want to see what you can do, put a drawing with the room dimensions up on this sub forum and watch guys like Obsidian and maybe me and some others go wild. With elevation changes and multiple levels, you can squeeze in as much as you want (see pics above).
Attachments
Coming along nicely.
I would suggest that you glue the sections of layers for the second level together then chop the edges for your rock effect before attaching to the first layer. It will be a pain if you try to do it in place.
Terrence you can do a lot in a little space. Here is what a came from at the old house. Its a 10 by 10 room but with doors and such I was limited to 10x8.
As you can see I really stuffed it in there! My trains were chasing their tails but I did it anyway. Now that I have this new room (which is immense compared...) my trains really stretch out and are much more enjoyable to watch. I actually have two running on the mainline in the pictures above due to it taking so long for the train to come back around! Ha ha. 12x9 might not seem like a lot, but when I was at 10x8 I would have killed for another 1 ft by 2 feet! And if you really want to see what you can do, put a drawing with the room dimensions up on this sub forum and watch guys like Obsidian and maybe me and some others go wild. With elevation changes and multiple levels, you can squeeze in as much as you want (see pics above).
WOW! You sure DID pack 10 pounds of salami into a two pound bag - LOL! It must feel incredible to have all of the new space.
I emailed you my train room foot print and I will take your suggestion and post the room dimensions on a new thread to see if anyone can assist me in creating a quality layout.
Thanks again and keep us posted on your project as it develops.
Your OGR buddy,
Terrence
Coram, NY
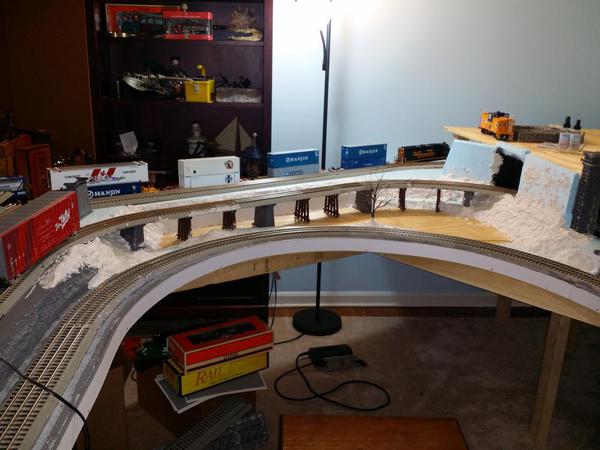
I worked a little late last night on the tunnels and mountain out on the peninsula. You know once you get started on that kinda project its just hard to stop!
This provides a good view of the big mountain on the peninsula and the two mainlines running through it. I'm going to close off this side with either paper mache or possibly some rigid sheet material.
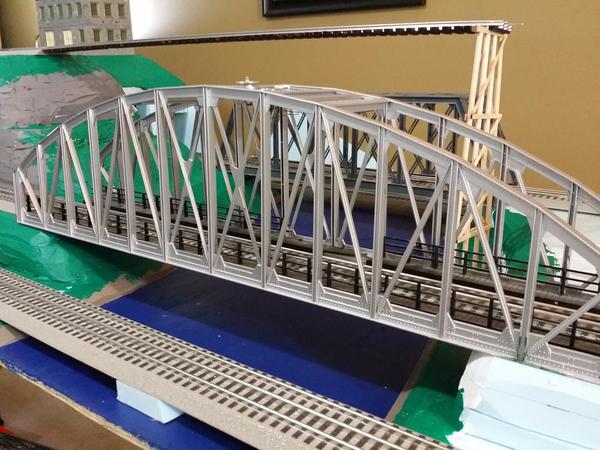
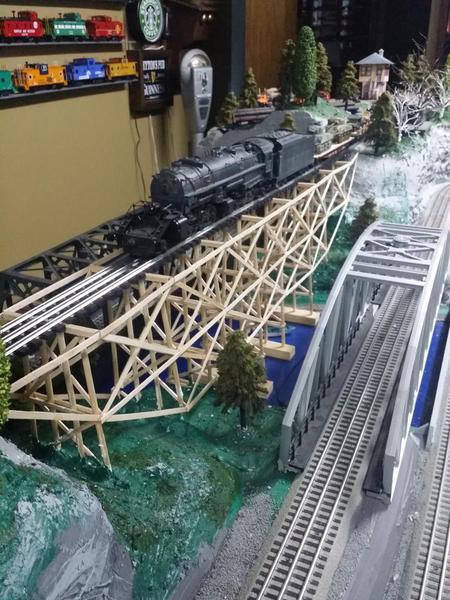
I think the interesting thing here is the trestle sitting between the two big bridges in the river. This is the first time one of the trestles has been set up and you can see how it matches the height of the mountain. That's gonna be a busy section of river with 5 bridges!
Attachments
It's coming along nicely!
I have a question- Now that you are getting some weight on the table, how is the stability without diagonals on the legs?
Ok one more, what's your source for the blue foam board? The builders around here must not be using much of it, so the depot and lowe's don't carry it anymore.
Is it 1/2" or 1"?
Looks great!!! ![]() Good start.
Good start.
The legs are every so slightly able to sway on the peninsula so they may get cross bracing. But the majority of the table is butted up against the walls of the room so there is no movement.
I'm using the 1 inch blue foam that is readily available at Lowe's here in the Memphis area. They also have the thinner .75. It is making the structure much lighter than my previous layout.
Thanks for the info. I presumed it was just a local issue, if it's not selling they don't stock it. A lot of 2" foil faced stuff here. I suppose due to the colder winters S. NJ.
Do you think having the SCARM plan has made construction of the layout easier?
Yes having the SCARM software made this project MUCH easier!
Looking good! Can you post some closer pictures of your water area? I'd like to see how you built your water crossing as I'm planning on the same type of feature for my layout.
Well the water crossing is FAR from done as two bridges are simply sitting on the blue foam and two are still just tracks crossing the river (soon to have simple bridges built around them). The third will be a tall trestle crossing. But I'll post pics soon to show some closer progress.
Looks very nice, looking forward to the finish of the mountain. Thanks for sharing the update. Nick
Tackindy, what type of adhesive are you using on the foam?
On the foam I'm using a hot glue gun. I'm not sure its the best but it allows for super fast assembly. But then again laying big sheets it also makes for short working time! I put in some work on the river so I'll have to get a picture of it, but for now here is a blurry picture of the mountain.
The bridge does not stay there... it was just sitting there during the riverbank work.
Attachments
Here you see the yard as it is getting its decking cut and test fit. I'll spray it all grey before installing it. This is made from hardboard (what clipboards are made of).
View of the layout from the door into the room.
View from workroom door.
Someone asked for river pics. I haven't poured any "water" or done any landscaping other than paint the base colors.
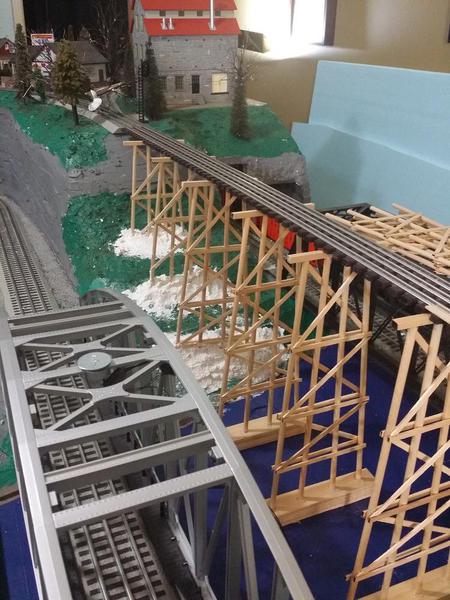
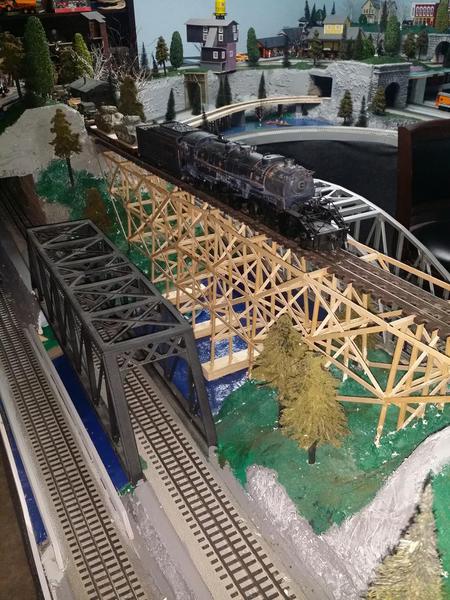
Another view of the river showing one of the trestles I made in place holding the upper line over the river. I'm also going to build bridges in place on the lower line (the outer/lowest rails).
Attachments
Looks Great... Only proves that "Space" is the final frontier. ![]() If you got the space you can build.
If you got the space you can build.
Nicely done!
Peter
Good job.
I'm sure I need to add some power to the tracks as I only have one on each loop! It was running the trains fine but when I try to add or do anything with engines in the yard it doesn't see them. Ha ha.
So how many power drops do you guys think I should put on each loop? I was thinking three?
I'm sure I need to add some power to the tracks as I only have one on each loop! It was running the trains fine but when I try to add or do anything with engines in the yard it doesn't see them. Ha ha.
So how many power drops do you guys think I should put on each loop? I was thinking three?
Looks great, Not sure what kinds of transformers your using or how many but that could be the limiting factor. I would just do one drop at each end. The way it's running you shouldn't need more however nothing exceeds like excess.
I'm sure I need to add some power to the tracks as I only have one on each loop! It was running the trains fine but when I try to add or do anything with engines in the yard it doesn't see them. Ha ha.
So how many power drops do you guys think I should put on each loop? I was thinking three?
Yeah I feel like I need at least 2 on the mainlines, and then a third right inside the yard to hit those lines. The reason I sensed trouble is that I put power switches on the blocks at the beginning of each storage track in the yard. I then put my Y6b on one to power it up to see how it handled the tunnel but when I applied power to that track with the switch the remote wouldn't see the engine. I figured it was signal strength and so I thought I was needing more power drops from the TIU.
By the way, someone asked about bricks and I'm using two MTH 1000 bricks, one for each mainline.
If i'm not mistaken, the MTH 1000 is only 100 Watts x 2 = 200 watts of power. This is pretty small depending on the number of trains/accessories you are running.
Power up and check voltage at the end of each of the tracks in your yard. Should all be about the same reading. Check various points around your loops. Should also be about the same. If you see voltage drops, you likely need more power drops.
If voltage is essentially even and you are still having trouble, you may need another or bigger power supply.
Remember: Power (watts) = E (voltage) * I (current). So, 200 Watts @18 volts only gives you about 11 amps to play with. Big engines and heavy loads will draw more current.
good luck!
Yes I need to get my hands on two Lionel 180 watt power houses to run those mainlines and one yard.
I'm sure I need to add some power to the tracks as I only have one on each loop! It was running the trains fine but when I try to add or do anything with engines in the yard it doesn't see them. Ha ha.
So how many power drops do you guys think I should put on each loop? I was thinking three?
Its the FasTrack switch internals blocking the DCS signal. Gunrunnerjohn suggested to place a 22uF choke across the Aux IN and Gnd terminals to isolate the interference of the DCS signal by the switch control electronics in place of the jumper.
See DCS signal and FasTrack switches. email Grj. I think it's just a capacitor, but I may be wrong.
Your power is fine(and signal, I presume) otherwise, so hold off on the power drops until you resolve the switch\yard stub issue. DCS wiring convention would recommend more.
I asked this on the other post too, but do I need that for each switch even if they are manual? Only the track into the yard is on an automatic switch. The other switches inside the yard are manual.
You shouldn't need the choke on a manual switch. There's no electronics to interfere with the signal.
Where were you testing, after a manual?
Are the power block switches connected to only the hot rail?
I was testing in the yard on a line which is behind a manual switch AND an auto that leads into the yard. So it was behind one Automatic switch. The blocks are wired where only the middle rail is interrupted.
Ok, I went back and looked at some of my notes(bookmarks).
It is a 22uh choke. It's not a capacitor. A choke blocks RF, which does not need to go to or come from the switch control board.
Mouser electronics has them in the 1/2A (560ma) that Grj recommended in the other thread.
Order some of the those. Use the axial leads to replace the track power jumper under the switch and it should solve your problem with the DCS signal not getting past the switch. Putting a power and common drop on the yard spur will only mask the problem.
You should put them on all of your remote or command switches.
I ordered a bunch from Digi and I'm waiting on them to be delivered!
That's good! I don't run DCS, but I ordered some for my switches anyway. Don't need stray RF. Digi is better on the shipping.
Let us know if it solves the issue.
Yes the ALASKA paint scheme has always been pretty to me, but after watching that RailRoad Alaska show I just had to have one represented on the layout! Over this weekend I didn't do a ton but I got some stuff done. The chokes from DigiKey came in and I put one on the yard switch and that cleared up a lot of the problem with the remote not seeing engines. I then added a power lead next to the switch and now ALL engines in the yard are being seen and controllable. I was really excited about that so that is why you now see trains actually staged in the yard. Only the two that were running the upper mainline are in there along with the steamers but it does make the yard look good doesn't it!
Next up is probably going to be work on the city that will be above that yard on an elevated platform extending only about 20 inches from the wall. All of my buildings, lights, people, and vehicles are in boxes and I'm itching to get a few out to fire up the Miller Designs signs!
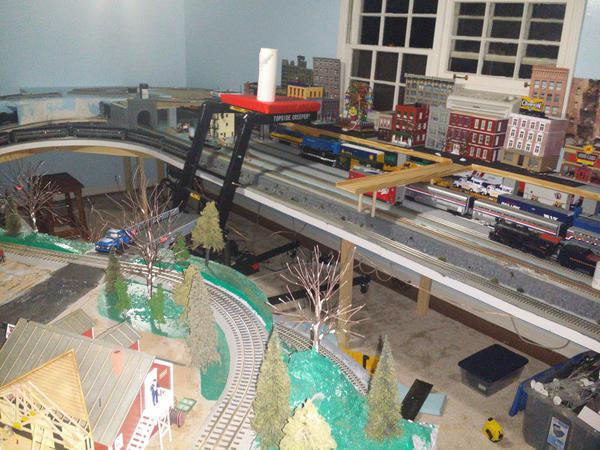
Here's the latest! And yes that is a topside creeper you see in the pictures. Its a new addition that I must admit is very handy!
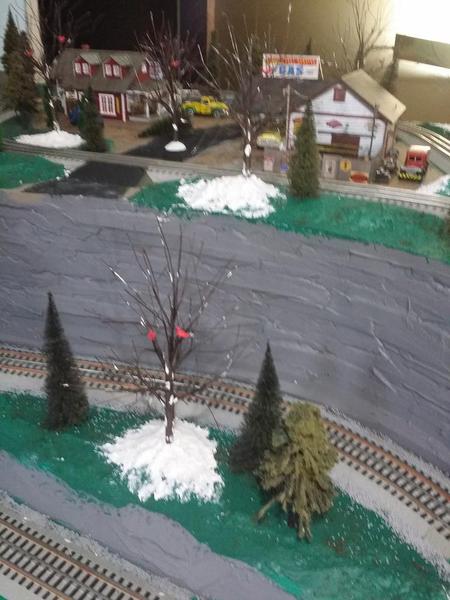
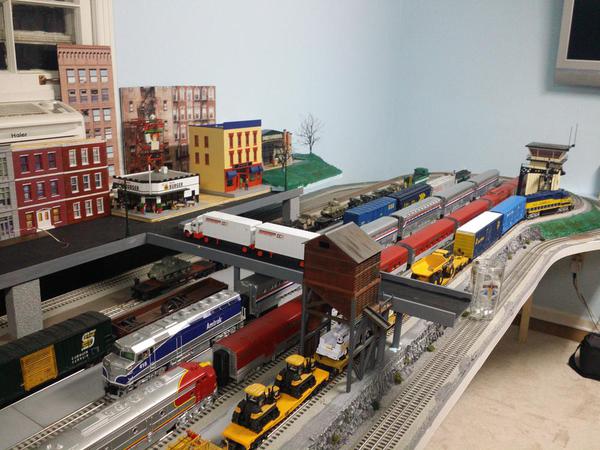
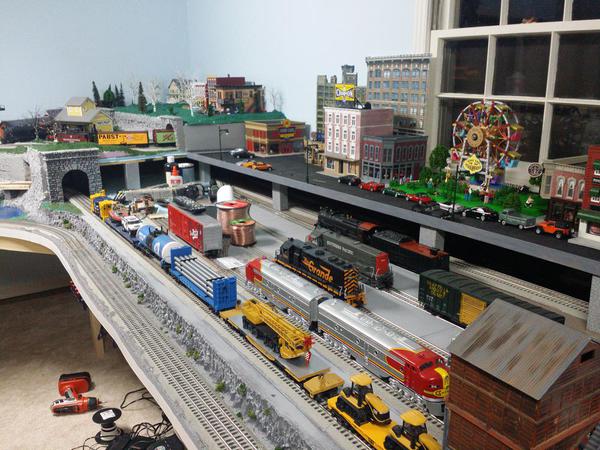
You can see the city taking shape. This wasn't shown on the original plans but was planned for that location all along. I used a few AmeriTown store fronts to build a cover for the window AC unit. The other window with the Ferris Wheel in front of it will be a park in order to keep my view out the window fairly open. You can also see a bunch of Dept56 armature trees appearing. I bought them from Amazon for about $17 per six thinking I would add foliage to them but honestly I kinda like the bare branch look. We'll see.
In the foreground the mountain will be build up for the upper line to go on, and the 2 lower lines closest to you in the pic will be covered in tunnels. This will give me a little more needed room for some structures and such.
The view from the river back to the peninsula part of the mountain. You can see the upper line that will cross the river via my home built trestles and continue on once the mountain gets built on the other side of the river! A stone casement will be built on the points where the track leaves the ground and goes airborne using Dr Ben's granite building blocks.
Attachments
A few updates on projects....
Installing the trestles for the bridge. I used a little hot glue on the base to secure, and then sculptamold around the base to finish it off. Once it's dry I'll paint it and apply some bushes and grass.
Used some more Sculptamold to blend the Amazon.com Dept 56 trees into place! I'm really liking these trees that I got for $17 for 6.
The city area over the yard is getting an edge to it. I'll either paint it grey or possibly put a brick pattern over the wood. It extends about three quarters of an inch above the street level to make a wall. I'll be putting some street lights in against it also so that will hide the bases.
Attachments
So guys (if anyone is still following this), what color should I put on the trestle bridge? I had thought about staining the wood, painting it dark brown, or even diluting black and painting it that to simulate the creosote look?
What do you think?
And I didn't pre-paint it due to adding runners and braces after getting it all up and done.
I always liked the look, and smell, of creosote!
That's my two cents.
If you mean the trestle bents, I would make some black lines with a fine point sharpy to simulate a grain, only a few for highlights. Then take some artist chalks and use some browns, umbers, whatever makes it look like wood. You don't need complete coverage. Then spray it with a dullcoat to seal it. New railroad, new logs.
The skinniest area just looked like it should have a lake/swamp area in it. Plus it gave me a chance to use up some supports that were boxed up and put away. I know its a mixture of stone and wood supports but you know the guys just ran out of stone work and threw in the wood supports. Sigh.... what do you do?
Attachments
I thought that the stone piers were installed to comply with the weight testing for the heavier axle load engines the rr is now using.
The lake will look nice.
Yes yes Moonman I just talked to my foreman and you are correct! ![]()
Tackindy,
Don't worry, we are still here! Glad you are making such good progress. ![]() How long is the trestle going to be when completed? It looks like it is going to go on for a while.
How long is the trestle going to be when completed? It looks like it is going to go on for a while. ![]() Are you going to have to keep access to the windows, or do you plan a backdrop behind the buildings?
Are you going to have to keep access to the windows, or do you plan a backdrop behind the buildings?
I was curious to see how tunnel junction at the center of legs would develop. I thought there may have been an opportunity for a valley there. It looks good and you have plenty of work on your list.
It's almost time for your artistic eye to take over. It's showing already.
Have you tried the steak knife attack on the foam? The technique leaves you with a rock like surface ready for paint.
Mark,
I think the photo with topside creeper answers the window access question.
Thanks for the compliments/encouragement guys! Yes I have LOT to do but at this point I'm getting to start doing more artistic work rather than structural. The last major hurdle is connecting the trestle bridge to the other side of the river valley and continuing it on to the section you see built above the new swamp/pond area with the two canoes.
The trestle section has not been measured but it isn't going to go too long. I just haven't built up the mountain on the other side of the river yet where the tracks will land coming off the bridge. At that point it will begin a slow descent to meet up with the tracks you can already see in the far corner of the layout. Its only about a 3/4 inch difference in height.
The window will stay open with no backdrop in front of it as I do love being able to see outside while in the room. I would be more realistic with a backdrop.... even more so if I took out the window unit and carried on the backdrop there too, but I like my view and being cooled in the summer so it all stays! Ha ha
Oh, and I've ordered a 25lb bag of Sculptamold as I have grown very fond of this stuff! I also bought a bottle of Realistic Water for the the pond and river. I tried pouring some acrylic gloss but it ran between the boards of what I THOUGHT was a well sealed area.... oh well. I'm not too worried about a beautiful clear glass water look there because it is a swamp/pond anyway!
I was curious to see how tunnel junction at the center of legs would develop. I thought there may have been an opportunity for a valley there. It looks good and you have plenty of work on your list.
It's almost time for your artistic eye to take over. It's showing already.
Have you tried the steak knife attack on the foam? The technique leaves you with a rock like surface ready for paint.
Mark,
I think the photo with topside creeper answers the window access question.
There is a ridge along the yard where another line is about 2 inches lower than the yard.... I haven't taken a good picture of that ridge but I jammed a flathead screwdriver down and pulled outward all along that and it did the rock face nicely. The steak knife approach needs to be tried too though. There is still plenty of rock face that will be done as well as some that could be improved upon so that technique will be tried! Thanks!
Tackindy,
yes, I have always kept access to windows a priority too.
Moonman,
Yes the creeper sure does answer that question. It was plain as day, but I must have been having another senior moment not to figure out it wasn't just for reaching the back of the layout. lol. Joke's on me, once again! Ha, ha!
Back to window access, I have seen some guys cover them over, with no access provision. I set my old layout back about 18 inches from the wall so I could crawl under and up to the windows. That was okay when in my 30s, but now at 58 and not building for a year or two, I will provide easy access to my windows.
Yeah the creeper is my ONLY access to that window. The house was built in 1976 so the windows are not easy to open in the first place. I figured I would put the ferris wheel in a little park setting in front of the window and it would kinda blend in with open sky behind it? Maybe?
coming along very nicely
A few pics of the highway bridges going up!
I spent some time living in a very old but small Ohio town as a boy. There was an old "half bridge"(more like 1/3rd) right on the back edge of our one entrance, small, hillside, "subdivision". I think it once went over a deep but narrow gully before there was a rail line, or dirt road, or both, added. Both ran there under the then 1/2 bridge. Just the one bridge mouth, supporting foundation, and some of bridge rise. 4' heavy chain link to lean on & cement pillars stopped cars. Cool view. The rise looked to short to reach the other side (RR side). And that side had big trees right to its steep edge. Spent a lot childhood time speculating the destination, and fate, of the vanished road, and bridge 1/2 belonging on the other side. This unfinished view reminded me of it all.
It's been a while. Here are some pics taken last night.
You can see the city taking better shape and it has electricity run. Still working on street lights and sidewalks. Then I'll be placing cars and people and really making it come alive!
You can see the gulch/valley taking shape. I finally got to work on the other side!
A better shot of the valley taking shape!
In this one you can see both sides of the valley.
Once the major landscape structures are done I'll go back and do some nice tunnel portals and stuff!
Attachments
tackindy; I see in a couple of your photos that you own a topside creeper. I've had mine about 3 years & love it. Quite a useful tool if you have the room.
tackindy; I see in a couple of your photos that you own a topside creeper. I've had mine about 3 years & love it. Quite a useful tool if you have the room.
Yes ABSOLUTELY! I wasn't planning on needing anything of the sort with this layout but quickly realized leaning over with on a stepstool and finding a place to brace myself with a hand on the layout AND only having one hand left to work with was just too much. I do love the topside creeper!
Eventually when the town and back corners are done it will be folded up and placed under the layout.
tackindy,
First I am happy with your progress on your layout. It looks like it will be a fun layout to operate trains on and it will be scenically appealing. In fact it already is.
Second, Spence's and your comments on the topside creeper. I do not have a layout per se right now, but have had several in the past. In my younger days, I was able to reach over a farther distance than I would like to now. In this image, how deep is your layout from front to back and what is the height? What I am thinking is that I may want to get one just for a layout in the mulling over in my head stage that isn't really that deep. I am just playing around with some temporary loops in some spare space until our last daughter to leave home does so, and I can acquire her 12 x 12 room.
Attachments
tackindy,
First I am happy with your progress on your layout. It looks like it will be a fun layout to operate trains on and it will be scenically appealing. In fact it already is.
Second, Spence's and your comments on the topside creeper. I do not have a layout per se right now, but have had several in the past. In my younger days, I was able to reach over a farther distance than I would like to now. In this image, how deep is your layout from front to back and what is the height? What I am thinking is that I may want to get one just for a layout in the mulling over in my head stage that isn't really that deep. I am just playing around with some temporary loops in some spare space until our last daughter to leave home does so, and I can acquire her 12 x 12 room.
Its about a 52 inch reach and the table is about 2.5 to 3 ft high (I'm at work and not home to measure). I designed the layout to not need too much help reaching into the layout to work/correct derailments but once scenery is added it just became too much to find a spot to brace myself on to lean in! The Topside Creeper just lets me climb up and lean right out over everything. I didn't HAVE to have it now but after buying it and putting it together and using it a few times I realized I am very happy I did! I did have some buyers remorse looking at that big old thing but then once I used it that went away!
That is lower than what I have been used to. My layouts have been about 4 feet high. I think as low as yours, I would soon get a back ache, just reaching halfway in. The topside creeper is a bit pricey, but I can see it can be worth it's weight in gold. I will probably get one myself once I start my next layout.
Thank you so much for your report.
Spence, thank you for asking about it in the first place
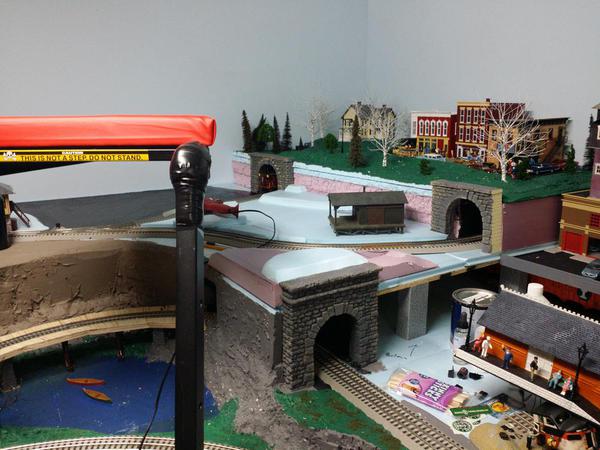
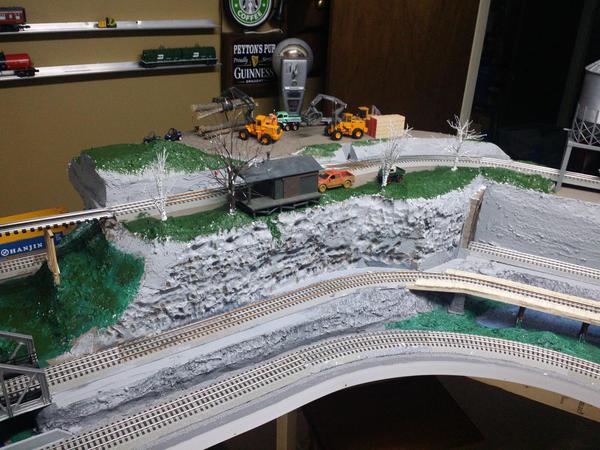
As you can see, there has been work going on. The Mountain on the opposite side of the gulch is roughed in (where the supply store is sitting). There is also a tunnel and buildings over the far corner.... a better picture is next.
I think there is going to be a logging operation at the base of this hill between the two tunnel portals. I was also thinking about putting the supply store here and putting the logging operation where it is. We'll see.
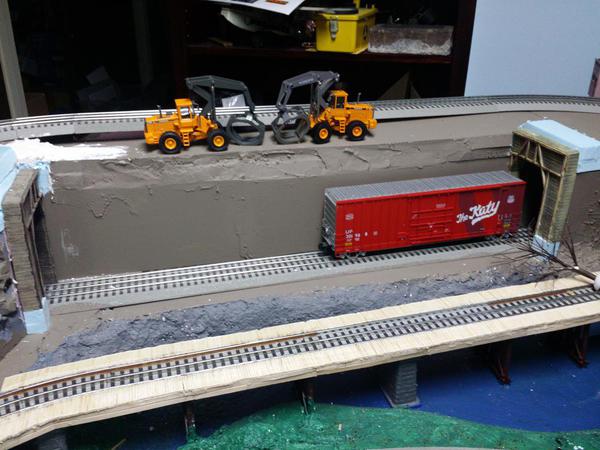
Two of the loaders for the logging operation are sitting above two tunnel portals I've completed hacking up to fit in.
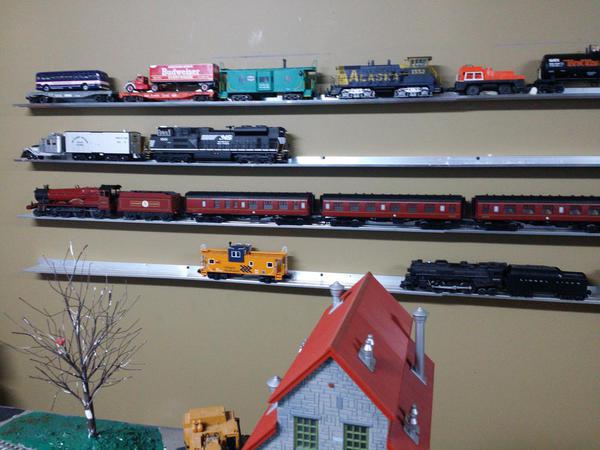
Just a picture of my Hogwart's Express I painted and installed TMCC/cruise into.
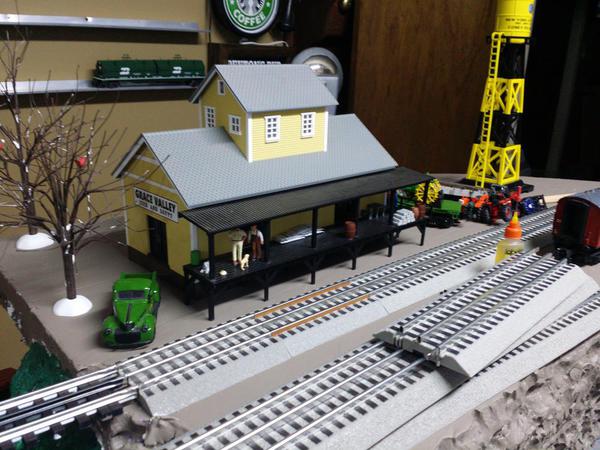 And finally a shot of the supply store I filled in the deck on with supplies and people. My brother in law gave me a John Deere flat car with two old tractors on so the store might get renamed to Privett Supply.
Attachments
So I've been working on finishing up some terrain and painting and staging scenes.
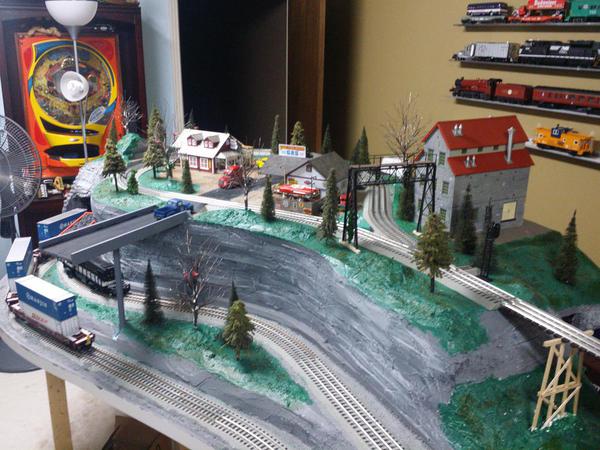
You can see the Supply Store moved over towards town. This was were the logging camp was going but I realized a spur could be added on the other side for it instead. Behind the PRR Atlantic you can see the top of a Rico Station. Trees are being planted soon!
And here is the logging staging area. Two log handlers and a shack that hasn't been decided where it will go occupy the area now. This area will be heavily forrested once I get around to it.
Just a shot of the peninsula I took last night before going to bed.
A shot I took showing downtown and the coaling tower being tried out in yet another new spot.
Looking back towards the new area... fresh paint and all!
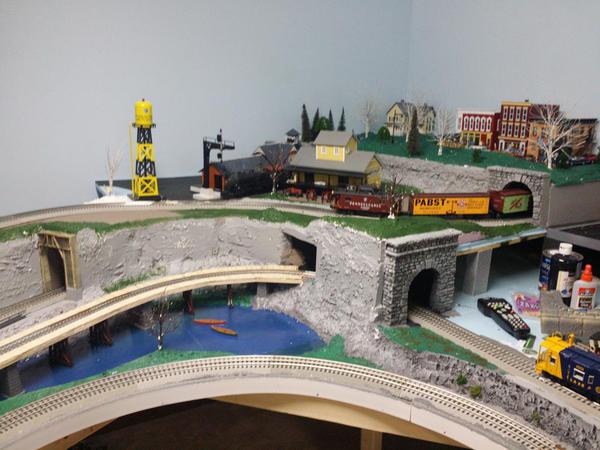
This shot gives you a good look at the logging camp on the left and the built up section on the right with the supply store, Rico Station, and town on the uppermost portion.
Attachments
Mark B. Keep an eye open for Micro Mark. They have sales on everything from time to time. I bought my topside creeper @ a reduced price. I think with shipping it was $249.00 or $259.00 about 3-4 years ago.
I kept looking for the extra behind the dark color passenger cars.
The city looks good. It's coming together.
Is it me or no audio?
Is the top running? Edit...ok, I saw the freight up top.
Mark B. Keep an eye open for Micro Mark. They have sales on everything from time to time. I bought my topside creeper @ a reduced price. I think with shipping it was $249.00 or $259.00 about 3-4 years ago.
Spence,
Thanks for mentioning it!! I have seen it in the Micro Mark catalog! I will have to keep a lookout. I'm not buying trains much right now. I am trying to get track, layout materials, and tools I may need in the future as it looks like after my wife and I have our upcoming surgeries, she will be loosing her job this summer along with a nice medical benefit package. My guess is we will not have as much discretionary income from then on and up until I retire in a few years.
I kept looking for the extra behind the dark color passenger cars.
The city looks good. It's coming together.
Is it me or no audio?
Is the top running? Edit...ok, I saw the freight up top.
The extra what behind the dark cars?
Yeah I think the audio cut out. Its just a roar anyway with 5 trains going.
Looking real good!
I kept looking for the extra behind the dark color passenger cars.
The city looks good. It's coming together.
Is it me or no audio?
Is the top running? Edit...ok, I saw the freight up top.
The extra what behind the dark cars?
Yeah I think the audio cut out. Its just a roar anyway with 5 trains going.
The other train(extra)...the engine has green classification lights.
We like the roar![]()
Nice videos!
Peter
enjoyed looking at you photos and videos - well done
rdeal
I kept looking for the extra behind the dark color passenger cars.
The city looks good. It's coming together.
Is it me or no audio?
Is the top running? Edit...ok, I saw the freight up top.
The extra what behind the dark cars?
Yeah I think the audio cut out. Its just a roar anyway with 5 trains going.
The other train(extra)...the engine has green classification lights.
We like the roar![]()
![]() Moonman. How soon did you expect the next train? RIGHT BEHIND the one with the green classification lights?!?! If the video had continued just a bit longer you would have seen the one behind it! And actually, it too had green classification lights because after about a minute yet ANOTHER ONE came through and HOLY MOLY IT HAD EM' TOO! Sure enough those guys just kept coming! Just over every minute yet another came through! I don't know who they were hauling but there were a lot of them!
Moonman. How soon did you expect the next train? RIGHT BEHIND the one with the green classification lights?!?! If the video had continued just a bit longer you would have seen the one behind it! And actually, it too had green classification lights because after about a minute yet ANOTHER ONE came through and HOLY MOLY IT HAD EM' TOO! Sure enough those guys just kept coming! Just over every minute yet another came through! I don't know who they were hauling but there were a lot of them! ![]()
Too funny! Point taken.
Pardon the terrible pix, but I love my topside creeper, how else could you do a triple decker? Great looking layout BTW, lot's of fun coming your way for sure! Russ

Pardon the terrible pix, but I love my topside creeper, how else could you do a triple decker? Great looking layout BTW, lot's of fun coming your way for sure! Russ

Russ, you and Spence have the wheels turning in my head. I just looked up the topside creeper on Micro Mark Web site as Spence said. $259 right now. I can think of some other uses for it other than just on the layout. Hmmm.
thanks!
Pardon the terrible pix, but I love my topside creeper, how else could you do a triple decker? Great looking layout BTW, lot's of fun coming your way for sure! Russ
Russ, you and Spence have the wheels turning in my head. I just looked up the topside creeper on Micro Mark Web site as Spence said. $259 right now. I can think of some other uses for it other than just on the layout. Hmmm.
thanks!
Well these are really just automotive topside creepers for leaning out and over the engine bay on larger vehicles. The height adjustments was for working on pickup trucks up to semi tractors.
Layout is looking good. Enjoyed the videos.
Wow, that's really a nice layout ![]()
I will post about it in SCARM Layouts & Track Plans site, so more users and model train fans to see it ![]()
Mixy
The last 2 photos show the vision that you had almost a year ago. I recall the posts before this thread when you were trying to get the deal completed on this house.
I hope the house and the move have been good for you.
Nice work on the layout. It looks fun to run on. Now what? Do you think a layout is ever done?
Congratulations!
Oh its far from done. There's still tons of detail work to go. I rough everything in and then go back and add details. That way I get to run trains through scenery faster! And yes we are loving the house and neighborhood immensely!
Very nice....keep the pics coming as you progress....well done!
Peter
Tackindy; the layout is really looking nice. You mentioned in a previous post that the topside creeper is actually an automotive creeper. That is where I originally saw it. My local mechanic shop has had one for years.
Ok, I put together a pretty cool timeline set of pictures from this thread on a website. Check them out. Kinda shows the progression in a neat way as you scroll down!
John,
That is an excellent photo show of the progress of this layout! It really is coming along nicely! Thank you!
nice work - love the photo essay
rdeal
Interesting thread and great layout!
Update on the layout! Its been a while but work HAS been progressing! Here is an update picture!
I have been updating these pictures, and you can see them in succession at http://peytonoriginal.com/trains.htm. It's really neat to see them all together. Also, work will slow on the layout once again probably due to this announcement from a few months ago....
Attachments
Congratulations! Yes, I imagine layout work time will turn to nursery room prep time.
Now you need to build a shelf layout. gunrunnerjohn's sound car should be completed in time to load some lullabies on to the sound chip to put the baby to sleep.![]()
The co-star will think the shelf is for baby items. it will be, the baby's first train.


