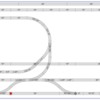
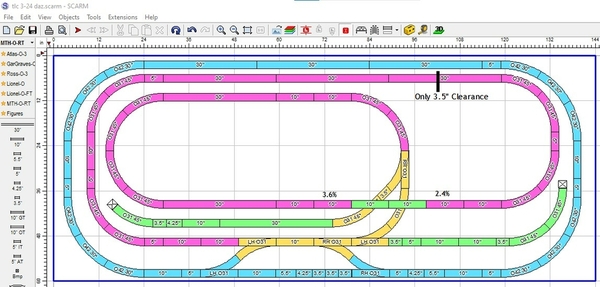
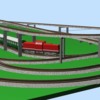
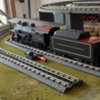
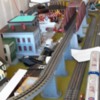
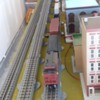
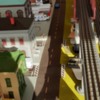
Like a lot of folks, I've decided to change things up and design a new layout. The layout will feature Realtrax with an elevated section. 2 Loops inner and outer connected and 2 siding. The total layout is on 12x5 plywood. The layout will be using MTH DCS system.
Replies sorted oldest to newest
Good morning -
My first thought was to move the switch that is currently in the center of the crossover to the immediate right of it. This would:
- Help reduce the "S" curve in the crossover
- Increase the length of the left siding and decrease the length of the right siding by the same amount
- Provide more room for the innermost loop to climb (2x)
My second thought is that your two sidings face in two different directions with no way to turn around. You would need two trains running in opposite directions on the two separate loops to take back into both sidings.
Here's a version with Long Hair's suggestions. I annotated the grades and where I see a clearance issue if 2 trains are running in opposite directions to service alternate spurs. They can pass on the straights, but will probably collide on the curves, depending on engine size. I added curves to the spurs for a bit more storage. I also fixed the joints that didn't connect so I could run the simulation. I had 2 trains running, stopping the inner one when there was a train on the upper outer curves. The clearance issue might be able to be fixed by removing 5" from all the purple loops and the left spur, but that will increase the 3.6% grade a bit and shorten the spur. There appears to be room on the spurs for an engine and 3-4 cars depending on size.
Attachments
I think this is much better from an operational perspective than your first layout.
I would personally move the two sections of the crossover further apart. I like to park cars inside of the crossover when switching them from train to train. When cars are in there, the outer train can run around them as needed.
However, big curves in sidings/spur tracks are not great. I gets riskier to back up and almost impossible to couple/uncouple.
(I'd sign my name here but it is the same as another member of the forum and causes much confusion)
@Long Hair posted:I think this is much better from an operational perspective than your first layout.
I would personally move the two sections of the crossover further apart. I like to park cars inside of the crossover when switching them from train to train. When cars are in there, the outer train can run around them as needed.
However, big curves in sidings/spur tracks are not great. I gets riskier to back up and almost impossible to couple/uncouple.
(I'd sign my name here but it is the same as another member of the forum and causes much confusion)
Long Hair, good suggestion on widening the crossovers. I haven't started the outside loop yet, so I'll play with it. Thanks for the suggestion
Attachments
Your layout actually resembles mine with what I call a front 9/back9 configuration like a golf course. All your action is on the front and the back is just long runs of track. In my case, the layout is in a bedroom alcove surrounded by walls on three sides and the design is a necessity. Note that the inside area is really best accessible by a tiny switching locomotive although with great care I can get other engines to operate in there - one car at a time.
Every island layout has a ratio of optimized for one spot viewing vs. optimized for all around viewing. This layout is optimized for one spot viewing like a diorama (again, out of necessity). I suggest that you take a look at your space and decide how much you want to favor that particular side as you move forward. You have a lot more options than I do. Good luck!
Attachments
Tlc, I like the changes. I like that you can now park a full train on the longest spur. While I generally avoid curves on spurs, I added them in this case for the extra storage. Given how close the tracks are, there doesn’t appear to be room for buildings, so there doesn’t seem to be a need to uncouple any cars. Either way, 1 car less storage isn’t a deal breaker.
Just a random thought. I don’t know how much landscaping you plan to do or what the grade turned out to be, but there might be room to start the grade a little further from the switch/spur and add another long spur inside going from right to left. That would let you park a counter-clockwise train on the current spur and a clockwise train on the new spur. You could then alternate running them for some added variety.
Attachments
Dave the center is where the town goes. So no room for another spur. I'm liking the suggestions that were made. Now to get it all together. BTW the smaller spur on the curve is for a 2 car MTA subway set. Also will be running 2 other trains, a 4 car subway set and a freight set.
Your random thought is brilliant! It also uses the same switch as the shorter spur on the right, which could then be deleted. It also uses that switch more effectively by running the mainline through the straight and the spur through the turnout.
Not sure if this layout could also be optimized for track sectioning as well. There seem to be a lot of "fitter" pieces on the bottom track to make the crossovers work. Sometimes it is possible to shift one of the crossovers over a bit to the left or right to reduce the overall number of small pieces needed. You would end up with some fitting on both tracks.
tlc -
Now that you mention all of that, I had a crazy idea. I think it would be cool to park the subway under the elevated section. I'm wondering if the inner loop could be expanded to run directly over that bottom spur. Not sure how workable that actually is. I don't think subways are real tall.
More room for the town, too.
Tlc, I figured that, but figured it wouldn’t hurt to put it out there.
Long Hair, that isn’t really an elevated inner loop, it’s a grade to get up and over the switch.
Dave - The best way I can describe what I was envisioning is an escalator at the mall where the management puts a line of vending machines under the sloping part of the escalator as far as they can to use the space to advantage.
The bumper would easily fit and would stop the first subway car from hitting the top. The rest is really just a matter of how far you could go before your subway hit the roof. I imagine that his subway cars are shorter than his freight cars, so that buys a bit of room to play with as well. Also, the whole train needs to fit on the spur, but it doesn't all need to be under the ramp to get the effect. How many cars he could fit is a function of how much peak height he has and then whatever the downward slope is.
I said it was a crazy idea.
I think this might be what you are thinking. Here's a link to a video of a SCARM simulation.
Attachments
Dave your under design is intriguing but I don't know of any commercial stantions that allow pass thru track. All the ones on the market are solid. The section you reference would be the best area as the height is 6.5" from end to end the ascent/descent begins at the ends of this stretch
tlc -
Ultimately the choices are yours in regards to how far you pursue crazy ideas. The stantion solution you reference may perhaps be addressed in another forum. I don't know that area of the market at all. You need something that allows trains to pass directly underneath, with minimal space taken up overhead, as well as some type of height adjustment.
You already have plans for a perfectly good, workable layout. Solving this next problem may or may not be something you want to pursue.
Dave -
I think that makes about the third time in the last couple of days that you took something that took me five minutes to describe in words and turned it into a Scarm example with files and pictures (now with youtube videos as well). This seems to be your way. Hats off to you. It's nice to see the forum working as it should because I never would have had the time to do what you just did.
Long Hair, I appreciate the input from everyone. Crazy ideas can turn into positive suggestions. Your suggestion of widening the crossover has become reality. Considering what I already have in place, I don't believe the spur underneath is possible unless I hear some good suggestions.
Thanks for all your input. I'll keep you all advised as I continue to build this layout. Awaiting some track delivery and I will post some pictures soon
@tlcottone posted:Dave your under design is intriguing but I don't know of any commercial stantions that allow pass thru track. All the ones on the market are solid. The section you reference would be the best area as the height is 6.5" from end to end the ascent/descent begins at the ends of this stretch
That’s not entirely true if you look past Lionel, MTH, etc. Here are some that would need to be modified for height. They’re 8” tall with a 6.5” tall opening in various widths. Cutting off 1.5” would make them 6.5” with a 5” tall opening. I think they’re too expensive and I wasn’t advocating you do it, just showing how it would look.
@Long Hair posted:I think that makes about the third time in the last couple of days that you took something that took me five minutes to describe in words and turned it into a Scarm example with files and pictures (now with youtube videos as well). This seems to be your way. Hats off to you. It's nice to see the forum working as it should because I never would have had the time to do what you just did.
Thanks, but I just have more experience with SCARM and a lot of time on my hands. 🤪
You might want to consider shrinking the entire thing because you won't be eligible for the 48 Club. Priorities, Man! ![]()
![]()
![]()
![]() x
x![]()
![]()
![]()
![]()
![]()
![]()
![]()
![]()
FWIW, the below link shows open trestles/stanchions that I recently built for a siding out of 1" X 1" stock.
Yours would be a little more complicated because you'll have to vary the height, but easily done.
I put a 1/4" board under my Fastrack because a Big Boy was going to be parked there, but the RealTrax should be stiff enough on its own that you shouldn't need to do that.
Building a Basic Elevated Siding | O Gauge Railroading On Line Forum (ogaugerr.com)
TLC, the spur on the right needs to have the 3.5” piece removed. There’s only 2.3” center rail clearance and if you park a car there, it’s going to get hit. If you use the Outline view for the tracks, you’ll see the ties are virtually touching each other and, with RealTrax, I suspect the roadbeds won’t even fit.
@DoubleDAZ posted:... if you look past Lionel, MTH, etc. Here are some that would need to be modified for height. They’re 8” tall with a 6.5” tall opening in various widths. Cutting off 1.5” would make them 6.5” with a 5” tall opening. I think they’re too expensive and I wasn’t advocating you do it, just showing how it would look.
Dave, Thanks for sharing this link to the Bridge Boss system. It's a good looking solution for overhead support. On the layout I'm still conceptualizing in SCARM, there are some upper level track support requirements. I'll probably make mine from scratch with wood, and these offer some inspiration.
@tlcottone posted:Sorry Will but the bench work is 3 4x5 sheets of plywood put together. I expanded it from an original 4x8
I was busting you of course, but did you build it already? You could save your self an entire sheet of ply since it's only 60 square feet. A full 4' x 8' and another 4' x 8' crosscut to 5' x 4' and 2@ 1' x 4' with a 1' x 4' left over. The framing might be a tad more complicated. That's a nice size for a layout. Walk around?
@Will posted:I was busting you of course, but did you build it already? You could save your self an entire sheet of ply since it's only 60 square feet. A full 4' x 8' and another 4' x 8' crosscut to 5' x 4' and 2@ 1' x 4' with a 1' x 4' left over. The framing might be a tad more complicated. That's a nice size for a layout. Walk around?
Actually I did it that way using only 2 4x8 and cutting them accordingly. The layout is a walk around since it would be a stretch if it was against the wall
@DoubleDAZ posted:TLC, the spur on the right needs to have the 3.5” piece removed. There’s only 2.3” center rail clearance and if you park a car there, it’s going to get hit. If you use the Outline view for the tracks, you’ll see the ties are virtually touching each other and, with RealTrax, I suspect the roadbeds won’t even fit.
Dave thanks for the input. I removed 2 5" pieces and replaced the 3.5" with a 4.25" piece. This effectively moved the inner loop a little tighter and allowing for the short spur without the ties touching each other
Attachments
Sorry, didn’t know you already had the track, etc., or I wouldn’t have wasted your time on the subway thing. 🤪 Probably should know, but I’ve been preoccupied with a few things and getting ready for a road trip. Nice to see some actual progress.
I've got the inner loop complete. Wired up and tested. Do I have to have a block as the engine passes each wired section? The engine stops when going from one section to the next. Need help with the wiring
PROBLEM SOLVED!!!
After researching this, I found the culprit. The black covering that MTH puts on the center rail was the cause. It was only happening on new track I had installed. Solution is to pre treat all new pieces by getting rid of that black coating
Looking good.
Good progress, looks like it’s all working well.


