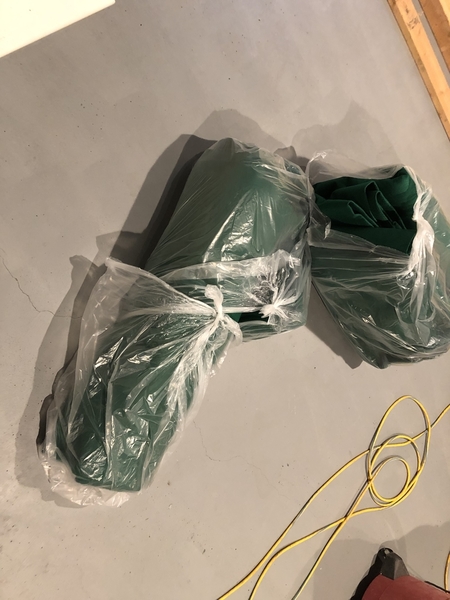
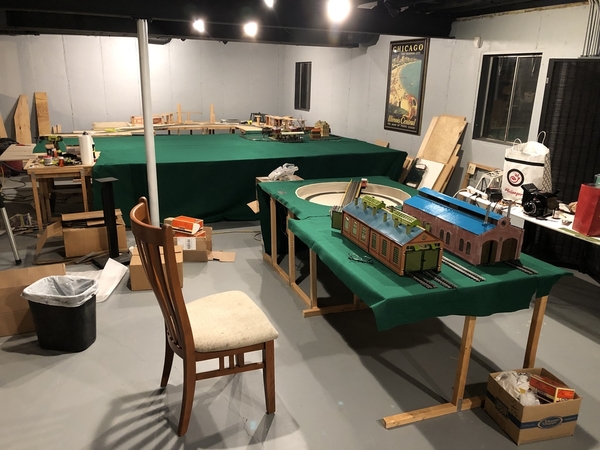
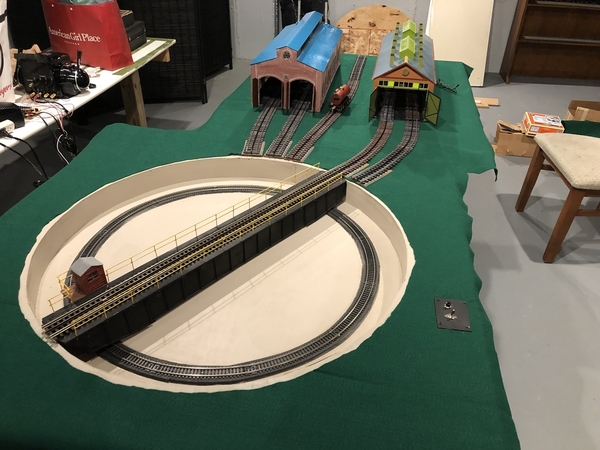
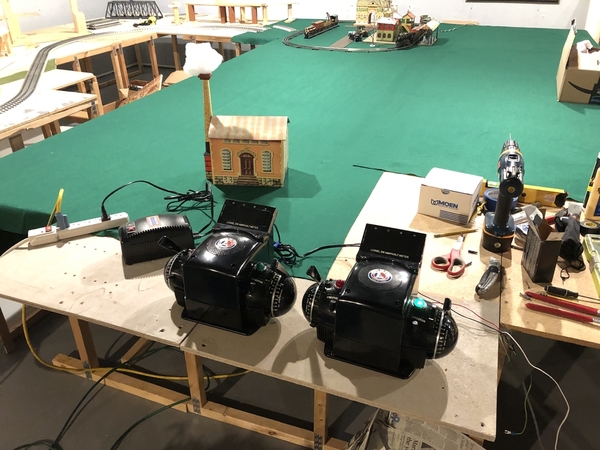
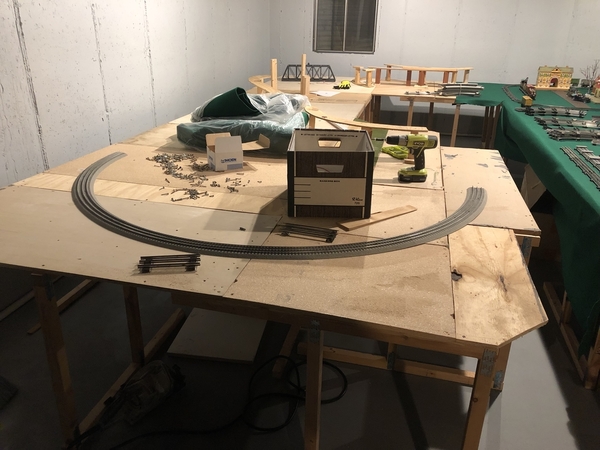
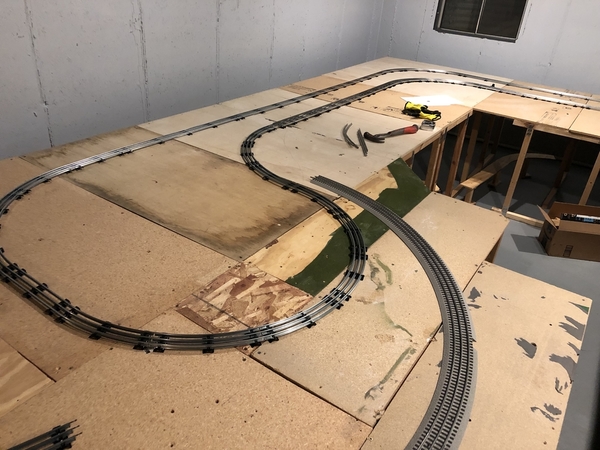
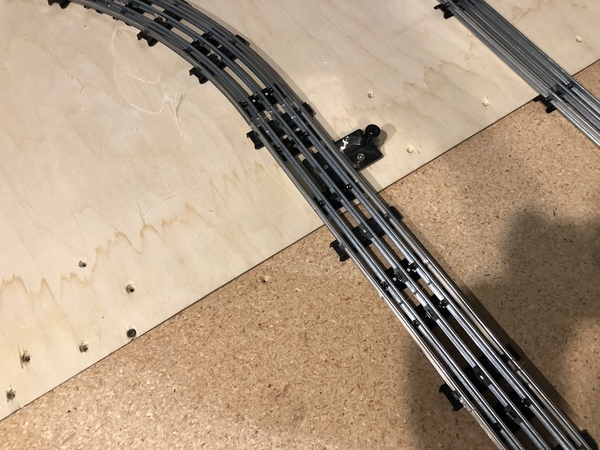
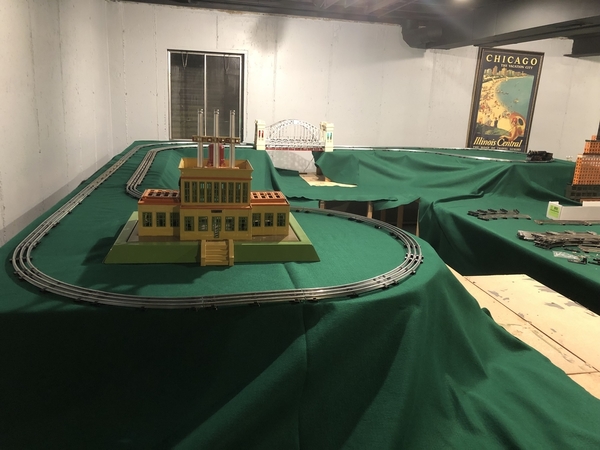
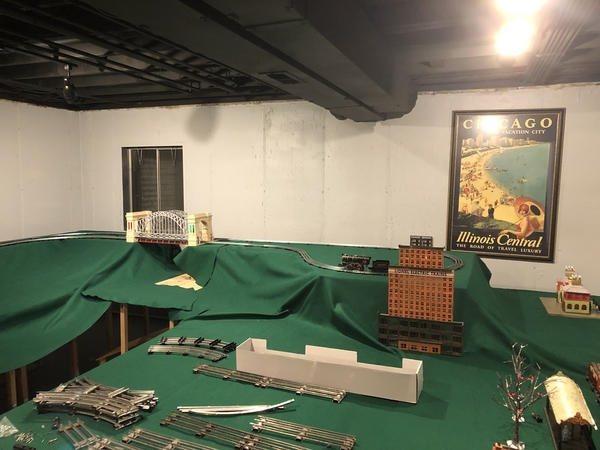
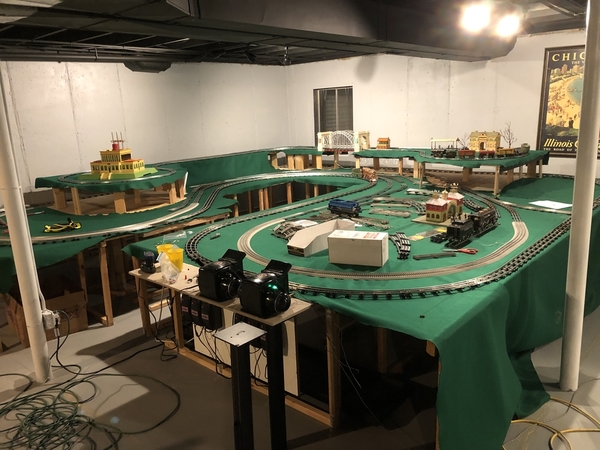
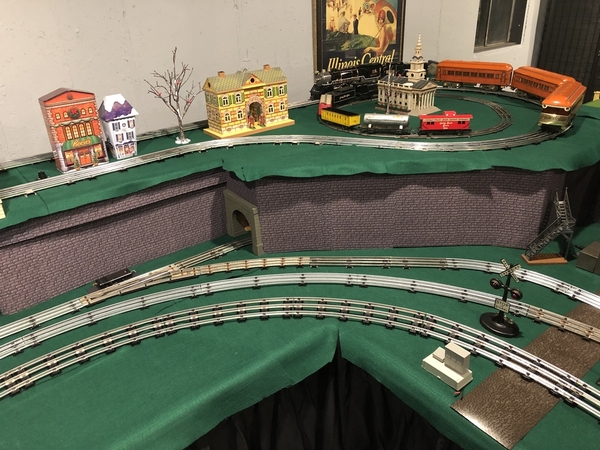
I have started the planning for my new layout. My current layout is in my parents' house. We tried to sell the house and needed to tear the layout down in my basement. That effort failed. It probably worked out though, because we had a small flood when we lost power. My sump pump runs all the time and during big storms, there is way too much water for a battery backup. I have two sump pits that are connected with separate pumps, so if I don't lose power, I should be good. So, the first step is to install an NG powered generator this Spring. I'm planning to insulate the walls with a paper foil-faced rigid foam that is paintable and meets fire code. I do not plan to put up drywall or a ceiling due to cost, mess, time and low ceiling height. More too come ...
Replies sorted oldest to newest
I'll start the popcorn.......
George, good news. That's always exciting. I'm confused by your description though. Is the new layout going to be at your house or your parent's? And how is it that tearing down the old layout failed? And that was the one at your parent's house? I guess it doesn't matter really but I read that a few times and remain confused.
I have a lot of plywood and wood ladder that I use for legs. The layout deck can be put together in a number of geometries. I’ll have at least two levels. I want this to be a multi-scale tinplate layout with standard gauge, O and O27. I would like the standard gauge to be on the outside, but am running into issues fitting my O gauge turntable and yard into this arrangement, because they need to be outside the standard gauge loops. I’m trying to avoid grades for the older tinplate but that is one option. I wish there was an O / Standard gauge crossing. I’m also trying to avoid simple loops to add interest. I have used reversing loops in the past.
George
beachhead2 posted:George, good news. That's always exciting. I'm confused by your description though. Is the new layout going to be at your house or your parent's? And how is it that tearing down the old layout failed? And that was the one at your parent's house? I guess it doesn't matter really but I read that a few times and remain confused.
Ahhh, sorry. Pronouns are a curse on language and meaning! ![]()
The new layout will be at my house in my basement. What failed was the sale of our house. The real estate taxes and school district have killed its value. The old layout was taken down and moved to my parents in preparation for putting my house up for sale.
I will be moving the layout back from my parents, but it will be reconfigured in the process.
George
I see. Thanks for the clarification. It's funny that you mention the STD/O crossover. I've thought of that many times over the last year or so. I suspect that could be made.
I know they make 5 rail track for Standard/O, I would think there might be a crossover? Maybe Steve Eastman would know.
Hey George, this is great--you have a blank canvas. Looking forward to seeing the progress. Are you going to York?
John
Steamer posted:I know they make 5 rail track for Standard/O, I would think there might be a crossover? Maybe Steve Eastman would know.
There are plans available to build 5 rail switches, but not for crossovers that I am aware of.
Steve
5 rail switches would be fantastic. ![]()
sounds like a do it yer selfer for the crossover then
I did a search and found this thread: https://ogrforum.ogaugerr.com/...like-brands-of-track
Looks like ACE made a custom O gauge crossover. It would be easy to modify this for O and Standard gauge. I don't have a radial arm saw, so I'll need to be creative on how to mill the junction. It looks like it would work well and solve my problem. My other minor problem is that two loops of O and two loops of Standard is a lot of track and may constrain my space for accessories. I'll update this thread as I make progress. It might be a while given the time involved in prepping the space.
George
Hey George, this is great--you have a blank canvas. Looking forward to seeing the progress. Are you going to York?
John
Hi John, Thanks! I’m not sure yet on York. It’s a little far off for me still considering I hardly know where I am traveling the next two weeks.![]()
Will definitely look you up if I do. I’d like to get there Wednesday to see a bandit meet and “rush the door” to the Blue Hall on Thursday.![]()
George
Hope to see you there, George--I'll be in the same place.
John
It looks relatively easy to make the Standard / O gauge combo crossover. I found a Dremel router table for about $30 and need a 1/8 inch bit. I hope the table fits my battery powered Dremel. Now, I just need to find 11/16 inch plastic stock. I have some 1/2 inch Corion from a kitchen demolition that would work but might be too thin. I need to route a depth of 3/8 inch for the rail height. I could also get 3/4 inch stock and sand it down a 1/16 inch.
George
Here is my first attempt at the STD / O crossover.
The router cutting method is not working too well. I think the Dremel is not sturdy enough for the Corian. I ended up chipping a corner with it too. Also, the grooves need to be just a little wider. Lastly, I did not realize that the O gauge rail height is lower than Standard gauge. I'm going to need to shim the O gauge tracks. Plastic might be a little easier to work with than Corian, but I don't have any thick enough.
I'll keep working on it. I will actually need two of these on my layout.
George
Attachments
looks pretty good for a first effort George (I expect my 10% for each one sold when you markert these). Keep at it, you'll get it.
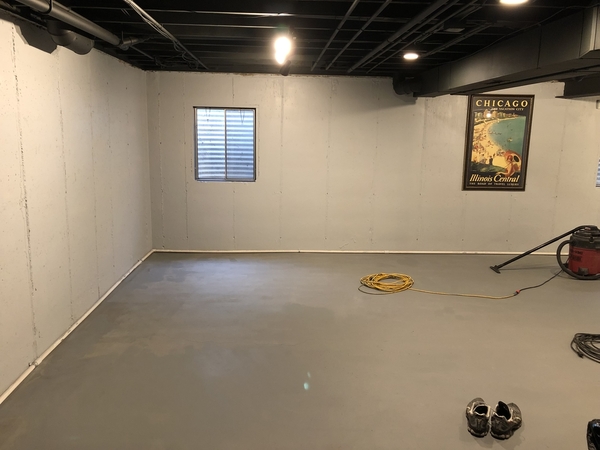
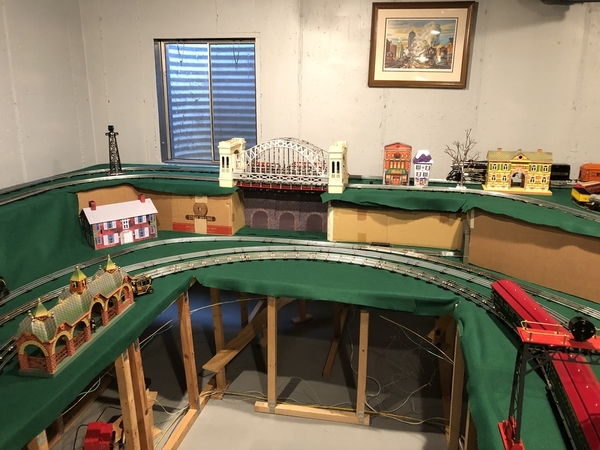
Ok, it took me until now to get this far. The space is clear and the generator is in to keep the basement dry in a power outage. Here are pics of the space from each side.
I’m thinking about painting the ceiling. It’s a little too short to finish with tile or drywall. I also need to add more lighting. The space is roughly 39’ x 20’.
George
Attachments
George S posted:I’m thinking about painting the ceiling.
I did that once. It was very easy and the results were just what I wanted. You should do it.
Looks like a nice space for a layout.
Use LED lighting for the room. Econolight.com is a good place to order from. They are in Sturtevant and my orders are always delivered next day. Look for their deals when ordering, generally 10% to 15% off, with code.
I went with the panels that drop into my ceiling grid, but they sell several different styles.
NWL
Looks like a good canvas to start with ![]()
Looks great, George!! Looking forward to seeing the progress.
John
I finally finished (almost, some touch ups needed) painting the basement ceiling in my layout room. I also added some room divider partitions to hide the unsightly basement infrastructure. Here are some pics.
I added a lot of lighting including can and track lights. I also added an electrical outlet near the place that will have the control panel for the layout.
Next will be painting the walls and some floor touch ups.
George
Attachments
Looks great. It makes it look like a loft space. It's nice that you have those big windows down there.
Looking good, George! Waiting on the progress shots, and knowing they will be interesting as well as informative! Great work on the dual gauge crossing, sir!
Jesse TCA 12-68275
Looking good George. Wish I had that kind of space.
I envy you guys with these huge basements. My basement is 10' x 20' with a boiler, A/C air handler, well tank and electric panels. I have squeezed a 3' x 12' temporary layout into the space. It's not the ideal venue but it will suffice until D2 gets her stuff out of my garage attic.
Sorry to seem like I'm hijacking your thread, but my thoughts may resonate among some.
How thick is the felt you purchased ? When I build my attic layout, I am contemplating green paint or something like your felt. Since I operate post-war accessories, most of which have vibrator motors, I have had mixed results with them on soft surfaces.
Hi Dan,
I do feel fortunate to have this space. It is half of the full basement. There is also a large crawl space that I had sealed. There was a little radon down there, so I had to put a mitigation system in. I also get a lot of ground water in the sump, so I had to install a generator to keep the sumps running if the power goes out. It paid for itself within 4 months when we lost power for 8 hours while we were out of town. ComEd gives me updates, which is nice when I’m away.
The felt is pretty thick. Good point about the vibrating accessories! I plan to put my coal loader on the layout. I will need to cut the felt out from under it.
Thanks for your post. You weren’t hijacking anything.
George
George S posted:Hi Dan,
I do feel fortunate to have this space. It is half of the full basement. There is also a large crawl space that I had sealed. There was a little radon down there, so I had to put a mitigation system in. I also get a lot of ground water in the sump, so I had to install a generator to keep the sumps running if the power goes out. It paid for itself within 4 months when we lost power for 8 hours while we were out of town. ComEd gives me updates, which is nice when I’m away.
The felt is pretty thick. Good point about the vibrating accessories! I plan to put my coal loader on the layout. I will need to cut the felt out from under it.
Thanks for your post. You weren’t hijacking anything.
George
Good Thanksgiving morning George. Thanks for your reply. Let us know how your coal loader works. When I build my layout, I may use felt instead of the green low pile carpeting I experimented with on my experimental layout. The carpeting is nice but I found that drilling through it was difficult. If I didn't separate the pile the drill would catch the nylon pile and wraps it around itself, causing a runner. Cutting a section out of the carpet to allow an accessory to sit wasn't to hard but then the edges would tend to unravel. If I decided to move an accessory, piecing the carpet back together wasn't always aesthedically pleasing.
Felt, on the other hand has no pile and no pile to run. Seems like piecing it back together might be easier too. Could be the best solution.
George S posted:
It’ll be great to see it it action!
Attachments
Like the black "sky" treatment.
The felt isn’t easy to cut. Fabric scissors might do a better job. My exacto knife doesn’t go through it too easily and you can’t drill through it. I am learning some tricks though. Cut it first where you are going to drill and open a space for the drill to go through without snagging. I’ll share more as I make more progress and run into the eventual problems. ![]() It does go back together nicely without leaving a noticeable sign. I haven’t glued it down anywhere yet.
It does go back together nicely without leaving a noticeable sign. I haven’t glued it down anywhere yet.
George
Tom Tee posted:Like the black "sky" treatment.
Thanks. That was a lot more work than anticipated. I should have hired it out, but it is hard to find good help these days.
George
For cutting felt padding we always used a slotted blade carpet knife available where carpet installation tools are sold.
WATCH IT !
You can cut a finger to the bone before you feel the incision. Extremely sharp.
Felt dulls the blade quickly, change the blade every 5' or so. Cutting against a steel straight edge is best, the steel edge primary purpose is to hold the felt steady & in place.
Hi George, good lucj with the new layout, have some fun and happy Thankf Giving
Ahh, carpet knives! Of course. I have those. Thanks @Tom Tee.
Happy Thanksgiving!
Hey George, I was looking at your crossover and had a thought. Why not try old school hardwood.
Easier to work with than corian or plastic.
non-conductive
Looks a lot classier.
beardog49 posted:Hey George, I was looking at your crossover and had a thought. Why not try old school hardwood.
Easier to work with than corian or plastic.
non-conductive
Looks a lot classier.
If I use the Corian, I'll paint it black. I like the idea of hardwood with a stain. I just worry that it might not wear well with the trains running through it. I really need to get a table saw to make these crossovers easily. I tried using a router and the tolerances are too small.
George
a lot of hard..... and soft.. wood was used on a lot of hundred year old trains. get some walnut and it
will out last you ![]()
I was doing a little work on the layout this evening. I think I am going to use 5-rail track on the upper level loop.
I'm running out of benchwork and still have a lot of open space in the basement.
George
Today I completed the first level benchwork on the left peninsula. Now I can sketch in track and layout the second level. I have parts to a second level already made, but I realized those were made to clear O gauge trains at 6.5”. I’m going to need 9.5” to 10” to clear Standard gauge.
I also placed orders for track with USA Track and Menards. My MTH / Lionel plastic roadbed track is on eBay right now. There will still be some Fastrack, Atlas and Gargraves on the layout until my budget gets replenished. I still have one Ross tinplate STD switch to buy and am plotting another STD loop, but I have plenty to do for now.
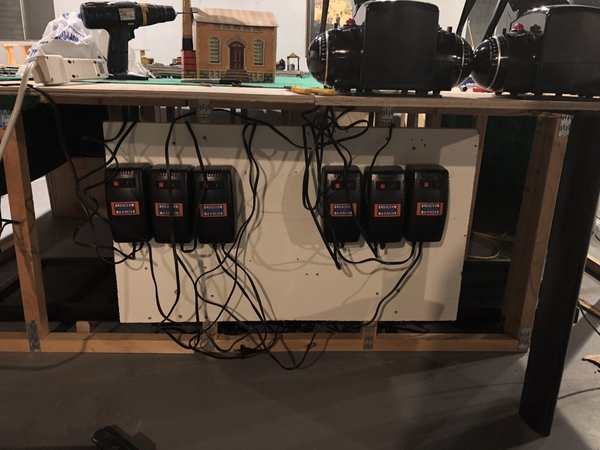
I started mounting the power supplies and realized I had left a few in storage.
Not a rush, since there’s only a little track down right now.
George
Attachments
Hey George,
When you drill through the felt, how do you keep it from winding up around the bit? I tried using felt once and it was a disaster.
PD
pd posted:Hey George,
When you drill through the felt, how do you keep it from winding up around the bit? I tried using felt once and it was a disaster.
PD
I haven't done a lot of that yet. I had that problem. I widened the hole in the felt and kept it away from the bit or up around the shank of the bit if there was slack in the felt. I plan to slice the felt going forward if I am drilling from the top.
I don't think it will do that if it is glued down in the spot you are drilling. So, another option is to slice the felt and glue it down in that spot. Once dry, you can drill. That will take longer though.
George
George S posted:pd posted:Hey George,
When you drill through the felt, how do you keep it from winding up around the bit? I tried using felt once and it was a disaster.
PD
I haven't done a lot of that yet. I had that problem. I widened the hole in the felt and kept it away from the bit or up around the shank of the bit if there was slack in the felt. I plan to slice the felt going forward if I am drilling from the top.
I don't think it will do that if it is glued down in the spot you are drilling. So, another option is to slice the felt and glue it down in that spot. Once dry, you can drill. That will take longer though.
George
Cut an X where you want to drill, then fold the flaps over and hold them out of the way with tape, then drill.
Steve
I hate to say it, but you should really pull the track up and put at least 1 inch styrofoam insulation down as a base. Your layout is going to be very noisy otherwise, as it looks like you are screwing the track directly into the plywood.
I know I wish I had put styrofoam in between the homasote and plywood on my layout.
Nation Wide Lines posted:I hate to say it, but you should really pull the track up and put at least 1 inch styrofoam insulation down as a base. Your layout is going to be very noisy otherwise, as it looks like you are screwing the track directly into the plywood.
I know I wish I had put styrofoam in between the homasote and plywood on my layout.
I want to overhaul my temporary layout starting in January and do something like this. Do you still secure the track to the foam, and if so how?
I kinda like the felt idea, but I have also had problems with the drill bit grabbing cloth and making a mess.
Carpet padding would be much quieter
Nation Wide Lines posted:I hate to say it, but you should really pull the track up and put at least 1 inch styrofoam insulation down as a base. Your layout is going to be very noisy otherwise, as it looks like you are screwing the track directly into the plywood.
I know I wish I had put styrofoam in between the homasote and plywood on my layout.
I haven't installed anything permanently yet. Right now, the track is just floating. I know what you are talking about though. I do not plan on using foam and homasote, although I have read that is the new standard. For me, it's too expensive and too much work. However, your point is well taken that I need to plan on some sound treatment. I think the felt will help a little, but the biggest issue seems to be the screw going through the tie plate to the plywood. (Someone should make plastic screws!) Kirk, from USA Track, recommends not tightening the screw head down to the top of the tie. I have always done that, so I plan to back them off this time. I also read a trick on Tinplate Times that said to put window insulation under the track ties. That seems like a better option for me, although the carpet padding also sounds like a good idea. I'll play with some options. I don't even have all my track yet.
My biggest issue is going to be the Fastrack that I still have. That has to be the noisiest track made. Eventually, I will replace that with Menards track.
George
I used this carpet pad right on top of plywood. There's very little noise. I suspect you'd be happy with something similar.
MikeH posted:I used this carpet pad right on top of plywood. There's very little noise. I suspect you'd be happy with something similar.
What thickness? Will 3/8" work? Do I put it over the entire layout or just where the track is going to be?
George
I have used 3/8 with great results. The idea is to isolate the track from the table.
My current little layout uses 3/8 foam roadbed, track is put together with track clips.
Then two sided tape is attached to the clip and then to the roadbed. No mechanical
fastners (screws, nails etc) between track and table. Even the few trestles I have are
attached to the table with two sided tape.
On a larger layout I built years ago I used the padding that is made with
little bits all pressed together. I got it for free, but an advantage turned out
that it could be painted. I don't know if the foam could be painted.
As far as the drilling felt problem goes, there are dozens of
hole punch sets for leather, etc online. Should work great.
Cheap method would be to sharpen the end of a piece of
brass tubing.
Another thought, chuck a 3" piece of appropriate size tubing in your drill, sharpen the end,
drill hole in felt. Easier than pounding.
What if I used this on top of the felt cut as roadbed?: https://www.homedepot.com/p/Fu...0553557-32/202601407
Do you folks think it would look right?
George
George S posted:MikeH posted:I used this carpet pad right on top of plywood. There's very little noise. I suspect you'd be happy with something similar.
What thickness? Will 3/8" work? Do I put it over the entire layout or just where the track is going to be?
George
George, that link is to the exact stuff I used. Regrettably, I tossed all my extra scraps or I'd post a picture. It's less than 3/8" though. Maybe 1/4". It is carpet pad made for area rugs as opposed to the bonded pad typically used for wall-to-wall carpeting. This pad that I used has a rubber face on one side (for non-skid surface) and the other side is sort of felt-type material. If you look at that Amazon pictures, that should match my description. It's denser than the typical wall-to-wall carpeting pad. It doesn't have near the sponginess. Here's a couple of construction pics from last year:
Attachments
George S posted:What if I used this on top of the felt cut as roadbed?: https://www.homedepot.com/p/Fu...0553557-32/202601407
Do you folks think it would look right?
George
I don't think so. If you go see the bonded pad in person, it usually won't present as gray like that picture. That picture shows a gray/black product with flecks of pink, blue, red, etc. in it. Usually, when you see that bonded pad, it will have a green tint or pink tint. But you'll have to go to your local Home Depot to be sure.
If I was building a layout from scratch like you, and was going to use pad, I would use the pad I linked to or something similar. If I was going to use something visible, above the felt, as roadbed, I'd opt for purpose-made material like Flexxbed. Although, I've never personally used Flexxbed so I can't opine on it's performance. I just think it looks nice.
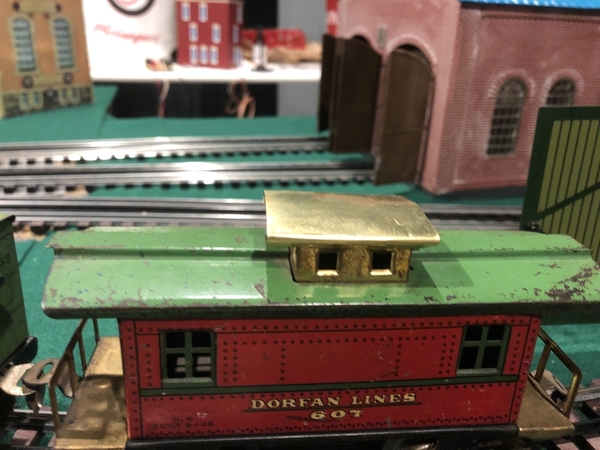
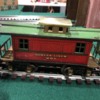
George,
Is that Dorfan train? Where did you find it?
Chris
LVHR

MikeH posted:George S posted:What if I used this on top of the felt cut as roadbed?: https://www.homedepot.com/p/Fu...0553557-32/202601407
Do you folks think it would look right?
George
I don't think so. If you go see the bonded pad in person, it usually won't present as gray like that picture. That picture shows a gray/black product with flecks of pink, blue, red, etc. in it. Usually, when you see that bonded pad, it will have a green tint or pink tint. But you'll have to go to your local Home Depot to be sure.
If I was building a layout from scratch like you, and was going to use pad, I would use the pad I linked to or something similar. If I was going to use something visible, above the felt, as roadbed, I'd opt for purpose-made material like Flexxbed. Although, I've never personally used Flexxbed so I can't opine on it's performance. I just think it looks nice.
I think it would work just fine, similar to what I have used. Just put your felt over it.
beardog49 posted:I think it would work just fine, similar to what I have used. Just put your felt over it.
Sure. Under the felt, just about any carpet pad will do.
lehighline posted:George,
Is that Dorfan train? Where did you find it?
Chris
LVHR
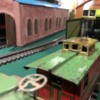
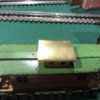
Yes it is. I bought it on eBay with some of the cars. I bought other cars and the caboose at different times. The caboose didn't have a cupola roof, so I made one out of brass stock. The caboose was otherwise in too good of condition to pass up.
I can't believe I found this engine in such great running condition. It runs like a rocket in both directions and pulls all the cars! That's way better than I can say for my Ives 1122. The Dorfan train was on eBay for a couple of weeks, and I made an offer.
I tore down the track temporarily to build the second level. I'll take a video of the Dorfan running once I get the second level built.
George
George,
Great find! I just picked up a group of Dorfan freight cars. Interestingly enough, mine is also missing the roof to the cupola. Please share a closeup of your hand made replacement. I'd like to copy it!
Chris
LVHR
lehighline posted:George,
Great find! I just picked up a group of Dorfan freight cars. Interestingly enough, mine is also missing the roof to the cupola. Please share a closeup of your hand made replacement. I'd like to copy it!
Chris
LVHR
Hi Chris,
Here are some pics of the caboose. I used a rod to shape the edges. I chose the rod size by comparing the ridge at the top of the cupola that the edge wraps around. The brass can also be painted to match the original. I believe there was red and green. I think the green is John Deere green found in a rattle can at Ace Hardware.
George
Attachments
I made the upper level.
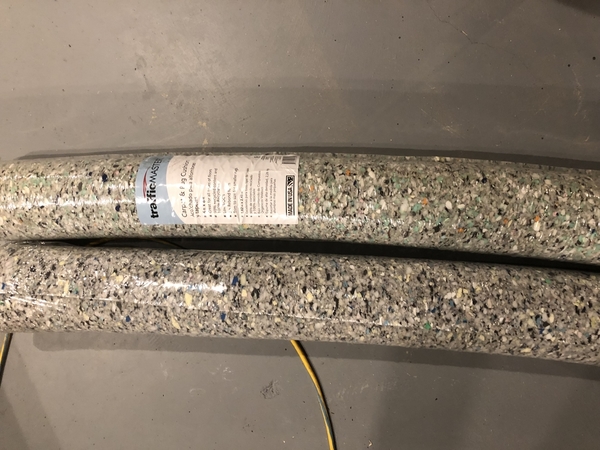
I laid out the track and some accessories for fitting. I’ll need to remove the track and felt as I complete the five rail track sections. I’ll install the carpet padding on the upper level at that time. Here is what I bought. I’ll need more, but I couldn’t fit the large roll in my car.
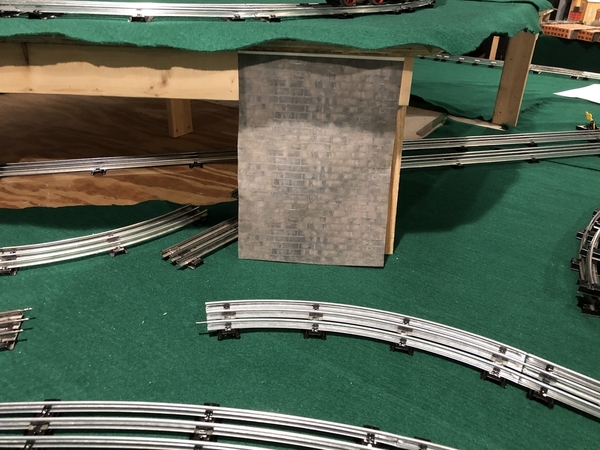
I also need to decide how to finish the side of the upper level. I’m thinking about a stone wall in spots. I may try printing it with my computer.
George
Attachments
That’s awesome. I like it! Keep going.
Awesome, George. Contact me privately and I will tell you how to drill thru
the padding, John
Thanks George! That is a nice set.
Progress this weekend... I installed the padding on the upper level. Now I need to finish the 5 rail track.
i started laying out the track on the lower level. The Standard Gauge loop is finished. It is mostly new USA Track with a little MTH and some vintage mixed in for the cuts. I have two loops of O gauge to complete, but I am worried about the clearances.
I am also working on how I will finish the transition between the lower and upper levels. I’m thinking of making a wall like this.
George
Attachments
hello George, layout is looking great !

can we get more info on your turn table, homemade ? I like it !
Attachments
briansilvermustang posted:
hello George, layout is looking great !
can we get more info on your turn table, homemade ? I like it !
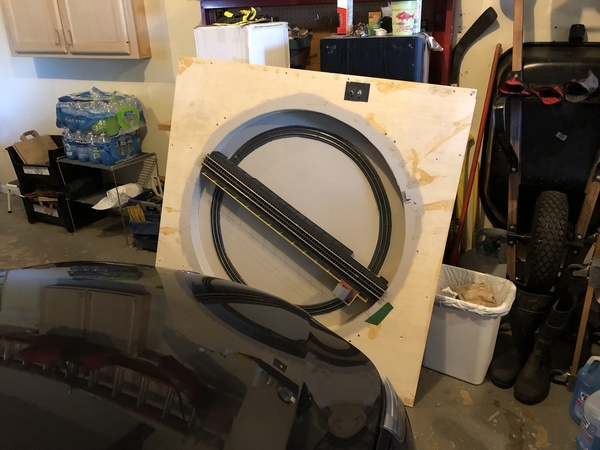
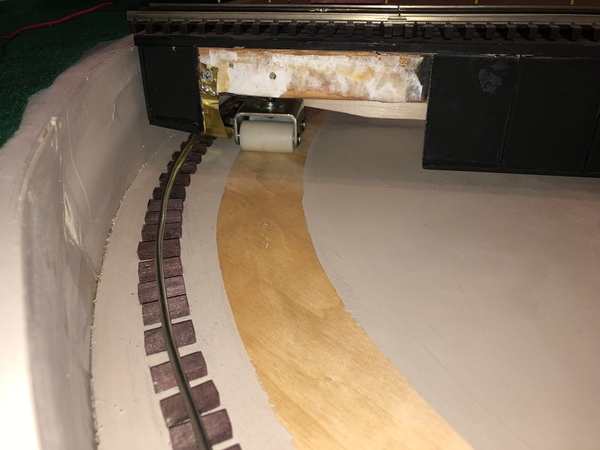
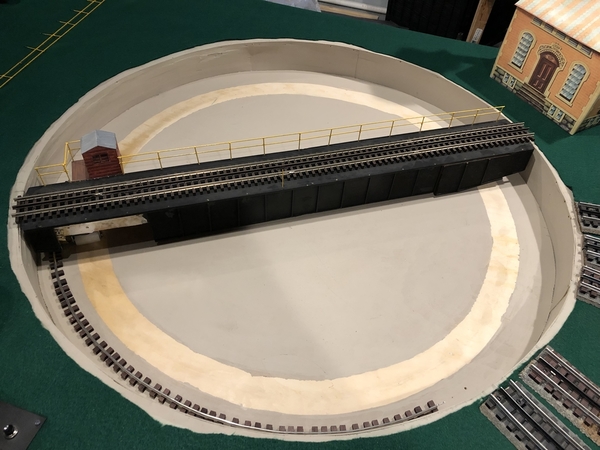
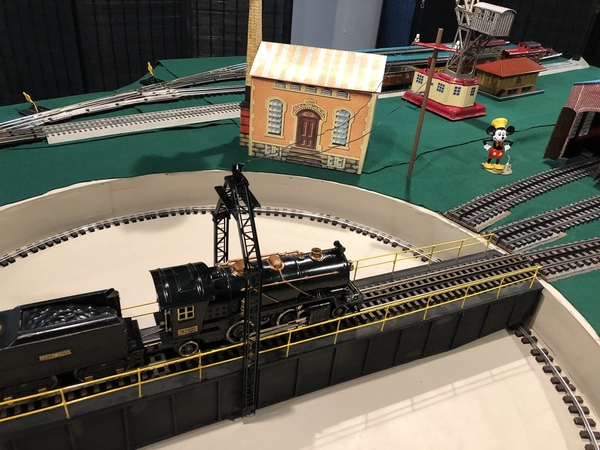
The turntable is homemade. I made it several years ago. It’s 36” so it can fit my entire Allegheny engine and tender on it. It’s not really a tinplate look, but it’s mine. The pit base is plywood hung with brackets from the table top. The pit walls are balsa wood. The drive motor is a Radio Shack antenna rotator. The bridge sits on a Lazy Susan ring. The sides of the bridge are balsa wood. The railings are brass stock cut and soldered together.
I used HO track for the pit rail. That’s my one regret. I should have cut a single rail of Gargraves but at the time worried about forming the circle.
George
thank you George, that is very nice ! maybe a possible video of it in action sometime...
are there HO trucks under the bridge riding on the rails ?
Green felt - I should have thought of that when building my L-shaped layout. I used the "standard" green patio carpet, which has worked out well. I pre-decided not to paint the layout platform surface -- "too plain."
Although it's noticeable, I placed 3/8ths-inch brass grommets in all drilled holes with a spot of T6000 glue, then dressed the wiring through it to an accessory, lighted building, or switch. The grommet prevented carpet unraveling and (to me, at least) it presented a "finished look" instead of a bare hole. If/when I must move an accessory to another location, I can pry the grommet loose. The carpet fibers tend to close and cover the hole. I use a small hand-held vacuum (by Woodland Scenics) to spot-clean the green carpet - it will pick up drill shavings and carpet fibers.
It's all in the details ...
Mike Mottler LCCA 12394
briansilvermustang posted:
thank you George, that is very nice ! maybe a possible video of it in action sometime...
are there HO trucks under the bridge riding on the rails ?
I tried that, with HO trucks. They bound on me. So, I installed rollers/casters that roll along the tops of the track. Then, I installed a thin piece of brass sheet as a wiper to pick up the power from the pit track. Power to the center rail runs through the Lazy Susan. I don't have the tracks powered yet, but the turntable is operational. I'll try a video this weekend.
George
thanks for the info George, will be watching for the video... great looking turntable !
Another note about the turntable... When I built the turntable, I didn't know much about them other than pictures I had seen. Since then, I have read more and learned that real life turntables use electric drive mechanisms. To get electricity to a rotating turntable, a bridge structure is installed over the track to carry the power. You will notice that my turntable does not have one of these (yet). That's a project for my list. I may change out the HO track when I tackle that.
George
Nice progress on the layout George. Good to see someone building something instead of rehashing, trying to get the perfect design, then never getting anywhere. Too much of that on here. I always believe in getting a train running ASAP to keep the motivation going. Keep going. It is super cool already.
Cheers, W1
Update on the turntable: I started replacing the HO track with a single rail of Gargraves. I removed the HO and lowered the casters that used to ride them to run on the pit base and I moved the wiper.
The motor is giving me trouble. I may need to find a replacement for that at some point. I would like to put one in that is slow, steady and stops precisely.
George
Attachments
George, your layout and turntable are looking great ! have a Merry Christmas !
briansilvermustang posted:
George, your layout and turntable are looking great ! have a Merry Christmas !
Merry Christmas to you too!
George
Here's a little note on the plans to create a more finished look. I'm not sure when this will get done, but it will eventually. Once the wiring is done and the layout is mostly set up, I'll finish the edges with pre-finished trim board from Home Depot. Behind that will be a rod (I am thinking about EMT conduit but am open to suggestions). From the rod will hang black drapes to the floor. I hear these are available for low cost from Amazon, but I need to check length. For a backdrop, I will use the blue sky bulletin board paper from Hobby Lobby. The backdrop won't be everywhere, because I plan to decorate some of the walls with train memorabilia like my Illinois Central framed print that is already hanging. I write this here not only to share my plans, but as a place to reference when I get to these parts.
George
A little update...
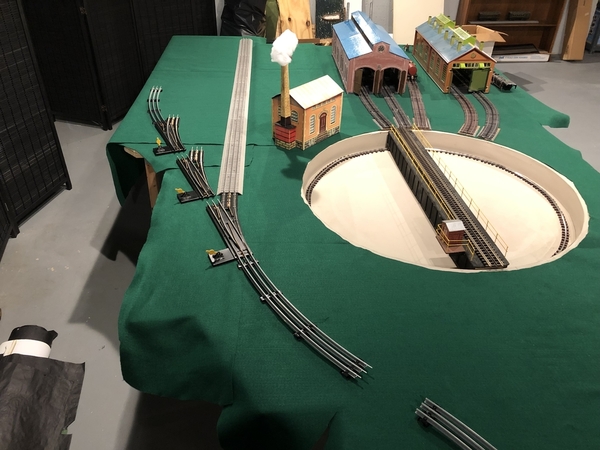
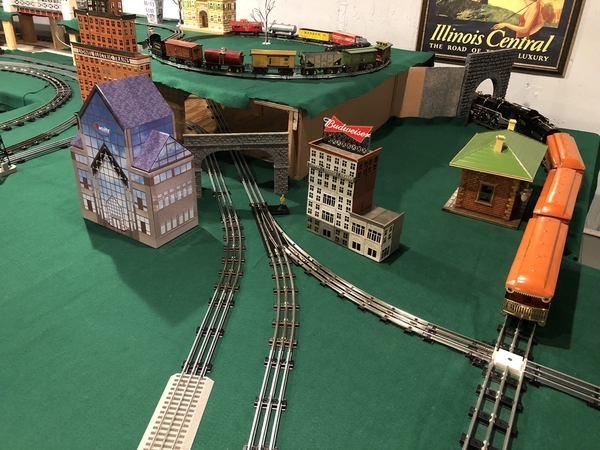
The yard and engine complex are coming along.
I built a Bilt E Z building that can hold my Budweiser Miller Engineering sign.
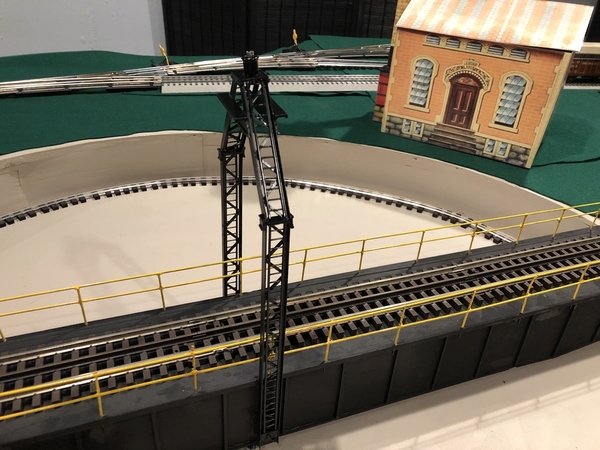
I bought some Plastruct to make the turntable electrical bridge.
Here is how the turntable moves. I have a momentary switch that I am pressing to give small bursts of power to the motor. (I apologize for my breathing. My allergies are in full swing.) The motor is powerful enough to turn the bridge, but it tends to slip and then surge due to variable table friction. Never build the pit base out of plywood like I did. MDF is much more stable and avoids warping. I will eventually take this motor off to check how freely the bridge turns and the decide on a better motorized mechanism, even if it is converting this to an indirect, geared drive.
George
Attachments
Wow, that’s awesome George. Nice work. Your layout looks great. Keep going!
George S posted:
I like this simple straight forward technique for a water scene. You could add rocks to the foam edges but I suspect you will simply paint the foam and be done. Nice job!
beardog49 posted:Awesome, George. Contact me privately and I will tell you how to drill thru
the padding, John
@beardog49, I would love some advice on how to drill through the padding without making a mess.
George S posted:
George, this is really inspiring to watch you put this together - thanks for sharing as you go. If I may ask, what is the make and radius of the switches in this picture? Do you run any modern trains or are you a strictly tinplate guy?
jhz563 posted:George S posted:George, this is really inspiring to watch you put this together - thanks for sharing as you go. If I may ask, what is the make and radius of the switches in this picture? Do you run any modern trains or are you a strictly tinplate guy?
As for the rocks, I was planning on just painting the foam. I have rock molds, but think adding too much detail will take away from the toy look that I am going for.
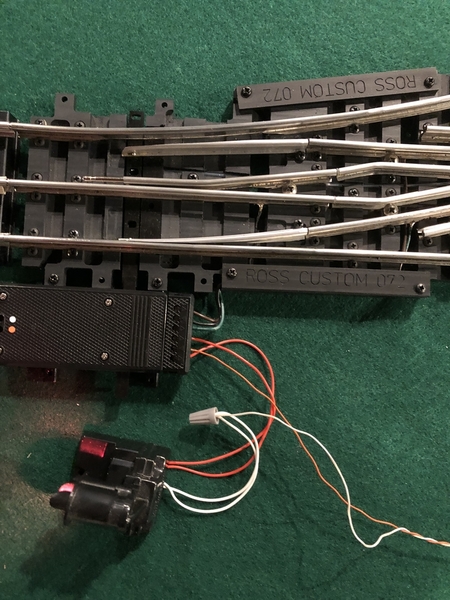
The switches are Merkur tubular switches from the Czech Republic. They are 900mm curve, which is equivalent to O72. They make smaller radius, but not bigger. Everything runs through them including Marx and modern. They are manual switch machines. I am working on making them electric. Merkur has a servo system to do it, but I didn’t go that route.
I will run a few modern trains. I have several, but am not planning to buy anymore, except for modern tinplate. (Unless Lionel tempts me with something unusual in their LionChief lineup. ![]() )
)
George
I changed the name of the topic and added a date for best practice. This way as I update progress, you will see when the date changes.
George
Looks like you are having a great time, and your scratch building skills are terrific. Thanks for sharing.
George S posted:I changed the name of the topic and added a date for best practice. This way as I update progress, you will see when the date changes.
George
Thank You; Thank You; a 1000 times Thank You. Only wish more serial-type thread starters (OPs) would adopt this thoughtful (for the thread's followers) simple device--it makes it so much easier to follow the project's progress.
George, as a suggestion, please include a BOM for the bridge and the source for its design.
Looks terrific.
Pingman posted:George, as a suggestion, please include a BOM for the bridge and the source for its design.
Looks terrific.
Hi Carl,
That's complicated. The design came from my mind's eye after reviewing dozens of pictures of turntables I searched for on the internet and one HO RR modeler site where they built one. I then went to the LHS and searched for the materials. Plastruct had the parts that worked for me. I used ABS, but I didn't write down the size. I am referencing the catalog now. The ladders came only in a cage, which I now have two of for another project. They were labeled O scale. I used one 24" strip of channel. I used two 12" OPEN WEB TRUSS - WARREN STYLE 2 sections (I bought 3, but only needed 2).
I ended up cutting the Plastruct with a Dremel and trimming with an Exacto knife. I laid the pieces out on a board and drew the dimensions on the board as a guide. For the width, I was working with the width of the bridge deck. For the height, I decided to make the upright the height of a Lionel O gauge tunnel portal then create the angle from there. I honestly eyeballed the angle. The top plastic piece is cut out of a clear SD card holder and glued to the Plastruct with Gorilla Glue Clear Contact Adhesive. The tubular part on the top is a broken Dremel EZ Lock Mandrel. I glued the Plastruct together with Plastruct Plastic Weld. I had to read some blogs on how to use that. Once it was all together and I checked that it fit the turntable, I primed it with Krylon gray primer, then immediately top coated it with Rustoleum Satin Black.
George
I got the 5 rail track installed on the upper level. Here are standard gauge and o gauge trains running on the same loop at the same time.
There is one major S curve and a couple of the 2800 series auto couplers don’t like it and derail. This is odd, because this is O42 and these should run in O31. I’ll need to get all my 2800 series cars out and find out which ones work. It started cooking (with smoke) the truck when it derailed!![]()
Also, it’s always something, my AF side rods started binding. So, I had to temporarily remove them.
George
Attachments
With a mix of DCS and conventional, I should be able to run 8 trains simultaneously on this layout, without running more than two trains on any loop simultaneously. I am also planning on an overhead G gauge loop.
The 5 rail track is the hardest to run std and o simultaneously, because the DCS scale speeds are different. Therefore I have to manually adjust the speeds of each engine.
George
George S posted:I got the 5 rail track installed on the upper level. Here are standard gauge and o gauge trains running on the same loop at the same time.
There is one major S curve and a couple of the 2800 series auto couplers don’t like it and derail. This is odd, because this is O42 and these should run in O31. I’ll need to get all my 2800 series cars out and find out which ones work. It started cooking (with smoke) the truck when it derailed!
Also, it’s always something, my AF side rods started binding. So, I had to temporarily remove them.
George
I tweaked the S curve and moved the cars that were binding. Maybe it was just a rail misaligned? It works better now. The track is not screwed down yet. I ordered some 1" screws that can make it through the track and the padding. I don't plan to use a lot of screws, and I won't be tightening them too much. They are really just to prevent shifting of the track.
As for the American Flyer side rods. I patiently reassembled each side and made sure everything was straight and the engine works fine now. I think maybe the mount to the frame in front of the brass piping twisted a little.
I also got my turntable to rotate more freely by backing each caster off 1/2 turn.
There is also a little loop of O27 on the upper level. There are three straights in the loop. I need to cut each of those in half to create a little more clearance.
George
George S posted:
I have 4 072 ross's and they are flawless,,,,except my 380 with the large spur gear dosnt like them,,cant win them all
George S posted:
That's an LGB switch drive. You should get many years of service from it, especially indoors.
George, it appears that switch has a movable point frog. I wasn't aware they had such a thing in the model/toy train world. The switch looks really nice. I've been watching your progress, your new layout is coming along great! I also have enjoyed your video updates as well!
Rusty
Looks great, George!! I hope you like your Ross SG switches as much as I like mine; they are worth every penny.
John
George. 5 rail crossover. If I can hold it in the vise I can mill it. would have to make a jig. It would have to be sq. 90°. X and y.
riki posted:George. 5 rail crossover. If I can hold it in the vise I can mill it. would have to make a jig. It would have to be sq. 90°. X and y.
Thank you. I’m not happy with the smoothness of my O/STD 90 degree crossover. It needs more work. It could be the base... I don’t plan on a 5 rail crossover. That would be very ambitious!
George
Diverging Clear posted:George, it appears that switch has a movable point frog. I wasn't aware they had such a thing in the model/toy train world. The switch looks really nice. I've been watching your progress, your new layout is coming along great! I also have enjoyed your video updates as well!
Rusty
Yes, it does have a moveable point frog. I never saw it work before. It’s very cool. I’ll try to take a video. Also, it has a supplemental switch on the LGB switch machine. I think it throws connectivity of the center rail with the switch direction.
George
George S posted:Diverging Clear posted:George, it appears that switch has a movable point frog. I wasn't aware they had such a thing in the model/toy train world. The switch looks really nice. I've been watching your progress, your new layout is coming along great! I also have enjoyed your video updates as well!
RustyYes, it does have a moveable point frog. I never saw it work before. It’s very cool. I’ll try to take a video. Also, it has a supplemental switch on the LGB switch machine. I think it throws connectivity of the center rail with the switch direction.
George
I wired the Ross switch.
Here is a video showing the moving frog.
George
Attachments
Ribbit. George, keep going. Glad to see someone going at it like you are. That looks like fun. Enjoy!
George S posted:George S posted:Diverging Clear posted:George, it appears that switch has a movable point frog. I wasn't aware they had such a thing in the model/toy train world. The switch looks really nice. I've been watching your progress, your new layout is coming along great! I also have enjoyed your video updates as well!
RustyYes, it does have a moveable point frog. I never saw it work before. It’s very cool. I’ll try to take a video. Also, it has a supplemental switch on the LGB switch machine. I think it throws connectivity of the center rail with the switch direction.
George
I wired the Ross switch.
Here is a video showing the moving frog.
George
the only thing I would like is a lighted controller,,,but I check lgb page and couldn't find one ,any suggestions?
Thank you for the demonstration of your new Ross switch, George! I appreciate you taking the time to do that!
I think it is cool that Ross has that feature, it's something that is actually used on real railroads around the globe!
I think it will reduce the chance of a derailment while running your trains on your new layout, keep the updates coming!
Rusty
terry hudon posted:George S posted:George S posted:Diverging Clear posted:George, it appears that switch has a movable point frog. I wasn't aware they had such a thing in the model/toy train world. The switch looks really nice. I've been watching your progress, your new layout is coming along great! I also have enjoyed your video updates as well!
RustyYes, it does have a moveable point frog. I never saw it work before. It’s very cool. I’ll try to take a video. Also, it has a supplemental switch on the LGB switch machine. I think it throws connectivity of the center rail with the switch direction.
George
I wired the Ross switch.
Here is a video showing the moving frog.
George
the only thing I would like is a lighted controller,,,but I check lgb page and couldn't find one ,any suggestions?
Hi Terry,
You would just need to buy a green and red LED ( or whatever color you choose). You would then run three wires from the open spots on the LGB supplementary switch (opposite the two wire power feed on the switch machine). The middle is power and each side corresponds to the direction the switch is thrown. If the switch is straight, the lead furthest from the switch will be connected to power and you could hook that to the green LED. You would then hook the other side to the red LED. Pretty straightforward. Evans Designs makes 14v already packaged LEDs in green and red. I will wire a dwarf signal next to the switch to show how it works.
George
William 1 posted:Ribbit. George, keep going. Glad to see someone going at it like you are. That looks like fun. Enjoy!
Thanks William! In a way, this is reassembling a layout I tore down years ago, so it allows me to go faster. Also, I have been planning this in my head the last couple of years.
George
The Ross standard gauge switch was developed in cooperation with a committee of Standard Gauge Module Association members. The goal was to design a switch which would work reliably with the widest variety of both vintage and modern standard gauge trains. The switch motor also controls the electrical contacts routing power to the rails, and provides extra contacts for signals or controls. We use these to control the aspect of nearby block signals, showing the position of the switch from a distance. An added feature is that if two of their #4 switches are connected by their diverting routes, a crossover with the SGMA center to center track spacing of 7-1/4" is created. This is the track spacing provided by the 42-57-72-87 curved track sections sold by USA Track LLC also.
You can't buy a better switch!
Kirk Lindvig
George S posted:I got the 5 rail track installed on the upper level. Here are standard gauge and o gauge trains running on the same loop at the same time.
George
Hi George,
I have been enjoying following your progress on your layout. I haven't even started on a new layout yet. This move is taking forever. I am gathering ideas for what I will eventually build. I consider myself a collector and curator of my collection, with operation being a lower priority. I don't plan on building a layout as large as I had at the previous house. I like your use of 5 rail track, which I have decided to use so I can run both gauges. What are the dimensions of the second level that you have installed? It looks great and may accomplish what I want.
Keep the updates coming and keep up the excellent work.
Northwoods Flyer
Greg
Greg J. Turinetti posted:George S posted:I got the 5 rail track installed on the upper level. Here are standard gauge and o gauge trains running on the same loop at the same time.
George
Hi George,
I have been enjoying following your progress on your layout. I haven't even started on a new layout yet. This move is taking forever. I am gathering ideas for what I will eventually build. I consider myself a collector and curator of my collection, with operation being a lower priority. I don't plan on building a layout as large as I had at the previous house. I like your use of 5 rail track, which I have decided to use so I can run both gauges. What are the dimensions of the second level that you have installed? It looks great and may accomplish what I want.
Keep the updates coming and keep up the excellent work.
Northwoods Flyer
Greg
Hi Greg,
The upper level is a roughly 12.5' by 16' 'L' shaped loop using STD / O42 curves. That requires about a 5' square on each end for the turn around, but the runs can be brought close together to a board as narrow as 1 foot.
I think you should also consider some space for your S gauge trains. I added an O27 loop inside the 5 rail loop on my upper level and am planning a ceiling loop of G gauge track. Otherwise, those trains will just sit in boxes on the shelf.
George
Been tweaking track and running electrical, so not too exciting. I thought I would try to run six trains at the same time. See if you can find them all!😀
The video ends with my Black Diamond observation car derailing on my Ross switch! (Well, almost. I added a night shot of my Budweiser sign running on my Bilt EZ building. Guess what I’m doing next.)
George
Attachments
George S posted:I added a night shot of my Budweiser sign running on my Bilt EZ building. Guess what I’m doing next.)
George
Cracking a beer? ![]()
I think I fixed the derailing problem by tweaking the truck on the problem car. I ended up taking the wheel set out and reinstalling it after making sure the truck frame was straight. I'm not sure what exactly I fixed, but it has gone through a few times now without derailing.
I also worked on my O/STD crossover. I redid the layout base under it as it was not level. Then I widened the grooves on the side that the STD trains go through, so the wheels aren't hitting the crossover. I recessed the mounting screw better and put a cap over it. Then, I painted it black. I'll get a picture when it's dry.
George
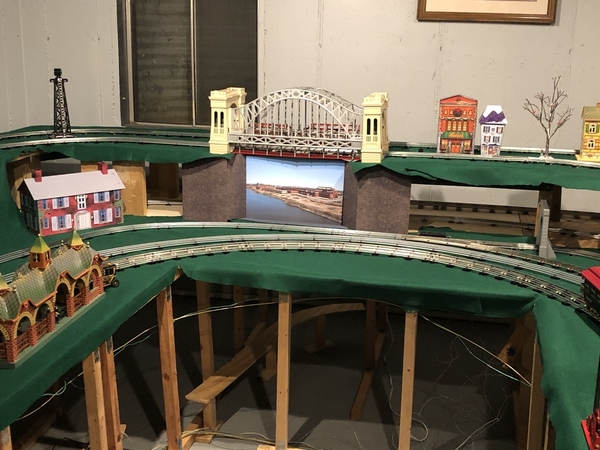
What does everyone think of the view under my Hellgate bridge? Mind you, my layout is a mythical city where all the major railroads operate, not NYC. So, the view can be anything. It’s actually a picture of the Inland Steel mill outside Chicago where I live and grew up. I’m not sure it looks right though. Too realistic for my tinplate layout maybe? Or too obviously a picture under a bridge? I’m trying to hide the tracks under and behind the bridge.
George
Attachments
Imitating Dirty Harry......."you gotta ask yourself just one thing punk......do YOU like it?" It's a toy train layout. If you like it, that's all that matters George.
I don't like it there. Is that copyrighted? A shot like that would be a good candidate for a custom backdrop on one of your walls.
MikeH posted:I don't like it there. Is that copyrighted? A shot like that would be a good candidate for a custom backdrop on one of your walls.
A picture of a copyrighted item in another picture that is substantially more than the copyrighted picture, would fall under the fair use doctrine. The source did not list a copyright, but I always assume a privilege. That said, nobody is coming in my home with a warrant for a copyrighted picture on my wall. That case would throw intellectual property law on its ear.
So, it doesn’t look right. I’m still baffled what to put under the bridge...
George
George S posted:MikeH posted:I don't like it there. Is that copyrighted? A shot like that would be a good candidate for a custom backdrop on one of your walls.
A picture of a copyrighted item in another picture that is substantially more than the copyrighted picture, would fall under the fair use doctrine. The source did not list a copyright, but I always assume a privilege. That said, nobody is coming in my home with a warrant for a copyrighted picture on my wall. That case would throw intellectual property law on its ear.
So, it doesn’t look right. I’m still baffled what to put under the bridge...
George
Whoa! I only asked that because if you send a copyrighted picture off to a professional printer such as one that prints big vinyl backdrops, then it would be an issue. I'm no forum police. Or as they say in the Ozarks:
Don't make me no nevermind. ![]()
MikeH posted:George S posted:MikeH posted:I don't like it there. Is that copyrighted? A shot like that would be a good candidate for a custom backdrop on one of your walls.
A picture of a copyrighted item in another picture that is substantially more than the copyrighted picture, would fall under the fair use doctrine. The source did not list a copyright, but I always assume a privilege. That said, nobody is coming in my home with a warrant for a copyrighted picture on my wall. That case would throw intellectual property law on its ear.
So, it doesn’t look right. I’m still baffled what to put under the bridge...
George
Whoa! I only asked that because if you send a copyrighted picture off to a professional printer such as one that prints big vinyl backdrops, then it would be an issue. I'm no forum police. Or as they say in the Ozarks:
Don't make me no nevermind.
Sorry Mike. Thought you were saying I couldn’t use it or post it here. Love the Ozarks colloquialism! Can’t say I’ve heard that one before.![]()
I haven’t really thought about scenery backdrops other than blue sky yet, since the upper level blocks most of that type of view.
George
George,
I think the concept is great. Perhaps using a print that has the style of catalog art would give you the look you want. SGMA president Wayne Strobel has made some amazing backdrops for the TCA National Toy Train Museum by photoshopping old catalogs.
Kirk Lindvig
Thanks Kirk. I'll look into that. I've decided that I don't like it. I think to Mike's point, it would look better as a backdrop. I think there is too much sky in the picture and it is too realistic. There is something off with the perspective too. I am running into the limits of my technical art skills.
George
I like this better. The other backdrop was nice but it would be hard to blend in.
As always- your railroad, your rules!
I like the concept George. I'm not sure the ceramic houses are the solution. I'd like to see something along the lines of what Kirk is suggesting...some kind of catalog art adapted for that space. Then the trees in front of it would make a nice transition. What have you decided to do with the transition between the two levels?
Northwoods Flyer
Greg
George S posted:
George, I'm going to come right out and say I don't care for either one. Fir trees with snow under the Hellgate Bridge is just, well, odd.
Isn't there track behind there? Just leave it open so you can see the trains go by back there. After all, the idea of a multiloop layout is to see several trains at once. Later if you want, you can put a simple back drop on the wall behind those tracks.
Your layout style is "classic floor layout tinplate" with a flat green table top. Keep it simple and let the trains and accessories dominate. If you start adding unrelated realistic scenic bits, you will confuse the issue, IMO.
You might consider:
I applied velcroed panels on my backdrop on my 9x16 Attic layout so I could remove them later and have C Sam paint selected scenes or apply ready made scenes. Unfortunately, serious health issues invaded in early 2010 and I never got around to the scenes. Sits dormant now in 2020..
Attachments
Greg J. Turinetti posted:I like the concept George. I'm not sure the ceramic houses are the solution. I'd like to see something along the lines of what Kirk is suggesting...some kind of catalog art adapted for that space. Then the trees in front of it would make a nice transition. What have you decided to do with the transition between the two levels?
Northwoods Flyer
Greg
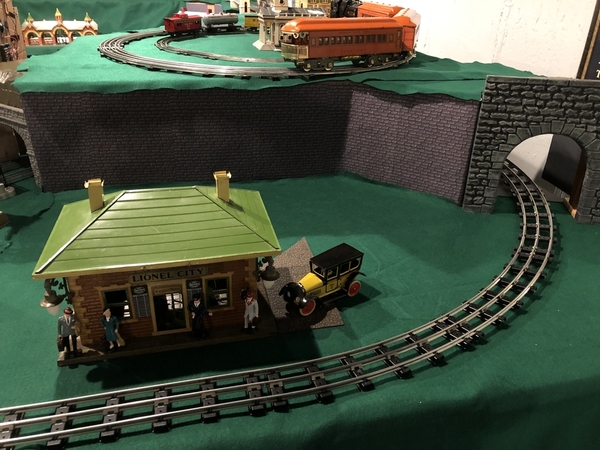
There will be a stone wall around most of it. You can see a couple of sections I printed on either side of the bridge. I think I will keep the one section just green felt, which will look like a grassy hill.
George
Thinking of what bridges generally go over, I'd be thinking about a picture of a roadway or a river and set back a little under the bridge from the front edge. Doesn't have to be realistic - something whimsical could work.
Just my $ 0.02
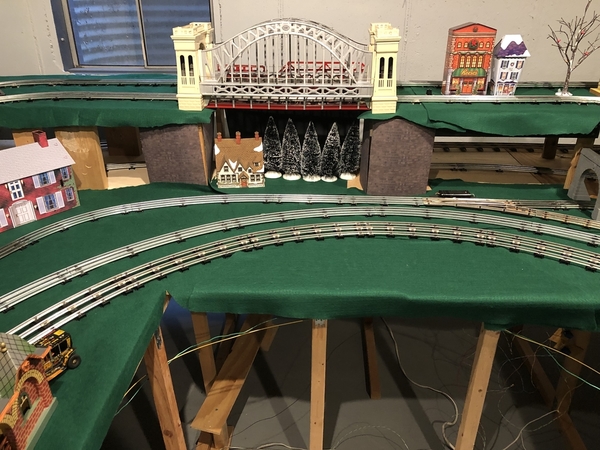
Will posted:George S posted:Here is another option. I can fill in the foreground with some ceramic houses and trees and then use a black background further back in front of the standard gauge track. I need to get a few ceramic houses out of storage.
George
George, I'm going to come right out and say I don't care for either one. Fir trees with snow under the Hellgate Bridge is just, well, odd.
Isn't there track behind there? Just leave it open so you can see the trains go by back there. After all, the idea of a multiloop layout is to see several trains at once. Later if you want, you can put a simple back drop on the wall behind those tracks.
Your layout style is "classic floor layout tinplate" with a flat green table top. Keep it simple and let the trains and accessories dominate. If you start adding unrelated realistic scenic bits, you will confuse the issue, IMO.
You have a point. I got the idea from this picture of Railroads on Parade. http://thefreegeorge.com/thefr...1/07/Railroads-2.jpg
George
Richie C. posted:Thinking of what bridges generally go over, I'd be thinking about a picture of a roadway or a river and set back a little under the bridge from the front edge. Doesn't have to be realistic - something whimsical could work.
Just my $ 0.02
I'm also having trouble with setting it back under the bridge. The bridge creates a shadow on the picture, which screams out that it is a photo. I've tried using lighting under or in front of the bridge to get rid of the shadow, but it doesn't work. The only thing that works is pulling the picture forward.
George
Steamer posted:Imitating Dirty Harry......."you gotta ask yourself just one thing punk......do YOU like it?" It's a toy train layout. If you like it, that's all that matters George.
I agree with Dave,
When it comes right down to it you are the one who will be looking at it most of the time. Keep experimenting until you find what you like.
Northwoods Flyer
Greg
get some blue paint, make a river. find some antique Battleships, and viloa'
George, I go along with the comment, "Do you like it?" and Greg's "Keep experimenting until you find what you like" and any idea we can come up with. I like Dave's idea of blue paint and a battleship, but how much space is there from the rear of the bridge to the first track you are trying to hide? Maybe a tug boat would fit better.
I'll try to think of other suggestions, as it seems others are doing!
Steamer posted:get some blue paint, make a river. find some antique Battleships, and viloa'
I'd love to do a water scene and battleships are cool, but there isn't space. I could build it to show the trains passing in the back, but there is a bit of layout construction to camouflage.
George
How about a model of your yacht? ![]()
Small (maybe 2-3 pieces) oil tank farm you can make from a few PVC sections to custom height and diameter and then paint and decal yourself. Doesn't have to look too realistic.
I didn’t want my road ending against a wall so I made a dummy tunnel with cars in it. You could add roads going under the bridge going into a fake tunnel.
Steve
Attachments
Steve "Papa" Eastman posted:
Very cool Steve. The fake tunnel is awesome! I had to do a double take. I especially like the cartoon style of a the block mortar joints.
George
Steve, what are those cars? They look like small models of the old metal pedal cars we had as kids.
George S posted:Steamer posted:get some blue paint, make a river. find some antique Battleships, and viloa'
I'd love to do a water scene and battleships are cool, but there isn't space. I could build it to show the trains passing in the back, but there is a bit of layout construction to camouflage.
George
some of the old ones I see in antique shops are about the size of a Matchbox car. And I used to build some when I was in school, don't remember the scale, but they were waterline kits. Used to lay tin foil down and they would look like they were on the water, Less than a foor longt IIRC.
Will posted:Steve, what are those cars? They look like small models of the old metal pedal cars we had as kids.
They are Hallmark Kiddie Car Classics. They are mini versions of pedal cars. All the buildings and accessories in that section of the layout are from Hallmark.
Steve
So, Steve inspired me, and here is what I came up with.
I didn’t try to put anything in the tunnels. I could cut them out later to show the trains behind them, but my layout building philosophy is that there should be hidden tracks to create interest. Trains “disappear” into a tunnel and reappear somewhere else. All the magic goes away if you can see them in the background.
I’m also installing cardboard as backing for my block walls. I found a better, less realistic stone wall picture that you can see under the bridge. The cardboard is coming from what my wife calls my cardboard box collection.![]()
George
Attachments
I think it is going to look great, George!!
I like it, George!
Yes, no question it’s better than the photo. Blends in nicely. Keep going!
I have to say, doing scenery is boring. This is going to take me some time. 
I printed most of the block walls. I need to trim them and glue them in place.
Here is a picture and video of a dwarf signal wired to the Ross STD gauge switch. This wiring would be the same if you chose to mount custom LEDs or use a lighted switch control.
George
Attachments
and that is why I have green painted plywood. Lookin good George!
How could that be boring. I like the signal with the switch. I miss having to figure stuff like that out.
Keep going!
George S posted:I have to say, doing scenery is boring. This is going to take me some time.
I printed most of the block walls. I need to trim them and glue them in place.
Here is a picture and video of a dwarf signal wired to the Ross STD gauge switch. This wiring would be the same if you chose to mount custom LEDs or use a lighted switch control.
That looks fantastic! Forgive my ignorance, but what brand/model is that dwarf switch?
asmith1440 posted:George S posted:I have to say, doing scenery is boring. This is going to take me some time.
I printed most of the block walls. I need to trim them and glue them in place.
Here is a picture and video of a dwarf signal wired to the Ross STD gauge switch. This wiring would be the same if you chose to mount custom LEDs or use a lighted switch control.
George
That looks fantastic! Forgive my ignorance, but what brand/model is that dwarf switch?
That's an ordinary Lionel #148 plastic dwarf signal 6-12883. The switch is a Ross Standard Gauge tinplate 072 switch that comes with an LGB switch machine.
George
I bought one table skirt to test on the layout. I think it will work. It ends up being the perfect length when I attach it under the felt on top of the table.
I also made a lighting rig for my Bilt EZ Lionel building. I used LED strip lights. These were supposed to be warm white. They are nowhere near as "warm" as the picture on the box, but they are not "daylight" either. I wish I could dim them a little. I have read that you can use a PWM dimmer, but I have heard mixed results.
George
Attachments
George,
I'm in the middle (started in November) of building a multi-level STD/O gauge layout also. Love your progress and advice. Didn't see your final verdict on felt vs. indoor/outdoor carpet? Your 5 rail track doesn't look like the 5 rail Gargraves I have used in the past? Who makes that all tinplate 5-rail? May just do the green area in my main STD city/roundhouse area. I'll post pictures soon of my progress.
SteveMa posted:George,
I'm in the middle (started in November) of building a multi-level STD/O gauge layout also. Love your progress and advice. Didn't see your final verdict on felt vs. indoor/outdoor carpet? Your 5 rail track doesn't look like the 5 rail Gargraves I have used in the past? Who makes that all tinplate 5-rail? May just do the green area in my main STD city/roundhouse area. I'll post pictures soon of my progress.
The 5-rail track is custom. You need to make it from USA Track standard gauge and Menards O track. Nobody makes it in tubular.
As for the felt vs. indoor/outdoor carpet, I am very happy with the felt. I easily solved the problem of drilling through it. I use an Exacto knife to cut a slit; I keep my vacuum nearby; I open the slit with needle nose pliers; I drill the hole and then vacuum the sawdust. The felt goes back in place and you can push wires through. The felt was inexpensive and readily available at JoAnn Fabric. It has a sound dampening effect without even adding padding. I tried padding on the upper level. It worked fine but isn't really needed with the felt. The felt cleans up well too. I just vacuum it with a dust-buster or use a small brush attachment on my shop vac. I have only loose laid the felt so far. I may glue down some areas when I get closer to the finishing stage of the layout.
George
George S posted:
George,
Looks good. I see you have a couple of Dept 56 winter birch trees on your layout. Trees / shrubbery are an important thing to remember to add, as they make the layout look better.
A friend convinced me to add trees to my layout and it looks much better now. My friend used a lot of pine trees on his layout, but I did not care for them as much. I ended up going with a lot of the Dept 56 autumn trees (birch, maple, and a few oaks), as I found that they looked better as one could see the trains through the trees.
Here are some shots without and with trees.
NWL
Nation Wide Lines posted:George S posted:Started laying out my town. I have lots of space to fill.
George
George,
Looks good. I see you have a couple of Dept 56 winter birch trees on your layout. Trees / shrubbery are an important thing to remember to add, as they make the layout look better.
A friend convinced me to add trees to my layout and it looks much better now. My friend used a lot of pine trees on his layout, but I did not care for them as much. I ended up going with a lot of the Dept 56 autumn trees (birch, maple, and a few oaks), as I found that they looked better as one could see the trains through the trees.
Here are some shots without and with trees.
NWL
I like the autumn ones you have. Now that I have a layout, I'll need to add more trees to the budget.
George
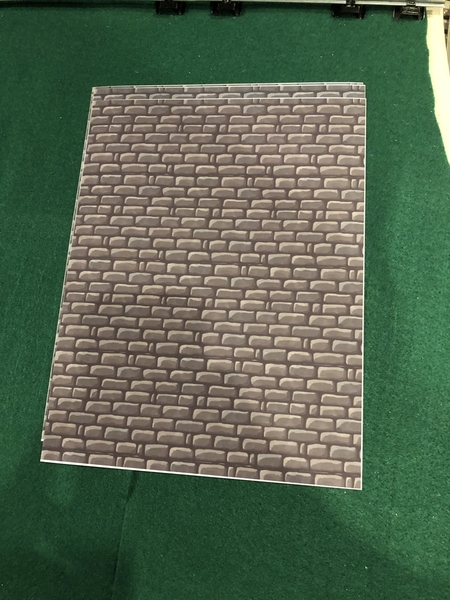
I received the glue I needed to glue my printed wall on the cardboard structure I built. I started with Titebond Premium Wood Glue, but the setup time was slow and the water content was high, causing wrinkles. It looked fine once dry, but I decided it was not the right product. After research, I decided that Best-Test Paper Cement was the right product. Photographers mounting pictures to cardboard swore by it online.
to print these photos of the block wall.
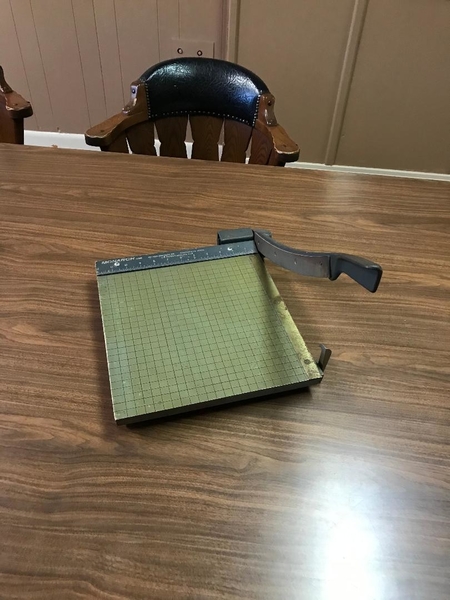
My dad loaned my this old cutter to trim the white edges of my photos.
Here is the start of progress on the wall.
George
Attachments
Hi George , I just wanted to pass along one of my project ideas on trees. Once made , one can spray paint them to spring , summer or fall colors . As for me , I did mine in mid summer colors. I used two slightly different greens on the same tree. These trees are easy to make and are basically free except for the spray paint . They are made from end of season dried hydrangea blooms . I was able to get mine from a friends yard . To make some trees more fuller than others , I taped two stalks together with masking tape , then added some wood glue and sprinkled saw dust on them to resemble bark. Once everything was dry I spray painted the trunk brown and the flower part green . As you can see from the photos I used some scrap wood for the bases with a sanded edge and appropriate size hole for the trunk . As for having scrap wood lying around and saw dust and the tool for sanding the base edge , I am a carpenter by trade . My trees vary in size and height , the tallest being 15 inches tall . I hope this gives you another option to think about for when you are ready to start planting trees on your great layout . Cheers .
Attachments
Attachments
JohnnieWalker posted:Hi George , I just wanted to pass along one of my project ideas on trees. Once made , one can spray paint them to spring , summer or fall colors . As for me , I did mine in mid summer colors. I used two slightly different greens on the same tree. These trees are easy to make and are basically free except for the spray paint . They are made from end of season dried hydrangea blooms . I was able to get mine from a friends yard . To make some trees more fuller than others , I taped two stalks together with masking tape , then added some wood glue and sprinkled saw dust on them to resemble bark. Once everything was dry I spray painted the trunk brown and the flower part green . As you can see from the photos I used some scrap wood for the bases with a sanded edge and appropriate size hole for the trunk . As for having scrap wood lying around and saw dust and the tool for sanding the base edge , I am a carpenter by trade . My trees vary in size and height , the tallest being 15 inches tall . I hope this gives you another option to think about for when you are ready to start planting trees on your great layout . Cheers .
Those are really nice! Great idea!
I can't see the first picture. You may need to repost it.
Thanks!
George
Richie C. posted:
Yours is in great condition compared to my dad's. I was worried that it was dirty and rusty. I wiped the wood down with a damp paper towel and used furniture polish on it. I used WD-40 on the blade and also an abrasive pad. I also ran an edge sharpener on it. It is sharp and working and not leaving any rust marks on my prints. Oh, it looks like you have a safety lock on yours. Mine doesn't have that.![]() When I first picked it up, I almost cut my finger off!
When I first picked it up, I almost cut my finger off!
George
George S posted:
The "rock face" above the tunnel portal above is painted rigid pink foam shaped to look like a rock. I needed to extend the portal from the upper level, because the track entered at an angle. I used some leftover paint I had. Unfortunately, it was gloss paint, and you can really see the shine on it. I think I will need to address that with some of my Woodland scenics paints this weekend.
George
you might try a mirror under the hellgate. Ive seen this done on tons of RRs.
You could always go with some original trees...American Flyer trees c. 1925 ![]()
However, I have only found 2 over the years, which were packaged with an uncataloged set that is now on display in the cabinet (Middle shelf).
NWL
Nation Wide Lines posted:You could always go with some original trees...American Flyer trees c. 1925
However, I have only found 2 over the years, which were packaged with an uncataloged set that is now on display in the cabinet (Middle shelf).
NWL
![]()
Ooo, ahhh!!!
George
Attachments
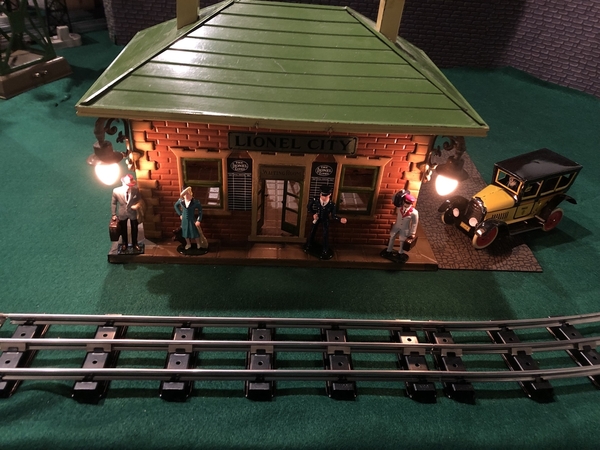
This is a the bulb that burned out in my power station.
I was going to ask what kind it was, and then I realized it was printed right on it. I looked it up, and it is an appliance bulb. I bought an LED version online and installed it. It’s warm white.
I also got a PWM dimmer for my rope lights in my Bilt EZ building. I was going to take a picture but realized the rope lights are falling down. I’ll need to fix that and take a picture later.
George
Attachments
George an 1156 bulb is/was commonly used in automobiles for the back up lights or any single contact light. 1157s are used for tail/brake/turn signals.
Steve "Papa" Eastman posted:
The lithographed one is the double, extended Darstaed replica of the Hornby shed. It's not a true replica; it's its own beast.
The plastic engine shed is Atlas. I used Minwax stain on the doors to give them a true wood look. I painted the roof with Rustoleum Lagoon and applied a gloss coat. The brick mortar is a wash of drywall topping compound that I wiped off the brick to leave the mortar.
George
Steamer posted:George an 1156 bulb is/was commonly used in automobiles for the back up lights or any single contact light. 1157s are used for tail/brake/turn signals.
Yep, but the base became a standard that is used in microwaves and landscape lights. The 1156 cross references to a BA15s bayonet base. I don't think I would have got the selection I did and the ability to buy a warm white LED if it wasn't used in the landscape lights. (I had to buy a 5 pack of course. So if anyone needs one, let me know.)
George
George - My layout is a wreck right now, but I snapped this pic of one of the tunnel portals I hand made from a bit of 1x8 white pine and some basswood:
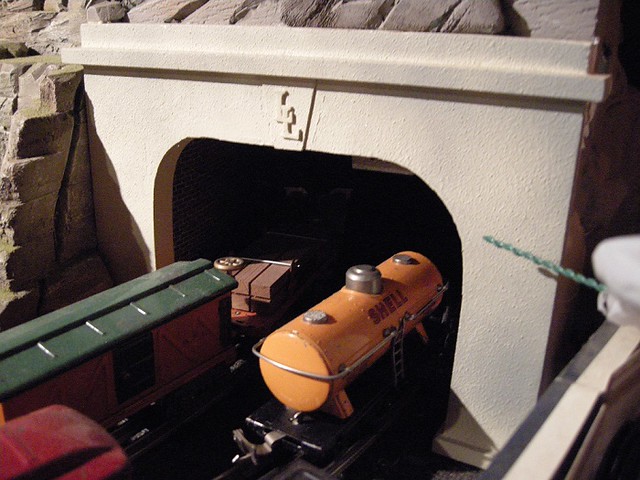
I painted it with some textured spray-paint, than an over-spray of what I thought looked about right for fresh concrete. The little "LL" Lionel Lines keystone I fashioned from a couple of foam letters I stole from my wife's craft-box. The tunnel-lining is brick-paper from the web, pasted onto cereal box cardboard. It works, but it could stand some weathering.
PD
pd posted:George - My layout is a wreck right now, but I snapped this pic of one of the tunnel portals I hand made from a bit of 1x8 white pine and some basswood:
I painted it with some textured spray-paint, than an over-spray of what I thought looked about right for fresh concrete. The little "LL" Lionel Lines keystone I fashioned from a couple of foam letters I stole from my wife's craft-box. The tunnel-lining is brick-paper from the web, pasted onto cereal box cardboard. It works, but it could stand some weathering.
PD
Very nice! I used some plastic Lionel portals I had, but I painted them to get rid of the plastic gray color.
George
George S posted:
George, I can't tell you enough that this is looking fantastic. I am envious of your progress and taking serious mental notes of your work.
I really am not a fan of fast track but it looks nice in this application. The fact that you also have the oft overlooked background work done is a huge plus too. Ie. walls painted, generally good lighting, skirts applied already. All these things make your work and your collection look even better.
Bravo sir!
George, you are a rather resourceful modeler. To me, it's what makes our hobby gratifying.
jhz563 posted:George S posted:George, I can't tell you enough that this is looking fantastic. I am envious of your progress and taking serious mental notes of your work.
I really am not a fan of fast track but it looks nice in this application. The fact that you also have the oft overlooked background work done is a huge plus too. Ie. walls painted, generally good lighting, skirts applied already. All these things make your work and your collection look even better.
Bravo sir!
Thank you. I will eventually replace the Fastrack. You can see that I adapted it to tubular for now. I'm not replacing it for its looks, but it is really noisy. I have a decibel meter on my phone. I'll take some measurements for you guys. Unfortunately, it's a budget thing. It's probably a $250 worth of Menards track to buy to replace it, and the utility isn't there right now.
For the walls, yes, I painted them and am happy with it, even though I didn't do the full drywall finish approach. I do plan to add some sky background and think I just determined the approach to mount it. Look for that to come soon.
George
Dan Padova posted:George, you are a rather resourceful modeler. To me, it's what makes our hobby gratifying.
Thank you Dan!
Since you are just starting with the lighting I'd like to offer the following suggestions.
1. For the LED stick with the warm white - the cool white comes out light blue when you photograph it.
2. Wire the lights for the houses with as many separate circuits as possible and install potentiometers in the lighting circuits. You will want to make sure the pots you get can take the current draw otherwise you will have a lot of interesting smoke coming from your control panel. With pots in the circuits you can adjust the light levels independently. Among the many things this will allow is low light photography (still or motion) of your layout with the street lights looking like streetlights instead of small atomic bombs and your house/factory interior lights looking like interior lights instead of giving the impression that the house/factory is on fire.


