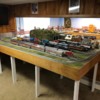
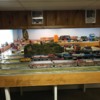
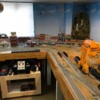
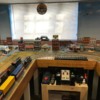
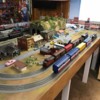
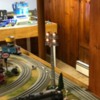
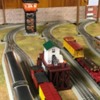
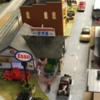
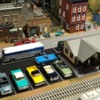
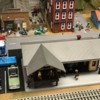
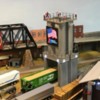
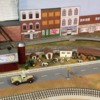
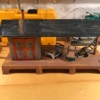
Finally got around to taking some pic's and a video of the completed construction of the layout with the legs now freshly painted white and the molding/trim around the edges in place and stained and poly'd. It took 5 coats of poly, lightly sanding between each coat, before I was satisfied with the outcome. The 4th coat was a high gloss and then I finished with a semi-gloss.

This completes all the major construction of the layout. All the basic wiring (power, switch, siding toggles, command control, etc.) is done, but I still have to decide on a final layout of the buildings and wire up the accessories and structures. I also want to add some fabric around the perimeter so I can use the underneath for storage, but that won't get done until I finish with the remaining underneath wiring of the buildings and accessories. 

I just started relocating the power inputs on my Menards structures (I understand why they build them this way, but I hate that the barrel connectors are on the outside of the buildings and "show", rather than underneath) and will post pics of my progress on laying out and installing all the accessories and structures in the future, as I go along. 

But for now, everything is up and running well and basically completed.  I want to thank all the members who contributed their time, expertise and support in helping me design and build the layout. It took almost a year from deconstruction of the old layout and partial wall tear-down to basic completion of construction of the new layout (obviously, I still have more wiring to do - they're never really finished anyways), but it was well worth it and I'm very pleased with the results.

The two trains running in the video are my venerable Legacy Rio Grande GP-9 diesel and the Legacy E-6 Atlantic steamer.  


Attachments

Images (8)
  • END PHOTO 1
  • END PHOTO 2
  • END PHOTO 3
  • END PHOTO 4
  • END PHOTO 5
  • END PHOTO 6
  • END PHOTO 7
  • END PHOTO 8
Videos (1)
NEW LAYOUT MOVIE
Last edited by Richie C.
Richie C. posted:

Finally got around to taking some pic's and a video of the completed construction of the layout with the legs now freshly painted white and the molding/trim around the edges in place and stained and poly'd. It took 5 coats of poly, lightly sanding between each coat, before I was satisfied with the outcome. The 4th coat was a high gloss and then I finished with a semi-gloss.

This completes all the major construction of the layout. All the basic wiring (power, switch, siding toggles, command control, etc.) is done, but I still have to decide on a final layout of the buildings and wire up the accessories and structures. I also want to add some fabric around the perimeter so I can use the underneath for storage, but that won't get done until I finish with the remaining underneath wiring of the buildings and accessories. 

I just started relocating the power inputs on my Menards structures (I understand why they build them this way, but I hate that the barrel connectors are on the outside of the buildings and "show", rather than underneath) and will post pics of my progress on laying out and installing all the accessories and structures in the future, as I go along. 

But for now, everything is up and running well and basically completed.  I want to thank all the members who contributed their time, expertise and support in helping me design and build the layout. It took almost a year from deconstruction of the old layout and partial wall tear-down to basic completion of construction of the new layout (obviously, I still have more wiring to do - they're never really finished anyways), but it was well worth it and I'm very pleased with the results.

The two trains running in the video are my venerable Legacy Rio Grande GP-9 diesel and the Legacy E-6 Atlantic steamer.  


Awesome photos! Btw, the on the inside of the menards buildings they have a power connector there too. 

Mark - thanks, that's Jeff Gordon watching over the layout !!

Matt - thanks, I may be mistaken, but I believe some of the Menards buildings have an optional connection point, but not all. I couldn't find one on the underside of the Morton's Salt Factory and just popped out the board on the side and re-positioned it to the underside. I also intend to cut out the passageway, so the track lies flat on the layout surface. 

Richie C. posted:

Mark - thanks, that's Jeff Gordon watching over the layout !!

Matt - thanks, I may be mistaken, but I believe some of the Menards buildings have an optional connection point, but not all. I couldn't find one on the underside of the Morton's Salt Factory and just popped out the board on the side and re-positioned it to the underside. I also intend to cut out the passageway, so the track lies flat on the layout surface. 

You can tell I'm not a NASCAR fan.  

Matt, Thank you for the tip!   I have the Menards hobby shop and Watkins Block.  Now I see they both have a power connector inside.  I never thought to look!

Been awhile since my last post but I've been busy trying to complete the layout.

Got the yard lights mounted and wired together into a single LED switch. Also, wired up the yard tower and bought an icing station and hooked that up. Took a lot of trial 'n error to get the height and track spacing just right - I don't think it was designed with Fastrack in mind.

As you can see, I don't like the look of exposed wiring so all the switches were wired straight through the outside molding trim which necessitated drilling through the back of the switches and relocating wires, etc. The yard light switch has a diode soldered in place to keep the LED from burning out.

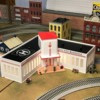
Got downtown Main Street in place and wired up and painted a parking lot for the train station with satin black paint and a white paint pen. Made an area for the farm and bought the Lionel Hospital kit for an inside corner that you would only see the backs of buildings on. I painted the windows with Krylon "Frosted Glass" paint and junked the light bulbs the kit came with in favor of a couple of LED strips. Now I just need a '50's - '70's ambulance to park on the side !

The American Materials structure came in from Menards along with a BN hopper - very nice stuff. I popped the coal load out of the hopper and filled it with beach sand from Revere Beach and marked the tower "Frac Sand". I don't know what "Frac sand" looks like, but I guarantee nobody who sees my layout will, either, so it might just as well look like beach sand !

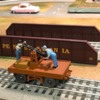
I also got this neat little powered handcar as a gift for the holidays.

Attachments

Images (14)
  • YARD LIGHT 1
  • YARD LIGHT 2
  • YARD LIGHT SWITCH
  • YARD TOWER
  • YARD TOWER SWITCH
  • MAIN STREET 1
  • MAIN STREET 2
  • STATION PARKING
  • TRAIN STATION
  • A.M. 2
  • A.M. 1
  • FARM
  • HOSPITAL
  • HANDCAR

John - thanks, the Esso sign is the Miller Engineering rotating sign. I also have a separate pole with a Sinclair gas sign that I alternate with the Esso sign. They make nice stuff. The base is mounted underneath the layout and attaches to a faceplate on the top surface. I recessed the faceplate about 1/8" and then covered it with turf and made a round wall out of leftover wall material covered with clump turf and a person sitting on the wall. It hides the "hole" pretty well.

Joe - the hospital is a nice piece and solves the problem of a corner where just the backs of buildings would ordinarily be seen.

Hey, Mark - that could be what frac sand is - I don't know, but it sounds right and, who knows - it might even look like Revere Beach sand !!

Last edited by Richie C.

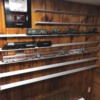
The aluminum shelving came in this weekend from Glenn Snyder and, as has been said many others on the Forum, it's great looking stuff.  I got 7 of the standard 6' foot lengths and had two of them cut back to 54" to fit in the top section and bought end caps for all 7 shelves for a finished look.

It wasn't easy mounting them on knotty pine walls with all the recesses and bulges, but I used wood shims and washers to make everything even.

I don't have a lot of trains or rolling stock to put on them (I'm sure that will change over the next few years), but now all the trains are on sidings to take out whenever I want to run trains.

Thanks to Glenn and his daughter for getting the stuff right out.

Attachments

Images (3)
  • SHELVING 1
  • SHELVING 2
  • SHELVING 3

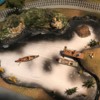
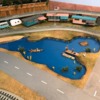
I was able to find time to cut out the "lake bed" on the layout over last weekend. I cut the foam pattern out with an exacto knife and utility knife and popped the foam out in sections. I applied a coat of Flexseal over the foam edges and plywood and cut some lines in the foam banks and spray painted with flat black and then highlighted with some light grey. The straight piece of Fastrack in pic 1 is where a new road will go.

I also shaved an area in the top left for a "beach"; coated the area with CA glue and sprinkled sand on it. Glued the fishing dock in place and also glued some grasses to the base.

I made the "pour" with Envirotech Lite that I mixed with some Mediterranean Blue and Pool Blue satin acrylic paint from Michael's. I've used the Envirotech stuff before and like it. Very easy to get bubbles out and pours very smooth. After about 6 hours, I placed the fishing boat next to the dock and the canoe in the lake and let them "settle" down inti the water a little bit.

I was able to save a curved hill from my old layout which fit in nicely on the new lake and will put in a waterfall later on.

I'll put some clear ModgePodge on the surface to simulate ripples later today and start detailing the area this weekend. 

Attachments

Images (3)
  • NEW LAKE 1
  • LAKE 2
  • LAKE 3
Mark Boyce posted:

That is very nice work, Richie!  I know what you mean about buying wood these days.  I am glad I have a couple sources of wood I can re-purpose, that doesn't look as pretty, but at least it is straighter than the new wood I bought.  I'll keep looking forward to seeing your progress.

Mark, its hit or miss with wood.  my home depot is pretty good for 2x4, but im still combing through the stacks!  but I get it home and it drys more and twists or something.  lol

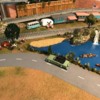
Got the lake 99.9% finished. I was able to save some of the structures and boats from my old layout (even though they had been "sunk" into the lake epoxy and put them in the new lake and added the scenery and waterfall. Just have to put out some "beach" people out (on order) and run "fake" fishing line from the poles to the lake.

"Hiding" the cable to the Mi-Jack crane as best I can is up next.


Attachments

Images (3)
  • LAKE 4
  • LAKE 5
  • LAKE 6

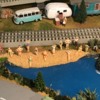
Lake completed with "beach people" and fishing line.

Also, kit-bashed a Plasticville loading platform and crossing shanty and weathered a Lionel yard house this weekend.

I also added some black cinder ballast to the yard to make it look a little "grittier" and added some yard people and clutter.

At this point, the basic layout is completed and I will be posting a couple of videos of the finished product later this week and closing out this thread.

Attachments

Images (7)
  • BEACH PEOPLE
  • LOADING PLATFORM 2
  • LOADING PLATFORM 3
  • CROSSING SHANTY
  • CROSSING SHANTY 2
  • YARD OFFICE
  • YARD OFFICE 3

Attached are a few videos of the layout. There's still a lot of empty space to fill on the layout (like waiting on the Lionel Renz Hobby Shop for Main Street), but it is basically completed.

The layout consists of a double main line (O-36 FT outside and mostly O-31 FT inside) with a crossover and several loop switches; a homemade double portal tunnel; a Lionel bridge; and a yard with 8 switchable sidings - one of which passes all the way back to the main line.

There's a large corner mountain; a lake; a main street; and an industrial area with an intermodal crane. I cut a slot in the layout for the crane cable to be able to slide back and forward with the movement of the crane. There are two  IR crossing gates and a few operating accessories like the MTH Gateman, Lionel playground, Lionel yard tower; and Lionel Ice loading station. The double-sided green Lionel billboards are homemade from two individual billboards.

There is no exposed wiring anywhere and the Gateman, playground, Miller Eng. rotating sign, and crossing Gates have been recessed into the layout for a more realistic look. Almost all the buildings and structures are weathered and lit - either from the manufacturer or by my trial and error.

I am using one Z-4K to power everything right now (the CW-80 broke on my old layout) and it seems to be doing a great job. I am running all command control right now with a Legacy system integrated into a full MTH DCS/TIU system with remote and Wifi and the app running on a 10" tablet. The main lines are electrically separated, so I could run conventional in the future if I get into post war projects. Right now, I have two steam engines and five diesels (two freight and three passenger) and plan to add a small yard switcher like the GE 44 Tonner in the near future.

This has taken about a year to complete to this stage. I had to take down my existing small layout and cut through a wall to make the yard fit. I also had to install Masonite sheets on the tongue and groove pine walls to put up the cloud background - (cheap at Hobby Lobby), so there was a lot of time spent even before construction could start. The construction is basic ladder type construction every 24" on center and it is strong enough to support my full weight and a lot more using a 1/2" plywood top with 1" foam on top of that. I also installed a few shelves from Glen Snyder systems and need to start filling them up.

It has been a sometimes frustrating, but overall very enjoyable experience and I would urge anyone thinking about building a layout to just get the project started and it will come. FWIW, I can offer a few tips a) start with a plan - SCARM, homemade, whatever - just have something to start with and don't be afraid to modify it as you go along, and b) don't rush to get it done - do it right the first time and make it bulletproof and electrically protected - a lot of my connections are wired and/or soldered - there's nothing worse than trying to sort out electrical issues after it's built, and c) no matter what size layout you are building, if you can, try to incorporate an elevation change and a tunnel to keep it visually interesting. Remember, there's no right or wrong in this hobby - only what makes you happy - it's your railroad, and d) if you have one nearby, make friends with your LHS - fortunately, I live near Charles Ro and, in addition to the Forum, their knowledge and expertise has been invaluable.

Anything new that happens, I'll post on a different thread.

I want to thank Mark and everyone else for their words of encouragement, tips, comments, suggestions and expertise in getting this project off the ground and completed.

Sorry about the quality of the last video !!


Attachments

Videos (4)
LAYOUT MOVIE 1
LAYOUT MOVIE 2
LAYOUT MOVIE 3
LAYOUT MOVIE 5
Last edited by Richie C.

Richie, Those are all good words of advice!  I like your power cart under the switch controls.  I forgot the beach scene was part of the lake with canoeists. There is a lot of activity there.  That wood paneling on the walls looks great!  It is almost a shame to cover it with the sky backdrop, but the backdrop makes the layout look so much better.  The yard and town all looks great!  I was glad to add some questions and words of encouragement along the way!  Keep up the good work when you come up with something to add or change. 
Add Reply

Post
The Track Planning and Layout Design Forum is sponsored by

AN OGR FORUM CHARTER SPONSOR

OGR Publishing, Inc., 1310 Eastside Centre Ct, Suite 6, Mountain Home, AR 72653
800-980-OGRR (6477)
www.ogaugerr.com

×
×
×
×
Link copied to your clipboard.
×
×