The reason that any of the control systems require twisted pair is to help in the isolation of the signals. Sooooo an answer to your question is NO do not use the third wire for anything other that a spare. I might even go so far as to suggest that maybe it should be grounded at both ends of your bus run just for safety sake as far as spurious signals is concerned. Any how thats my 2c worth for tonight! ![]() Russ
Russ
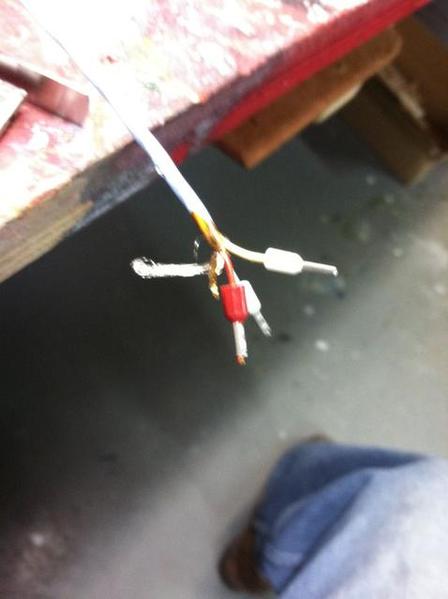
My question is now moot. I decided to take a closer look at this wire. It's too small! It's somewhere between 20 and 22 gauge. It's very sophisticated which includes full shielding around all three conductors and the individual wires themselves have what seems like a very thin copper-looking foil around the strands. Since DCS needs 14 – 16 gauge this won't work. It will be perfectly okay to power all my Ross switches and powering lights and accessories, but my euphoria about all this free wire was a bit premature.
Here's the wire with some ferrules crimped on the end. The white ones fit perfectly. The red ones are too large. Pardon the focus, this is a iPhone photo.
Attachments
Russ, I thought you only grounded one end of the shield, otherwise it created a ground loop witch created noise? Im not sure on this, just kinda remember it from EE school
Ryan
Ryan, I think you are right except I was thinking of an isolated seperate ground not tied to the electrical ground.
Since the price was right how about just making a double run of cable and using one cable (a pair of wires) for each leg of the bus. I.E. each cable would be the same as a single wire, 2 wires at 22 versus 1 wire at 14. Just a thought. Russ
Can you sell it and turn around and get the right thing?
If I'm going to sell it, I really should give it back to the company that gave it to me.
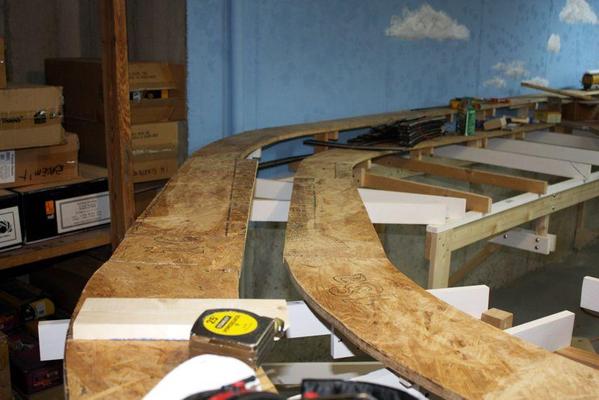
Today, my oldest grandson and I did some more work on the bridge area. We got the joists in place with him doing the real low work, while I did the cutting. I then built 7 more riser/cleat assemblies, and started getting the subroadbed in place. I had to make some adjustment cuts to the mating edges to bring the roadbed into alignment across the bridge area.
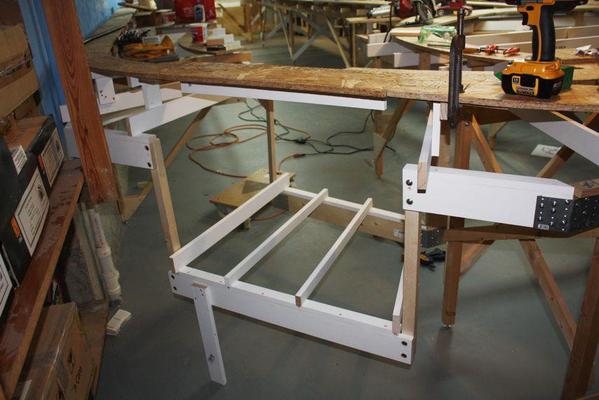
The left side of the assembly was a little springy since the rear girder was pretty far away from the wall bracket. My grandson suggested just putting a support under the bottom. It was a simple solution that made the unit very solid. As the subroadbed is added the construction gets more stable. It doesn't get in the way since this part is way to low to ever have to get under... unless you're really, really small.
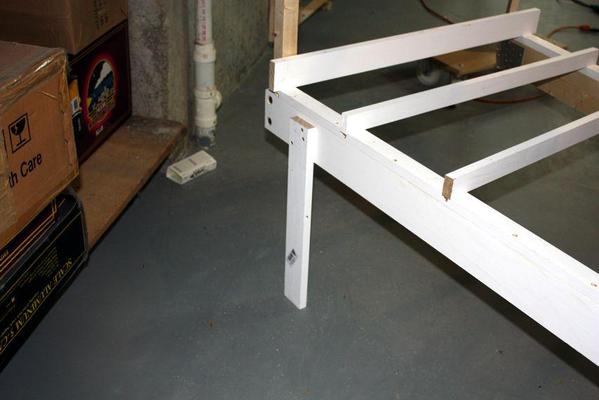
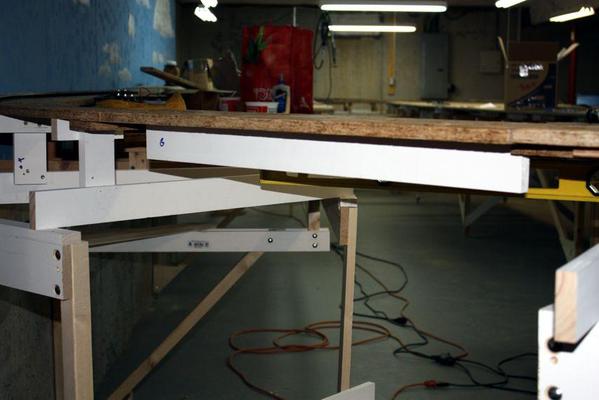
For the temporary bridge I cut and fit a piece of OSB into the gap. I then installed an edge-mounted 1 X 3 on the bottom to act as a stiffener since the span will be more than 31 inches. It makes a nice flat piece.
I set the risers for the outer track first. This installation is complicated in that it's part of the down slope of the high line. I temporarily fixed the risers with clamps until the total grade was smooth without any abrupt changes in elevation. I then put in one screw in each riser and went back and leveled the heads before putting in the other screw. That's where we ended today. Tomorrow, I'll finish up the bridge area and with that the bench work will be finished... or at least finished enough to start laying track.
The temporary gap filler is just that... temporary. As so as I build the bridges and start landscaping the gorge, the temps will be discarded and the real bridge will take over. There won't be any rush since the trains will be running, but I can't get too complacent since I've already bought them.
Attachments
Moving right along, I finished the bridge end with the temporary bridges. I found another springy portion and added another drop-leg to ensure that if I learn on it, it doesn't move downwards. I also took care of a punchlist item. Some of the joist ends were sticking out beyond the OSB on the layout's long front. I kept catching stuff on it and today it almost pulled the camera out of my hand when the strap caught on one of the longer joists. I used a square to draw a vertical line on each joist that extended out past the sheeting and then carefully used the saber saw to hack them off. I'll mount the skirting to these ends (and also some glued blocks that will have cross-grain facing out for a better grip on the little screws.
While the center sections are temporary, they're strong, flat and will hold up anything I run across them. I will have to keep my momentum or they could easily become "permanent" bridges. With the 23" drop, it should be a decent looking ravine.
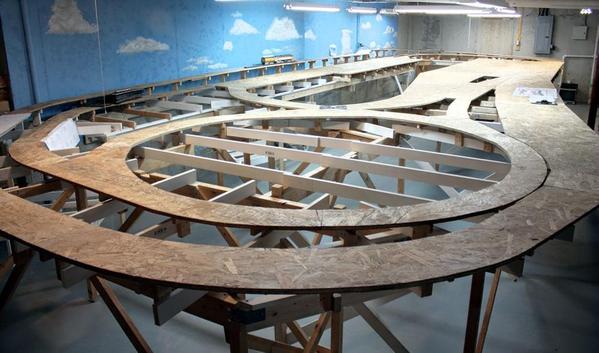
With this out of the way, I started on the final structure piece before I can actually lay track. It's been five months so far and it's almost done... the bench work that is. If the railroad was the size it used to be, it would have been built months ago, a point which I am regularly reminded about.
The middle bridge area has an OSB piece that was cut before I decided how I was going to bridge the ravine in this area, so I am using this piece as the temporary bridge. I braced the bottom using the last pieces of the old layouts laying around. This piece was actually two reinforced pieces that used to hold up a bridge in old design. BTW: any areas of open joists like that in the background, will be eventually covered with pink foam. I intend on doing most of the landscaping with pink foam and I have a foam carving set to do it.
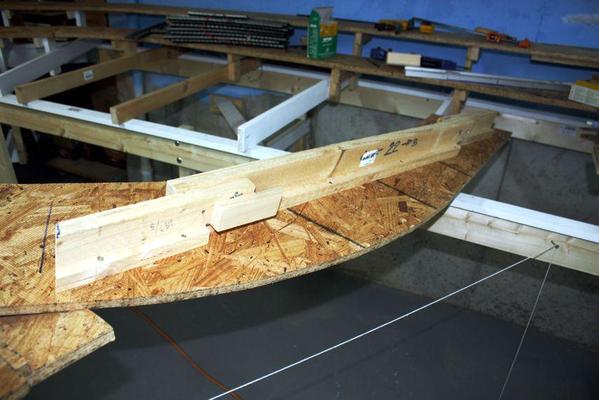
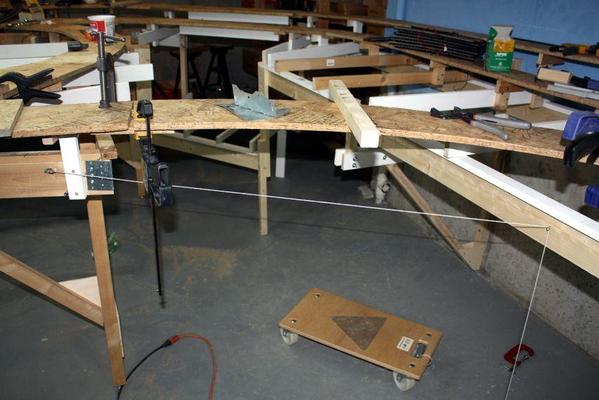
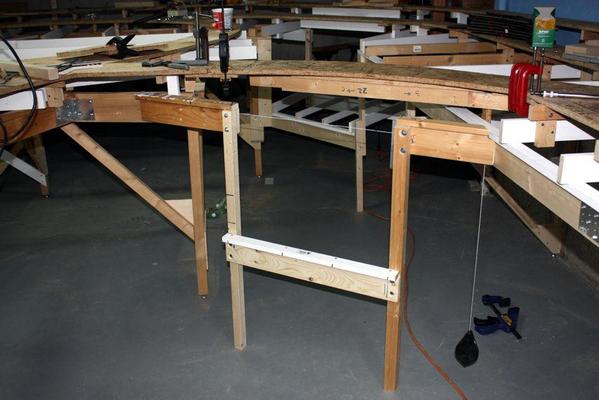
I ran a string line to set a reference for the structure that's going to support this whole affair when all the landscaping is in ... some time in the distant future.
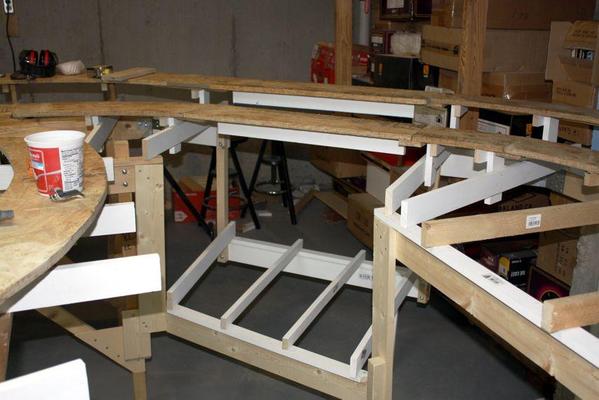
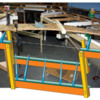
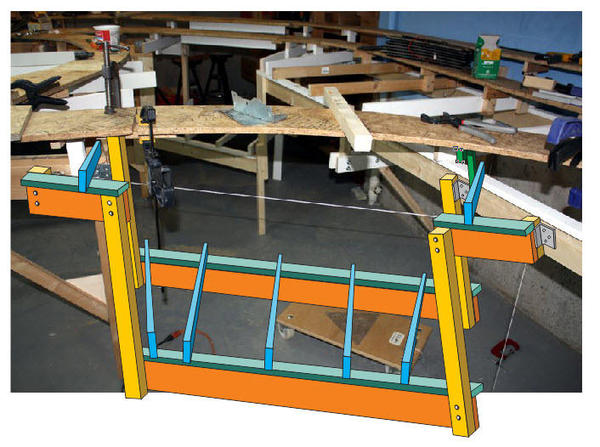
And here's my "artist's" impression of the structure. Perspective's a bit off, but it gives the general idea. As before, I imported the photo into CorelDraw and hand drew the structure on top of it. It's tricky (in real life that is) because all these members intersect the rear girders at angle requiring Simpson Strong-tie plates to provide attachment. Right now the temporary bridge piece extends all the way to the main piece on the right, but the actual bridge section will start above the place where the L-girders are dropped. I'll make that cut after it's finally fitted.
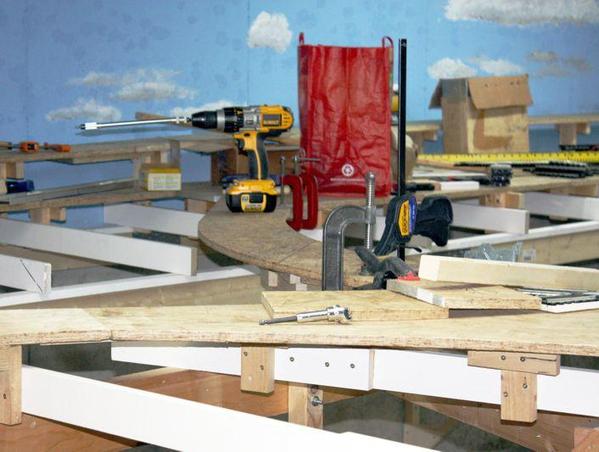
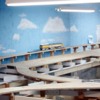
Here's a view looking across the layout. It's a bit confusing (to me anyway) looking at all the pieces going off in a directions. It will look much better when there's track on it rather than scraps of wood and power tools.
Attachments
Did some more work today on the middle bridge area. I got all the pieces cut and assembled the right hand frames. I decided to continue the vertical supports all the way to the floor since the nature of the these jogged frames seem to be springy. I had the stock so I decided to consume it. I was able to salvage a couple more chunks of old L-girder, so I only had to fabricate two new girders for the middle spans on the right and left frames. I even scavenged the last of my square stock. One leg is an American 2 x 2, another is a German 50mm X 50mm, and two more are old 2 x 3s from the very oldest iteration of this layout when I was building an N-gauge pike before my son went to college in 1989. I had some metric carriage bolts left, but they were too short to properly pass through all this wood and have enough threads on the outside for the nut and washer, so I used a Forstener bit to counterbore the bolt holes. On the Metric-sized lumber I had to counterbore both pieces, since the Metric is quite a bit thicker than it's American counterpart. Next session I'll finish these up and the benchwork is complete!
I still have to fasten this structure onto the existing girders. I'm going to use Simpson Plates again for this. There's really not much stress on this part of the layout since it's main purpose is to support scenery, but I am concerned to maintain the precise alignment between the two parts of the layout. These two bridge areas are the only things keeping the entire front part of the layout from pulling away from the back... plate tectonics and all that...
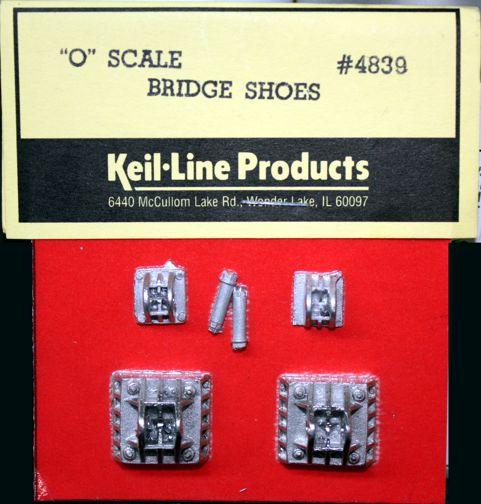
On a totally different subject, I decided to get some nice Keil-Line bridge shoes for the bridges that are eventually going to close these gaps over "dead man's ravine". Valley Model Trains had them in stock and I got three pairs. I actually will need five since the middle bridge is going to consist of three deck bridges to accommodate the curve and each will need shoes on one end.
From the ads in the magazines, I thought these were plastic, but was happily surprised to find that they're cast metal. The bridges have to support a lot of weight, such as large 3rd rail steamers. Being metal I'm no longer worried about this.
Attachments
WOW I just read your whole post and you are the MAN. You haave such a great looking layout, I just wish I could build something as nice. I cant wait to watch the rest come together.
Mike, thanks! It's my fourth time making an L-girder layout so "practice makes perfect" or so they say. I was a shop teacher and am pretty handy, but I also read the Kalmbach layout construction book cover-to-cover many times before attempting to build one of these things. My philosophy is "just start doing something", you'll learn as you go. You can't do it well first time out. There's some stuff that even after practice I never got good at...I'm talking about golf here. You need some basic power tools plus a good power miter saw. My big DeWalt driver is a God send with enough power to run hours on a charge and drive anything I need to use.
My grandson and I continued working today on the middle bridge area. I got the two support structures built and then he helped me by doing the low work. It thought I measured the legs correctly along with all the other parts, but when I aligned the tops of the L-girder extensions with the tops of the main girders, the legs sort of no longer were on the floor. I don't actually need them to touch since the whole thing will get stiffer and stiffer as I add the subroadbed, track, and all the scenery elements, but I may just screw some ply extensions to the legs that touch the floor to add some more stability.
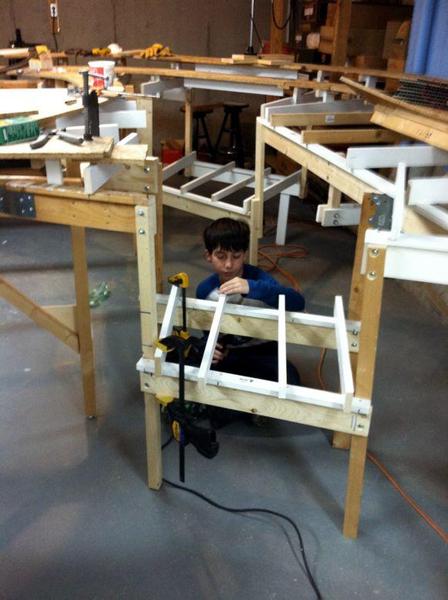
On the front right leg in this picture, I had to drill the holes three times. First I found out that the girders made with German lumber are bigger in all dimensions that those with US lumber. The legs on the left side are almost a half inch longer than on the right side. I didn't know this until I constructed the frame and fit it in place and found the girder extension was much higher than the mating girder. I took it apart, cut off the excess leg length and then re-measured and drilled the holes for the girder, but I inadvertently put the counter-bores on the wrong side so I turned it over and did it one the other side. The only reason for the counter-bores is because my carriage bolts are too short and I didn't feel like buying any more. Then I found out that I positioned the main girder wrong so I had to take it apart AGAIN, and put in another set of holes. I began to look like Swiss cheese. Even after getting it all installed, they're still cockeyed. Luckily they're not being asked to do very much, just hold up some scenery and stay put. They'll do both jobs just fine.
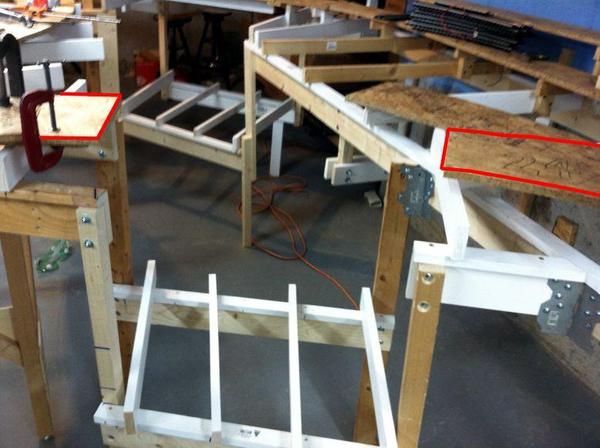
I cut the 24" out of the center of the existing bridge piece that represents the actual bridge gap. The two end pieces—shown here outlined in red—will be permanently fastened to the approaches and will both have a riser and cleat under them. The middle section will get a bottom rib to stiffen it. This piece will be temporary. Once I construct the ravine and river bed, then add the abutments and piers, this piece will give way to three, segmented deck bridges.
A point of information. All cabling that has to go from the control panel in front to the entire rear of the layout will be passing under and around this middle bridge area or the left end bridge area (in the background of this shot). It can go around the right side because the swing-gate cuts it off. It's one of the reasons that I'm going to need so much wire. If I'm using DCS, I may run just the power leads to a Track Interface Unit (TIU) positioned in the rear section, then run all the power block runs from that position. It will reduce the wiring that needs to go under the mid-bridge, and reduce the length of digital signal lines which is helpful also. I probably will have four power blocks fed by two TIUs. I will still have to run the switch machine wiring from the panel, but this is smaller gauge. You can also operate track switches remotely with the DCS, but I'm more comfortable with switch control on a real control panel with real indicator likes. I'm old-fashioned that way.
Also, I am not going to scenic the entire ravine from the left to mid bridge areas. I'm going to let folks use their imagination to fill in the missing area. I want that are open for access to the rear trackage.
Attachments
Well... the benchwork is officially done. I completed building the temporary bridge for the middle-bridge section. When I'm ready to add the real bridges, I just have to remove the three temporary fillers and then build the abutments, etc. and install the new ones.
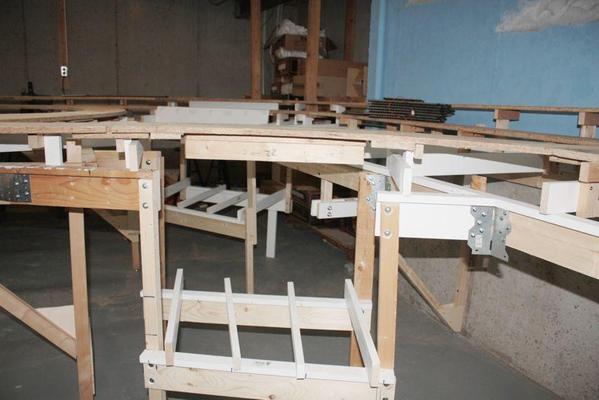
You can see the stiffening rib under the temporary filler. This thing is rigid enough for me to stand on.
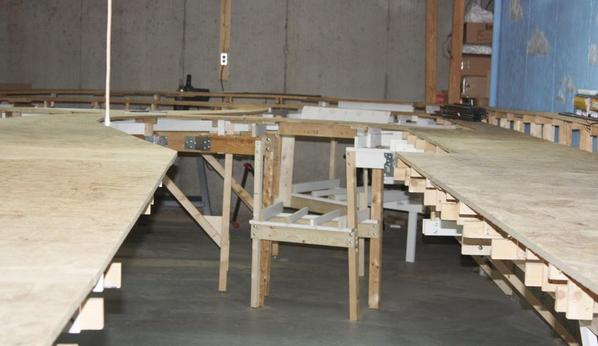
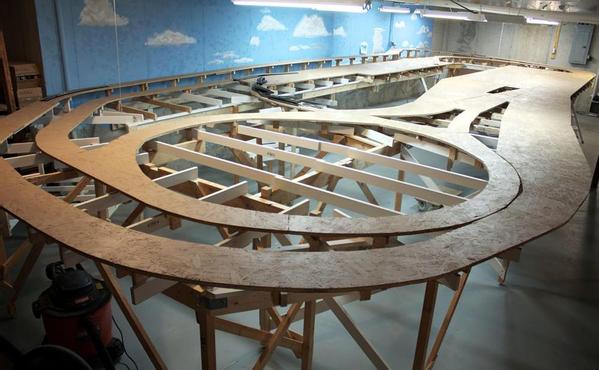
Here's a shot taken from the top of a step ladder showing all the benchwork. I cleared off all the tools, trash, etc. in preparation for this shot.
And here's my MTH Veranda which couldn't wait to try out the high line. Big layouts make O'gauge, scale-length engines look good.
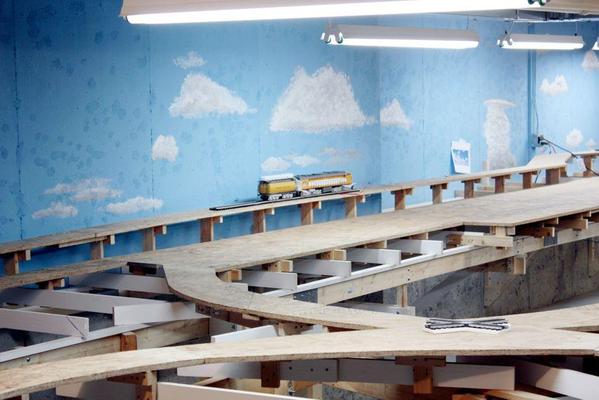
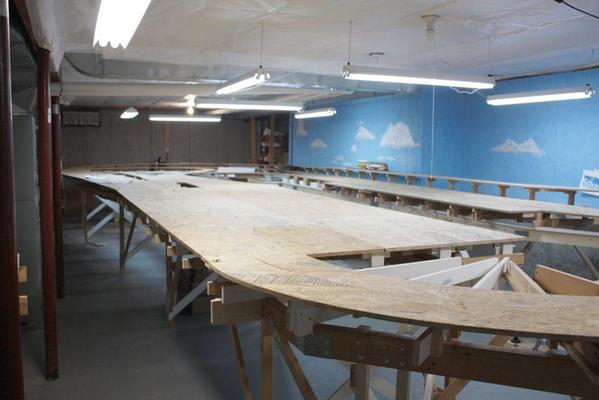
Here's a reverse angle view. Looks like an empty 'artist's canvas' just waiting for something creative to happen...
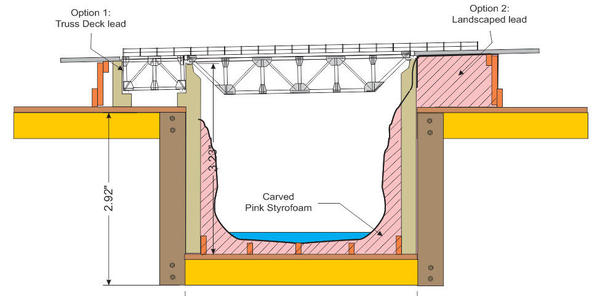
I've been doing research on how the Plastruct Truss Bridges should be configured now that I'm turning them upside down and converting them from a through truss to a deck truss. The bridge doesn't have to be as high or as wide since a train with over-height freight cars doesn't have to pass inside. So I took the scale drawing of the original design and narrowed it and reduced the height. In the Kalmbach "Bridges and Trestles" book I found some drawings of single tracked deck bridges and it looks like the trusses are centered about where the loading gauge of the engine is, and was stated at 9'-6", roughly double the track gauge.
Here, I hung the new plan under the temporary span to see how it looks and fits. It works well and the proportions seem right. Since all the components of the bridge kit are "cut your own", I should end up with extra material which be used to build the plate deck bridges that are going to span the middle bridge gap.
Here's the newly proportioned bridge on the previous plan. The height of the truss looks about right. The previous version was too deep for the length of the span. The shorter the truss members, the greater their compression carrying capacity, however the longer the tension members are the greater tension they can carry.
I found some screw points sticking through some OSB on the far end that I had missed. I'll grind them off next session. Then, I'll vacuum the entire surface (and the floor) in preparation for track laying. I'm actually going to be building a model railroad not just the world's most complicated work bench.
Attachments
I painted the entire surface with some Behr Acrylic in a nice earth tan. This will keep the splintering down a bit, provide a neutral backdrop for scenery to come, and make it easier to see the Sharpie marks that will show where the tracks will go. I also made a little fixture that will position the edge of the Sharpie beyond the edge of the Ross ties that will mark the outside edge of the Flexibed roadbed. I bought a laser level to shoot straight lines. I had some straight runs on the previous layout that weren't all that straight.
This picture was taken with my tripod taped the flip-out tray on a 6 ft step ladder. I'm keeping this setup so I can take time lapse shots of the track laying process.
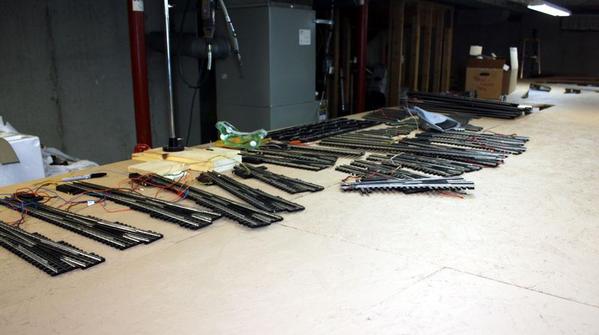
Right now I'm preparing track...lots of track! Some of the old track has adhesive and old foam roadbed on the back which I have to remove so the track lies nice and flat.
Here's what I'm talking about.
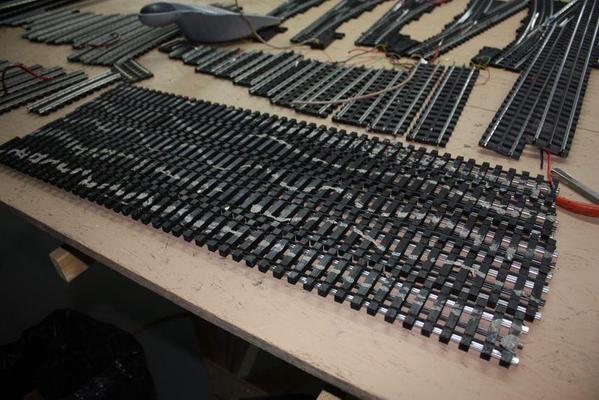
The old roadbed Vinylbed from Hobby Innovations. I used two different adhesives. In Germany I used a clear urethane adhesive which worked real well, but it a pain to remove once cured. In the US expansion, I used Liquid Nails. It's easier to remove since it's a bit more brittle. At first I tried removing it with a razor blade scraper. It worked, but was difficult to control. Then I used the special chisel I have for removing detail from plastic models. It worked better, but it's very slow.
Tonight I tried using the Dremel with the flexi-shaft handpiece with a coarse sanding drum on a slow speed. It worked great! I was able to clean a piece of 29" Ross straight track in about 1/3rd of the time.
What you see here is just track from the old layout. I've got a couple boxes of new track that gets added. I have a lot of pre-cut pieces from the previous iteration. I'm going to measure each piece and put a tag on it so I can quickly find cut pieces without having to chop up more good track. I had removed all the track pins when I packed the track so it wouldn't puncture holes in the packing boxes. I have to reinsert all of them. You can see the Dremel on its stand. Getting the flexi-shaft and the stand was a good decision. It makes handling the tool much lighter and more precise. I used a c-clamp on the base to ensure it doesn't tip over when I'm working.
Next session should finish up all the track cleaning and I'll be ready to start assembling a train layout. Right now I'm trying to decide on how to divide up the DCS power blocks. My past layout was cab control and had 30 separately controllable blocks. I'm not going that route this time. I think it will take two DCS TIUs fed from one Z-4000 and should be enough. At least I hope so...
Attachments
looking good. I too, took the 5/8 OSB route for my sub road bed. After four hours working with that equals about 30 minutes of splinter pulling. All in all, I do like the fact that its not as "directional" as Plywood, which has led to verry little waste. I was going to paint it, but instead, I am going to skin it over with ceiling tiles turned up side down (Can't get homosote or quiet brace here) then run a base coat of paint over that.
Keep up the good work....
Ryan
Ryan, I used ceiling tile to build a building table for RC plane building. It makes a great surface to push pins into to hold parts to plans. I hadn't thought about it for the railroad. It would have been a lot of ceiling tiles...
I'm having Trainman 2001 with drawls any new happenings or has the Holidays slowed your progress?
$oo
trainman 2001, pig tails are okay where you run into a problem if more than one power drop is in same block that is where DCS has issues. I have them on my layout and haven't had any issues once i delegated one TIU channel to one Lionel BPC and one transformer per TIU channel I have perfect 10's and nary a error message unless this old senior forgets to turn the transformers on!!
thanks for the update and I Wish You And Yours A Safe And A Very Merry Christmas.
$oo
Back when I was in HO I used to use a regular hot glue gun to hold down tracks and roadbed. Neat thing about hot glue is it holds well but is very easily removed with rubbing alcohol, couple small drops and it immediately releases. Hot glue sets very quickly so your able to put down a lot of track fast.
Happy holidays to everyone with the patience to read through all the details about this project...
I have a glue gun and just bought a bunch of long refills. I have to check how it behaves with the Flexibed roadbed. Anyone have any experience with this?
I am about to start room prep and layout construction and found your thread. The Tryvec ceiling is a GREAT idea and as I had been trying to conceive a solution that was affordable and not permanent. My planned bench work is much like yours too so I'm glad it is working well. Thanks for the info.
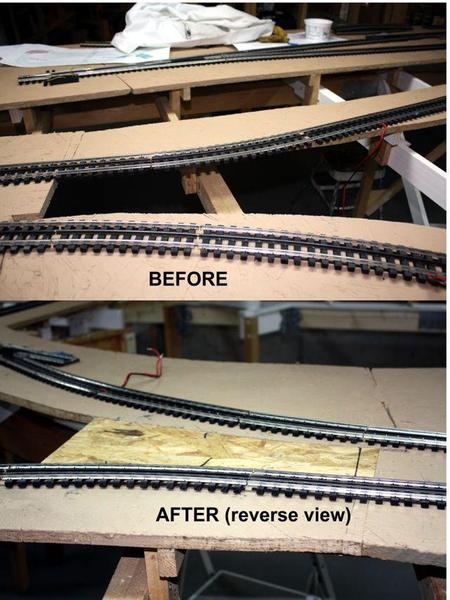
Track laying continued, but mostly doing problem solving. I suppose the upside of using Gargraves flex track is that you can simply bend the curves to conform to the roadbed regardless of minor changes in radius, and conversely, the downside of using Ross sectional track is that this flexibility is lost. When you design a layout with sectional track in the precise way that it appears in RRTrack software, you get a very accurate layout, but when you transfer it to the real world strange things start to happen. Between making changes in the layout process in CorelDraw, cutting the panels a bit off, and not having the layout exactly sized when overlaying the OSB plan, there have been several close calls, all of which are now fixed except for one.
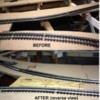
Yesterday and today I did just that. In two cases, I was able to unattached the OSB from the cleats and splice plates and pull them out a bit so the track wasn't hanging over the edge.
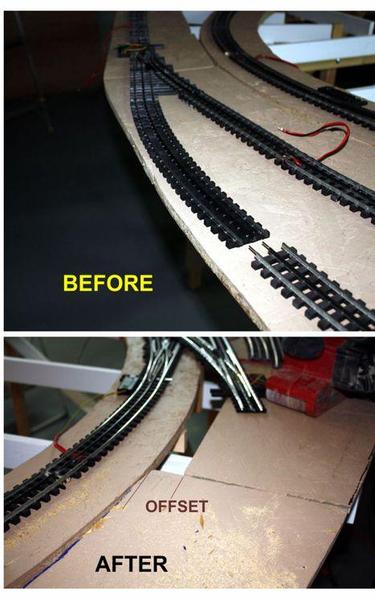
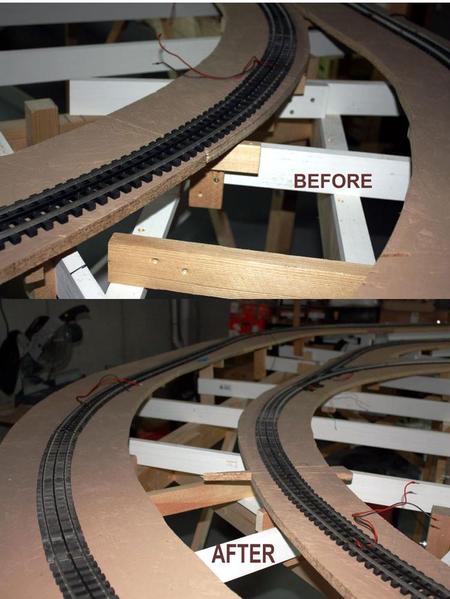
In another I cut a filler-piece to close up one of the two holes in the layout (the other's going to have to be closed up also),
and today, I added a mild "S" curve to bring the track further into the layout and get off the front edge. I generally try to avoid "S" curves especially with what they do with long equipment. I put 10" of straight track in the middle. This brought the two tracks into a 4.5" C-to-C distance and gave me over an inch to the edge. It's still scary, but it's better than the alternative. The alternative was trying to cut a piece of OSB to extend the platform at that notch. The notch was not supposed to be there, but was the result of the complete screw-up I made in cutting the OSB piece in the foreground.

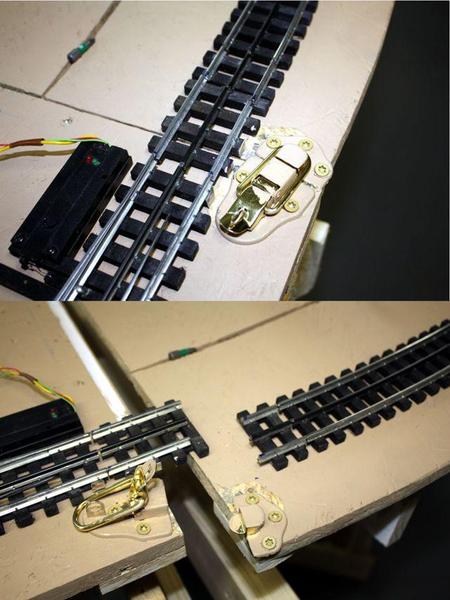
The last thing I did today was do more adjusting of the track union at the swing-out door. I had to re-position the latch closer to the layout front edge to enable the tracks to align properly.
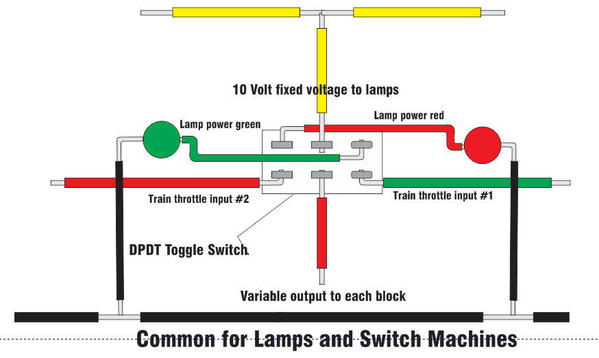
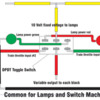
Last night I redrew the panel graphics from the previous layout. Here's the schematic for the pilot lights for each channel in the cab control set up. I may still wire this new layout in cab control and then convert to digital. I was able to work with cab very nicely in the old layout. The reason the lights are on the reverse side of where they're connected is so they light when the toggle switch is thrown in that direction. What's underneath is actually the reverse.
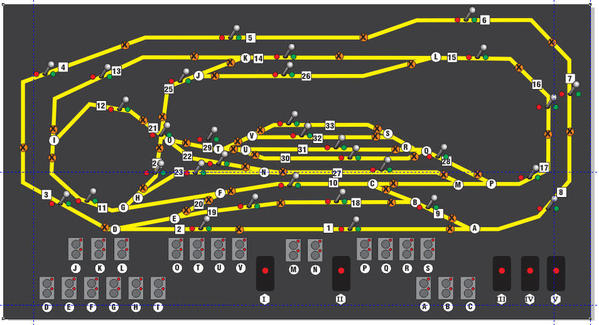
Here's the new panel with the blocks and switches identified. Each block switch lies directly over the track it controls. The switches are arranged in geographic groups corresponding to their place on the diagrams. Blocks are numbered, switches are letters and uncoupling tracks are Roman numerals.
As the last time, the panel will be plexiglass with all the graphics applied on the reverse side. The upside: a smooth professional looking, surface that's quite durable. The downside: the panel is absolutely impossible to modify to add new or change track design. First I put down the numeral graphics, then apply masking strips for the tracks. I spray the back black, then pull up the masking tape and spray the strips yellow. It looks terrific when done this way. I may be adding tracks to both the front yard and the back passing siding so I have to figure out how to make this area modifiable. It would be easier to do front-mounted graphics which could be changed, but it wouldn't be as durable. Another way would be to make the graphics on a separate sheet that would be laminated to the underside of the acrylic. That could be modified by just replacing the graphic. I may try that.
The second challenge is to be able to drill the holes for all the penetrations. Using a standard 118º drill bit tends to grab the plastic just as it breaks through. Plexiglass drills are ground to a more acute included angle.


