Funny about what we think we can and can not do.  Mark your ongoing work on Blackwater shows you have some 3D thinking skills. Maybe not to your satisfaction, but they are there. Nice progress

I am working out the transition from computer to physical model. In my case due to my insistence on a long passenger yard, necessarily on a lower level and with a 3/4 way around the layout downslope to get there, the rest of the layout is turning out central Illinois flat. Right now the dimensions are essentially 12x12. I wish one of those were over 18 feet. 

Looking good Mark! As for the one cleat leaning it could be just a super elevation for that section of track! LOL

I wish I could think in terms of 3D then I wouldn't so much time and end up with so many little scrap pieces I might have to glue back together to use! LOL

As for the knee the doc didn't say anything about PT, just said take it easy and stay off of it for 3 days then do as I please and what my body will let me do. It is feeling better, but I think I stopped the pain pills a little soon as I don't want to get addicted! LOL

@Mark Boyce posted:


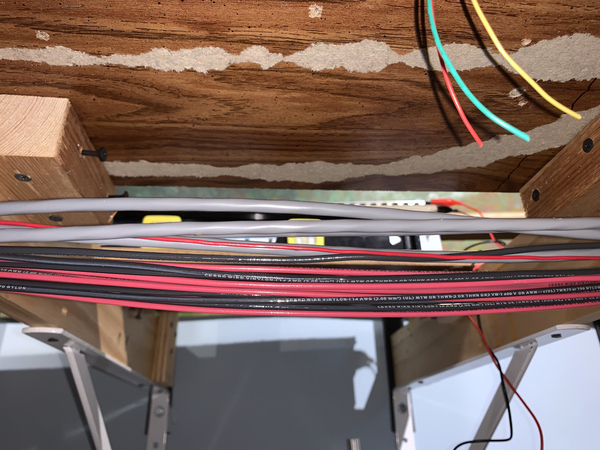
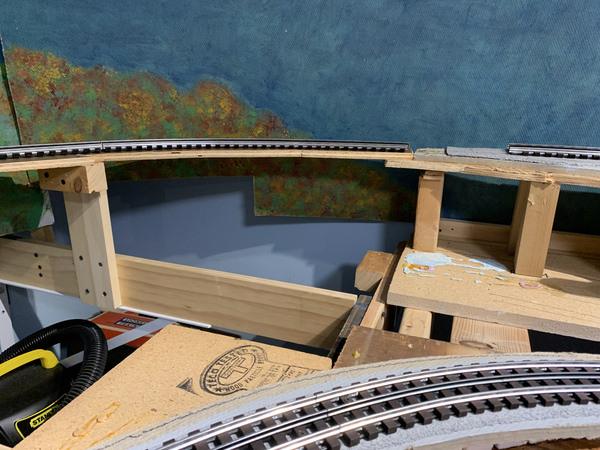
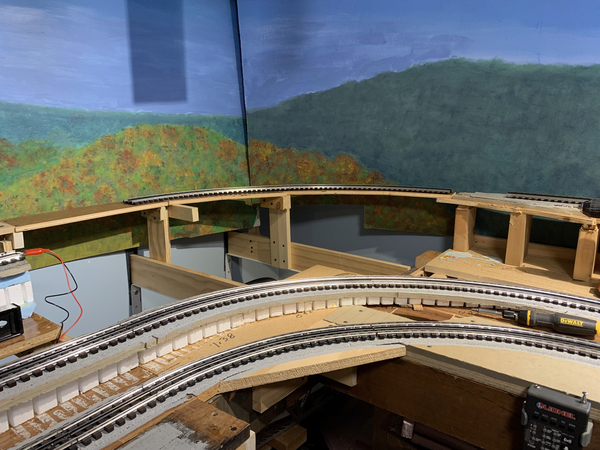
It's funny the things you find when you take things apart.  I have been looking for a red and black clamp for a couple years.  Guess where I finally found it.  Whoops!!  I guess I will have to finish securing the last brace for the backdrop while I am here. 

20230118_010835878_iOS

I've replaced tools that I thought I lost only to find them later. Most recent example....I did a small plumbing repair in our bathroom. For weeks after I could not find my channel lock pliers and I had no idea where they went. So I bought a new set. A few weeks later my wife is folding towels to put away and hands the missing pliers to me. She said "why did you leave these under the sink....." 🤪🤪🤪

Bob

Thank you, Andy, Jeff, Mike, Bill, Bob!

I guess I am doing 3D, it just doesn’t come out the way I imagined!  I have lots of those scrap pieces, Mike!  😄

Jeff, don’t all of us with spaces the size of ours wish we had 18 feet!  What a nice passenger yard you could build with that!

Bill, I did but 3 clamps a few weeks ago!  😆  I like this one better.  It and it’s pair hold tighter.

Speaking of plumbing, I have purchased about 3 extra rolls of Teflon tape over the years.  Small purchase in comparison to channel locks!  

I cut roadbed today, and now only have to do the curve in the corner.  More scrap on the way, Mike!  🤦‍♂️  I also liberated the clamp and trimmed the 1x2 to length.  I really don’t know how that all happened a couple years ago, but it is the way it should be, and the backdrop didn’t fall down in the process!  👍🏻👍🏻

This is a bit long winded but on the subject of mid build track plan changes.  As usual, lots of well thought out progress with detailed documentation, Mark.  I do wish I had documented my build, especially in regards to all the design changes needed to finally get up and running.

Grades present a great number of design mental blocks that impede the actual constuction in flex track, but I eventually realized the brain power involved in solving design changes just another learned skill of the hobby.  Yah, the ideas never seem to come fast enough, or on time, but given enough unrushed thought, even a compromise in design can produce the most satisfying results.  Think of it this way....we're experiencing much of what it took for real railroad builders to survey and grade a new line.

I consider my drawing skills up to the task of putting onto paper what comes to mind.  Still, where multi-level construction is involved, I am never fully confident in my 3 dimensional ideas on paper until I have at least roughed in the roadbed.  Rather than uss cookie cutter roadbed design from big sheets of plywood, curved Roadbed for flexs are comprised of numerous flat lumber sections.  The ability to change mid build without plywood waste ( at roughly $80 per) saves in so many ways.

The attic issue was another addition to my design problems...imagining and fitting a multi level layout into a triangular attic, rather than cubic room.  Again,  roughing it in before even considering the viability was an absolute.  It was way beyond my ability to think 3 dimensionally well enough to imagine the pitfalls of the restricted space then draw an accurate track plan of it in flex track.

These days are filled with sketching scenes as the landscaping process begins.  I wish I could say with confidence that the track planning stage is fully behind me, but a small engine facility remains.  The fight against analysis paralysis continues.

Best of luck on continuing layout progress, Mark.  It looks like you have the process down pat.

Bruce

Last edited by brwebster

Thank you, Steve, Chuck, Bruce!

Steve, I think it is everyone’s comments that makes threads like this one.  I have learned a lot from comments and side tracks here and on similar threads I follow.  It must be winter, since I have a backlog of threads I am following!

Chuck, the sky is falling, the sky is falling!!  😄 You called it correctly.  I had one column that was in the way.  Now I wonder why?  Right at the end of a straightaway.  I have already removed it in this photograph.  

A4B2E909-A521-4DE9-AE1C-0402D9321E94

I had intended to position it where the mark is to the left of the screw I didn’t pull, but there was a joist in the way.  I should have moved to the left instead of right.  Even if I had been able to use the original mark, it probably would have been too close.  Here may be a better position.

B30E57CB-01E7-4BDD-A9E9-49C20F0CD8E2

Thank you for mentioning it.

Bruce, I recall your attic layout.  You have a lot more to work around than any of us with a rectangular room!

Speaking of straight cuts for roadbed, I made straight cuts on the last curve instead of using the keyhole saw as I did on the other curves.  Only one more section to go! 👍🏻

FE2CF5C0-5D33-4BA2-BCD0-C1065D87D694

I can’t control the saber saw anymore even on low speed, so did them by hand.  I’ve been using the hand saw since my circular saw is over at our younger daughter and son-in-law’s.  At least I could sit and saw in the warm train room instead of going in and out in the weather to use the circular saw. 👍🏻

Attachments

Images (3)
  • A4B2E909-A521-4DE9-AE1C-0402D9321E94
  • B30E57CB-01E7-4BDD-A9E9-49C20F0CD8E2
  • FE2CF5C0-5D33-4BA2-BCD0-C1065D87D694

Thank you, Rubin, John!

Yes the friendly help everyone gives here on this forum is amazing!  None of our layouts, engines, cars, electronics would be what they are without this collaboration!  I think the best help is when we share what didn’t work; either to get the right answers from someone or to show others how to get out of a jam!

Steve, I forgot to mention I purchased two more clamps when we braved the crowd at Walmart yesterday!  As an aside, our crowds here in Butler are nothing like what folks face in the cities and suburbs.  😎

Last edited by Mark Boyce
@RubinG posted:

Since so many of us seem to be trying hard to avoid stress on our knees, backs, etc. and I am certainly in that class (two knee replacements, arthritic hips ) I was wondering what you do to compensate while installing bus wiring, turnout wiring, DCS, TMCC, etc to maximize access and minimize joint stress?

Do as much wiring as possible from above before things start to close up. I am also using wireless controllers for activating switches and powering blocks. With another set sending back block occupancy information. Not sure if this helped with not going under layout too much, as these items still need to be connected to track, switches etc. My purpose was to have fun playing with the electronics and designing a new way of accomplishing these tasks. So it may or may not be helpful for knees, hips, back etc. But at least I had some fun doing it.

Now using the quick connector clips on to bus wiring does save time under the layout which is definitely beneficial.  I think Mark posted the connectors.  Hope this helps.

Last edited by Aegis21

Thank you John, Rubin.

Rubin, I can appreciate your dilemma.  I have one replaced knee, a double lumbar fusion, and a damaged sciatic nerve that acts up if I sit on a hard surface.

I did wiring from the top of the layout as much as possible.  Here is one example.  I drilled holes to drop wires through that were already connected to the track and switches.  Where I could reach, I made connections to the wires that would go back to the controls which were still on the spools.  I liked using these WAGO connectors that you just lift the little orange tab, poke the wire in, then snap the tab shut for a good connection.  They are stiff on the initial opening, so I opened them when me finger nails needed trimmed.  I then finished pulling the wire to the control panel before cutting to length.

20230120_195938458_iOS

Here it was easier to drop the wires through the gap between the wall and layout.  Otherwise I did everything else as above.  I don't recall why I used butt splices on the upper connection.  That is trickier than the WAGO connectors.

20230120_195859760_iOS

I ran all of my wires along the front of the layout so I could sit on the rolling padded stool.  Thus, there are no other connections under the layout.

20230120_200038839_iOS

To make it easier than in the first photograph, my new high line in the rear is completely open awaiting wiring.  I will make the connections from the drops to the main wire using the WAGO connectors and run the wires right out to the front of the layout to take to the control panel.

20230120_200106548_iOS

20230120_200128659_iOS

20230120_200557547_iOS

John will have to explain his wireless controllers.

Attachments

Images (6)
  • 20230120_195859760_iOS
  • 20230120_195938458_iOS
  • 20230120_200038839_iOS
  • 20230120_200106548_iOS
  • 20230120_200128659_iOS
  • 20230120_200557547_iOS
@RubinG posted:

It does help. But what do you mean by “ wireless controllers for the switches?” Would please provide an example? Thanks.

I will describe them as best that I can.  Using MTH AIU's to control a switch or a power block, I have the out put of the AIU feed an input to a ESP32 micro-controller. The Micro controller takes that input and sends it wireless to its receive unit under the layout. The receive unit activates a relay which either powers a block or switches a turnout. That eliminates wires going from AIU to blocks and switches on layout. If there is interest for more info I could start another thread just for that project and supply schematics, pcb drawings etc. It probably is not cost effective, however it was fun to do!

@Mark Boyce posted:

Thank you John, Rubin.

Rubin, I can appreciate your dilemma.  I have one replaced knee, a double lumbar fusion, and a damaged sciatic nerve that acts up if I sit on a hard surface.

Here it was easier to drop the wires through the gap between the wall and layout.  Otherwise I did everything else as above.  I don't recall why I used butt splices on the upper connection.  That is trickier than the WAGO connectors.

I ran all of my wires along the front of the layout so I could sit on the rolling padded stool.  Thus, there are no other connections under the layout.

To make it easier than in the first photograph, my new high line in the rear is completely open awaiting wiring.  I will make the connections from the drops to the main wire using the WAGO connectors and run the wires right out to the front of the layout to take to the control panel.

John will have to explain his wireless controllers.

Mark, Great job wiring and even better explanation. I could not remember the name of the connectors you used, they look really simple and solid.

Ditto on using  WAGO Lever Nut connectors.  I went with the compact 221-41x series, purchased at Menard's.  They're actually  thin enough to fit inside/underneath FasTrack O with a little room to spare.  They also work with short fingernails.

Wago Lever Nuts

Through experimentation, I've found that even though they are rated to work on wire as small as 24 gauge they actually will hold this 29 gauge stranded wire securely.

V-notch stripper_fine-wire_wago

Attachments

Images (2)
  • V-notch stripper_fine-wire_wago
  • Wago Lever Nuts

Thank you, John, Mike, Steve!

John, I think it would be a great idea to start a thread on using your ESP32 micro-controllers.  You could start by giving a brief overview and see if you get any traction on getting interest.  I think there are a lot of folks on the Forum who have the background to take your idea and run with it.  The ESP32 was new to me, but I follow the concept.

Mike, I didn't know about the WAGO connectors until someone presented them here on this Forum.

Steve, I will have to be buying more WAGO connectors for wiring my additions and I will buy the 221-41x series you used.  I read about them (here on the Forum of course), but was already finishing up the initial wiring.  They really look nice, and I will be glad to find them easier to open and close.  I am glad you shared the series number here, because I was going to have to look them up.  I need to make a trip to Lowes soon, so I will look for them there.  The closest Menards is in Warren, Ohio, about an hour and a quarter away from us.

I have an update from yesterday.  The roadbed is all installed for the high line.  It isn't pretty, but it is level and that's what counts.  Here is the last section.

20230120_200557547_iOS

I didn't have trouble installing the roadbed, but I think I would have trouble installing cork roadbed reaching in that far.  Here are the toughest spots.

20230120_200421798_iOS

20230120_200453051_iOS

I could mark exactly where I want the cork to go, then remove each section and glue down the cork, and reinstall before laying track.  I also could just lay track on the bare wood and ballast later.  However, I don't know how much noise will be eliminated by the cork.

To be honest, to get my roadbed smooth and get overhead clearances right, there are small sections of track on just Homasote with no cork, and there are small sections where the track is on bare wood.  With the DSC and TMCC sound running, and my slow speed running, I can't tell the difference.  I think I will lay the track on the high line, then run a train across it and compare the sound with a train running on the rest of the layout with Homasote and cork.  I am almost out of Homasote and don't want to hunt around to buy more of that.  I could buy a little more cork or try out some of the rubber roadbed if I think it is too noisy.

One more photograph.  Here is the end of the last section of roadbed.  Since I wasn't planning to use Homasote on this new addition, I was pleased with how the height matched up after installing this new roadbed halfway around the layout.  Not just pleased, I was astonished something came out right the first try for once!! 

20230120_200740359_iOS

Attachments

Images (4)
  • 20230120_200557547_iOS
  • 20230120_200421798_iOS
  • 20230120_200453051_iOS
  • 20230120_200740359_iOS

Mark, the layout looks great! Things are coming together nicely. I have heard of Wago connectors from you and other folks on the forum. They seem to be reliable and easy to use. I don’t need them for my current layout, but will keep them in mind for the next one.

As far as sound issues, the track for my entire layout is directly on Homasote. The engines are very quiet when running, but I do have carpet on the floor (not sure how much difference that makes). The track is not screwed or nailed down. It’s held in place by the ballast. The layout is Atlas track. I think you’ll be ok with the track right on Homasote.

Glad you were able to fine tune the placement of that support without too much trouble.

Andy

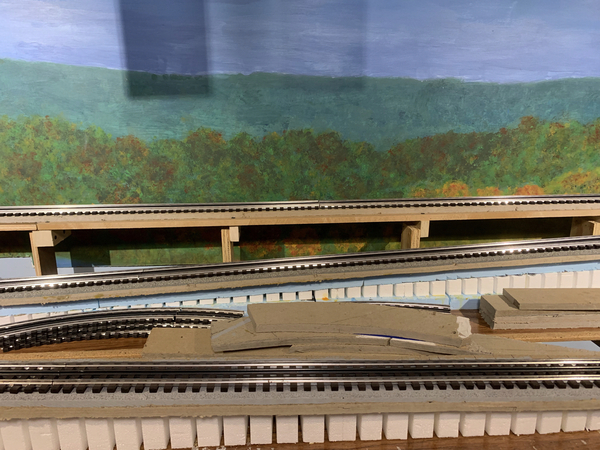
I think I was able to scrounge up enough Homasote for the rest of my roadbed.  Some of the sections are only 12 to 15 inches long, but they are working out.  I have installed some roadbed and track as well.  The first three photographs are of the progress looking at the long wall from left to right.

20230127_004432589_iOS

Some of the shorter sections of Homasote are piled up between tracks here.

20230127_004440229_iOS

I have also put in a set of power drops but haven't pulled in the wire to the drops.

20230127_004445863_iOS

Here is an overall view of the progress this week.

20230127_004543445_iOS

Thank you for taking a look!!

Attachments

Images (4)
  • 20230127_004432589_iOS
  • 20230127_004440229_iOS
  • 20230127_004445863_iOS
  • 20230127_004543445_iOS

Mark, you’ve really made a lot of progress; I’m jealous!

I just found an unopened box of homasote roadbed in my garage. I remember discussions from back in the day discussing the for sealing homasote. Did you seal it in any way? I guess I will mix it with my cork. Have you done so?

I was also intrigued about how you created and mounted your backdrop. If you addressed this earlier, I apologize.

Mark, this is really looking great!  Seeing the last photo you posted above ("...an overall view of the progress this week.") prompted me to go back and look again at page 1 of this thread (dated 01.08.2017).  The work you have accomplished is a true inspiration.  Thanks for taking us along on the ride and sharing your story.  Looking forward to more.

Sam

Last edited by CurlSnout

Hi Mark,

Cudo's along with everyone else's positive remarks.You are doing fantastic work with Murphy riding on your shoulder the whole way! What did you use to cut the homosote? And did you angle the sides? It is hard for my old eyes to garner that info from the pics. On your first pic it appears the sides of the homosote are 90 degree cuts. Again great progress and if you are short a couple of pieces of homosote, I am sure I have much more than I need.

Thank you, Rich Bill, Jay, Rubin, Andy, Mike, Sam, John!

Jay, I have no schedule in mind.  If I did come up with a date, I'm sure I would overrun it.

Rubin, I did not seal my Homasote.  I have read of folks sealing it, but I never did on previous layouts.  Maybe I have gotten along fine because I have had dry layout rooms to work with.  However, all the Homasote used on this layout came from a 12x4 sheet that was the top of a table that was used by a seamstress.  Yes, that was not a typo, it was one complete sheet 12 feet long and 4 feet wide.  The lady had pencil marks on it at one inch intervals, which can be seen in some of my photographs.  It was worn along the edges and has lots of pin holes, but it showed no sign of taking on moisture.  It had been in a basement room for years right beside a utility room with a sump pump.  I assumed if it held up there, it would hold up in my dry room that is above ground.

No apologies needed.  It was probably discussed before, but in 84 pages, I don't expect anyone to look for it.  I actually bought the backdrop from a Forum member who had it painted on Masonite for his layout.  He decided to go with photographic murals for his new layout, so this wasn't needed.  I thought it would work for my layout, which was already under construction.  I swapped some sections around to get it to fit my room better.  I cut some sky off to fit the long wall with the bulkhead that encloses the exhaust pipes for the furnace and dryer.  Since I didn't plan ahead, the longest sheet was a bear to get over the layout and into place.  I did plan ahead in that I left a 1" gap between the joists and the wall, so for the most part the Masonite just balances on the brackets that support the joists.  I had planned to put up 1x2s screwed to the wall and attach the backdrop to that.  It was a bit cumbersome, so I just attached it to the wall studs with screws.  I didn't want to, but figured, the wall would need spackled and repainted whenever the layout is taken down by me or someone else, so why not.

Andy, the above paragraph shows I didn't plan as well as I would have liked, but you are right, there is a good bit of planning here.  After 6 years, I guess it shows.

Mike, your wood looks like some of mine.  I'm glad to see you are making progress on the benchwork for the loop.  Yes, we are in the same boat, reworking some of our layouts.

Sam, I'm glad you took a look over what has been going on!  It certainly has been a long haul, but there are scads of good ideas and examples that others have contributed in all these pages.  I hope you will keep on with us.  I had read through many threads like this one, so when I started planning this layout, I was looking for ideas, and then just carried it on once I started building.  You will certainly see a lot of mistakes and do-overs, but looking back over my life I think those are the best learing experiences.

John, I cut the Homasote with a bent utility knife that carped layers use.  Some folks here say you can cut through half inch Homasote with 3 passes, but with a sharp blade it takes me 5 or 6.  It is certainly better than using a regular saber saw blade, though some use a special knife blade for a saber saw.  I'm not able to control a saber saw even on low speed, so I cut curves in plywood with a had keyhole saw.

I did not bevel any of the Homasote.  I'm fortunate enough to get rather 90 degree cuts done.  I figure when I ballast, some of the ballast will form a slope like real ballast.  Thank you for the offer if I run out.  I think I have enough, but you never know.

Last edited by Mark Boyce

Thank you, RJ!  Your problem is exactly what I thought when I built the benchwork.  I had no idea how I was going to make the backdrop, though I had an idea I wanted something like what I finally got.  I even took a painting class, but they focused on sketching faces.  No, that didn’t help for my plans.  I decided to go ahead with the benchwork than wait longer to get a backdrop.  I had already waited 25 years while our daughters were growing up!  All I can say is I am in good company if you don’t know what you want either! 😉

Last edited by Mark Boyce

Add Reply

Post
The Track Planning and Layout Design Forum is sponsored by

AN OGR FORUM CHARTER SPONSOR

OGR Publishing, Inc., 1310 Eastside Centre Ct, Suite 6, Mountain Home, AR 72653
800-980-OGRR (6477)
www.ogaugerr.com

×
×
×
×
Link copied to your clipboard.
×
×